What's on this page
- What ISO actually is
- The ISO numbers ladder
- Stops: how ISO measures light
- Why ISO is not really sensitivity
- Noise: what a higher ISO actually costs
- Base ISO and native ISO
- Expanded ISO: the L and H settings
- Dynamic range: the quieter cost of high ISO
- Auto ISO, and how to fence it in
- ISO by scenario
- How much noise actually matters
- Modern sensors changed the conversation
- ISO invariance in plain terms
- Raw, jpeg, and noise reduction
- ISO and sensor size
- ISO on phones
- When ISO should move first
- Exposing to protect the shadows
- A worked example: one dim room, three ISO choices
- Common ISO mistakes
- Find your own ISO ceiling in one evening
- Where ISO sits in the exposure triangle
- The bottom line
Short answer: ISO settings control how much the camera amplifies the light it has already collected; they do not gather more light, which is why grain arrives with the brightness. The full stop ladder runs 100, 200, 400, 800, 1600, 3200, 6400 and up, each rung doubling brightness. Base ISO, commonly 100, gives the cleanest files, but a sharp noisy photo beats a clean blurred one, so raise ISO whenever the shutter speed needs it.
Every camera hands you three controls over a photograph, and ISO is the one people misunderstand most. Aperture is easy to picture, a hole that opens and closes. Shutter speed is easy to picture, a curtain that stays open longer or shorter. ISO looks like neither: it is a number that starts at 100 and climbs by doublings, it makes the picture brighter without touching the lens or the timing, and it comes with a warning attached about grain. That combination of usefulness and reputation is exactly why so many beginners leave it locked at 100 and then wonder why their indoor photos are blurred.
This field note explains what ISO settings on a camera actually do: how the numbers ladder works, what noise really is and where it comes from, what base ISO and native ISO mean, how to set auto-ISO so it helps instead of guessing, what ISO to reach for in each kind of scene, and how much the noise from a modern sensor genuinely matters. It is the third of the deep field notes on the exposure controls, alongside what aperture is and what shutter speed is, and it slots into the exposure triangle field note that shows the three trading against each other. The full stop scales sit in the camera settings reference if you want them on one page.
Key takeaways
- ISO sets how much the camera amplifies the light it already collected. It does not gather more light, which is why the grain arrives with the brightness.
- The full-stop ladder runs 100, 200, 400, 800, 1600, 3200, 6400 and up, and each rung doubles the brightness, exactly like one stop of aperture or shutter.
- Base ISO, commonly 100 on most cameras, is where files are cleanest and dynamic range is widest. It is the home position, not a rule to defend at any cost.
- Auto-ISO becomes a professional tool the moment you set its two fences: a maximum ISO you accept and a minimum shutter speed it must protect.
- A sharp noisy photo beats a clean blurred one every time. Noise is a texture you can live with; missed focus and camera shake are failures you cannot.
What ISO actually is
ISO is the setting that decides how strongly your camera amplifies the signal it reads off the sensor. Light falls on millions of photosites during the exposure, each one accumulating a charge in proportion to how many photons landed on it. That charge is a small electrical signal, and it has to be boosted and converted into the numbers that make up a digital file. ISO is the dial on that boost. Set it low and the signal is passed through with barely any gain, so the file is a faithful, quiet record of a well-lit scene. Set it high and the same signal is multiplied several times over before it becomes an image.
The practical result is what you see on the back of the camera: at the same aperture and shutter speed, ISO 1600 produces a picture four times brighter than ISO 400. Nothing about the light changed. The camera simply turned up the volume on what it heard. That analogy is worth keeping, because it explains the whole trade in one sentence: turning up the volume on a quiet recording makes the music louder and the hiss louder at the same time.
This is why ISO sits slightly apart from the other two controls. Aperture and shutter speed both change how much light physically reaches the sensor. ISO changes what the camera does with the light after it arrives. All three change how bright the final photo looks, which is why they are treated as a set, but only two of them are actually collecting anything.
The ISO numbers ladder
The standard ISO scale is the friendliest of the three exposure scales because it is pure doubling: 100, 200, 400, 800, 1600, 3200, 6400, 12800, 25600, and upward on cameras that offer it. Every step doubles the brightness of the resulting image, and every step back halves it. There is no square root of two to remember, no reciprocals to invert. If you can double a number, you can read the ISO ladder.
Most cameras start their standard range at 100, though some are built around a base of 64 or 200, and the top of the range varies enormously between bodies and generations. Between the full stops your camera will also offer third-stop clicks, so the dial passes through values like 125, 160, 250, and 320. Those in-between values are fine adjustments; the full stops are the rungs worth thinking in, because they line up exactly with the full stops of aperture and shutter speed.
The numbers themselves come from film. An ISO 400 film stock was more sensitive to light than an ISO 100 stock, so it needed less exposure, and photographers chose a roll to suit the light they expected to be shooting in for the next 36 frames. Digital inherited the scale so the numbers would mean the same thing, which is a real convenience: an exposure that worked on ISO 400 film works at ISO 400 on a digital body. The difference is that you now change the number between frames instead of between rolls, which is a far larger freedom than it sounds.
Stops: how ISO measures light
Photography measures light in stops, and one stop is a doubling or halving. ISO speaks that language natively: one stop up the ISO ladder is one doubling of image brightness, which is why ISO trades so cleanly against the other two settings. Give up one stop of shutter speed, going from 1/125 to 1/250 to freeze a subject, and one stop of ISO, going from 800 to 1600, pays it back exactly. Close the aperture two stops for depth of field and two stops of ISO restores the brightness.
That even exchange is the machinery underneath every exposure decision, and it is worth practicing until it is automatic. In a dim room at f/2.8 and ISO 800 your camera might want 1/30 of a second, too slow to hold steady. Two stops of ISO, up to 3200, buys 1/125, which most hands can hold. You did not find more light, you accepted more noise in return for a sharp frame. That is the deal ISO always offers.
The same arithmetic runs in reverse when light is plentiful. On a bright beach at ISO 800 the camera may need 1/4000 at f/8 and still be close to overexposing. Dropping three stops to ISO 100 hands you back a comfortable 1/500, or the option to open the aperture for a shallower zone of focus. Living at a high ISO when there is light to spare buys nothing and costs quality, which is the one situation where the low-ISO instinct is exactly right. The complete stop tables for all three controls sit side by side in the camera settings reference.
What each ISO stop buys you in one dim room
Illustrative shutter speeds in a single indoor scene at a fixed f/2.8. Each ISO stop doubles the shutter speed you can use.
The bars are the whole argument for raising ISO. At ISO 100 this scene is a blurred handheld frame; at 1600 it is sharp. The light never changed, only what the camera did with it.
Why ISO is not really sensitivity
You will read everywhere that ISO controls the sensitivity of the sensor. It is a useful shorthand and it is not quite true, and the difference explains most of what confuses people about noise. A sensor’s photosites have one physical response to light, and it does not change when you turn a dial. What changes is how much the resulting signal is amplified on its way to becoming a file, plus how the camera maps that signal to the brightness levels of the image.
Why does the distinction matter in practice? Because it tells you what ISO can and cannot fix. Raising ISO cannot collect a single extra photon, so it cannot reduce the fundamental uncertainty that comes from photographing a dim scene. Only aperture, shutter speed, and adding light do that. What ISO does is let you shoot with less light on purpose and still end up with a normally bright picture, which is enormously useful and completely different from making the camera see better in the dark.
The honest way to hold it in your head: aperture and shutter speed decide the exposure, meaning how much light the sensor actually receives. ISO decides how that exposure is rendered as brightness. Photographers use the word exposure loosely to include ISO, which is fine, but every time you are tempted to think a higher number is somehow gathering light, remember that the camera is turning up the volume, not opening the window. Our exposure triangle field note treats the three as equals for good practical reasons; this section is the fine print behind that simplification.
Noise: what a higher ISO actually costs
Noise is the visible randomness in a digital image: the fine speckled grain in shadows, the blotchy color mottling in dark areas, the loss of smooth gradation in a night sky. It looks like something the camera added, and mostly it is something the light failed to supply. Light arrives as discrete photons, and in a dim scene each photosite catches relatively few of them. The count varies randomly from one photosite to the next, and that natural variation is the dominant source of what you see as grain. Amplification makes it visible; it does not create it.
There is a second, smaller source: the electronics themselves contribute a little noise when reading and converting the signal. On modern sensors this contribution is small and gets proportionally smaller as ISO rises, which is part of why raising ISO in camera often looks better than shooting dark and brightening later. But the headline cause of noise is simply a shortage of light, which is why the fix is almost always to gather more of it rather than to fight the number on the dial.
Noise arrives with two companions worth naming. Colors lose a little saturation and separation as the signal gets noisier, so high-ISO files can look slightly flat before editing. And fine detail softens, because noise reduction, whether in camera or in software, cannot distinguish tiny texture from tiny randomness and smooths some of both. Neither is a catastrophe. Both are the reason to spend ISO deliberately rather than by accident.
Base ISO and native ISO
Base ISO is the setting at which your camera reads the sensor with its minimum amplification, and it is where the body performs at its absolute best: the cleanest files, the widest dynamic range, the most latitude for editing. On the majority of cameras base ISO is 100. Some are designed around 64, and some older or specialized bodies start at 200. Your camera’s specification sheet lists it as the bottom of the standard ISO range, and it is worth knowing yours by name, because it is the setting to return to whenever the light allows.
Native ISO is a related term with a slightly different job. It refers to the ISO values the camera reaches through genuine gain applied in the analog part of the signal path, rather than by pushing numbers around in software afterwards. The standard range printed in the specifications is the native range; anything beyond it, usually labeled with an L or an H, is extended and behaves differently. Staying inside the native range is the simple rule that keeps you on the part of the ladder your camera was actually engineered for.
One more wrinkle is worth knowing because it surprises people who test carefully: many recent sensors have a second gain step partway up the range, a point where the readout circuitry switches modes and noise performance improves slightly compared with the rung just below it. Where that step sits varies by body, and on some cameras it is invisible in ordinary use. If you shoot a lot of dim scenes it can be worth finding yours empirically, which the practice section at the end of this field note explains how to do.
Expanded ISO: the L and H settings
Below base ISO and above the top of the native range, most cameras offer extended settings, shown as L or Lo at the bottom and H or Hi at the top, or sometimes as greyed-out numbers you have to enable in a menu. They look like extra range for free. They are not quite that, and understanding what they are prevents two different disappointments.
The expanded low setting does not give you a cleaner file than base ISO. It typically records the same exposure the sensor would receive at base ISO and then pulls the result down in processing, which usually costs highlight headroom: bright areas that base ISO would have held can clip. If you are reaching for a low expanded setting to shoot a wide aperture in bright sun, a neutral density filter is the tool that actually solves that problem without the trade.
The expanded high settings are the mirror image: they generally take the top native value and push it brighter in processing rather than applying more real gain, so you gain convenience and lose quality compared with simply brightening the file yourself later. In an emergency they are perfectly usable, and a noisy photograph of something that mattered is better than none. As a habit, though, treat the native range as your working territory and the extended values as the fire exit.
Dynamic range: the quieter cost of high ISO
Noise gets all the attention, but the second cost of a high ISO is the one that shows up in editing: dynamic range shrinks as the number climbs. Dynamic range is the span between the darkest shadow that still holds detail and the brightest highlight that has not turned to blank white. At base ISO that span is at its widest, which is why a base ISO raw file can survive a heavy shadow lift or a highlight recovery. As a rough working model, expect to lose roughly a stop of that range for every stop of ISO you add.
The practical consequence is that high ISO frames are less forgiving of exposure mistakes. At ISO 100 you can underexpose a scene, lift it in editing, and often get away with it. At ISO 6400 the same rescue attempt reveals the noise that was hiding in the shadows and can bring color blotching with it. High ISO shooting rewards getting the brightness close to right in camera, which is a good habit anyway and becomes close to mandatory once the number is up.
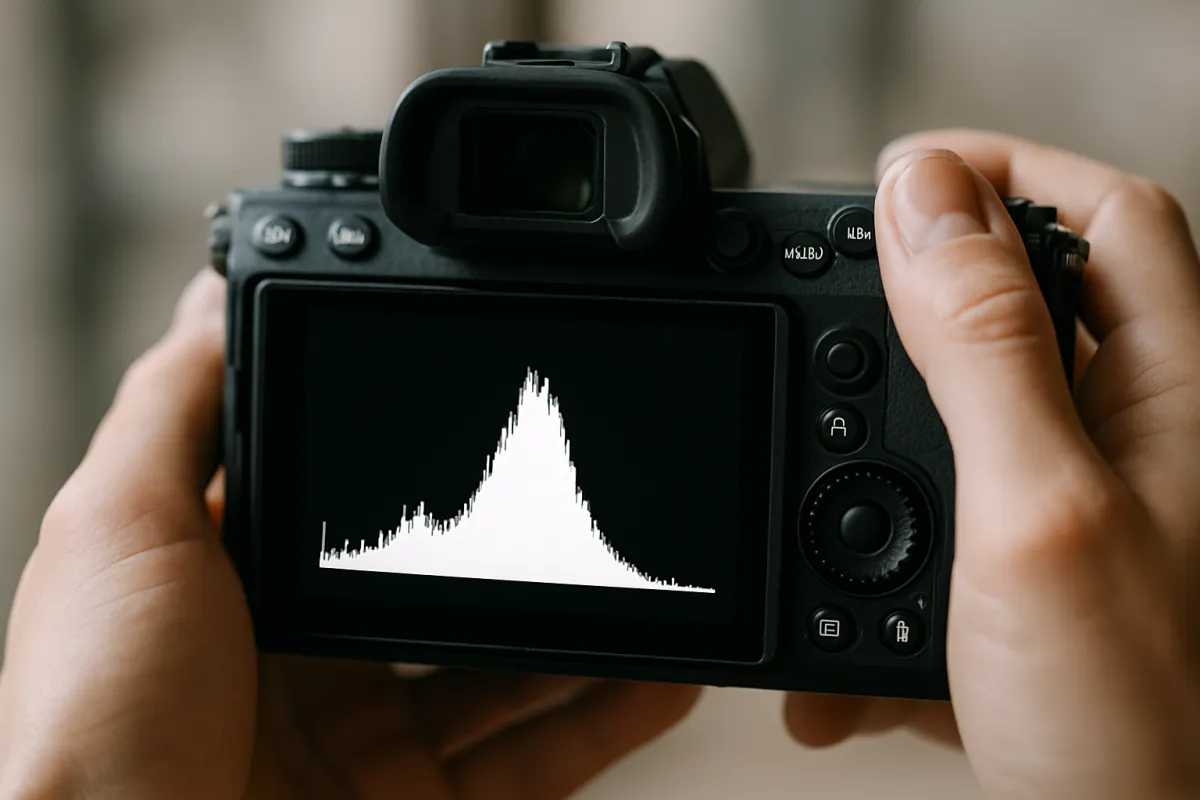
It also changes how you meter contrasty scenes. In a dim room with a bright window, base ISO might hold both the window and the room; at high ISO you will likely have to choose. That is not a reason to avoid high ISO, it is a reason to decide consciously which end of the tonal range matters in the frame you are taking, then protect it. Reading the histogram rather than the rear screen is how you keep that decision honest.
Auto ISO, and how to fence it in
Auto ISO has a reputation as a beginner setting, and that reputation is wrong. It is what a large share of working photographers use for anything that moves, because it removes the one variable that changes fastest, ambient brightness, while leaving the creative decisions to you. The camera adjusts ISO frame by frame as you swing from a shaded doorway into sunlight, and you never take your eye off the subject to chase it.
Auto ISO only becomes genuinely good, though, when you set its two fences. The first is maximum ISO: the highest value you allow the camera to reach. Set it to the ceiling you have decided your body’s files are still worth having, and the camera will never quietly hand you a frame noisier than you would accept. The second, and the one that matters more, is minimum shutter speed: the slowest shutter the camera may use before it starts raising ISO instead. Without it, many cameras will happily let the shutter sag to 1/30 in dim light and give you a clean, blurred photograph.
Set the minimum shutter speed by what you shoot. For still subjects, around one over your equivalent focal length is the classic floor, which is exactly the reciprocal rule from our shutter speed field note. For walking people, 1/125 is a sane floor; for children and pets, 1/250; for sports, 1/500 or faster. Many cameras also offer an automatic minimum tied to focal length, sometimes with a bias toward faster or slower, which handles zooms neatly. With those fences set, auto ISO stops being a guess and becomes a rule you wrote.
ISO by scenario
Numbers stick better attached to scenes, so here is a working set of starting points. All of them assume a moderate aperture and are illustrative rather than prescriptions, since light varies enormously within every category.
Bright daylight outdoors: base ISO, commonly 100. There is more light than you need, and the shutter and aperture have plenty of room. Overcast or open shade: 200 to 400, because shade is one to two stops darker than it looks. Indoors during the day near a window: 400 to 800, and further from the window it climbs quickly. Indoors in the evening under household lamps: 1600 to 3200 is completely normal, and this is the scene where most people’s low-ISO instincts cost them sharp pictures.
Indoor events, receptions, and stage light: 3200 to 12800, depending on the venue and how fast your lens is. Sports under floodlights: often the top of your comfortable range, because the shutter speed is non-negotiable. Night street photography: 1600 to 6400 handheld. Astrophotography of stars: usually 1600 to 6400 on a tripod with a wide fast lens, as covered in our night sky field note, because even on a tripod the earth’s rotation limits how long the shutter can stay open. Anything on a tripod with a still subject: back to base ISO, since a long shutter can gather the light instead.
The pattern behind the list is worth more than the list. ISO is the setting that absorbs what the other two cannot supply. Whenever you can add light, add support, or open the aperture, do that first, because those gather light. When you cannot, raise ISO without guilt and keep the shutter speed the subject demands.
Where an illustrative enthusiast's frames land on the ISO ladder
An illustrative split of a year of mixed shooting by ISO band. Most frames live at the clean end; the top of the range is a specialist tool.
The split is illustrative, not a target. The shape is the point: the clean end does most of the work, the middle rungs handle real life indoors, and the very top exists for the pictures that are worth some grain.
How much noise actually matters
Ask how bad high ISO noise is and you get answers calibrated to a screen zoomed to 100 percent, which is not how anyone looks at photographs. Noise is a texture, and its visibility depends on how large you view the image, how far away you stand, how much you crop, and how much of the frame is dark. The same file that looks unacceptable at 100 percent on a large monitor can be indistinguishable from clean at the size a phone or a print actually presents it.
A more useful way to judge is to work backwards from the output. If your photographs mostly live on phones and social feeds, the display is small and heavily resized, and noise largely disappears in the downscaling. If you print at moderate sizes and hang the result on a wall, viewing distance does similar work. If you crop aggressively or print large, you are magnifying the grain along with everything else, and your usable ISO ceiling drops accordingly. Resolution interacts with this too, a thread we pull in the megapixels field note.
There is also a subjective side that technical tests miss. Fine, even luminance grain reads as film-like and often flatters a photograph, while blotchy color noise reads as a fault. Modern processing separates the two and removes the ugly one preferentially, which is why high-ISO files often look better after a light edit than the camera’s own preview suggested. The practical conclusion: decide your ceiling by looking at your own output at its real size, not by reading a chart of someone else’s test.
Modern sensors changed the conversation
Much of the received wisdom about ISO is a decade or more out of date. The idea that anything above 800 is unusable comes from a generation of cameras where that was roughly true. Sensors, readout electronics, and processing have all improved substantially since then, and the values that used to be emergencies are now ordinary. The upshot is a real, useful shift: on a recent camera, the ISO settings you have been avoiding are probably fine.
This matters because the fear of noise causes more bad photographs than noise does. A photographer who refuses to leave ISO 400 indoors is choosing camera shake, missed focus at wide apertures, and motion blur on anything that moves, all of which are unrecoverable failures, over grain, which is a cosmetic cost that editing partially removes. The mental model to replace is the one that treats a high number as damage. It is a purchase, and often a bargain.
Two caveats keep this honest. First, improvements have not been uniform, and a small sensor in a compact camera or a phone is still working with far less light than a large sensor, so its usable ceiling is genuinely lower. Second, the top of a modern camera’s ISO range is still a marketing number in part: bodies commonly offer values well past the point where files stay pleasant. Knowing your own ceiling, rather than trusting either the fear or the spec sheet, is the whole job, and our low-light shooting field note works through the rest of the technique that goes with it.

ISO invariance in plain terms
ISO invariance is a piece of technical vocabulary that has escaped into forum conversation, and it is simpler than it sounds. A sensor is described as ISO invariant when raising ISO in camera and brightening the file in editing afterwards produce roughly the same amount of noise. On such a sensor, shooting at ISO 400 and lifting the file three stops in software gets you close to what shooting at ISO 3200 would have given you.
Where it becomes useful is high-contrast scenes. If a sensor is close to invariant, you can shoot at a lower ISO to protect the highlights, knowing you can lift the shadows later without a noise penalty worth worrying about. Concert and night photographers use this deliberately: expose for the bright spotlight, keep ISO modest, and bring the rest up afterwards. It is a specialist technique rather than a general habit.
Most sensors are only partly invariant, so raising ISO in camera still helps somewhat, especially in the lower part of the range. The honest general rule for everyone else stays what it has always been: get the brightness close to right in camera, because that costs nothing and is more reliable than any recovery. If you want to know where your own body sits, photograph one static scene at base ISO and at several higher values, then brighten the low-ISO frames to match and compare shadows. Ten minutes settles it for your camera, which is worth more than any general claim.
Raw, jpeg, and noise reduction
The file format you shoot changes how much control you have over noise, which makes it part of the ISO conversation. A jpeg is processed and finished inside the camera, which means the body’s noise reduction has already been applied and baked into the pixels, along with sharpening and color. That processing is usually decent, and at high ISO it is doing significant work, but it is a decision made by the camera on your behalf and it cannot be undone.
A raw file keeps the sensor data with far less processing applied, so all the noise reduction decisions stay yours. You choose how much luminance grain to smooth and how much to keep, how aggressively to clean color mottling, and how to balance that against fine detail, which matters because every increment of noise reduction costs some texture. For anything shot near your ISO ceiling, raw is a meaningful advantage, and the whole trade is worked through in our raw versus jpeg field note.
Two habits help regardless of format. First, apply color noise reduction generously and luminance noise reduction sparingly, since the blotchy color kind is the one that reads as a defect while fine grain often reads as texture. Second, judge the result at the size you will actually publish, then step back and check again, because it is easy to smooth a photograph into plastic while staring at it at 100 percent. If you shoot jpeg, check whether your camera’s high-ISO noise reduction setting is turned up further than you want, since aggressive in-camera cleanup can cost more detail than the noise it removes.
ISO and sensor size
The same ISO number does not deliver the same file quality on every camera, and sensor size is the main reason. For the same framing and the same f-number, a larger sensor collects more total light, simply because there is more area to catch it. More light means a stronger signal relative to its natural randomness, which means less visible noise at any given ISO. That is the honest technical core of the full-frame advantage, and it shows up exactly where you would expect: dim rooms, evening streets, indoor events.
The practical translation is that usable ISO ceilings shift by format. Illustratively, a photographer might treat 6400 as comfortable on a full-frame body, 3200 on an APS-C body, 1600 on a Micro Four Thirds body, and lower still on a compact with a small sensor. Those are starting points to test rather than laws, since a recent smaller-sensor camera can easily outperform an older larger-sensor one, and the gap has narrowed over successive generations.
None of this makes smaller formats a mistake. They buy lighter kit, cheaper and smaller lenses, more depth of field at a given f-number, and more reach for wildlife, which are real advantages that a stop of noise performance does not cancel. The trade is laid out in full in our full-frame versus crop sensor field note and again from the format side in the Micro Four Thirds field note. The point for ISO purposes is narrower: know your own body’s ceiling, and do not import someone else’s from a different format.
ISO on phones
Phone cameras have ISO too, and in automatic mode they use it aggressively, often reaching values that would alarm a camera owner. They get away with it because they are not producing a single conventional exposure. A modern phone captures a burst of frames in the instant you press the button and merges them, and averaging many frames cancels much of the random noise that would ruin any one of them. The result is a photograph that appears to come from a sensor far larger than the one behind the lens.
That computational approach is genuinely impressive and it has limits worth knowing. Merging depends on the frames being alignable, so subjects that move during the burst can smear or produce odd artifacts. Aggressive noise reduction and sharpening give phone files their characteristic look, smooth in the shadows and crisp at the edges, which holds up beautifully on a phone screen and less well when enlarged. And because the sensor is small, the underlying signal really is weaker, which is why night modes need a second or more of stillness to work.
For a camera owner the useful comparison is not phone against camera in the abstract but what each one does with the same dim room, a question our iPhone camera lens field note treats honestly. The phone will produce a clean, bright, slightly synthetic-looking picture with everything in focus. The camera at a high ISO with a fast lens will produce a grainier file with real subject separation and detail that survives enlargement. Different tools, and knowing what ISO is doing in each explains why they look different.
When ISO should move first
Most of the time ISO is the setting that absorbs whatever aperture and shutter speed leave behind, but there are situations where reaching for it first is the correct move rather than the last resort. The clearest is any scene where both the shutter speed and the aperture are already dictated by the picture. Indoor sports is the classic: you need 1/500 to freeze the action and you are already wide open on the lens you own. Nothing is left to adjust, so ISO is not a compromise, it is the only variable.
The second is when the shutter speed you need is set by your hands rather than your subject. Handheld shooting below your safe floor produces camera shake that no editing can undo, so as light fades the correct response is to raise ISO the moment the shutter approaches that floor, not after it has crossed it. Our sharp photos field note ranks shutter discipline above nearly everything else for this reason.
The third is when depth of field is non-negotiable. A group photograph at f/2 with one face soft is a failure, so if the room is dim you keep f/5.6 and let ISO cover the gap. In each case the logic is the same: identify which settings the picture itself has already decided, then let ISO settle the arithmetic. That way of thinking, deciding what the scene demands and paying for it in stops, is what our manual mode field note builds into a habit.
Exposing to protect the shadows
Because noise lives disproportionately in the dark parts of a picture, how you expose at high ISO matters more than how you expose in daylight. A frame that is a little bright, with the histogram pushed toward the right but the highlights kept short of clipping, gives the shadows a stronger signal and leaves you pulling brightness down in editing rather than lifting it up. Pulling down hides noise; lifting up reveals it. This is the whole reason experienced low-light shooters watch the right edge of the histogram so carefully.
The technique has a limit, and the limit is clipping. Once a highlight has recorded as pure white there is no detail to recover, so the goal is to approach the right edge, not to cross it. Cameras that show a live histogram or highlight warnings make this easy; on cameras that do not, take a test frame and check. The white balance field note makes a related point about judging color from data rather than from the rear screen, which glows deceptively bright in a dark room.
Two habits follow. First, in a scene with one bright source, a lamp, a window, a stage light, decide before you shoot whether that source needs to hold detail. If it does not, let it blow and expose for the subject. Second, resist the temptation to underexpose deliberately in order to keep the ISO number low. That trade almost never pays, because the noise you were avoiding shows up anyway the moment you brighten the file, usually looking worse than if you had simply raised ISO in the first place.
A worked example: one dim room, three ISO choices
Put the ideas together on a single scene. A birthday dinner indoors in the evening, a 50mm f/1.8 prime on a crop-sensor body, household lamps and a few candles, and a child who will not sit still for longer than a heartbeat. You want a sharp frame of that child laughing. Wide open at f/1.8, the camera’s meter says ISO 100 needs about 1/8 of a second.
Choice one, ISO 100. The file will be as clean as this camera can make it and the photograph will be blurred twice over: your hands will move during an eighth of a second, and so will the child. This is the choice a low-ISO habit makes for you without announcing itself, and it produces a technically pristine failure.
Choice two, ISO 800. Three stops up the ladder buys 1/60, which is on the edge. A still adult might survive it; a laughing child will not. Noise is barely visible at this level on most modern bodies, so nothing has been lost in quality, but the frame is still a coin flip. This is the compromise position that produces a lot of nearly-sharp photographs.
Choice three, ISO 3200. Two more stops buys 1/250, fast enough to freeze the moment and forgiving of a shaky hand. The file will show real grain in the shadows behind the table, colors will need a little help in editing, and the picture will exist. Six months later nobody looking at it will notice the grain, and everybody will notice whether the face is sharp. That is the trade in a sentence, and it is why the ISO dial exists at all. If reading this makes you want a faster lens so that ISO 800 could have done the job, the upgrade budget planner will show what that costs against your year’s gear money, and our fast lens field note covers which one to buy.
Common ISO mistakes
The most common mistake is the one the worked example illustrates: locking ISO at 100 and treating every rise as a defeat. It produces blurred indoor photographs, missed moments, and a slow conviction that the camera is bad in low light when the setting was the problem. The fix is a mental reframe, from ISO as damage to ISO as currency you spend to buy shutter speed.
The mirror-image mistake is leaving ISO parked high in bright light because you forgot to change it back. Shooting a sunny afternoon at ISO 3200 costs dynamic range and cleanliness for absolutely nothing, and it forces very fast shutter speeds or a closed-down aperture you may not want. Auto ISO with sensible fences prevents both mistakes at once, which is the strongest argument for using it.
Three quieter errors round out the list. Underexposing to protect a low ISO number, then brightening later, which delivers the noise you were avoiding plus less recoverable detail. Using extended H values instead of the top native value, which buys convenience at a real quality cost. And judging noise at 100 percent magnification on a large screen, then choosing a low ceiling that costs you sharp pictures for a difference nobody will ever see at the size you actually publish.
Find your own ISO ceiling in one evening
General claims about ISO are worth less than one test with your own camera, and the test takes about an hour. Set up a static scene in dim indoor light with some dark areas, some texture, and a bright source somewhere in the frame. Put the camera on a tripod or a solid surface, set aperture priority at a middle f-number, and photograph the identical scene at every full stop from base ISO to the top of the native range. Shoot raw, and let the shutter speed do the compensating.
Now review the files the way you actually use photographs. Export them at the size you normally share or print, look at them on the device where they will be seen, and find the point where the grain stops being texture and starts being a distraction. Then repeat the judgment with a mild noise reduction pass applied, because that is the honest working condition. Write down two numbers: the value where files are still clean, and the value where they are still worth having. The first is your comfort ceiling, the second is your emergency ceiling.
Feed both back into your camera. Set auto ISO’s maximum to the emergency ceiling, since that is the point past which you would rather not have the frame at all, and set the minimum shutter speed to suit your usual subject. From then on the camera cannot hand you a file outside the range you personally approved. That is a five-minute setup that removes an entire category of doubt from your shooting, and it is worth redoing whenever you change bodies, a decision the upgrade field note frames around named limits like this one.
Where ISO sits in the exposure triangle
Step back and the three controls sort themselves neatly by what they cost. Aperture buys light and charges you depth of field. Shutter speed buys light and charges you motion, either your subject’s or your own hands’. ISO buys brightness and charges you noise and dynamic range. The reason ISO is usually the one that moves last is simply that its cost is the least visible and the most recoverable: grain degrades a picture gently, while blur and missed focus destroy it.
That ordering gives you a decision sequence for any scene. Ask what the picture requires of depth of field and set the aperture. Ask what it requires of motion and set the shutter speed. Then read what the meter says is missing and pay it in ISO. If the ISO that requires exceeds your ceiling, you have three honest options: open the aperture if the lens allows, add support so the shutter can slow, or add light. Those are the moves that gather photons; everything else is amplification.
Understood this way, ISO stops being the mysterious third setting and becomes the ledger that balances the other two. It is also the setting that most directly reflects your gear: a faster lens, a larger sensor, or a steadier support all show up as a lower ISO for the same picture, which is why low-light capability is really a system property rather than a number on a body. The exposure triangle field note puts all three side by side, and the kit lens versus prime field note prices the fastest way to buy yourself several stops of ISO headroom.
The bottom line
ISO settings on a camera control how much the body amplifies the light it has already gathered, on a ladder of doublings that runs 100, 200, 400, 800, 1600 and upward, with each rung trading exactly against one stop of aperture or shutter speed. Low numbers give the cleanest files and the widest dynamic range, high numbers give you sharp photographs in rooms where clean ones were never available, and the cost of the climb is grain plus some editing latitude rather than ruin. Set aperture for the depth of field the picture needs, set shutter speed for the motion it needs, then let ISO settle what remains. Fence auto ISO with a maximum you have tested and a minimum shutter speed that matches your subject, expose to the right without clipping, and judge noise at the size your photographs are actually seen. Do that and the third dial stops being a warning label and becomes what it always was: the setting that lets you keep shooting after the light runs out. The two dials it trades against are covered stop by stop in our field notes on aperture and shutter speed, and when the honest answer is that your kit runs out of light too early, the upgrade budget planner will price the fix.
This field note describes how ISO behaves in general terms and names no camera models on purpose. Every ISO value, shutter speed, and percentage in it is an illustrative reference point chosen to make the relationships visible, not a measured specification or a rule for your scene, because usable ISO ceilings differ by body, generation, sensor size, subject, and how large the result will be viewed. Run the ceiling test on your own camera, believe your own files over any published chart, and let the photograph in front of you decide how much grain was worth paying.
Frequently asked questions
What are ISO settings on a camera in simple terms?
ISO is the setting that decides how much the camera amplifies the light it has already collected, which shows up as how bright the picture is for a given aperture and shutter speed. A low number such as ISO 100 applies almost no amplification and gives the cleanest possible file; a high number such as ISO 6400 amplifies hard so you can shoot in dim light, at the cost of visible grain. ISO is the third setting in the exposure triangle alongside aperture and shutter speed, and it is the one you spend when the other two have nothing left to give. Think of it less as a quality dial and more as the setting that buys a usable shutter speed after dark.
What ISO should I use?
Use the lowest ISO that still lets you keep the shutter speed and aperture the picture needs, and no lower. In bright daylight that is usually the camera's base ISO, commonly 100 on most bodies; in shade or overcast light it often lands around 200 to 400; indoors during the day around 400 to 1600; and at an indoor event in the evening it can be 3200 or higher without anything having gone wrong. The mistake is treating a low number as automatically better, because a clean photo that is blurred from too slow a shutter is a failed photo. Set the aperture and shutter the scene demands first, then let ISO cover the difference.
Does a high ISO ruin photo quality?
It costs quality, but far less than the internet folklore suggests, and the cost is smaller than the alternatives it prevents. Raising ISO amplifies the noise that is already in a dim signal, so files get grainier, colors get slightly less saturated, and fine detail softens as the noise grows. On a recent camera, images at moderate high ISO values commonly hold up well at screen sizes and ordinary print sizes, and modern noise reduction cleans up much of the rest. The honest comparison is never high ISO against a clean base ISO frame; it is high ISO against a blurred frame, a missed moment, or no photo at all.
What is base ISO or native ISO?
Base ISO is the setting where the sensor is read with its minimum amplification, and it is where the camera delivers its best dynamic range and its cleanest files. On most bodies it is ISO 100, though some are built around ISO 64 or ISO 200, so check what your camera lists as its lowest standard value. Native ISO refers to the values the sensor reaches through real analog gain rather than software push, which are the ones printed as the standard range in the specifications. Some modern sensors also have a second gain step partway up the range where noise performance improves slightly, which is why the ladder is not always perfectly smooth.
What is auto ISO, and should I use it?
Auto ISO lets the camera choose the ISO value for each frame while you keep control of aperture, shutter speed, or both, and for most shooting it is the sensible default rather than a beginner shortcut. It becomes genuinely useful once you set its fences: a maximum ISO so the camera never goes past the noise you are willing to accept, and a minimum shutter speed so it raises ISO instead of letting the shutter drift into blur. With those two limits set, the camera handles the brightness housekeeping frame by frame while you concentrate on the picture. The setting to check first is the minimum shutter speed, because that is where most auto-ISO disappointment comes from.
What is the difference between ISO and exposure?
Exposure is how much light actually reaches the sensor, and only aperture and shutter speed control that; ISO changes how the captured light is amplified into the final image brightness. That distinction matters because raising ISO does not gather one extra photon, so it cannot fix the underlying shortage of light the way a wider aperture or a longer shutter can. What it does is let you accept less light on purpose and still get a normally bright picture. Most photographers use the word exposure loosely to include ISO, and that is fine in conversation, but the technical split explains why noise appears when the number climbs.
Why do my high ISO photos look grainy and washed out?
Because a dim scene gives the sensor a weak signal, and amplification lifts the random variation in that signal along with the picture itself. The grain you see is mostly the natural randomness of light at low levels, made visible by the gain, and the washed-out look comes from the reduced contrast and color separation that accompany a noisy file. Underexposing and brightening afterwards produces the same effect, often worse. The cures are to gather more light rather than more gain: open the aperture, slow the shutter as far as the subject allows, add support so you can slow it further, or bring in light of your own.
Is ISO 100 always the best setting?
Only when the light allows it, which in practice means bright daylight, a tripod, or artificial light you control. ISO 100 gives the cleanest file and the most dynamic range, so it is the right default whenever the shutter speed and aperture you want are still reachable. The moment holding ISO 100 forces a shutter speed too slow for your hands or your subject, it stops being the best setting and becomes the reason the frame is blurred. Treat base ISO as the home position you return to, not as a rule you defend at the cost of the picture.