What's on this page
- Before you start
- Step 1: Understand the exposure triangle
- Step 2: Set your ISO first
- Step 3: Choose aperture for depth of field
- Step 4: Set shutter speed for motion and sharpness
- Step 5: Read the in-camera light meter and balance the triangle
- Step 6: Nail focus and white balance
- Step 7: Review, read the histogram, and adjust
- A worked example: one portrait through all 7 steps
- Common mistakes to avoid
- Troubleshooting the tricky moments
- Your manual mode checklist
- The bottom line
Short answer: How to shoot in manual mode: set three things yourself in a fixed order, ISO first, at the lowest value the light allows; aperture for the depth of field you want; then a shutter speed fast enough to freeze motion and beat camera shake. Read the in-camera meter and nudge one setting until it sits at zero, confirm focus and white balance, shoot, and check the histogram. An illustrative portrait start is f/2.8, 1/200, ISO 200.
Shooting in manual mode is the skill that intimidates more beginners than any other, and the fear is almost entirely misplaced. The letter M does not stand for a secret language of numbers that only professionals speak. It stands for three dials you turn yourself instead of letting the camera turn them, and once you know what each of those three dials does and the order to reach for them, manual mode stops being a test and becomes the most predictable, repeatable way to shoot there is. The reason your automatic photos sometimes come out too dark, too bright, or with the wrong thing blurred is that the camera is guessing, and manual mode is simply you taking the guess back.
This is a how-to, not a gear roundup, so it leans on the reference field notes rather than repeating them. The three settings you are about to set by hand are the exposure triangle, and our exposure triangle field note explains the physics behind why they trade against each other. The low-light edges of manual shooting connect to our best lens for low light field note, the aperture and depth-of-field choices in Step 3 draw on our prime versus zoom field note, and if you are still choosing a body that even has a manual mode worth using, start with our first camera on a budget field note. Price your own kit as you read with the upgrade budget planner.
Key takeaways
- Manual mode means setting three things yourself: ISO, aperture, and shutter speed, the exposure triangle. Everything else can stay automatic until you are ready.
- Work in a fixed order every time: ISO first (lowest that works), aperture for depth of field, shutter for motion and sharpness, then balance on the meter.
- The in-camera light meter is your guide: in manual mode only you move the marker, so nudge one setting until it sits at zero, then confirm with the histogram.
- Manual mode settings to start from, for an illustrative portrait, are f/2.8, 1/200 of a second, ISO 200, then adjusted from the meter. Numbers get you close; the meter finishes the exposure.
- The most common mistake is leaving ISO too high, which adds noise you did not need. Drop it to the floor the light allows and raise it only when you must.
Before you start
Learning to shoot in manual mode is a low-difficulty, high-payoff task: an afternoon of deliberate practice is enough to make the mode feel natural, and once it clicks it never leaves you. Difficulty is beginner to intermediate, and a productive first practice session runs about one hour with a single, patient subject. You do not need special or expensive gear. You need a camera that has a manual mode, something to point it at, and, most of all, good light, because learning manual in a dim room stacks the deck against you before you begin.
Here is the short list of what you need, in rough order of how much each one helps:
- A camera with a manual mode. How do you put a camera in manual mode? Turn the mode dial to the M position, or pick the manual option in the shooting-mode menu of a camera or phone app that offers one. Almost every interchangeable-lens camera has it, and many advanced compacts and phone apps do too.
- A single, cooperative subject: a person willing to sit for ten minutes, a pet that will hold still, or simply a still-life on a table. A subject that does not move lets you change one setting at a time and actually see what it did.
- Good light to start: a bright window, open shade outdoors, or a softly lit room. Starting in generous light means you are not fighting high ISO and slow shutters on your first day, so the lessons land cleanly.
- A lens you know, ideally one with a reasonably wide maximum aperture such as f/1.8 or f/2.8, which gives you room to explore depth of field. A kit zoom works fine to learn the mechanics.
- A little patience and a notebook habit: change one setting, take the shot, look at what changed. Manual mode is learned by isolating variables, not by spinning every dial at once.
With that gathered, the seven steps below take you from an intimidating M on the dial to a repeatable routine you can run on any scene. Run your own gear budget through the upgrade budget planner before you add anything, because the mode costs nothing and the camera you own almost certainly already has it.
Step 1: Understand the exposure triangle
Before you touch a dial, understand what you are about to control, because manual mode is nothing more than setting the three corners of the exposure triangle by hand. Those three corners are ISO, aperture, and shutter speed, and each one does two jobs at once: it changes how bright the photo is, and it changes something about how the photo looks. That double duty is the whole reason manual mode gives you creative control, and it is the whole reason it takes a moment to learn.
ISO is the sensor’s sensitivity to light. Raise it and the image gets brighter, but you also introduce noise, the grainy speckle that muddies detail, so the look-cost of ISO is cleanliness. Aperture is how wide the lens opens, measured in f-numbers, where a small number like f/2 is a wide opening and a large number like f/16 is a narrow one. Aperture changes brightness, and its look-cost is depth of field: wide open blurs the background, stopped down keeps everything sharp. Shutter speed is how long the sensor is exposed, measured in fractions of a second. A fast shutter like 1/1000 freezes motion and a slow one like 1/30 lets it blur, so the look-cost of shutter is how movement is rendered, and, quietly, whether your handheld shot is sharp at all.
The reason it is called a triangle is that the three are linked: change one to make the image brighter and you can change another to compensate and hold the same brightness, which lets you trade one look for another at a fixed exposure. Want a blurrier background? Open the aperture, and darken back with a faster shutter. Our exposure triangle field note works this balance in full, and it is worth reading alongside this one. The watch-out for now is simply this: do not try to memorize numbers yet. Understand only that three settings control brightness and each carries a look-cost, because the next four steps are just the order in which you set them. The chart below lays out what each corner controls so the trades are visible at a glance.
What each manual setting controls
Illustrative weighting, out of 100, of how strongly each of the three manual settings drives brightness versus its creative look-cost. There is no single right split; this is a mental model, not a measurement.
All three settings move brightness by about the same amount, one stop for one stop, which is why they trade cleanly. What differs is the creative side effect each one carries, and that is what you are really choosing between. Tune the model to your own shot with the companion above.
Step 2: Set your ISO first
With the triangle understood, start setting it, and start with ISO, because ISO is the setting you want to touch least and lock earliest. The rule is simple: use the lowest ISO that the light will allow. Low ISO gives you the cleanest possible image, the finest detail and the least noise, so you treat it as a floor you only leave when you are forced to. In bright daylight that floor is your camera’s base ISO, usually ISO 100. In open shade or a bright room it might be ISO 200 to 400. In a dim indoor space it might climb to ISO 1600, 3200, or beyond, and that is fine, because a slightly noisy sharp photo always beats a clean blurry one.
The reason you set ISO first is that it frames the two creative settings that follow. Once ISO is fixed at the lowest sensible value for the light, you know how much light you are working with, and you can spend your aperture and shutter choices on the look you want rather than on rescuing a dark frame. If you set aperture and shutter first and only then discover the image is too dark, you are back to raising ISO anyway, so leading with it keeps the workflow clean. An illustrative sequence: outdoors on a bright day you set ISO 100 and never think about it again; indoors by a window you might set ISO 400; in a dim restaurant you accept ISO 3200 as the cost of a hand-holdable shot.
The watch-out is the single most common manual-mode error there is: leaving ISO high when the light does not require it. Cameras remember the last ISO you used, so the 3200 you needed in the restaurant last night is still set when you step into bright daylight this morning, and now your clean scene is needlessly grainy and your shutter is being forced absurdly fast. Make a habit of glancing at ISO first, every time you start shooting, and dropping it to the floor the current light allows. If your camera offers an auto-ISO option with a maximum limit, it is a reasonable safety net once you understand what it is doing, but learn to set the floor yourself first so the instinct is yours.
Step 3: Choose aperture for depth of field
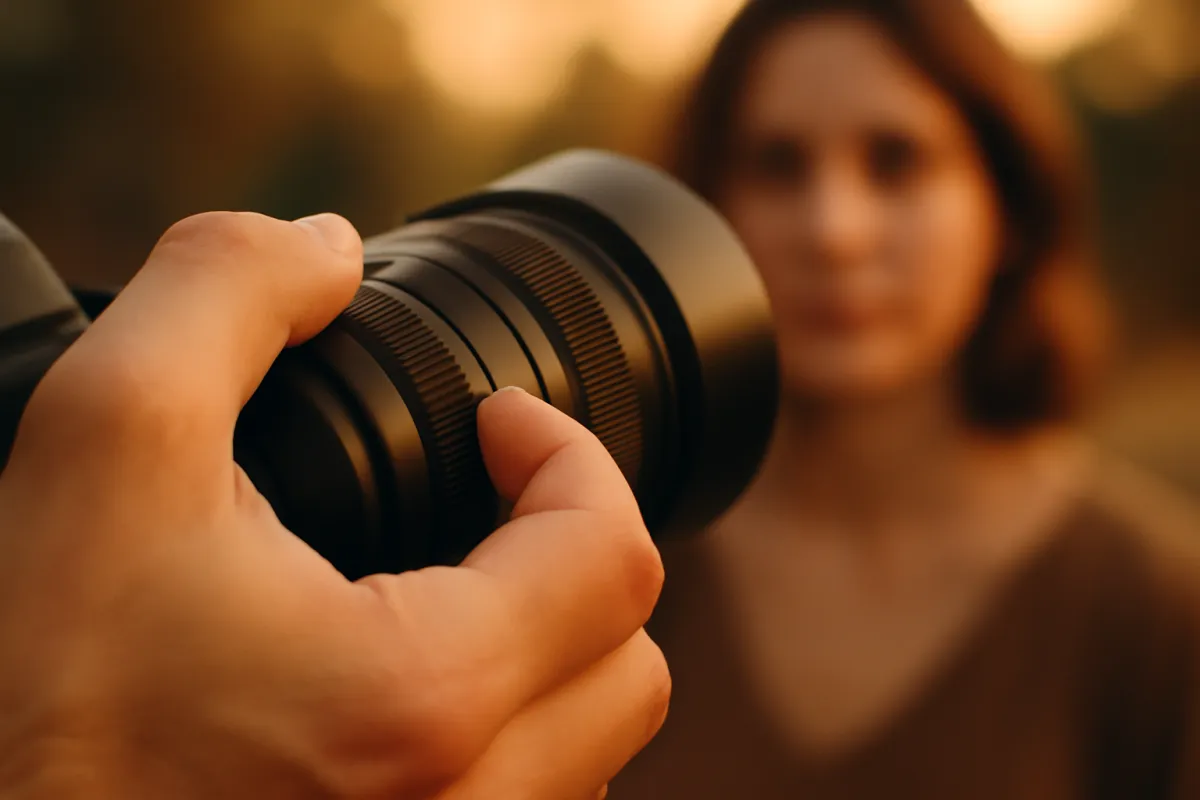
ISO is set, so now spend your first creative decision: aperture, the setting that decides how much of your scene is in sharp focus. Aperture is written as an f-number, and the counterintuitive part that trips up every beginner is that the small numbers mean big openings. f/1.8 is a wide-open lens that lets in a lot of light and throws the background into soft blur; f/16 is a tiny opening that lets in little light and keeps the whole scene, front to back, in crisp focus. The band between them is where you make the picture, and the choice is driven entirely by the look you want rather than by any rule.
For a portrait where you want the person to lift off a creamy, blurred background, choose a wide aperture: f/1.8, f/2, or f/2.8 are the classic portrait openings, and the wider you go the shallower and dreamier the focus falls away. For a landscape or a group photo where you need everything sharp from the near foreground to the distant hills, stop down to a narrow aperture such as f/8, f/11, or f/16. For an everyday scene where you want a natural, mild separation without extremes, the middle of the range around f/5.6 is a dependable home base, and it is also where most lenses are at their sharpest. Our prime versus zoom field note covers which lenses reach the widest apertures, and our best lens for low light field note explains why a wide aperture doubles as your friend in dim conditions.
The watch-out is that a wide aperture is a double-edged tool: the same shallow depth of field that blurs a background beautifully also gives you almost no margin for focus error, so at f/1.8 a portrait can land with the eyelashes sharp and the eyes themselves soft. The wider you open, the more precisely you have to focus, which is why Step 6 insists on single-point autofocus on the eye. An illustrative portrait choice for this walkthrough is f/2.8, wide enough to separate the subject from the background and still forgiving enough that focus is not on a knife-edge. Choose the aperture for the look, then respect the focus discipline that look demands.
Step 4: Set shutter speed for motion and sharpness
Two corners of the triangle are set, so now set the third: shutter speed, the length of time the sensor stays exposed, and the setting that decides both how motion appears and whether your handheld shot is sharp at all. Shutter speed is written as a fraction of a second, so 1/500 is fast and 1/30 is slow, and it does two jobs. The first is freezing or blurring movement: a fast shutter of 1/500 or 1/1000 freezes a running child or a bird in flight into crisp stillness, while a slow shutter of 1/15 lets a waterfall smear into silk or a passing car streak into light trails. The second job is quieter and catches more beginners: beating your own hand shake.
Here is the rule that saves more photos than any other, the reciprocal rule: to hand-hold a sharp shot, use a shutter speed at least as fast as one over your focal length. On a 50mm lens that means 1/50 of a second or faster; on a 200mm lens it means 1/200 or faster, because a longer lens magnifies both the subject and your tiny hand movements. In practice, give yourself a margin and round up: shoot the 50mm at 1/100 rather than 1/50, because the rule is a floor, not a comfortable cruising speed. If a camera or lens has image stabilization it buys you a few stops of slower shutter, but the reciprocal rule is the safe default to internalize first. For our worked portrait, an illustrative 1/200 of a second is comfortably above the reciprocal floor for a normal lens and fast enough to freeze the small movements of a seated person.
The watch-out is matching the shutter to the actual motion in the frame, not just to the reciprocal rule. A perfectly hand-holdable 1/100 will still blur a sprinting dog into a smear, because the subject is moving faster than the shutter can freeze it, so for action you deliberately climb to 1/500, 1/1000, or beyond, and accept that you will pay for that light with a wider aperture or a higher ISO. Conversely, if you want the sense of motion, a river turning to mist, you deliberately go slow and put the camera on something steady. Decide first what the motion in your frame should look like, then set the shutter to deliver it, and only then check that it also clears the reciprocal floor.
Step 5: Read the in-camera light meter and balance the triangle
You have now set all three corners for the look you want: ISO for cleanliness, aperture for depth, shutter for motion. The question that remains is whether that combination actually produces a correctly bright photo, and the tool that answers it is the in-camera light meter. The meter is a small scale, usually running from minus two on the left through a zero in the middle to plus two on the right, shown along the bottom of your viewfinder or on the screen. A marker slides along it, and it is telling you one thing: whether the camera thinks your current settings will make the photo too dark, too bright, or balanced. In manual mode, and this is the key insight, nothing moves that marker except you.
Point the camera at your subject and read where the marker sits. If it is over toward the minus side, the camera thinks the shot will be too dark, so you need to let in more light; if it is toward the plus side, too bright, so you need less. The cleanest way to balance is to decide which of your three settings you are least attached to and adjust that one. In our worked portrait you care about the f/2.8 look and the 1/200 sharpness, so the setting you flex is usually ISO, or a small nudge of the shutter: turn the dial and watch the marker slide toward zero. When it reaches zero, the camera considers the exposure balanced, and you have your starting shot. This is the moment manual mode stops feeling like blind guessing, because the meter turns it into a simple game of moving a marker to the middle.
The watch-out is that zero is a suggestion, not a commandment, because the meter is easily fooled. It assumes the world averages out to a middle gray, so a scene dominated by bright snow or a white wall tricks it into underexposing (it makes the white look gray), and a scene dominated by dark shadow tricks it into overexposing. The fix is exposure compensation by hand: for a bright snowy scene, deliberately push the marker to plus one to keep the snow white; for a dark, moody scene, pull it to minus one. You confirm all of this after the shot with the histogram in Step 7, but the habit to build now is to treat the meter as a well-informed guide you can overrule, not an autopilot. Balance to zero, then adjust for what the scene actually is.
Step 6: Nail focus and white balance
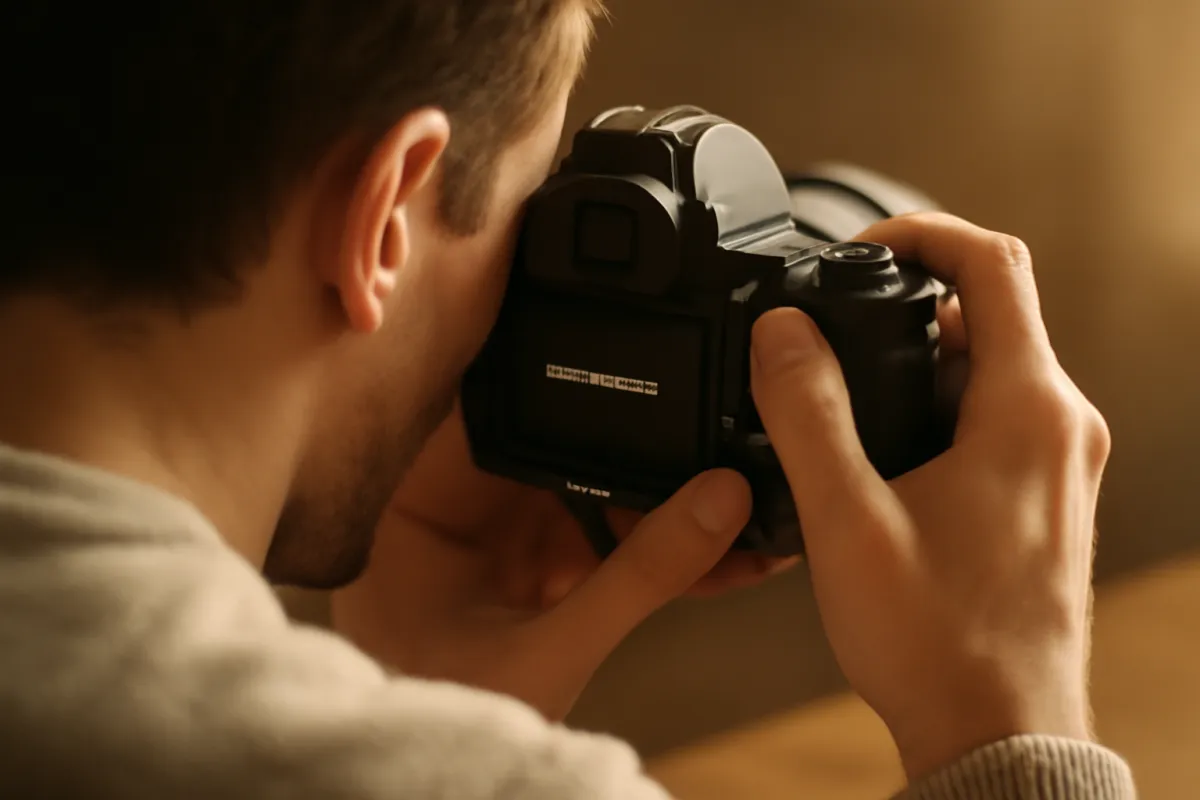
The exposure is balanced, but a perfectly exposed photo of the wrong thing, or one where nothing is quite sharp, is still a failed photo, so before you press the shutter, lock down focus and white balance. Start with focus, because it matters most and fails most often, especially at the wide apertures Step 3 encouraged. Switch your camera from any wide-area or automatic focus-point selection to single-point autofocus, which lets you place one small focus point exactly where you want the sharpness to fall. For a portrait, that point goes on the subject’s nearest eye, every time, because the eye is where a viewer looks and shallow depth of field is unforgiving. Place the point, half-press to focus, confirm the camera has locked, and only then take the shot. For a landscape at a narrow aperture, focus roughly a third of the way into the scene to spread the deep depth of field across the frame.
White balance is the second lock, and the good news is that it is separate from the exposure triangle, so switching to manual exposure does not force you to set white balance by hand. You can leave white balance on Auto and it will be right most of the time. When you do want control, pick the preset that matches your light: Daylight for open sun, Cloudy for overcast or to add warmth, Shade for open shade, Tungsten for warm indoor bulbs, Fluorescent for that light’s green cast. Matching the preset to the light keeps skin tones and colors true rather than letting a scene drift orange under household bulbs or blue in shade.
The watch-out, and the single habit that makes white balance almost a non-issue, is to shoot in RAW rather than JPEG whenever your camera allows it. A RAW file stores the full sensor data, which means you can set white balance precisely on the computer afterward with no loss of quality at all, turning it from an in-the-moment decision into a fully reversible one. A JPEG, by contrast, bakes the white balance in at capture, so a wrong preset is harder to undo later. If you shoot RAW you can safely leave white balance on Auto and fine-tune every frame later; if you shoot JPEG, take the extra second to match the preset to the light. Either way, get focus right in the moment, because unlike white balance, focus is the one thing you cannot fix afterward.
Step 7: Review, read the histogram, and adjust
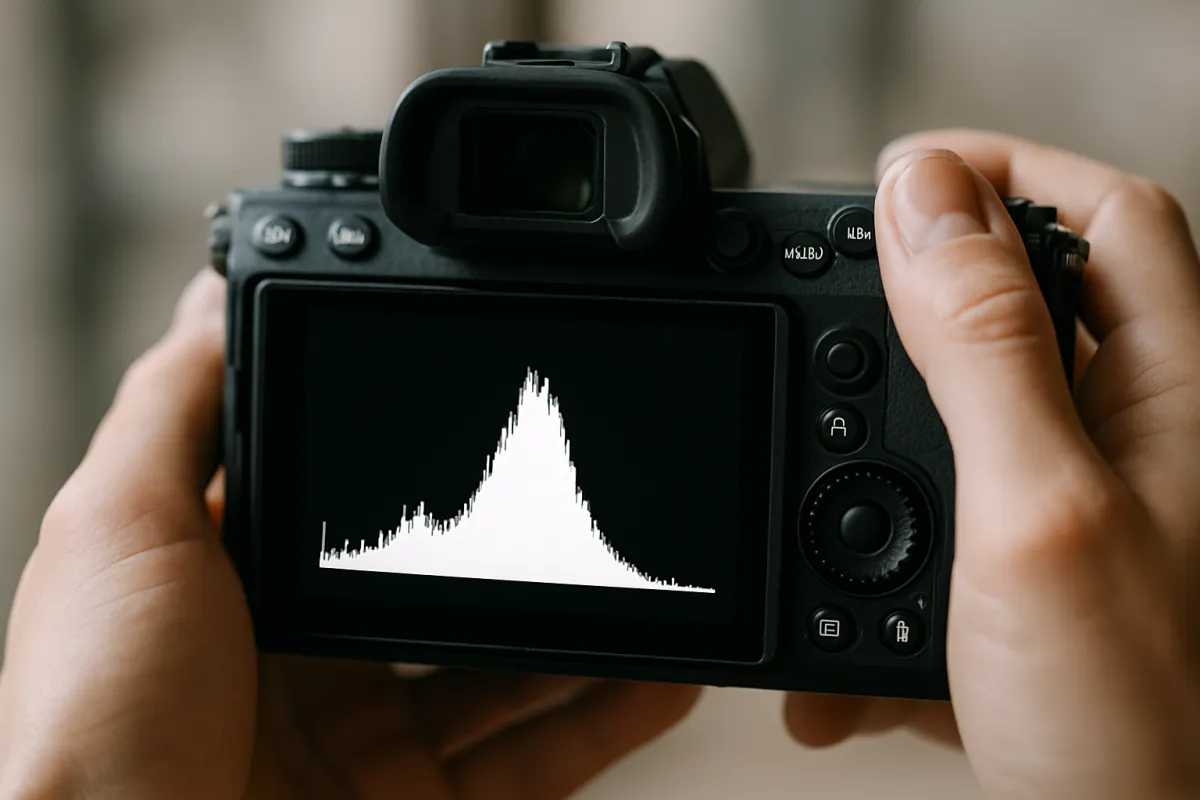
You have taken the shot, and manual mode gives you something automatic modes discourage: the chance to check your own work and correct it before the moment passes. The instinct is to glance at the photo on the back screen and judge the brightness by eye, but that instinct lies, because the brightness of a small screen changes with the ambient light: a photo looks perfect on the screen in a dark room and turns out badly underexposed, or it looks too dark under bright sun and is actually fine. The honest tool is the histogram, a small graph you can display on playback that plots the tones in your image from pure black on the far left to pure white on the far right, with the height at each point showing how many pixels fall at that brightness.
Reading it is simpler than it looks. A well-exposed photo generally has its data spread across the graph without being crushed hard against either edge. If a tall spike is jammed against the left wall, you are clipping shadows to pure black and losing detail there, a sign the shot may be underexposed. If a spike is piled against the right wall, you are clipping highlights to pure white, blowing out detail that cannot be recovered, a sign of overexposure. There is no single ideal histogram shape, because a photo of a black cat and a photo of a snowfield should look completely different, but the general aim is to capture the range without clipping the ends you care about. Many cameras also offer a highlight warning, blinking the overexposed areas on playback, which is the fastest way to catch a blown sky.
The watch-out here has a name photographers use with a wince: chimping, the habit of staring at each photo on the back screen and judging it by how it looks, without reading the histogram. Chimping feels productive and teaches you almost nothing, because you are trusting a screen that lies. Instead, take a frame, glance at the histogram, and make a concrete adjustment: if the highlights are clipping, lower your exposure by a third to a full stop by nudging ISO, aperture, or shutter, and reshoot; if the shadows are crushed and you want that detail, raise it. This closed loop, shoot, read, adjust, is the entire skill of manual mode compressed into three actions, and it is what turns a lucky exposure into a repeatable one. The chart below shows how a correct exposure is built up from these steps.
Building a correct exposure, step by step
Illustrative share of the work that each phase of the manual routine contributes to landing a clean, correctly exposed frame. The three parts sum to the whole exposure.
Most of the exposure is decided when you set the three settings in order, the meter fine-tunes it, and the histogram confirms it. Skip the last quarter and you are back to guessing. Adjust the split to your own workflow with the companion above.
A worked example: one portrait through all 7 steps
Theory into practice: here is a single realistic scene run through all seven steps, with illustrative settings, so the sequence is concrete rather than abstract. The scene is a portrait of a friend seated near a large window on an overcast afternoon, soft daylight coming from one side, a plain wall a few feet behind them that you want to blur into a clean, uncluttered backdrop.
Step 1, the triangle. You remind yourself of the plan: ISO for cleanliness, aperture for the blurred background, shutter for a sharp, freeze-the-small-movements portrait, then balance on the meter. Step 2, ISO. The window light is decent but not bright, so you set ISO 200, low enough to stay clean and high enough that you are not forcing an impossibly slow shutter. You notice the camera was still on ISO 1600 from a dim room last night and drop it, dodging the most common mistake. Step 3, aperture. You want the wall behind your friend to melt away, so you open up to f/2.8, wide enough to separate them cleanly from the background while still leaving enough depth of field that both eyes will be sharp if you focus carefully. Step 4, shutter. On a normal lens the reciprocal floor is easy to clear, and a seated person still makes small movements, so you set 1/200 of a second, comfortably sharp for handheld and fast enough to freeze a shifting expression.
Step 5, the meter. You point at your friend’s face and read the meter: the marker sits at minus two-thirds, so the shot would come out a touch dark. You are attached to the f/2.8 look and the 1/200 sharpness, so you flex ISO, nudging it from 200 to 320, and the marker slides to zero. Balanced. Step 6, focus and white balance. You switch to single-point autofocus, place the point on the eye nearest the camera, half-press, confirm the lock, and leave white balance on Auto because you are shooting RAW and can perfect it later. Step 7, review. You take the frame, pull up the histogram, and see the data sitting nicely across the middle with a small, intentional peak in the darker tones from the shadowed side of the face, no clipping at either wall. The back screen looked a little dark in the bright room, but the histogram tells the truth, so you trust it, take a few more frames as your friend relaxes, and you are done.
One portrait, seven steps, an exposure you built on purpose: f/2.8 for the soft background, 1/200 for the sharpness, ISO nudged to 320 to balance, focus on the eye, confirmed on the histogram. Nothing was guessed, so the next portrait, and the one after, will be just as repeatable. Run your own scene’s kit and budget through the upgrade budget planner.
Common mistakes to avoid
Most frustrating first weeks in manual mode fail in one of a handful of predictable ways, and knowing them in advance is the fastest route to sharp, well-exposed frames. These are the pitfalls that come up again and again:
- Leaving ISO too high. The camera remembers last night’s ISO 1600 into this morning’s bright daylight, and now your clean scene is grainy for no reason. Glance at ISO first, every session, and drop it to the floor the light allows.
- Ignoring the light meter. Beginners set the three dials for the look they want and shoot without checking the meter, then wonder why the frame is dark or blown. The meter is the whole point of the mode: read it and nudge one setting to zero before you shoot.
- Wrong shutter for the motion. A hand-holdable 1/100 still smears a running dog, and a slow shutter on a long lens blurs even a still subject from hand shake. Match the shutter to the actual motion, and always clear the reciprocal floor of one over your focal length.
- Forgetting white balance in mixed light. Leaving a Tungsten scene on the Daylight preset stains it orange, or shooting shade on Auto can go cold. Match the preset to the light, or shoot RAW so you can fix it losslessly later.
- Chimping instead of reading the histogram. Judging exposure by how the photo looks on the back screen trusts a display that changes with the ambient light. Read the histogram and the highlight warning instead, and adjust by a concrete amount.
- Changing every dial at once while learning. Spinning ISO, aperture, and shutter all together makes it impossible to see what each one did. Change one setting, take the shot, look at the result, then change the next. Isolate the variable.
Troubleshooting the tricky moments
Manual mode does not always hand you a still subject in soft window light, so here is how to handle the situations that fight you. What if your photos come out too dark? Your settings are letting in too little light, so open the aperture to a smaller f-number, slow the shutter (as long as you stay above the reciprocal floor), or raise the ISO, in that order of preference for image quality, and watch the meter marker move toward zero as you do. What if they are too bright, with a blown-out sky or washed highlights? Do the reverse: narrow the aperture to a larger f-number, speed up the shutter, or lower the ISO until the histogram pulls back off the right wall and the highlight warning stops blinking.
What if everything is blurry? Diagnose the type before you fix it, because the fixes differ. If the whole frame is soft, it is camera shake from too slow a shutter, so raise the shutter speed above the reciprocal floor or brace on a tripod. If the background is sharp but your subject is soft, it is a focus miss, so switch to single-point autofocus and put the point on the subject. If a moving subject is smeared while stationary things are sharp, it is motion blur, so climb to 1/500 or faster. What if you are stuck in low light and cannot get a sharp, bright shot? This is the classic squeeze, and the honest answer is that you trade something: open the aperture as wide as the lens goes, accept a higher ISO than you would like, and hold the shutter as slow as you dare above the reciprocal floor, ideally with a stabilized lens or a brace. Our best lens for low light field note covers why a wide-aperture lens is the real fix here.
What if the action is too fast to freeze? Prioritize shutter speed above everything: set 1/1000 or faster, then open the aperture wide and raise the ISO as needed to feed that fast shutter enough light, accepting noise and shallow depth as the price of a frozen frame. This is exactly the moment auto ISO earns its place, letting the camera chase the changing light while you keep your fixed fast shutter and chosen aperture. And what if the meter and your eye disagree? Trust the histogram over both: the meter is fooled by very bright or dark scenes and your eye is fooled by the screen, but the histogram plots the actual tones, so when in doubt, shoot, read the graph, and adjust.
Your manual mode checklist
Save this and run down it the next time you switch the dial to M:
- Glance at ISO first and drop it to the lowest value the current light allows; do not inherit last night’s high ISO.
- Choose your aperture for the look: wide (small f-number) to blur the background, narrow (large f-number) for front-to-back sharpness.
- Set a shutter speed fast enough to clear the reciprocal floor (one over your focal length) and to freeze the motion in the frame.
- Point at your subject and read the in-camera meter; nudge one setting until the marker sits at zero.
- Override the meter toward plus for bright scenes (snow, white walls) and minus for dark, moody scenes so it does not average them to gray.
- Switch to single-point autofocus and place the point on the subject, the nearest eye for a portrait; confirm the lock before you shoot.
- Match white balance to the light, or shoot RAW and leave it on Auto to fine-tune losslessly later.
- Take the shot, then read the histogram, not the screen brightness; watch for data crushed against either edge and the highlight warning.
- Make a concrete adjustment (a third to a full stop) and reshoot until the histogram sits where you want it.
- Change one setting at a time while learning so you can see exactly what each one does.
The bottom line
Shooting in manual mode is not a test of talent or a badge of seriousness; it is a short, repeatable routine of setting three dials in the right order and reading a simple scale. Set ISO first at the lowest value the light allows, choose an aperture for the depth of field you want, set a shutter speed fast enough to beat both hand shake and the motion in the frame, then read the in-camera meter and nudge one setting until the exposure balances, overriding toward plus or minus when the scene is unusually bright or dark. Confirm focus on the eye and match your white balance, take the shot, and read the histogram rather than trusting the back screen, then adjust and reshoot. The single most important habit is leading with ISO and keeping it low, because it costs nothing and saves every frame from needless noise, and the single most freeing realization is that the meter turns the whole mode into a game of sliding a marker to the middle. None of this requires expensive gear: the camera you own almost certainly already has an M on the dial, and an hour of deliberate practice with a patient subject in good light is enough to make it feel like second nature. Learn the order, trust the histogram, and every exposure from now on will be a decision you made rather than a guess the camera made for you. Mastering manual is also the cheapest way to find out whether your body genuinely limits you, which is the first question in our camera upgrade field note. Price your own kit in the upgrade budget planner, then switch the dial to M and go make some frames on purpose.
This field note is written to teach a shooting workflow, not to sell any camera, lens, or accessory: no brand paid for a placement and none is named on purpose, only settings, ratios, and techniques that work across every system. All camera settings are illustrative starting points rather than fixed rules, because the correct ISO, aperture, and shutter speed change with the light, the subject, and your gear, so read the meter and the histogram and judge each frame on its own. The exposure numbers here describe standard photographic technique, not a measured test of any specific model, so treat them as a place to begin and let the scene in front of you, not any writer’s recipe, set your final settings.
Frequently asked questions
What settings do I change in manual mode?
In manual mode you set three things yourself that other modes decide for you: ISO, aperture, and shutter speed. ISO controls how sensitive the sensor is to light, aperture (the f-number) controls how wide the lens opens and therefore how much of the scene is in focus, and shutter speed controls how long the sensor is exposed and therefore how motion is rendered. Those three are the exposure triangle, and together they set both the brightness of the image and its look. Everything else, focus and white balance among them, can still be automatic if you want, so manual mode is really about taking control of those three exposure settings while letting the camera help with the rest until you are ready to take those over too. Set them in a repeatable order and the mode stops feeling like guesswork.
What is a good starting point for manual mode settings?
There is no single correct set of numbers because the right exposure depends entirely on the light in front of you, but a useful illustrative starting point for a portrait in decent indoor or shaded light is aperture f/2.8, shutter speed 1/200 of a second, and ISO 200, then adjust from the meter. For a bright outdoor scene you might start near f/8, 1/250, and ISO 100. For a dim room you may need ISO 1600 or higher, a wider aperture, and a slower shutter you can still hand-hold. Treat any starting recipe as a first dial-in, not a rule: point the camera at your subject, read the in-camera light meter, and move one setting until the meter sits where you want it. The starting numbers get you close; the meter finishes the job.
How do I read the light meter in manual mode?
The in-camera light meter is a small scale, usually running from minus two through zero to plus two, shown in the viewfinder or on the screen. A marker slides along it to tell you whether the camera thinks your current settings will produce a photo that is too dark (marker toward the minus side), too bright (toward the plus), or balanced (at zero). In manual mode nothing moves that marker except you: change ISO, aperture, or shutter and the marker shifts. The simplest workflow is to set your ISO and aperture for the look you want, then turn the shutter dial until the marker reaches zero for a balanced exposure. Zero is a starting point, not a law, because the meter is fooled by very bright or very dark scenes, so you will sometimes aim for plus or minus a bit and confirm with the histogram after the shot.
Why are my manual mode photos blurry?
Blur in manual mode almost always comes from one of two causes, and they have different fixes. If the whole frame is soft, your shutter speed is probably too slow to hand-hold and camera shake is smearing the image; raise the shutter speed until it is at least one over your focal length (about 1/100 of a second for a 100mm lens) and ideally faster, or brace the camera on a tripod. If the background is sharp but your subject is soft, or the wrong thing is in focus, the problem is focus rather than shake: switch to single-point autofocus, place the point on the subject's nearest eye, and confirm before you shoot. Motion blur from a moving subject is a third case, fixed by a faster shutter of 1/500 or more. Identify which blur you have before you change anything, because the wrong fix wastes the light.
Should I use auto ISO in manual mode?
Auto ISO in manual mode is a legitimate and popular halfway house, and it is worth understanding rather than dismissing. With it on, you set aperture and shutter speed by hand for the look you want, and the camera raises or lowers ISO automatically to balance the exposure, which lets you keep full creative control of depth of field and motion while the camera handles the brightness in changing light. It shines in fast-moving situations, an event or wildlife, where the light shifts shot to shot and you cannot spare a hand for the ISO dial. The trade is that you give up direct control of noise, so set a sensible maximum ISO limit in the menu so the camera does not push the sensitivity higher than you find acceptable. Learn full manual first so you understand what the camera is doing, then use auto ISO as a deliberate tool, not a crutch.
What is the difference between manual mode and aperture priority?
Aperture priority (marked A or Av) is a semi-automatic mode: you choose the aperture and the ISO, and the camera automatically picks the shutter speed to balance the exposure. Manual mode (marked M) hands you all three, so you set aperture, shutter, and ISO yourself and the camera only advises through the meter. Aperture priority is faster and excellent when depth of field is your main concern and the light is steady, which is why many working photographers live in it. Manual mode is the right tool when you want the exposure to stay fixed regardless of what the camera would otherwise do, for example across a panorama, in tricky backlight that fools the meter, in a studio with flash, or any time consistency between frames matters more than speed. Neither is more advanced as a badge; they are different tools for different problems.
Do professional photographers always shoot in manual mode?
No, and the belief that they do is one of the more persistent myths in photography. Plenty of professionals shoot aperture priority most of the time because it is fast and the results are identical when the light is steady, reaching for full manual only when the situation demands a locked exposure, such as studio flash, backlit scenes that fool the meter, panoramas, or video. The value of learning manual mode is not a badge of seriousness; it is understanding, because once you can set the exposure triangle by hand you understand exactly what every other mode is doing for you, and you can predict and override it. Shoot manual to learn and to solve specific problems, then use whatever mode gets the shot in front of you. The photograph does not know or care which mode made it.
Can you control the shutter speed on an iPhone camera?
Yes, though not from the default camera app, and understanding this is a useful bridge from a phone to manual mode. The stock iPhone camera hides shutter speed and picks it automatically, but the exposure slider (tap and hold to lock focus, then drag the sun icon) nudges the whole exposure brighter or darker. For real control over shutter speed you use a third-party manual camera app, which exposes shutter, ISO, and focus the same way a dedicated camera does, letting you freeze motion with a fast shutter or blur it with a slow one on a tripod. The exposure triangle in this field note works identically on a phone: the phone simply defaults to deciding the shutter for you until you take that decision back.
How do I set white balance in manual mode?
White balance is separate from the exposure triangle, so switching to manual exposure mode does not force you to set white balance by hand; you can leave white balance on Auto and it will work well most of the time. When you do want control, choose a preset that matches your light: Daylight for sun, Cloudy for overcast or to warm a scene, Shade for open shade, Tungsten for warm indoor bulbs, and so on. The most future-proof habit is to shoot in RAW rather than JPEG, because a RAW file lets you set white balance precisely on the computer afterward with no loss of quality, which turns white balance into a fully reversible decision. If you shoot JPEG, set the preset in camera to match the light, since a JPEG bakes the white balance in and it is harder to correct later.