What's on this page
- Why sports photography is its own technical problem
- Before you start
- Step 1: Set the shutter speed the sport demands
- Step 2: Choose the exposure mode that protects it
- Step 3: Set up continuous autofocus and the right area mode
- Step 4: Tune tracking sensitivity to the sport
- Step 5: Pick a drive mode your buffer can sustain
- Step 6: Position yourself for the light and the action
- Step 7: Anticipate the play and prefocus where it will arrive
- Step 8: Handle indoor and floodlit venues
- Step 9: Cull ruthlessly the same day
- A worked example: an outdoor afternoon game, start to finish
- Sports photography settings: the cheat sheet
- How much reach you actually need
- Deliberate motion blur: panning and the slow shutter
- Shooting sports with a kit zoom or a phone
- Youth, school, and rec league sports
- Common mistakes to avoid
- Troubleshooting the hard cases
- Your sports photography checklist
- The bottom line
Short answer: Sports photography settings start with the shutter speed the sport demands, around 1/1000 for running field sports, 1/500 for court sports, and 1/2000 for bat or racket contact, then putting the camera in manual with auto ISO so nothing can steal that speed. Use continuous autofocus with an area mode sized to the chaos, shoot short bursts, stand where light and action favor you, and pre focus where the play is going.
The best camera settings for sports photography are the ones chosen before the game starts, because once a player breaks toward you everything you learned about exposure stops being a leisurely decision and becomes a race. The light is whatever the sky is doing, and you have about a second and a half to have already been correct. Most people who try it come home with a card full of near misses: bodies smeared into streaks, a perfectly sharp referee three yards behind a fuzzy striker, a burst that stopped firing exactly as the ball left the boot. None of that is a camera problem. It is a small set of decisions made in the wrong order, and the wrong order is what this field note fixes.
KitBorough already covers the subject tutorials for portraits, food, pets, and the night sky, but action is a genuinely different technical problem, because everything in it serves one setting instead of balancing three. The steps below run from the shutter speed the sport actually demands through the exposure mode that protects it, the autofocus setup that is the real skill, the drive and buffer discipline that keeps you shooting, and the positioning and anticipation that separate a photographer from a spectator with a camera. Where a step leans on a concept covered elsewhere, it links our shutter speed field note, our ISO field note, and the camera settings reference rather than repeating them. Price any reach you decide you need in the upgrade budget planner.
Key takeaways
- Shutter speed is the master setting in action photography: pick it first from the sport, hold it, and let every other setting serve it. Running field sports start around 1/1000, court sports around 1/500, and the moment of bat or racket contact wants 1/2000.
- Manual mode with auto ISO is what most working action shooters use, because it locks the shutter and the aperture, the two settings that decide sharpness, and lets ISO absorb every change in light without your input.
- Autofocus is the actual skill, not exposure: continuous AF, an area mode matched to how predictable the subject is, and a tracking sensitivity biased toward sticky will save more frames than any other change you make.
- Position and anticipation beat reach. Standing where the light is behind you and the action arrives, then pre-focusing on the spot the play is heading to, produces more keepers than a longer lens ever will.
- The most common cause of a wasted afternoon is a low ISO ceiling. Set it high, accept the grain, and remember that noise is a fixable problem while motion blur is a permanent one.
Why sports photography is its own technical problem
Every other kind of photography lets you balance the exposure triangle as a negotiation. In a portrait you might trade a stop of aperture for a stop of ISO because you prefer the look. In action work that negotiation is over before it starts, because one setting has a hard floor set by physics: if the shutter is not fast enough to stop the movement, nothing else you do can rescue the frame. Sharpening does not undo motion blur. Noise reduction does not undo motion blur. There is no editing move that puts an athlete’s hand back where it was.
That single constraint reorganizes everything. You do not choose the shutter speed last after setting a mood; you choose it first from the sport, and then aperture and ISO exist only to make that shutter speed correctly exposed. Our exposure triangle field note explains the relationship in general terms, and action photography is simply the case where one leg of the triangle is nailed to the floor.
The second thing that makes sports distinct is that the subject moves toward and away from you, not just across the frame. A portrait subject stays at one distance, so a single focus acquisition holds. An athlete running at you changes the focus distance continuously, which means focus has to be re-acquired dozens of times per second while you hold the button. That is why autofocus configuration, not exposure, is where most of the learning actually sits, and why two photographers with identical cameras can come home with wildly different keeper rates.
Before you start
Sports photography is an intermediate task with a forgiving learning curve, because the feedback is immediate and brutal: you can tell within two minutes whether your settings are working. Budget about two hours for a first session, which is roughly one game or one practice, plus twenty minutes beforehand to set the camera up while you are not under pressure. Difficulty is intermediate rather than beginner, mostly because the autofocus menus are where camera manufacturers hide their worst labeling.
Here is the short list of what you need, in rough order of how much each changes the result:
- A camera with continuous autofocus and a burst mode. Almost every interchangeable-lens camera made in the last fifteen years has both. A phone can do daylight sports acceptably, with real limits covered in a later section.
- Reach. A telephoto zoom that gets you to around 200mm covers most small fields and courts from the sideline. Larger fields want more. Our telephoto lens field note covers the focal-length decision in depth.
- A lens that opens reasonably wide if you shoot indoors or at night. This is the one place where a faster lens is not a luxury but the difference between usable and unusable frames.
- A fast memory card with headroom. Buffer stalls are a card problem as often as a camera problem, and cards are the cheapest fix on this list.
- A charged spare battery. Continuous autofocus and burst shooting drain a battery far faster than casual shooting does.
- Permission and a plan for where you are allowed to stand, which matters more at school and youth events than most people assume.
You do not need to buy anything to run the nine steps below on a practice session. Run your own kit against the upgrade budget planner before you assume the gear is what is holding you back, because for most people it is step three that is holding them back.
Step 1: Set the shutter speed the sport demands
Start here, every time, before you touch anything else. Ask what the fastest thing in the frame is doing, not what the athlete’s body is doing, because a sprinter’s torso moves far slower than the sprinter’s hand. Then pick a shutter speed from the movement and treat it as fixed for the session.
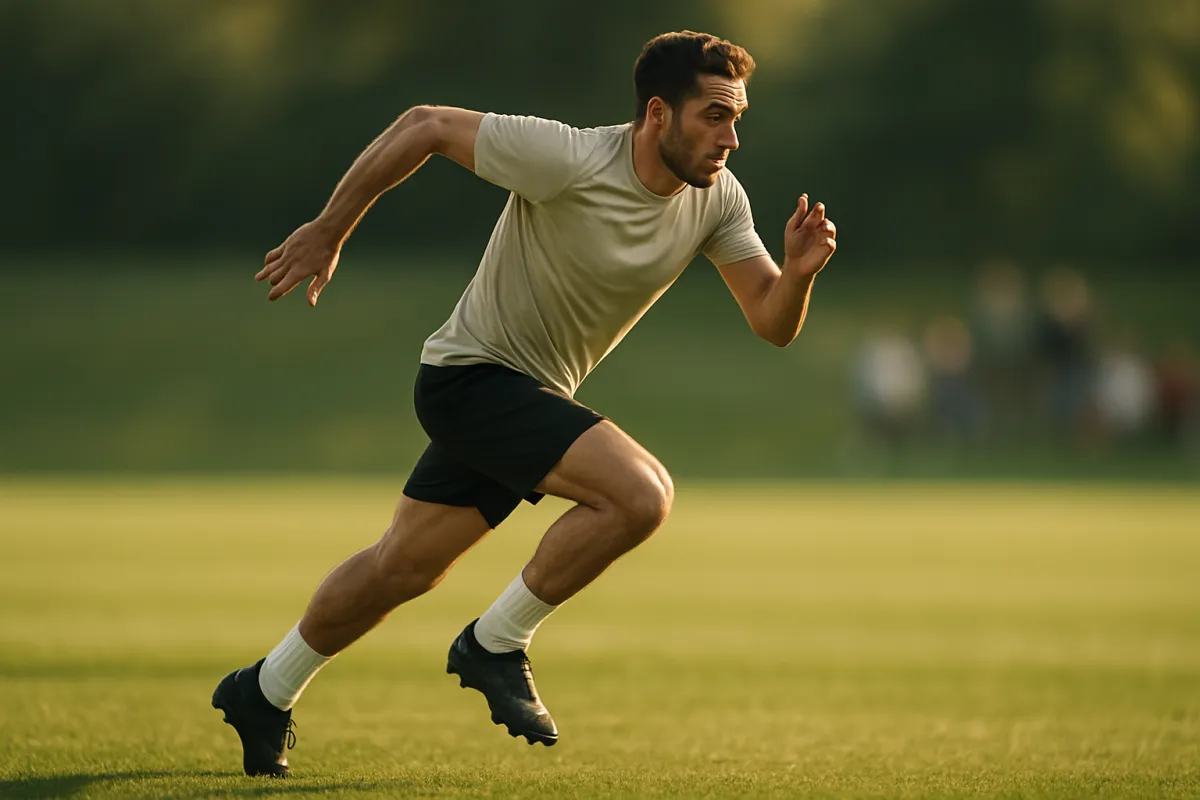
Useful illustrative starting points: running field sports such as soccer, football, rugby, and lacrosse sit around 1/1000, which stops a sprinting body and usually stops the limbs too. Court sports indoors, basketball and volleyball, are often fine at 1/500 to 1/800, because play happens in shorter bursts across a smaller space. Track sprints, cycling, and motorsport want 1/1600 or faster. Swimming and gymnastics land near 1/800. Youth and recreational play, where nobody is moving at adult speed, is genuinely fine at 1/500. The single fastest thing most amateurs try to freeze is bat, club, or racket contact, which wants 1/2000 if you need the impact sharp.
Now the important part, which most articles skip: those numbers are a floor, not a target. If the light allows a faster shutter at no cost, take it. What you must not do is drift below the floor because the light dropped, and that is exactly what full auto mode will do to you.
Watch out: test rather than trust. Shoot ten frames early, zoom to 100 percent on the rear screen, and look at the hands and the feet rather than the face. Faces are often the slowest-moving part of an athlete and will look sharp in a frame whose extremities are smeared.
Step 2: Choose the exposure mode that protects it
Having picked a shutter speed, your job is to stop the camera from taking it away. There are two defensible ways to do that.
Shutter priority (S or Tv) locks your shutter speed and lets the camera choose the aperture. It is simple, it is a fine place to start, and it works well in stable daylight. Its failure mode is quiet: when the light drops far enough that the lens is already wide open, the camera cannot open further, so it either underexposes the frame or, on some bodies with auto ISO enabled, silently drops the shutter speed to compensate. You find out afterward.
Manual with auto ISO is what most experienced action shooters actually use, and it is worth the small extra effort. You set the shutter speed yourself, you set the aperture yourself, and ISO floats to make the exposure correct. That locks down both settings that determine whether the frame is sharp, and hands the variable you care least about to the camera. When a cloud crosses or a player runs from sun into shade, ISO moves and your sharpness does not. Our manual mode field note covers the mechanics if the mode itself is new to you.
Two settings make manual with auto ISO work. Set the auto ISO ceiling high, high enough that it never has to choose between your shutter speed and correct exposure. And set exposure compensation to taste, because exposure compensation still works in manual with auto ISO on almost every camera; it shifts the ISO the camera picks. A common starting point for sunlit fields is around minus one third, protecting bright uniforms from clipping.
Watch out: if your camera drops the shutter below your chosen value once auto ISO maxes out, that is by design. Either raise the ceiling or accept a darker frame you will lift in editing, which is almost always the better trade.
Step 3: Set up continuous autofocus and the right area mode
This is the step that decides your keeper rate, and it is the one most people skip because the menus are intimidating. Three settings matter.
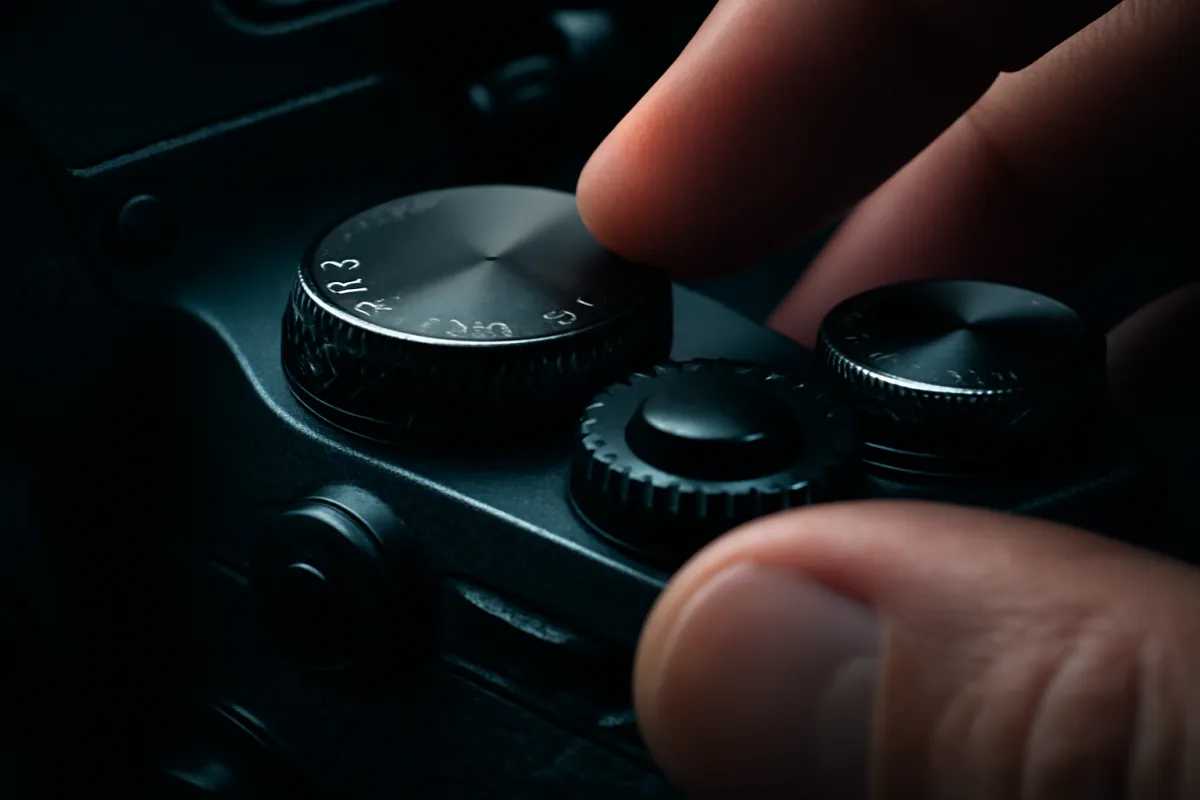
Focus mode. Switch from single autofocus (AF-S, One Shot) to continuous autofocus (AF-C, AI Servo). Single mode locks focus once and holds it, which is correct for a still subject and catastrophic for a moving one. Continuous mode keeps re-acquiring for as long as you hold the shutter halfway or hold a back-button focus control. If your camera has a back-button focus option, sports is the use case that justifies learning it, because it separates focusing from firing and lets you keep tracking between bursts.
Area mode. This is the choice people get wrong. A single tiny point gives you precise control and falls off a moving athlete constantly. A full-frame-wide area never falls off anything and will happily focus on the referee. The useful middle is a small or medium zone for sports where you can reliably keep the subject under the box, such as a swimmer in a lane, a runner on a track, or a batter at the plate, and a wide area or subject tracking mode for chaotic sports where the subject moves unpredictably, such as basketball or a soccer scramble.
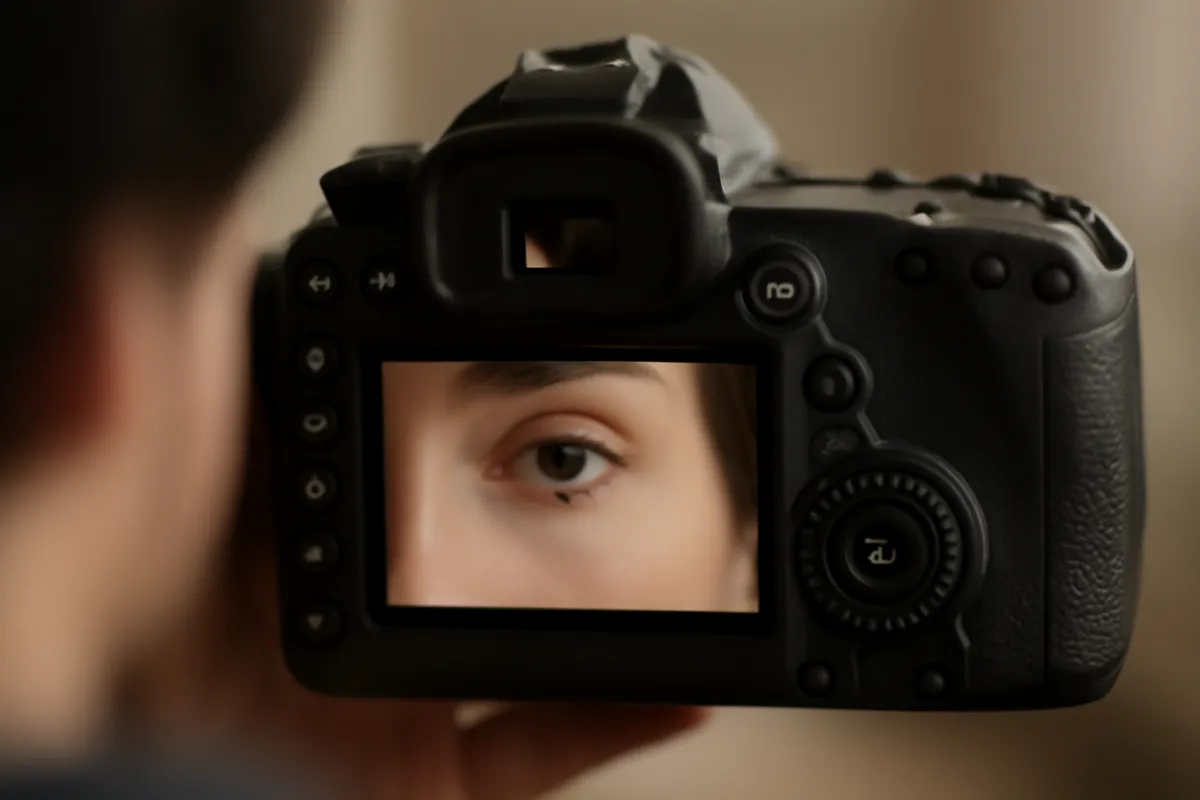
Subject detection. If your camera detects humans or eyes, turn it on. Treat it as a strong assist and not a guarantee, because detection systems generally lock onto the most prominent face, which may be a defender rather than your subject. Many cameras let you nominate which detected subject to hold; learn that control if yours has it.
Watch out: start focusing early. Continuous autofocus needs a moment to acquire and predict, so half-pressing as the play develops gives it far better information than stabbing the button at the peak moment.
Step 4: Tune tracking sensitivity to the sport
Buried in most autofocus menus is a setting variously named tracking sensitivity, AF sensitivity, subject-switching sensitivity, or lock-on. It controls how quickly the camera abandons your subject when something else enters the focus area. It is one of the highest-value settings almost nobody touches.
Think of it as a dial between sticky and responsive. Sticky means the camera keeps holding what it had even when a body crosses in front, which is what you want for sports full of traffic: soccer, basketball, football, hockey, anything with defenders. Responsive means the camera jumps quickly to whatever is newly in the area, which is what you want when the subject genuinely changes, such as when you are following one runner in a pack and want to switch, or shooting a sport where subjects enter the frame suddenly.
The practical default for a beginner is one notch toward sticky from the middle. That single change fixes the most common autofocus complaint in action photography, which is not that focus is soft but that focus keeps grabbing something else. If you find the camera is slow to pick up a subject that has genuinely replaced the old one, walk it back toward the middle.
Some cameras also expose an acceleration or tracking behavior setting, which describes how the subject moves rather than how the camera should switch. If you see it, choose the option that describes your sport honestly: steady speed for a runner or a swimmer, erratic for a soccer player or a tennis player.
Watch out: do not tune this from a menu description alone. Shoot a practice session with it one notch sticky, look at how many frames landed on the wrong person, and adjust from evidence.
Step 5: Pick a drive mode your buffer can sustain
Burst mode is what converts a well-timed press into a sharp frame at the peak of the action, because peak moments are shorter than human reaction time. But burst mode has a hard limit called the buffer, and running into it mid-play is one of the most frustrating failures in sports photography.
Here is the mechanism. Frames go first into fast internal memory, the buffer, and are written from there onto the card in the background. As long as you fire slower than the card can absorb, you can shoot indefinitely. Once you fire faster, the buffer fills, and when it is full the camera’s frame rate collapses to card speed, which can mean a wait of several seconds. That wait tends to land exactly on the shot you came for.
Three habits solve it. Shoot short bursts, roughly three to eight frames, aimed at the moment rather than sprayed through a whole possession. Use a fast card with real write headroom, which is the cheapest meaningful upgrade in this article. And choose a file format your buffer can live with: compressed RAW or a high-quality JPEG stores far more frames than uncompressed RAW does, and for most sports work that trade is worth it. Our raw versus JPEG field note covers what you actually give up.
Watch out: measure your own camera once. Point it at a wall, hold the button, and count the seconds until the frame rate audibly collapses. Whatever that number is, plan bursts at well under half of it, and you will never be stalled at the decisive moment.
Step 6: Position yourself for the light and the action
Everything above happens in the camera. This step happens with your feet, and it is worth more than a lens upgrade.
Light first. Put the sun behind you or over your shoulder so it falls on the athletes’ faces rather than behind them. Shooting into the sun gives you silhouettes and lens flare and forces exposure decisions you did not want. If the sun is high and harsh, the shade side of the field is usually the better place to stand even if it means a longer view, because harsh top light hides eyes under helmet brims and caps. Late afternoon and early evening light, covered in our golden hour field note, flatters sports as much as it flatters anything else.
Action second. Sit or stand where the sport delivers action toward you rather than away. That means the attacking end rather than the middle for soccer, near the finish line or a corner for track, behind the baseline or near a corner for basketball, and near the turn for cycling. Low angles usually look better than eye level, because shooting up at an athlete against sky separates them cleanly from the background.
Background third. A clean background is a compositional decision made with your feet. Two steps to one side can swap a crowded stand of parked cars for open grass. Longer focal lengths help, because a telephoto’s narrow view and shallow depth of field blur more of what is behind the subject; our aperture field note explains why.
Watch out: get permission and stay where you are supposed to be. Sideline access at organized events is not automatic, and stepping over a line to improve a photo is how photographers get asked to leave.
Step 7: Anticipate the play and prefocus where it will arrive
The difference between someone who photographs sports and someone who photographs the back of the play is a half second of prediction. You cannot react fast enough to a peak moment; you have to already be pointed at it.
That means learning the sport well enough to know where the ball is going. In soccer, watch the passer’s body rather than the ball, and be on the receiver before the ball arrives. In basketball, the shot goes up from predictable places, and the rebound comes down in a predictable arc. In track, the finish line and the first turn are where faces show effort. In baseball or cricket, contact happens in one small volume of space that never moves.
The technique that turns prediction into sharp frames is pre-focusing on the arrival point. Aim at the spot where you expect the play to be, hold continuous autofocus on something at that distance, and let the system be already tracking at roughly the right range when your subject enters the frame. Autofocus acquires far faster from a near-correct starting distance than from infinity.
Leave room in the frame in the direction of travel, which reads as a subject moving into space rather than into an edge, and which also gives you crop room when the play develops differently than you guessed.
Watch out: resist the urge to follow the ball with your camera all game. Watching the whole field with your naked eye and raising the camera when a play forms produces better anticipation than staring through a viewfinder for two hours.
Where a sports frame is usually lost
Illustrative weighting, out of 100, of how often each failure is what ruined an action frame for a photographer who is still learning. This is a mental model drawn from common experience rather than a measured study, so read it as where to spend your attention first.
Focus failures outrank shutter failures for most people learning action work, which is why step three earns more of your setup time than steps one and two combined. The bottom three are cheap to fix and are pure lost value, because a stalled buffer, a low ISO ceiling, and a lazy cull all throw away frames you already paid for. Tune the model to your own shooting with the companion above.
Step 8: Handle indoor and floodlit venues
Indoor and night sports are where the whole approach gets stress-tested, because the light is roughly six stops below an overcast afternoon and you still need the same shutter speed. Nothing about the method changes; the numbers just get uncomfortable.
Accept the ISO. As illustrative examples, holding 1/800 at f/2.8 under outdoor floodlights lands near ISO 5000, and holding 1/500 at f/2.8 in a typical gym lands near ISO 4000. If your lens only opens to f/4 at the long end, both roughly double. At f/5.6 they roughly quadruple, which is the honest reason a variable-aperture kit zoom struggles at night. Set the ceiling above those numbers and let the camera use them. Our low light field note covers the noise trade in more depth.
Fix the flicker. Many gym and stadium lights pulse with the alternating current feeding them. At fast shutter speeds each frame catches a different point in that pulse, so a burst comes back swinging between green and magenta, sometimes with visible bands. Look for an anti-flicker or flicker reduction setting, which times the exposure to the peak of the cycle. It costs a little responsiveness and is almost always worth enabling.
Lock white balance. Auto white balance under mixed sports lighting hunts frame to frame, which makes batch editing miserable. Set a fixed preset or a custom value, shoot RAW, and correct once for the whole set. Our white balance field note explains the presets.
Watch out: do not fix a dark venue by dropping the shutter speed. That is the one trade that cannot be undone later, and a grainy sharp frame will always beat a clean smeared one.
Step 9: Cull ruthlessly the same day
Burst shooting produces volume, and volume without culling is how a good session turns into a folder nobody ever opens. The final step of the method is subtraction, and doing it the same day while you still remember the plays is far easier than doing it a month later.
Work in two passes. The first pass is technical and fast: reject anything out of focus, anything with motion blur where you did not want it, and anything where the subject is obscured, cut off, or facing away. Do not think about content on this pass, and do not zoom in on every frame. Sharpness is usually obvious at a moderate preview size, and if you are unsure, reject it, because a frame you had to squint at is not a keeper.
The second pass is editorial: from the technically sound frames, keep the ones with a peak moment, a clear expression, a clean background, or a story. From a fifteen-frame burst of one play, one or two frames are the play; the rest are the approach and the aftermath. Keep those, delete the rest, and be honest about near duplicates.
A useful discipline is a target. Deciding in advance that a game yields twenty keepers forces real choices and produces a set someone will actually look through. Our photo editing field note covers what to do with the survivors, and our backup field note covers keeping them.
Watch out: do not delete from the camera in the field. Rear screens flatter and lie, cards fail during in-camera deletion more often than during writing, and you will throw away frames you would have kept on a real screen.
A worked example: an outdoor afternoon game, start to finish
Here is one realistic scenario run through all nine steps with numbers. The setting: a youth soccer game on an open grass field, late afternoon, sun getting low, thin high cloud. Kit is a telephoto zoom that opens to f/4 at the long end. Every number below is an illustrative starting point, not a prescription.
Step 1. Running field sport, so the floor is 1/1000. Players are young and not adult-fast, so 1/800 would probably survive, but there is enough light to afford 1/1000 and no reason to give it away.
Step 2. Manual with auto ISO. Shutter 1/1000, aperture f/4 (wide open on this lens, which also blurs the parked cars behind the far touchline), ISO ceiling set to 12800, exposure compensation at minus one third to protect white uniforms. In that light the camera settles around ISO 250. As the sun drops through the second half and the light falls about a stop and a half, ISO climbs to roughly ISO 800 on its own and nothing else changes. That is the whole reason for choosing this mode.
Step 3. Continuous autofocus, medium zone rather than a single point, human detection on. Half press starts as soon as a possession forms rather than when the shot presents itself.
Step 4. Tracking sensitivity one notch toward sticky, because defenders cross in front of the ball carrier constantly in soccer.
Step 5. Continuous burst, short presses of about five frames, compressed RAW. Timed at home, this body runs roughly eight seconds before stalling, so five-frame bursts never come close.
Step 6. Standing at the attacking end the home team is shooting into, sun over the left shoulder, crouched low so players are framed against the far treeline instead of the parking area.
Step 7. Watching the midfielders’ hips rather than the ball, pre-focused near the top of the penalty area where crosses arrive.
Step 8. Not applicable in daylight, but as the sun goes the ISO climb described in step 2 is the same mechanism, just milder.
Step 9. About 600 frames from ninety minutes, culled to roughly 40 technically clean frames, then to 20 keepers. That ratio, a little over three percent, is normal and healthy for action work rather than a sign of failure.
Sports photography settings: the cheat sheet
Compressed to a single reference. These are illustrative starting points to meter from and adjust, not fixed values.
Shutter speed by sport: running field sports 1/1000; indoor court sports 1/500 to 1/800; track, cycling, and motorsport 1/1600 or faster; swimming and gymnastics 1/800; youth and recreational play 1/500; bat, club, or racket contact 1/2000; deliberate panning 1/60 to 1/125.
Mode: manual with auto ISO, or shutter priority if you prefer simplicity, never full auto.
Aperture: as wide as your lens allows in poor light; one stop closed down from wide open in good light, which sharpens most zooms slightly and gives a little depth-of-field margin for focus error.
ISO: whatever the shutter speed demands. Illustrative outcomes at 1/1000 on an f/4 lens: about ISO 100 (base ISO) in bright sun, about ISO 250 on an overcast or late afternoon field. At f/2.8 holding 1/800 under floodlights, about ISO 5000; at f/2.8 holding 1/500 in a gym, about ISO 4000.
Autofocus: continuous, medium zone for predictable subjects and wide or tracking for chaos, subject detection on, tracking sensitivity one notch sticky.
Drive: continuous burst, short presses, fast card, compressed RAW.
White balance: fixed rather than auto indoors and under floodlights; auto is fine in daylight if you shoot RAW.
How much reach you actually need
Reach is the question everyone asks first and it deserves an honest answer rather than a lens recommendation. What matters is how large the athlete is in the frame, which depends on focal length and distance together, so the same lens is generous at a small court and inadequate at a large field.
As rough working guidance: from the sideline of a small pitch or a school gym, something reaching around 150mm to 200mm on full frame fills the frame with a player reasonably well. A full-size soccer or football field where you are stuck behind a fixed boundary often wants 300mm or more for the far half. A track where you can stand near a turn is friendlier than the numbers suggest, because the athletes come to you. On a crop-sensor body, the same lens frames tighter, which our crop sensor field note explains properly.
The point worth making is that position substitutes for focal length far more cheaply than money does. Moving from midfield to the corner flag can change your effective framing more than doubling your focal length would, and it costs nothing. Before you buy reach, spend two sessions experimenting with where you stand.
There is also a real cost to long lenses that nobody mentions in the sales copy: they are heavier, they are harder to keep steady, they have a narrower view that makes finding a fast subject genuinely difficult, and they usually open to a smaller maximum aperture at the long end, which hurts exactly when the light drops. Price the honest total in the upgrade budget planner rather than the lens alone.
Deliberate motion blur: panning and the slow shutter
Everything above serves freezing motion, which is the default sports look and the right place to start. The advanced move is the opposite: deliberately blurring to convey speed, which is what panning does.
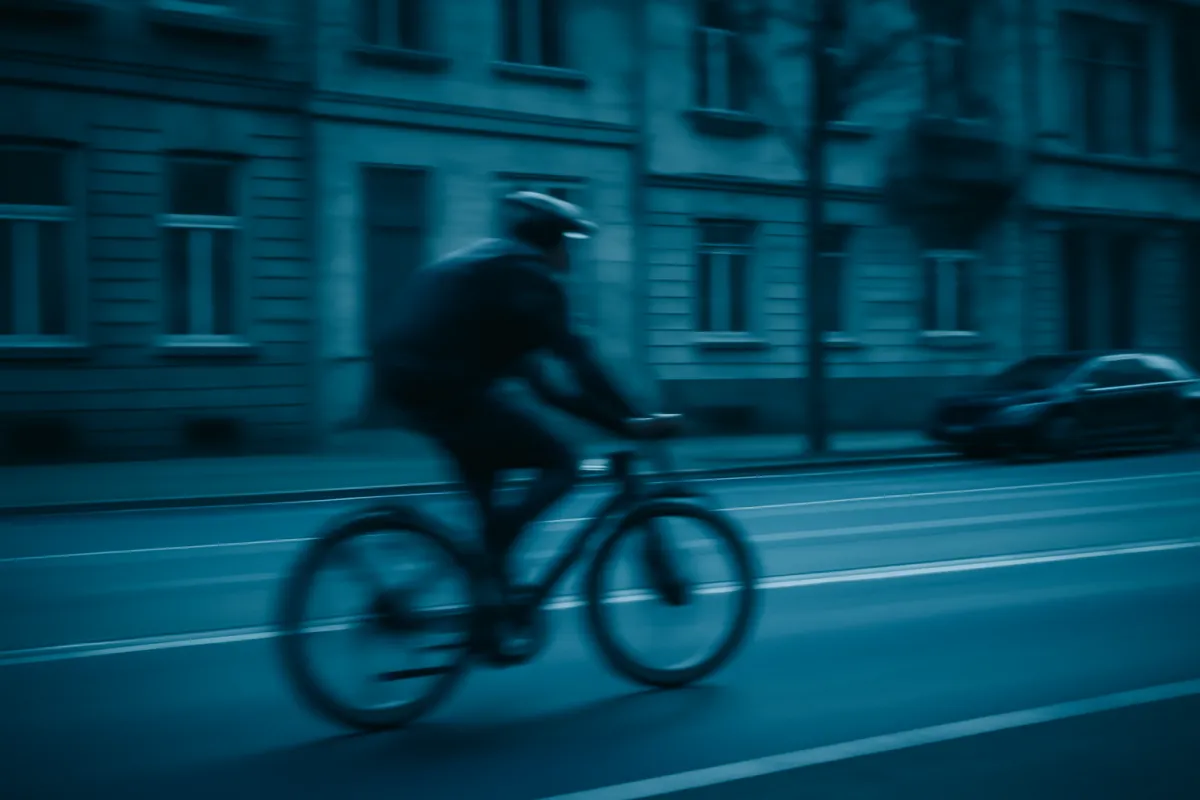
The technique is straightforward and the execution takes practice. Drop the shutter speed far below your freezing floor, to somewhere around 1/60 to 1/125 for a running athlete or a cyclist, and swing the camera smoothly with the subject through the exposure, continuing the swing after the shutter closes the way a golfer follows through. The subject stays relatively sharp because it is not moving relative to the sensor; the background smears into streaks because it is.
Expect a low hit rate. One frame in ten is a normal panning result even for people who do it often, so shoot far more frames than feels reasonable. A few things help: use continuous autofocus, choose a subject moving perpendicular to you rather than toward you, turn image stabilization to a panning mode if your lens has one, and pick a background with texture or color, because a plain wall smears into nothing interesting.
A gentler middle ground is to keep the fast shutter but let one element blur, such as a spinning wheel or a swinging club, by choosing a shutter speed fast enough for the body and slow enough for the extremity. Around 1/250 does this on many subjects, which our shutter speed field note unpacks in general terms.
Where the work of a sports frame sits
Illustrative share of the effort that goes into a keeper, split across the four things a photographer actually controls at a game. The four parts sum to the whole result, so no single one carries it alone.
Autofocus configuration and where you choose to stand together account for the larger share of a sports frame, which is why the two steps that cost nothing (step three in the menu and step six with your feet) matter more than the gear conversation. Shutter and exposure mode are the foundation everything else rests on, and drive and buffer discipline is the small slice that quietly decides whether you were still shooting at the moment. Adjust the split to your own shooting with the companion above.
Shooting sports with a kit zoom or a phone
Not everyone reading this owns a fast telephoto, and the honest answer is that daylight sports are very achievable with modest gear while night and indoor sports mostly are not.
With a variable-aperture kit zoom that reaches f/5.6 at the long end, daylight is fine. At 1/1000 in bright sun that lens lands near ISO 125, and on an overcast afternoon near ISO 500, both comfortable. The same lens holding 1/800 under floodlights would need something in the neighborhood of ISO 20000, which is where the frames stop being worth keeping on most cameras. That single comparison is the clearest argument for a faster lens, and it applies only if you actually shoot at night. Our kit lens versus prime field note covers the wider trade.
With a phone, daylight sports work better than people expect. Modern phones default to fast shutter speeds in bright light and their subject tracking is often good. The two hard limits are reach, because digital zoom degrades quickly and a phone’s optical telephoto is short, and low light, because a small sensor at high ISO gives up detail fast. Get close, use the actual optical lenses rather than the zoom slider, and use burst mode. Our phone camera lens field note covers what the add-on options really do.
The practical advice for both: shoot the daylight games with what you own, learn steps three through seven properly, and only then decide whether a lens purchase is buying you photographs or buying you a hobby. The upgrade budget planner is there to price that honestly.
Youth, school, and rec league sports
Most amateur sports photography is somebody photographing their own child, and that context brings a few considerations the technical steps do not cover.
Access rules vary and are not negotiable. Many schools and leagues restrict sideline access to credentialed photographers, sometimes for insurance reasons and sometimes for child safeguarding reasons. Ask the organizer before the game rather than after being asked to move, and expect the answer to be different at a school event than at a public park.
Photographing other people’s children has norms attached, and they differ by country, by school, and by league. Some organizations require consent before images of minors are shared or published, and some parents opt out of photography entirely. The safe posture is to photograph your own child freely, share other children’s images only with their families or through the channel the organizer designates, and check the specific rules of the specific organization rather than assuming.
Technically, youth sports are easier than they look. Play is slower, so 1/500 to 1/800 is often plenty. Fields are usually smaller, so modest reach is enough. Games are frequently in daylight. What is harder is that youth fields tend to have terrible backgrounds, parking areas, fences, and other games running behind, so step six earns its place more than usual.
Common mistakes to avoid
- Shooting in full auto. The camera optimizes for a correctly exposed frame, not a sharp one, and it will hand you 1/125 in shade without a word. Everything else in this field note follows from refusing that.
- Capping ISO too low out of a fear of noise. Noise is a fixable, tolerable, and increasingly minor problem. Motion blur is none of those. If you find yourself trading shutter speed for ISO, you have the priorities backward.
- Leaving the camera in single autofocus. This is the single most common reason a sharp-looking viewfinder produces a soft file. Single AF locks focus at the moment of acquisition, and a moving athlete has left that plane by the time the shutter opens.
- Holding the burst button through an entire possession. You fill the buffer with the boring part of the play and stall through the interesting part. Short, aimed bursts beat long sprays.
- Chasing the ball with your camera to your eye. You will always be behind. Watch the game with your eyes, predict, and raise the camera to where the play is going.
- Standing wherever the seat is. Position is free and it changes light, background, and framing all at once. It is the biggest improvement available to someone with modest gear.
- Never culling. A folder of 3,000 unreviewed frames is worth less than twenty edited ones, because nobody, including you, will ever open it.
Troubleshooting the hard cases
What if my frames are sharp but the wrong person is in focus? That is a tracking sensitivity or area mode problem, not a shutter problem. Move sensitivity one notch toward sticky, and shrink the focus area so it is not sampling half the field. If your camera has subject detection with a way to nominate the tracked person, learn that control.
What if everything is sharp but the photos still look flat? That is usually light and position rather than settings. Flat midday sun, a background at the same brightness as the subject, and eye-level framing all drain a photo of depth. Move so the light rakes across the subject, drop low, and find a background darker or farther away than the athlete.
What if the camera hunts and never locks? Low contrast and low light are the usual causes. Aim at something with an edge, a shoulder seam or a shoe rather than a plain shirt, and pre-focus at roughly the right distance so the system starts near the answer. If your lens has a focus limiter switch, set it to exclude the close range you never use.
What if my sharpest frames are still slightly soft? Check the aperture. Wide open, depth of field on a long lens at sports distance can be thin enough that focusing on the chest leaves the face soft. Closing one stop often fixes it, and our sharp photos field note covers the other causes.
What if the venue bans the lens I own? Some stadiums restrict lens length for spectators. Check before you travel, and if the limit bites, plan for wider storytelling frames of the crowd and the venue rather than tight action you cannot reach.
Your sports photography checklist
- Pick the shutter speed from the sport before you leave the house, and write it on your hand if you have to.
- Set manual with auto ISO, lock the aperture, and raise the ISO ceiling higher than feels comfortable.
- Switch to continuous autofocus and choose an area mode sized to how predictable the subject is.
- Turn subject detection on and move tracking sensitivity one notch toward sticky.
- Set continuous drive, confirm a fast card is in the camera, and choose a file format your buffer can sustain.
- Indoors or under floodlights, enable anti-flicker and set a fixed white balance.
- Walk the venue before the whistle: sun over your shoulder, action arriving toward you, clean background behind.
- Shoot ten test frames, zoom in on hands and feet, and adjust the shutter speed before the game matters.
- Fire short bursts at anticipated moments, pre-focused on where the play will arrive.
- Cull the same day in two passes, technical then editorial, and aim for a small number of real keepers.
The bottom line
Sports photography looks like a gear problem and is almost entirely a sequence problem. Choose the shutter speed the sport demands before anything else, because it is the one thing no edit can rescue, then put the camera in a mode that cannot take it away from you, which for most people means manual with auto ISO and a ceiling set high enough to be irrelevant. From there the real skill is autofocus: continuous rather than single, an area sized to the chaos in front of you, subject detection on, and tracking sensitivity biased toward holding what it has. Add a drive habit your buffer can sustain, and you have removed every technical reason to miss.
What remains is the part that has nothing to do with the camera and produces most of the improvement. Stand where the light falls on faces and the action comes toward you. Learn the sport well enough to know where the ball is going and be there half a second early with focus already tracking at the right distance. Then be honest in the cull, because twenty frames somebody wants to look at are worth more than six hundred nobody will. Do those five things at one practice session, and the camera you already own will start returning frames that look like the game actually felt. Price any reach you decide you genuinely need in the upgrade budget planner, and then go stand at the attacking end.
This field note exists to teach an action shooting method, not to sell a camera or a lens: no manufacturer paid for a placement, none is named on purpose, and every technique here works on whatever body and glass you already own. Shutter speeds, apertures, and ISO figures throughout are illustrative starting points that assume typical venue lighting; your own sensor, lens, meter, and stadium will move them, so shoot a test frame and read the result rather than trusting a number on a page. Access to sidelines, courts, and tracks is granted by organizers rather than assumed by photographers, and rules on photographing minors differ by school, league, and country, so confirm the specific policy where you are shooting and let the organizer, not this article, decide where you may stand and what you may share.
Frequently asked questions
What shutter speed should I use for sports photography?
Start at 1/1000 for running field sports such as soccer, football, rugby, and lacrosse, because that is roughly where a sprinting body and a swinging limb both stop cleanly. Faster sports want more: track sprints, cycling, and motorsport reward 1/1600 or quicker, and the instant a bat or racket meets a ball is a 1/2000 moment if you want the contact sharp. Slower play forgives more, so youth and recreational games, gymnastics, and swimming often look fine between 1/500 and 1/800. These are illustrative starting points rather than fixed rules, and the honest test is to shoot a few frames, zoom in on the rear screen, and check whether hands and feet are crisp or smeared. If they smear, go faster and let ISO rise to pay for it.
Should I shoot sports in shutter priority or manual mode?
Both work, and the difference is which variable you refuse to let the camera change. Shutter priority locks your shutter speed and lets the camera pick the aperture, which is simple and safe until the light drops far enough that the lens runs out of aperture and the camera starts underexposing without telling you clearly. Manual with auto ISO is what a large share of experienced action shooters use, because it locks both the shutter speed and the aperture, the two settings that decide whether the frame is sharp, and lets ISO absorb every change in light. Set a generous ISO ceiling when you do that, since a noisy sharp frame is recoverable and a blurred clean one is not. Either mode beats full auto, which will quietly hand you 1/125 in shade.
What autofocus settings are best for action photography?
Switch the camera from single autofocus to continuous autofocus, the mode usually labeled AF-C or AI Servo, so focus keeps updating while you hold the shutter halfway down. Then pick an autofocus area that matches how predictable the subject's position is: a small or medium zone for a single athlete you can keep under the point, and a wide area or subject tracking when the action is chaotic and a small box would fall off. If your camera offers human or eye detection, turn it on, but treat it as an assist rather than a guarantee, since it can lock onto the nearest face rather than the one you care about. Finally, look for a tracking sensitivity or subject-switching setting and bias it toward sticky rather than responsive for sports where objects cross in front of your subject.
What ISO is normal for indoor and night sports?
Much higher than beginners expect, and that is the correct answer rather than a compromise. As an illustrative example, holding 1/800 at f/2.8 under outdoor floodlights lands somewhere near ISO 5000, and holding 1/500 at f/2.8 in a typical gym lands near ISO 4000. On a slower kit zoom that only reaches f/5.6 at the long end, the same shutter speeds ask for roughly four times that ISO, which is where indoor sports genuinely stop being practical with that lens. The exact number depends on your venue, your lens, and your metering, so shoot a test frame and read the histogram rather than trusting a chart. Set the auto ISO ceiling high and accept the noise, because modern noise reduction fixes grain and nothing fixes motion blur.
Do I need an expensive telephoto lens to photograph sports?
You need reach and you need light-gathering, and how much of each depends entirely on the venue. For a small field where you can stand near the sideline, a modest telephoto zoom reaching around 200mm is often enough to fill the frame with a player, and a slower variable-aperture zoom does fine in daylight. The problems start at large fields, where you may want 300mm or more, and at night or indoors, where a lens that only opens to f/5.6 forces ISO so high that the frames stop being usable. Before spending, the cheapest upgrade is position: moving closer to where the action arrives changes your effective reach more than a lens purchase does. Price any lens you are still tempted by in the upgrade budget planner before you commit.
How do I stop my sports photos from being out of focus?
Most soft action frames are focus failures rather than shutter failures, so diagnose before you change settings. Zoom in on a soft frame: if the whole subject is uniformly smeared with streaked edges, the shutter was too slow, and if the subject is crisply out of focus while something else in the frame is sharp, autofocus locked on the wrong plane. The focus fix is usually continuous autofocus rather than single, an area mode that is not so small it slips off the subject, and starting the tracking a moment before you need the frame so the system has time to lock. Holding the shutter halfway or using a dedicated back-button focus control keeps the tracking alive between bursts. Our sharp photos field note covers the shooting technique underneath all of this.
Why does my camera stop shooting in the middle of the action?
That is the buffer filling. Your camera writes frames into fast internal memory first, then flushes them to the card, and when the buffer is full the frame rate collapses to whatever the card can absorb, which is often when the play is peaking. The practical fixes are to shoot shorter bursts aimed at the moment rather than holding the button through a whole possession, to use a fast card rather than the cheapest one, and to shoot compressed RAW or high-quality JPEG rather than uncompressed RAW if your buffer is shallow. A useful habit is to time your own camera once at home: fire a continuous burst at a wall and count the seconds until it stalls, then shoot bursts comfortably shorter than that.
Why do my indoor sports photos have weird color bands or shifting color?
That is flicker, and it is a real problem rather than a fault in your camera. Many gym and stadium lights pulse with the alternating current that powers them, and at fast shutter speeds each frame catches a different point in that pulse, so a burst comes back with frames that swing between green, magenta, and normal, sometimes with visible bands across the image. Look for an anti-flicker or flicker reduction setting in your menu, which times each exposure to the peak of the cycle and largely fixes it at a small cost in shooting responsiveness. Shooting RAW helps, because you can correct the color of individual frames afterward, and setting a fixed white balance instead of auto keeps the swings at least consistent enough to batch correct.