What's on this page
- Before you start
- Step 1: Time it right for peak color and light
- Step 2: Pick the lens for the shot
- Step 3: Dial in exposure for depth and sharpness
- Step 4: Nail white balance to keep the colors warm
- Step 5: Use a polarizer to cut glare and saturate
- Step 6: Compose with layers, reflections, and backlight
- Step 7: Edit to enhance without oversaturating
- A worked example: one autumn scene through all 7 steps
- Fall foliage photography settings: the cheat sheet
- Planning the golden hour for autumn color
- Common mistakes to avoid
- Troubleshooting the tricky days
- Your fall foliage checklist
- The bottom line
Short answer: How to photograph fall foliage: shoot within the roughly one week peak color window, in golden hour or soft overcast light, never harsh midday sun. Choose a wide lens for the sweeping scene or a short telephoto to compress layers, expose at a low ISO from a tripod, warm your white balance with the Cloudy preset, shoot RAW, and rotate a polarizer to cut leaf glare. Edit lightly so the color stays rich rather than neon.
How to photograph fall foliage comes down to timing, light, and restraint, because it is the most forgiving kind of landscape work all year and the easiest to get wrong. The color does half the work for you, which is exactly why so many autumn shots disappoint: a phone pointed at a red hillside at noon comes back flat, and the leaves that glowed in person read as muddy brown on the screen. The gap between what you saw and what you captured is not the camera. It is timing, light, a polarizer, and a handful of settings, and this field note walks all of it in seven steps you can follow on your next shoot.
This is a how-to, not a gear comparison, so it leans on the reference field notes rather than repeating them. For the lens decision behind Step 2, see our field note on the best lens for landscape and, for the telephoto side, our prime versus zoom field note. The light behind Step 1 gets its own full treatment in our golden hour field note, the exposure choices in Step 3 draw on our exposure triangle field note and the camera settings reference, the color logic of Step 4 builds on our white balance field note, and the low-light edges of a golden-hour shoot connect to our best lens for low light field note. Price your own autumn kit as you read with the upgrade budget planner.
Key takeaways
- Timing beats gear: shoot within the roughly one-week peak color window, in the golden hour or under soft overcast light, and skip harsh midday sun that flattens the color.
- Match the lens to the shot: a wide-angle lens for the sweeping scene, a short telephoto to compress distant layers and isolate a single glowing tree.
- A polarizer is the one accessory that changes the color at capture, cutting the waxy sheen off leaves so the red and orange saturate in a way software cannot fully fake.
- Warm your white balance (the Cloudy preset is a good start) and shoot RAW so you can set the exact warmth later without wrecking quality.
- The most common mistake is oversaturation in editing: lift vibrance gently, watch the brightest leaves for lost texture, and stop before the color turns cartoonish.
Before you start
Fall foliage photography is a low-difficulty, high-reward task: a beginner can follow these seven steps and come home with frame-worthy images the first time out. Difficulty is beginner to intermediate, and a productive shoot runs about one to two hours on location, plus a little planning the day before to time the light and the color. You do not need expensive gear. You need the right timing and a couple of small accessories more than you need a new camera.
Here is the short kit list, in rough order of how much each item changes the result:
- A camera you can control, meaning any camera or phone where you can adjust exposure. A dedicated camera with a RAW mode gives you the most editing room, but a modern phone works.
- A lens or two: a wide-angle for scenes and a short telephoto for layers and detail. A kit zoom that spans both covers most autumn work in one lens, so do not buy glass to start.
- A polarizing filter sized to your lens thread. This is the highest-value purchase on the list and the one accessory that visibly improves color at the moment of capture.
- A tripod, so you can shoot at a low ISO and a small aperture without blur. A cheap one is fine for still conditions.
- Timing intelligence: a rough sense of when peak color hits your area and a plan to be out at sunrise or sunset. This costs nothing and matters most of all.
With that gathered, the seven steps below take you from an empty memory card to a set of autumn images that look the way the day actually felt. Run your own gear budget through the upgrade budget planner before you add anything.
Step 1: Time it right for peak color and light
Timing is the step that decides more than all the others combined, and it has two layers: the season and the day. The season layer is peak color, the roughly one-week window when the leaves have turned but have not yet dropped. Miss it early and the hills are still green; miss it late and the branches are bare, with brown leaves matting the ground. Peak arrives at different dates by latitude and elevation, so a good habit is to watch a regional fall foliage forecast and, if you can, scout the location a few days ahead. Higher elevations turn first, so if the valley is still green, drive uphill.
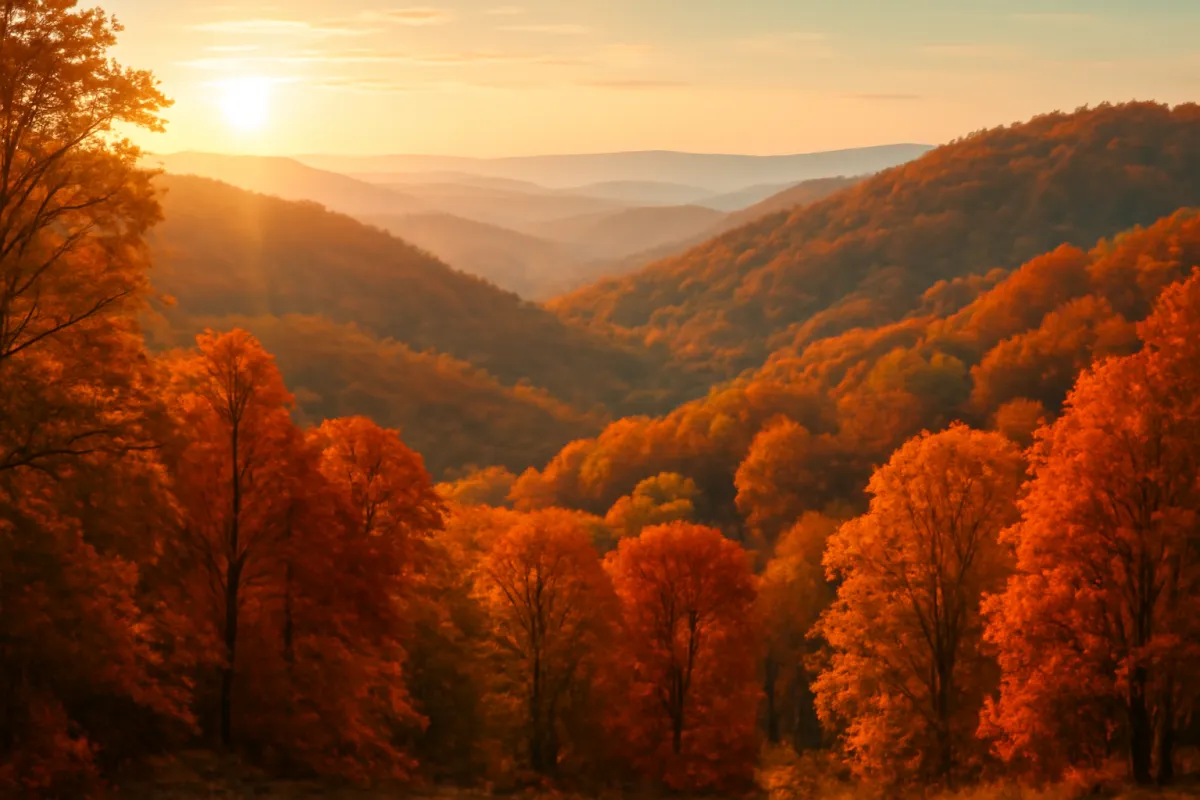
The day layer is light. The best light for foliage is the golden hour, the first hour after sunrise and the last hour before sunset, when the low sun is warm and rakes across the trees, amplifying the reds and oranges. Our golden hour field note covers that light in depth, and everything in it applies double in autumn. An illustrative sunrise shoot might have you set up in the dark and shooting by the time the first warm light touches the canopy. The strong second option is a bright overcast day: soft, even light with no harsh shadows lets the color saturate cleanly, which is why overcast is a foliage photographer’s friend, not a washout. The chart below scores the conditions so you can prioritize.
The watch-out: avoid harsh midday sun. Between roughly late morning and mid-afternoon on a clear day, the overhead light is flat and contrasty at once, the color goes lifeless, and the brightest leaves blow out to white. If midday is all you have, seek shade, shoot into backlight, or focus on details rather than scenes. But if you can choose your hour, choose the edges of the day. This one decision separates the autumn photos people frame from the ones they delete.
Best conditions for foliage color (scored)
Illustrative scores out of 100 for how much each condition helps autumn color read rich and saturated in the frame. Higher is better.
Peak color and soft or warm light do the heavy lifting; harsh midday sun and a windy, past-peak day work against you. Stack the good conditions and even a modest camera delivers. Tune your plan with the companion above.
Step 2: Pick the lens for the shot
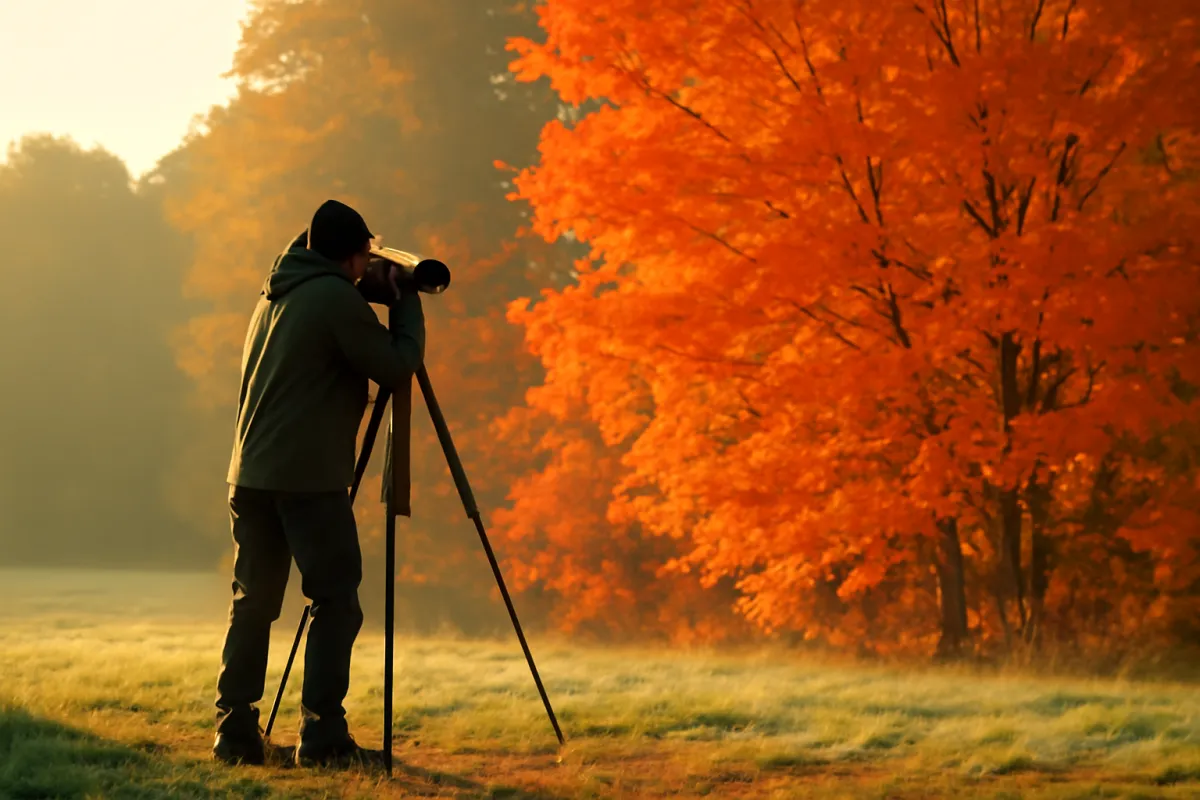
Autumn asks for two opposite lenses because it offers two opposite pictures, and choosing between them is the compositional decision that sets up everything after it. The first picture is the sweeping scene: a whole hillside or valley of color, a forest road disappearing into the trees, a lake ringed with fire-colored maples. That shot wants a wide-angle lens, roughly 16mm to 35mm on a full-frame camera, because a wide field of view fits the whole scene and stretches the near-to-far depth that gives a landscape its pull. Plant a strong foreground, a single fallen leaf, a mossy rock, a bend in a stream, and let the wide lens carry the eye back into the color. Our best lens for landscape field note works this choice in full.
The second picture is the compressed and the isolated, and it is the shot most beginners never make. A short telephoto, roughly 70mm to 200mm, does the opposite of a wide lens: instead of stretching depth it stacks it, compressing distant ridgelines of colored trees into flat bands of red, orange, and gold piled on one another like layers of cut paper. The same telephoto isolates, letting you pull one glowing tree, or a single lit branch, out of a busy scene and give it the whole frame. An illustrative kit for a day of foliage is a wide zoom plus a 70-200mm, and the telephoto shots are often the ones people find most striking.
The watch-out: do not assume you need to buy anything. A kit zoom, often 18-55mm on a crop body or 24-105mm on full frame, spans wide through short telephoto and covers a large share of autumn work in a single lens. If you are weighing whether a prime or a zoom serves your autumn shooting better, our prime versus zoom field note frames the trade, and the honest answer for foliage is usually a zoom, because you cannot walk closer to a distant hillside and the framing range is what you actually need. Price your own choice in the upgrade budget planner.
Step 3: Dial in exposure for depth and sharpness
With the lens chosen, set exposure to hold the color sharp and the scene deep. For a wide sweeping landscape, the workhorse starting point is aperture f/11, ISO 100, and a shutter speed the camera meters for you, shot from a tripod. The f/11 does two jobs: it puts you in the aperture band where most lenses are sharpest across the whole frame, and it gives a deep depth of field so a close foreground and a distant hillside are both in focus. ISO 100 keeps the color clean and free of the noise that muddies the reds at higher settings. Because f/11 and a low ISO let little light through, the shutter slows down, which is exactly why the tripod is not optional for the scene shot. Our exposure triangle field note walks how these three settings trade against each other.
For a tighter shot, a single tree or a portrait of a branch, change the recipe. Open up to around f/5.6 to f/8, which softens the background into a wash of color while keeping the subject crisp, and you can often hand-hold at these apertures because more light reaches the sensor. This is the autumn version of the depth question: wide and stopped-down for the whole scene, a touch more open for the single subject. Whatever the aperture, shoot in RAW rather than JPEG. RAW captures far more color and tonal information, which is what lets you set white balance precisely and rescue an over-bright leaf in editing, both of which matter more in foliage than in almost any other subject.
The watch-out: protect the brightest leaves. A brilliant yellow or orange leaf in sun is often the brightest thing in the frame, and if it clips to pure white it loses all texture and turns to paper. Check your camera’s highlight warning or histogram, and if the brightest leaves are blinking, dial in a little negative exposure compensation, an illustrative minus one-third to minus one stop, to hold detail in the color. It is easy to brighten a slightly dark RAW file later and nearly impossible to recover a blown highlight, so when in doubt, expose a touch under and protect the color.
Step 4: Nail white balance to keep the colors warm
White balance is the setting that decides whether your autumn leaves look like they glowed or like they went brown, and it is the step most people never touch (our white balance field note explains the setting from the ground up). Left on Auto, a camera often reads a scene full of warm color and tries to neutralize it, cooling the image and draining the golden tone that made you stop and shoot in the first place. The fix is to lean warm on purpose. The single easiest move is to switch your white balance from Auto to the Cloudy preset, which adds warmth and richer color, and many foliage photographers leave it on Cloudy even in sun because it flatters the reds and oranges. The Shade preset is warmer still, useful under heavy cloud or in open shade.
The reason this works is that autumn color lives in the warm end of the spectrum, so a white balance that biases warm amplifies exactly the tones you want while barely touching the greens and browns. An illustrative comparison: the same maple shot on Auto can come back a dull orange-brown, and on Cloudy the same file reads as a saturated, glowing red, with no other change. You are not faking color that was not there, you are keeping the camera from throwing away color that was.
The watch-out, and the reason this step is genuinely low-risk: shoot RAW and white balance becomes a fully reversible decision. A RAW file stores the raw sensor data, so you set white balance afterward on the computer with no loss of quality at all, sliding the warmth to taste until the image matches the feeling of the day. If you shoot RAW, you can leave the camera on Auto and warm the file later, or set Cloudy in-camera as a preview and still adjust freely. The only real mistake is going too far, tipping the whole frame into an orange cast that stains the sky and the shadows. Warm the color, do not dye the image.
Step 5: Use a polarizer to cut glare and saturate
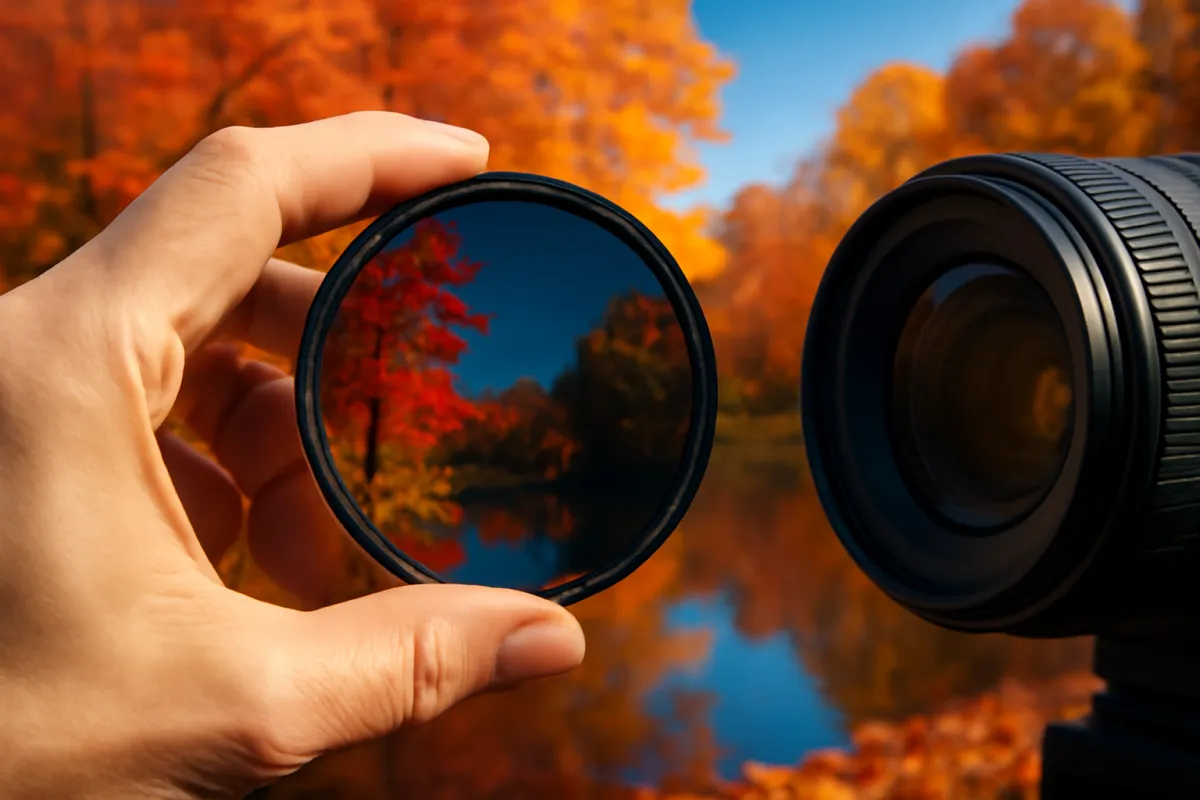
If you buy one thing for autumn photography, buy a circular polarizing filter, because it is the only accessory that improves the color at the moment of capture in a way editing cannot fully reproduce. Leaves have a waxy, slightly reflective surface, and in bright light that surface throws a fine sheen of glare that scatters back at the camera and washes the color out to a pale, milky version of what your eye sees. A polarizer filters out that reflected glare. Rotate it in its mount and you watch the sheen lift off the leaves and the true red and orange underneath saturate and deepen, live, through the viewfinder. It is the closest thing to a magic button that landscape photography offers.
The filter does more than the leaves. It cuts reflections off wet surfaces, so a rain-slick trail or the surface of a pond stops glaring and either goes transparent (letting you see into the water) or deepens. It cuts atmospheric haze over distant hills, adding clarity to a compressed telephoto layer shot. And it deepens a blue sky, which makes fiery foliage pop against a richer backdrop. To use it, rotate the front ring slowly while watching the scene and stop where the glare drops and the color peaks. The effect is strongest when you shoot at roughly a right angle to the sun and weakest when you point straight at or away from it.
The watch-outs are worth knowing so the tool does not bite you. First, a polarizer costs you light, roughly one to two stops, which slows your shutter further and makes the tripod from Step 3 even more useful. Second, on a very wide-angle lens the polarizing effect varies across such a broad sky that it can darken it unevenly, an odd-looking gradient, so ease off the rotation on ultra-wide scenes. Third, a polarizer can over-darken a sky or kill a reflection you actually wanted, so treat full rotation as the maximum, not the default, and dial back to taste. Used with a little restraint, it is the highest-leverage small purchase in an autumn bag.
Step 6: Compose with layers, reflections, and backlight
By now the color is timed, the lens is chosen, the exposure is set, and the polarizer is cutting glare. Composition is what turns a correctly exposed photo of leaves into a photo worth keeping, and autumn hands you four reliable compositional tools. The first is layers: with a telephoto, stack bands of colored trees receding into the distance so the frame reads as ribbons of red, orange, and gold, the compression effect from Step 2 used deliberately. The second is reflections: a still pond, a slow river, or even a puddle doubles the color and adds a calm, symmetrical anchor, and here you may want to ease off the polarizer, since it can erase the very reflection you are framing.
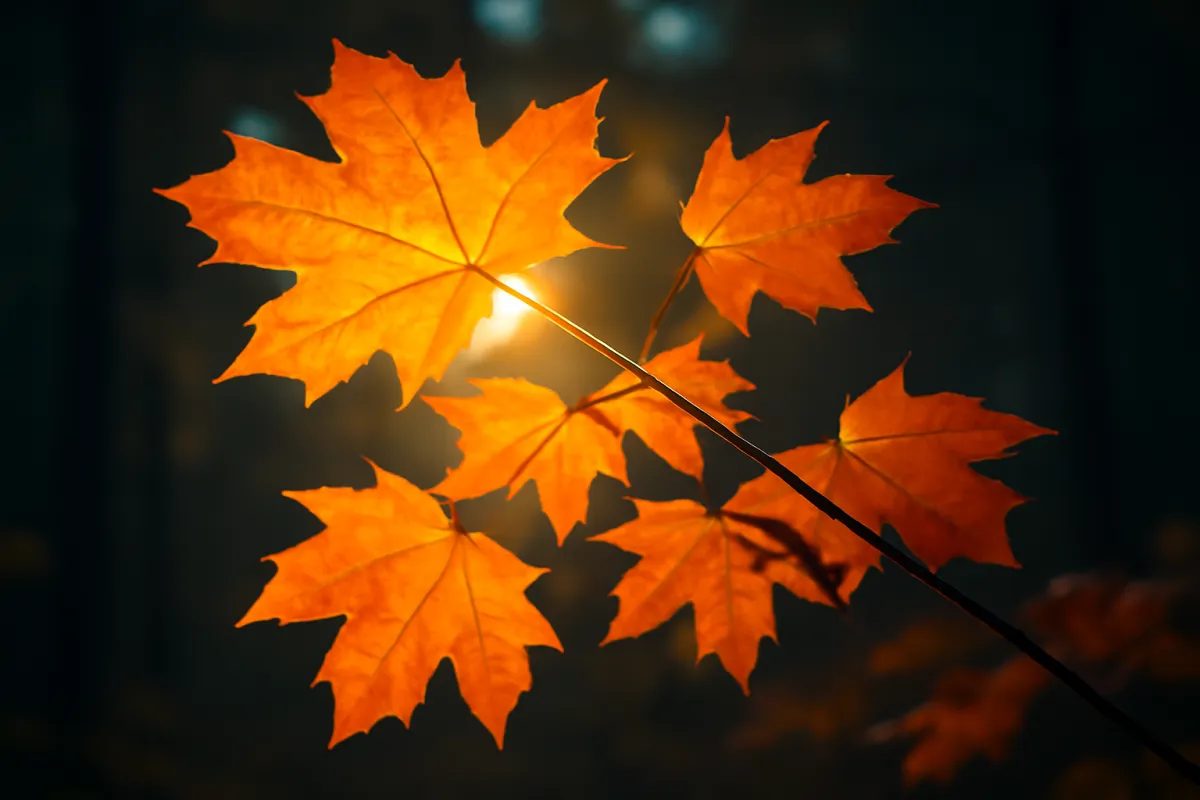
The third tool is leading lines: a forest path, a fence line, a stream, or a row of trees that draws the eye from the front of the frame into the color, giving the picture depth and a route to travel. The fourth, and the most magical in autumn, is backlight. When you shoot with the low sun behind the leaves rather than behind you, the light passes through them and they glow translucent, like stained glass, the veins and edges lit from within. Backlight turns an ordinary maple into a lantern, and it is the single technique that most separates memorable autumn images from flat ones. Expose for the bright leaves so they hold their color, let the background go darker, and the glowing foliage lifts off a shadowed backdrop.
The watch-out is the same discipline that governs all landscape work: give the frame a foreground and a subject. A wall of undifferentiated color, however pretty in person, reads as busy and flat in a photograph because the eye has nowhere to rest. Anchor the shot with a single strong element, one lit tree, a rock, a bend in the path, a person for scale, and let the color be the setting rather than the entire subject. Get low to bring a foreground of fallen leaves into the frame, or move until a trunk or a gap gives the composition structure. The color is the easy part in autumn. The composition is where the photograph is actually made.
Step 7: Edit to enhance without oversaturating
Editing is where a good autumn shoot is either finished well or ruined, and the failure mode is almost always the same: too much. The temptation to drag the saturation slider until the leaves scream is enormous, because the color is the point, and it is exactly the wrong instinct. Start instead with the basics that serve the color without distorting it. Set white balance first, warming to taste from the RAW file as Step 4 described. Recover the highlights so the brightest leaves regain texture, and lift the shadows a little if the darker parts of the forest have gone muddy. Add contrast in small amounts. These moves make the image read cleanly before you touch color at all.
When you do reach for color, favor vibrance over saturation, and understand the difference, because it is the whole game. Saturation raises the intensity of every color equally, which shoves the already-strong reds and oranges past the point where they hold detail and turn to flat, glowing paint. Vibrance is smarter: it lifts the muted, less-saturated tones more and protects the ones that are already strong, so the greens and browns come up to meet the reds instead of the reds blowing out. A modest vibrance lift, plus small, targeted saturation on specific hues if a tool allows it, gets you rich color that still looks like leaves. Watch the brightest leaves as you push: the moment they lose their texture and turn to a single flat color, you have gone too far, so back off.
The watch-out is your own eye, which adapts and lies to you after twenty minutes of editing. Color that felt bold when you were deep in the file often reads as garish the next morning. Two habits guard against it: edit to a point that feels slightly conservative and stop there, and step away for ten minutes or overnight before you commit, then look again with fresh eyes. A useful reference is a real memory of the scene, since the goal is color that looks the way the day felt, warm and rich and alive, not the way a candy wrapper looks. The stack bar below shows roughly how a foliage shoot’s effort divides, and editing is a smaller slice than beginners assume: get the capture right and the edit is a light touch.
A foliage shoot: planning vs shooting vs editing
Illustrative split of where the effort goes across a well-run autumn shoot. Timing and light are decided before you ever press the shutter, and a good capture keeps the edit light.
The bulk of the work is done before and during the shoot, which is why the color that survives editing is the color you captured. Adjust the split to your own workflow with the companion above.
A worked example: one autumn scene through all 7 steps
Theory into practice: here is a single realistic autumn scene run through all seven steps, with illustrative settings, so the sequence is concrete. The scene is a small lake ringed with sugar maples at peak color, on a clear October morning, with a still surface and a distant ridge of mixed color behind the near trees.
Step 1, timing. A foliage forecast put this area at peak this week, so the color is set. The shooter arrives before sunrise and is set up as the first warm light hits the far ridge, squarely in the golden hour, avoiding the flat midday light entirely. Step 2, lens. Two shots present themselves. The wide-angle, at 20mm, takes in the whole lake, the near maples, and the ridge reflected in the water. The 70-200mm, later, compresses the distant ridge into stacked bands of color and isolates one flaming maple leaning over the water. Both go on the tripod. Step 3, exposure. For the wide lake scene: f/11, ISO 100, and a metered shutter of an illustrative half a second off the tripod, with minus one-third stop of exposure compensation dialed in after the brightest leaves blinked on the highlight warning. For the isolated maple later: f/6.3, ISO 200, hand-held.
Step 4, white balance. Set to Cloudy in-camera for a warm preview, shooting RAW so the exact warmth is finalized later. The Auto reading had come back noticeably cooler and duller. Step 5, polarizer. Rotated slowly while watching the water: the shooter backs it off partway, because full rotation killed the ridge’s reflection in the lake, and settles where the leaf glare drops but the reflection survives. Step 6, composition. The wide frame uses the lake’s edge as a leading line and the reflection as a foreground anchor, with the lone red maple placed off-center on a third. For the telephoto frame, the shooter waits until the sun rises enough to backlight the leaning maple, so it glows against the shaded far bank. Step 7, editing. In post, white balance warmed a touch beyond Cloudy, highlights pulled back to restore texture in the brightest leaves, shadows lifted slightly, then a modest vibrance lift and a small, targeted bump to the reds. The shooter stops there, sleeps on it, and confirms the next morning that the color reads rich rather than radioactive.
Seven steps, one scene, two keeper frames: a wide reflection landscape and a backlit telephoto portrait of a single tree, both looking the way the morning actually felt. Run your own scene’s kit and budget through the upgrade budget planner.
Fall foliage photography settings: the cheat sheet
For the shooter who wants the whole field note compressed into something that fits on a phone screen at the trailhead, here is the settings side of fall foliage photography in one place. The wide scene: f/11, ISO 100, shutter metered, tripod, RAW, white balance on Cloudy, polarizer rotated to taste. The single tree or branch: f/5.6 to f/8, ISO as low as the light allows, hand-holdable if the shutter stays reasonably quick. The backlit detail: expose for the bright leaves, let the background fall dark, and check the highlight warning. In every case, dial in minus one-third to minus one stop of exposure compensation the moment the brightest leaves start blinking, because a blown red leaf never comes back.
Three reminders travel with those recipes. First, they are starting points, not rules: meter the scene in front of you and adjust, because a foggy sunrise and a clear afternoon need different answers from the same hillside. Second, the settings interact, so a polarizer’s one to two stops of light loss is the reason the tripod earns its place, and a windy day is the reason to trade a little ISO for shutter speed. Third, the recipes above are the autumn-specific slice of a larger system, and our camera settings reference is the season-agnostic version, worth a read before the trip so the foliage numbers slot into a framework you already understand.
Screenshot this section, or better, run your own subject and light through the companion above and carry a version computed for your shoot. The settings are the easy third of foliage work, and having them decided before you leave frees the whole shoot for the parts that actually rank harder: the timing and the composition.
Planning the golden hour for autumn color
Autumn quietly makes golden-hour shooting easier than any other season, and planning around that is worth its own few minutes. The days are shortening, so sunrise arrives at a civilized hour: a shoot that means a 5 a.m. alarm in June often means 7 a.m. in October, which turns the best light of the day from a heroic effort into a before-class errand. The sun also tracks lower across the whole day in fall, so the usable warm-light window stretches longer at both ends, and the raking side-light that models the texture of a hillside hangs around well past the textbook first hour.
A simple planning routine gets you into that light on purpose. The day before, check the sunrise and sunset times for your location and scout the spot in flat midday light, when you can wander without wasting good light, noting which slopes face east for morning fire and which face west for evening. Arrive thirty minutes before the hour you chose: before sunrise for the still air and the soft pre-light, or mid-afternoon for an evening shoot so the tripod is set when the color starts. Then stay past the obvious end, because the ten minutes after the sun drops, the edge of blue hour, render foliage in a cool, moody register almost nobody shoots, and a still pond doubles it beautifully.
The deeper mechanics of why low sun flatters color, the direction games of front light versus side light versus backlight, and the minute-by-minute anatomy of the hour are all in our golden hour field note, which pairs with this one the way the light pairs with the leaves. The short version for autumn: know your times, face the right slope, and be standing there early, because peak color lasts a week but the best light on it lasts minutes.
Common mistakes to avoid
Most disappointing autumn photos fail in one of a handful of predictable ways, and knowing them in advance is the fastest route to better results. These are the pitfalls that come up again and again:
- Missing the peak. The single biggest mistake is timing the season wrong, arriving a week early to green hills or a week late to bare branches. Watch a foliage forecast, scout ahead, and remember that higher elevations turn first.
- Shooting in harsh midday sun. Flat, contrasty overhead light drains the color and blows out the brightest leaves. Shoot the golden hour or a soft overcast day instead, and if you are stuck at noon, work in shade or into backlight.
- Blowing out the brightest leaves. A brilliant sunlit leaf that clips to pure white loses all texture and turns to paper. Check the histogram, expose a touch under, and use negative exposure compensation to protect the color.
- Skipping the polarizer. Without one, the waxy sheen on the leaves washes the color out and no editing slider fully brings it back. A polarizer is the cheapest, highest-impact autumn purchase there is.
- Oversaturating in editing. Dragging saturation until the leaves scream is the classic tell of an amateur autumn edit. Lift vibrance gently, protect the strong tones, and stop before the brightest leaves lose detail.
- A wall of color with no subject. A frame that is nothing but undifferentiated color reads as flat and busy. Anchor the shot with a foreground, a single lit tree, or a leading line so the eye has somewhere to go.
Troubleshooting the tricky days
Autumn does not always hand you a still, golden morning, so here is how to handle the conditions that fight you. What if the day is flat and overcast? Treat it as an opportunity rather than a problem: soft, even light saturates color beautifully and removes the harsh shadows that plague sunny shoots, so lean into intimate woodland scenes and detail shots, keep the bright white sky mostly out of the frame (it will photograph as a dull blank), and warm your white balance to counter the gray. Many of the richest, most saturated foliage images are made under cloud, not sun.
What if it is windy? Wind blurs individual leaves during the slow shutter speeds that a low ISO and small aperture produce, so raise your shutter speed by bumping ISO a little or opening the aperture, an acceptable trade to freeze the movement. Watch the trees and fire between gusts, in the still moments, which rewards patience. Or invert the problem entirely and use a deliberately long exposure so moving leaves blur into a soft, painterly wash while the trunks stay sharp, an effect that can look intentional and lovely rather than like a mistake.
What if all you have is a phone? A modern phone shoots very capable autumn images, and every principle here still applies: shoot the golden hour or soft overcast light, get low, find layers and backlight, and avoid harsh noon sun. Tap to set focus and exposure on the leaves, then drag the exposure down slightly to protect the brightest color. Shoot in the phone’s RAW mode if it has one for more editing room, and consider an inexpensive clip-on polarizer, since the phone’s biggest gaps are glare control and a true optical telephoto for compressing distant layers. What if the color looks brown, not red? That is usually white balance: warm the image with the Cloudy preset or in RAW editing, and the brown resolves back into the red and gold that was there all along.
Your fall foliage checklist
Save this and run down it before and during your next autumn shoot:
- Check a foliage forecast and target the roughly one-week peak color window for your area and elevation.
- Plan to shoot in the golden hour (sunrise or sunset) or on a soft overcast day; skip harsh midday sun.
- Pack a wide lens for scenes, a short telephoto for layers and detail, a polarizer, and a tripod.
- Set the camera to RAW so white balance and highlights stay adjustable later.
- Choose your shot: wide scene at f/11 and ISO 100 from the tripod, or a tighter subject at f/5.6 to f/8.
- Warm the white balance (Cloudy preset is a good start) so the color does not cool to brown.
- Rotate the polarizer to cut leaf glare and saturate, easing off if it kills a reflection or over-darkens the sky.
- Watch the highlight warning; dial in minus exposure compensation to protect the brightest leaves.
- Compose with a foreground anchor, layers, leading lines, or backlight rather than a flat wall of color.
- Edit with restraint: warm white balance, recover highlights, lift vibrance gently, and stop before the color turns neon.
The bottom line
Photographing fall foliage well is less about the camera than about doing seven small things in the right order: shooting at peak color in warm or soft light, matching a wide or telephoto lens to the picture in front of you, exposing at a low ISO from a tripod to hold the scene sharp, warming the white balance so the color stays golden, rotating a polarizer to strip the glare off the leaves, composing with a foreground and layers and backlight rather than a flat wall of color, and editing with a light enough hand that the reds still look like leaves. The single most important step is the first one, because no setting rescues a shot taken a week past peak in flat noon light, and the single best purchase is a polarizer, because it improves the color in a way editing cannot. None of this requires expensive gear: a kit zoom, a cheap tripod, a polarizer, and a plan to be out at sunrise will beat a professional kit used at the wrong hour. Time it right, protect the highlights, warm the color, cut the glare, and edit gently, and your autumn photos will finally look the way the season actually felt. Price your own autumn kit in the upgrade budget planner, then go chase the light while the leaves are still on the trees.
This field note is written to teach an autumn shooting workflow, not to sell any camera, lens, or filter: no brand paid for a placement and none is named on purpose, only settings, focal lengths, and techniques that work across every system. All camera settings are illustrative starting points rather than fixed rules, because the right exposure, white balance, and polarizer angle change with the light, the scene, and your gear, so meter and judge each frame on its own. Peak color dates vary widely by region, elevation, and year, so confirm your own area’s timing locally, tread lightly on the places you shoot, and let the scene in front of you, not any writer’s recipe, set your final settings.
Frequently asked questions
What is the best time of day to photograph fall foliage?
The best light for fall foliage is the golden hour, the first hour after sunrise and the last hour before sunset, when the sun is low and its warm tone amplifies the reds and oranges already in the leaves. A bright but overcast day is the underrated second choice, because the soft, even light removes harsh shadows and lets the color saturate without glare, which is why so many classic autumn woodland shots are made under clouds. The one light to avoid is harsh midday sun, which flattens the color and blows out the brightest leaves. Plan your shoot around the edges of the day, and treat an overcast forecast as an opportunity rather than a setback.
What camera settings should I use for autumn leaves?
For a sweeping foliage landscape, an illustrative starting point is aperture f/11, ISO 100, and a shutter speed set by the meter, shot from a tripod so the whole scene stays sharp front to back. For a single tree or a tighter portrait of a branch, open up to around f/5.6 to f/8 to soften the background while keeping the subject crisp. Keep ISO as low as your light allows, since low ISO holds the cleanest color and detail in the leaves. Shoot in RAW rather than JPEG so you can fine-tune white balance and pull back any over-bright leaves later. These are starting points, not rules: meter the actual scene and adjust.
What lens is best for fall foliage photography?
There is no single best lens, because the two classic autumn shots want opposite tools. A wide-angle lens, roughly 16mm to 35mm on full frame, captures the sweeping forest scene and the near-to-far depth of a whole hillside of color. A short telephoto, roughly 70mm to 200mm, does the other essential autumn job: it compresses distant layers of colored trees into stacked bands and isolates a single glowing branch out of a busy scene. Most foliage photographers carry both and choose by the picture in front of them. A kit zoom that spans wide to short telephoto covers a large share of autumn work in one lens, so you can start without buying anything.
Do I need a polarizer for fall foliage?
A polarizing filter is the single most useful accessory for autumn color, because leaves have a waxy surface that throws a bright sheen, and that sheen washes out the color your eye knows is there. Rotating a polarizer cuts the glare off the leaves and off wet surfaces, which lets the underlying red and orange saturate in a way no editing slider fully replicates. It also deepens a blue sky and cuts reflections on water, both useful in an autumn scene. The effect is strongest at a right angle to the sun and cannot be added convincingly afterward, which is why many foliage shooters consider a polarizer close to essential rather than optional.
How do I keep autumn colors from looking fake or oversaturated?
Oversaturation is the most common way a good autumn photo goes wrong, and the fix is restraint at every stage. Nail the color at capture with a polarizer and warm-leaning white balance, so you are enhancing real color rather than inventing it in software. In editing, favor a small lift in vibrance over a heavy push on saturation, because vibrance protects tones that are already strong and lifts the muted ones, while saturation shoves everything toward neon. Watch the brightest leaves for a loss of texture, which is the telltale sign of too much. A useful test is to walk away for ten minutes and look again with fresh eyes: the color that felt bold often reads as garish on the second look.
Can I photograph fall foliage with a phone camera?
Yes, a modern phone shoots very capable autumn photos, and the same principles carry over: shoot in the golden hour or under soft overcast light, get low or find a layered composition, and avoid harsh midday sun. Tap to set focus and exposure on the leaves, and if your phone offers it, pull the exposure down slightly to protect the brightest color from washing out. Shoot in the phone's RAW mode if it has one for more editing room. The main limits are the lack of a true optical telephoto for compressing distant layers, and glare, since you cannot easily fit a polarizer, though clip-on phone polarizers exist. Compose thoughtfully and the phone handles the rest well.
What white balance is best for fall colors?
For autumn you generally want a warm-leaning white balance that preserves the golden, red, and orange tones rather than a neutral setting that can cool them into brown. The Cloudy or Shade white balance presets add warmth and are a good starting point for foliage, and many photographers use Cloudy even on a sunny day to lift the color. If you shoot RAW you can set white balance precisely afterward with no loss of quality, so the safest approach is to shoot RAW and warm the image to taste in editing. The goal is color that looks like the scene felt, warm and rich, without tipping into an orange cast that stains the whole frame.
How do I handle wind when shooting autumn leaves?
Wind is the quiet enemy of a sharp foliage shot, because even a light breeze blurs individual leaves during the longer exposures a stopped-down aperture and low ISO produce. The first fix is to raise your shutter speed, which usually means raising ISO a little or opening the aperture, an acceptable trade to freeze the movement. Shooting between gusts, watching the trees and firing in the still moments, works well with patience. You can also lean into the motion deliberately, using a long exposure so moving leaves blur into a soft wash while trunks stay sharp, which can look intentional and lovely. Overcast, still mornings are the calmest conditions and worth targeting for detail work.