What's on this page
- What golden hour is
- When golden hour happens and how long it lasts
- How to find golden hour: apps and tools
- Why golden hour light flatters everything
- Golden hour versus harsh midday light
- Camera settings for golden hour: the starting point
- White balance: keep the warmth or cool it down
- Exposure: metering for backlight and a low sun
- ISO and aperture: clean files and the right depth
- Focusing when you shoot into the sun
- Backlight and rim light
- Shooting silhouettes at sunset
- Lens flare and sun stars
- Reflections and golden surfaces
- Composing in the golden light
- Golden hour portraits
- Golden hour landscapes
- Blue hour: the bonus round after sunset
- A worked example: one sunset shoot start to finish
- Common mistakes to avoid
- Your golden hour checklist
- The bottom line
Short answer: Golden hour is the roughly one hour window after sunrise and before sunset when the low sun turns warm, soft, and directional, with the exact length depending on your latitude and season. Shoot it by keeping ISO low, leaning white balance warm, and using exposure compensation so a bright sky does not underexpose your subject, then work the light with backlight, rim light, silhouettes, and reflections, and stay out past sunset for blue hour.
Golden hour for photography is the short stretch of warm, soft, low-angled light just after sunrise and just before sunset, and it is the closest thing photography has to a cheat code. The same scene that looks flat and harsh at noon looks three-dimensional and glowing an hour before sunset, without any change to your gear or your skill. Skin warms, landscapes gain depth, and ordinary streets turn cinematic, all because the sun dropped low in the sky. Learning to work with this light, and to find it reliably, is one of the highest-return skills a photographer can build, and it costs nothing but timing.
This field note covers the whole of it: what golden hour actually is and why the light flatters everything, when it happens and how to find it with free apps, the white balance and exposure choices that keep the warmth without fooling your meter, and the techniques that only golden hour makes possible, from backlight and rim light to silhouettes, sun stars, and reflections. It leans on the reference field notes rather than repeating them, so for the settings underneath every recommendation here, see our exposure triangle field note and the quick-reference camera settings field note. The low-light edges of a golden-hour shoot connect to our field note on shooting in low light. Price your own kit as you read with the upgrade budget planner.
Key takeaways
- Golden hour is the roughly one-hour window after sunrise and before sunset when low sun turns warm, soft, and directional; its exact length varies with your latitude and season, so check a real sunrise or sunset time.
- The light flatters because it is warm (long path through the atmosphere), directional (low angle rakes across texture and faces), and soft (open shadows, easy contrast), all at once.
- Keep ISO low to hold the clean light, lean white balance warm to keep the color, and use exposure compensation because a bright sky behind your subject fools the meter into underexposing.
- The signature techniques are backlight and rim light, silhouettes, lens flare and sun stars, and reflections off water and glass, all of which depend on shooting toward a low sun.
- Stay out past sunset: blue hour delivers twenty to forty minutes of soft, cool, even light that suits cities, water, and architecture, and it costs you only patience and a tripod.
What golden hour is
Golden hour is the period shortly after sunrise and shortly before sunset when the sun sits low in the sky and its light turns warm and soft. The name is a description, not a precise clock reading: the light literally goes golden, shading from a soft warm white just after the sun clears the horizon to a deep amber and orange as it sets. Photographers and cinematographers borrowed the term because this light is so reliably flattering that whole shoots are scheduled around it. It is sometimes called the magic hour, which tells you how much value the craft places on it.
The key idea is that golden hour is defined by the sun’s angle, not by a fixed length of time. The magic starts roughly when the sun is within about six degrees of the horizon and fades as it climbs higher or drops below. Because the sun’s apparent speed across the sky changes with your latitude and the season, that angular window translates into anywhere from about half an hour to well over an hour of usable warm light. Near the equator the sun rises and sets almost vertically, so golden hour is brief. Far from the equator, especially near the summer solstice, the sun grazes the horizon at a shallow angle and the warm light can linger for hours.
For practical purposes, treat golden hour as the hour after sunrise and the hour before sunset, then adjust from experience once you have shot your own location a few times. That simple rule puts you in the right light the vast majority of the time. What matters more than the exact minutes is the habit of planning around it, because this light appears and disappears on the sun’s schedule, not yours, and there is no way to recreate it later in the day or in software.
When golden hour happens and how long it lasts
Golden hour happens twice a day, bracketing sunrise and sunset, and its timing shifts every single day as the sun’s rising and setting points move through the year. In summer, sunrise comes early and sunset comes late, so the golden windows sit at inconvenient hours for many people, very early morning and late evening. In winter the windows are far more civilized, with sunset golden hour landing in the late afternoon. This is one small reason winter can be a rewarding time to shoot despite the cold: the best light arrives at a reasonable hour.
Length is the part beginners most often get wrong, because the phrase promises an hour and the reality varies. The driver is latitude and season, working through the angle at which the sun meets the horizon. Where the sun descends steeply, straight down toward the horizon, it passes through the golden angle quickly and the light is gone in thirty to forty minutes. Where it descends at a shallow, grazing angle, it lingers in that band far longer. The chart below scores how flattering the light is at different points around the day, so you can see why the low-sun windows are worth building a shoot around and the middle of the day is not.
The takeaway for planning is simple: never assume you have a full hour, and never assume the light will wait. In the tropics, and at any location around the equinoxes, the warm window can be genuinely short, so scout your composition beforehand and be ready to shoot the moment the light is right. Farther north or south in summer, you may have the luxury of a long, slow golden hour and can afford to work a scene from several angles. The timing helper above computes an illustrative window length for your latitude, season, and whether you are shooting sunrise or sunset, so you can plan your arrival with a realistic number rather than a hopeful hour.
How flattering the light is through the day (scored)
Illustrative scores out of 100 for how easy each light is to shoot and how flattering it looks straight out of camera. Higher is better.
The low-sun windows at each end of the day score highest because the light is warm, soft, and directional at once. Harsh noon sun is the hardest light to make look good. Tune the plan with the companion above.
How to find golden hour: apps and tools
You do not have to guess when golden hour arrives, and you should not, because being ten minutes late can mean missing the best of it. The most basic tool is free and already on your phone: any weather app lists the day’s sunrise and sunset times for your location. Add one hour to sunrise, or subtract one hour from sunset, and you have your working window. For a huge share of casual golden-hour shooting, that single number is all the planning you need.
Dedicated sun-planning apps go much further and are worth installing if you shoot landscapes or plan portrait locations in advance. Several popular ones show the exact compass direction the sun will rise and set on any date, the precise start and end of golden hour and blue hour for your coordinates, and an augmented-reality view that overlays the sun’s path onto the real scene through your phone camera. That lets you stand at a viewpoint days ahead and see exactly where the light will fall, whether the sun will drop behind a particular ridge, and when it will rim-light a building or backlight a tree. For a planned shoot, this removes almost all the guesswork.
The tools tell you when and where, but they cannot tell you what the sky will actually do, so pair them with a habit of arriving early and reading the conditions yourself. Clouds can extend the color long after the sun is technically down, or kill it entirely; haze can mute a sunset or turn it molten; terrain can hide the sun sooner than a flat-horizon app predicts. Treat the app as a plan and your own eyes as the final authority. Get to your spot fifteen to thirty minutes before the window opens, set up your composition in the calmer light, and then shoot through the change as the color builds and shifts.
Why golden hour light flatters everything
Three physical things happen at once when the sun sits low, and together they explain why this light makes almost any subject look better. The first is color. When the sun is low, its light travels through far more of the atmosphere to reach you than it does at noon, and that long path scatters away the shorter blue wavelengths while letting the warm reds, oranges, and yellows through. The result is the golden to amber tone the hour is named for, a warmth that flatters skin, wood, stone, and foliage because it pushes them toward the colors the eye finds pleasing.
The second is direction. At noon the sun is nearly overhead, so its light falls straight down, casting hard shadows into eye sockets and under noses and flattening the sense of shape in a landscape. A low sun sends light sideways, raking across surfaces so that texture stands out and forms gain a lit side and a shadowed side. That cross-light is what gives golden-hour photos their three-dimensional, sculpted quality. It reveals the ripples in sand, the grain in bark, the contour of a cheekbone, none of which a top-down noon sun shows.
The third is softness. As the sun drops toward the horizon and its light spreads through more atmosphere, and often through a little haze or dust, the light source effectively grows larger and gentler. Shadows go from hard-edged to soft, the difference between the brightest highlight and the darkest shadow shrinks, and the whole scene fits more easily into what a camera can capture in one exposure. Warm, directional, and soft, arriving together and for free, is a combination that studio photographers spend real money and effort to imitate. Golden hour hands it to you at no cost, which is exactly why it is worth planning around.
Golden hour versus harsh midday light
To understand why golden hour is worth an early alarm, it helps to see clearly what the alternative does to a photo. Harsh midday sun, on a clear day between roughly late morning and mid-afternoon, is the hardest light most photographers face. The overhead angle throws short, hard shadows straight down, which under a person’s face means dark hollows in the eyes and a heavy shadow under the nose and chin, the least flattering possible portrait light. On a landscape it flattens depth, because with the shadows hiding beneath objects there is little cross-light to reveal contour and texture.
Midday light is also high in contrast in the worst way. The gap between the sunlit highlights and the deep shadows often exceeds what a camera can record in a single frame, so you are forced to choose between blown-out bright areas or blocked-up black shadows, and neither looks good. The color is neutral to cool and does nothing to help skin or scenery. None of this means midday is unusable, and later in this field note the troubleshooting notes cover how to salvage it, but it does mean midday asks far more of you as a photographer than golden hour does.
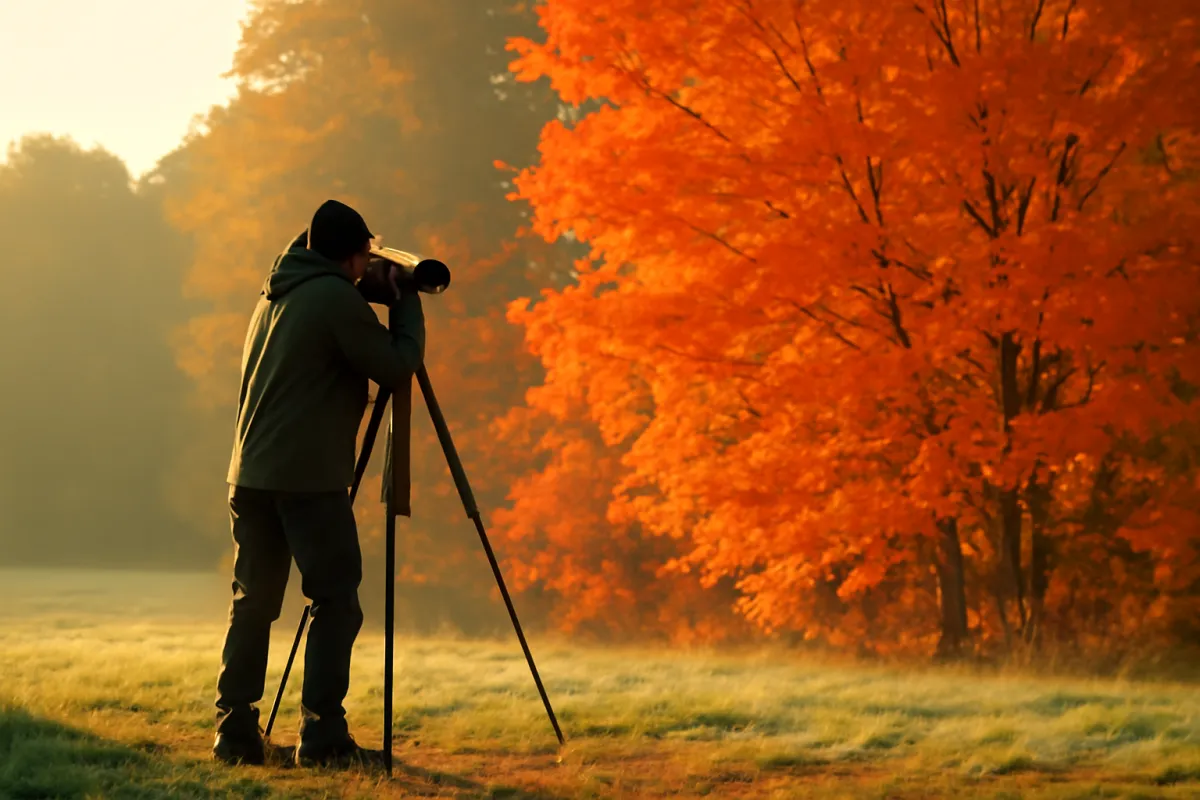
Golden hour inverts every one of those problems. The low angle lifts shadows out of eye sockets and lays them sideways where they sculpt rather than hide; the reduced contrast fits the whole scene into one exposure; the warm color flatters instead of doing nothing. The practical upshot is that golden hour is forgiving. A beginner shooting in golden light, even on automatic, comes home with better photos than an expert fighting noon sun, because the light itself has removed the hardest problems. That is the real argument for planning around the hour: it is not just prettier, it is dramatically easier to shoot well.
Camera settings for golden hour: the starting point
Golden hour is easy light, so the settings are less about rescuing a difficult scene and more about preserving what the light already gives you. A sensible starting point for a golden-hour portrait is aperture f/2.8 to f/4 to soften the background and separate your subject, ISO 100 to 400 to keep the file clean, and a shutter speed the meter chooses, with white balance leaning warm. For a wide landscape you want front-to-back sharpness, so stop down to f/8 to f/11, keep ISO at its base, and use a tripod once the light drops enough to slow the shutter. The companion above turns your subject and light into a specific starting recipe you can carry into the field.
Two settings deserve special attention in golden hour, and they are the two beginners most often leave on automatic. The first is ISO: keep it as low as the light allows. Golden-hour light is soft and clean, and a low ISO holds that cleanliness, preserving the subtle color gradients in a sunset sky that noise would otherwise mottle. As the sun sets and the light fades toward blue hour you will eventually need to raise ISO or slow the shutter, but push ISO up only as far as you must. The second is exposure compensation, which the next sections cover in detail, because a bright sky will fool your meter.
Everything else follows the normal logic of the exposure triangle, so this field note does not re-teach it: our exposure triangle field note walks how aperture, shutter, and ISO trade against one another, and the camera settings field note is a fast lookup for a starting point in any situation. The one mindset shift for golden hour is that the light is changing continuously, often quickly, so a setting that was right five minutes ago may be a stop off now. Check your exposure frequently as the sun drops, and be ready to open up, slow down, or raise ISO as the light dims toward the end of the window.
White balance: keep the warmth or cool it down
White balance is the setting that decides whether your golden hour looks golden, and it is worth a deliberate choice rather than leaving it to the camera. On Auto white balance, a camera sees a scene full of warm color and often tries to neutralize it, cooling the image back toward a neutral gray and draining away the very warmth that made you pick up the camera. The single easiest fix is to switch white balance from Auto to the Cloudy or Daylight preset, both of which hold or add warmth and let the golden tone come through the way your eye sees it.
There is a real creative choice here, not just a correction. Leaning warm, with Cloudy or Shade, amplifies the amber and orange for a rich, nostalgic look that suits portraits, landscapes, and anything where you want the light to feel like a memory. Staying neutral, with a Daylight or a measured white balance, keeps the color truer and can look cleaner and more modern. Neither is wrong. The point is to decide on purpose rather than let Auto quietly undo the light. Many golden-hour photographers set Cloudy and never look back, because the warm bias flatters almost every subject the low sun touches.
The safety net, as always, is to shoot RAW. A RAW file records the full sensor data and lets you set white balance afterward with no loss of quality at all, so you can dial the exact warmth on the computer, sliding it warmer for mood or cooler for accuracy until the image matches the feeling of the evening. If you shoot RAW you can leave the camera on Auto and warm the file later, or set Cloudy as a live preview and still adjust freely. The only genuine mistake is overdoing it, pushing the warmth so far that skin turns orange and the whole frame takes on a stain. Warm the light, do not dye the picture.
Exposure: metering for backlight and a low sun
The one technical trap in golden hour is metering, because the sun and the bright sky are often in or near your frame and they wreck the camera’s automatic reading. When a bright sky or the sun itself dominates the meter, the camera assumes the scene is far brighter than your actual subject and darkens the whole exposure to compensate, which drops your subject into shadow or outright silhouette. This is why so many first golden-hour portraits come back with a beautiful sky and a face you cannot see. The fix is to take control of what the meter listens to.
The most reliable approach is exposure compensation. When you shoot a backlit subject and the sky pulls the meter down, dial in positive exposure compensation, an illustrative plus one to plus two stops, to brighten the subject back to a proper exposure. Yes, the sky behind will get brighter and may wash out a little, and that is usually the right trade, because a well-exposed face against a slightly bright sky beats a perfect sky and a black face. Alternatively, switch your metering mode to spot metering and meter directly off your subject’s face, which tells the camera to expose for what matters and ignore the bright background.
Watch your highlights as you do this, using the camera’s highlight warning or histogram, because the goal is to lift the subject without needlessly blowing the entire sky to featureless white. Often the best exposure is a compromise: bright enough that the subject reads clearly, dark enough that the sky keeps some color and the sun keeps some shape. Because golden-hour contrast is lower than midday contrast, you can frequently hold both a good subject and a colored sky in one frame, which is part of what makes this light so forgiving. If you cannot hold both, expose for your subject and let the sky go, or make a deliberate silhouette by doing the opposite, as a later section describes.
ISO and aperture: clean files and the right depth
Aperture in golden hour is a creative choice about depth, and the low, soft light frees you to make it purely for the picture rather than out of necessity. For a portrait or any single subject you want to lift off its background, open the aperture wide, f/1.8 to f/4 depending on your lens, to throw the background into a soft warm blur that the golden light renders beautifully, with any highlights behind the subject melting into glowing orbs. For a landscape where you want the whole scene sharp from the foreground to the setting sun, stop down to f/8 to f/11, which also happens to be where most lenses are sharpest across the frame.
ISO deserves the discipline mentioned earlier because golden-hour light rewards a clean file more than almost any other light. The gentle gradients of a sunset sky, the smooth transition from warm highlight to open shadow on a face, the subtle color in the clouds, all of these are exactly the tones that digital noise degrades first. Keeping ISO at or near base, typically ISO 100, preserves them. Start low and only raise ISO when the fading light forces your shutter speed too slow to hand-hold, which happens toward the end of the window as the sun disappears. On a tripod for a landscape you can hold base ISO right through the transition into blue hour.
The interplay between the two is the same trade-off it always is, and worth thinking through before the light is fading and you are rushed. A wide aperture lets in more light, which lets you keep ISO low and shutter fast as the light drops, at the cost of shallow depth of field. A small aperture for landscape depth costs you light, which pushes you toward a tripod and a slower shutter rather than a higher ISO. If you are choosing a lens for this kind of low, dim shooting, our best lens for low light field note works through why a fast aperture earns its keep once the sun is on the horizon. Run the numbers on your own kit in the upgrade budget planner.
Focusing when you shoot into the sun
Autofocus can struggle in golden hour for a specific reason: shooting toward a bright, low sun floods the frame with backlight and lens flare, which reduces the contrast the autofocus system relies on to lock. The camera hunts, searching back and forth, and either misses focus or refuses to fire. This is most common when the sun is in the frame or just outside it and when you are shooting a low-contrast subject like a rim-lit silhouette. It is not a fault in your camera so much as a hard condition for any autofocus system.
Several habits get you sharp focus anyway. First, focus on the highest-contrast edge available, the outline of your subject against the bright sky rather than a flat area, and the system usually locks. Second, shade the lens: a lens hood, or your hand held just outside the frame, blocks the direct sun from hitting the front element, restores contrast, and often lets autofocus work normally. Third, use back-button focus or focus-and-recompose so you can lock focus on a good contrast edge and then reframe without the camera hunting again.
When autofocus simply will not cooperate, switch to manual focus, which is the reliable fallback for difficult backlight. With mirrorless cameras this is easy, because focus peaking highlights the in-focus edges and magnification lets you confirm critical sharpness on an eye or a horizon. For a landscape you can manually focus toward the distance and rely on the deep depth of field from a stopped-down aperture to cover you. The general point is that strong backlight is a known challenge, so do not trust a single autofocus beep in these conditions; confirm your focus on the rear screen, especially for the shots that matter.
Backlight and rim light
Backlight is the signature golden-hour technique, and learning to embrace it rather than avoid it is the single biggest step up in this light. Backlighting means placing the low sun behind your subject so it shines toward the camera. Do this with a person and the light wraps around them, catching the edges of hair and shoulders in a bright glowing outline that separates them from the background. That glowing edge is rim light or a hair light, and it is the effect portrait photographers chase, because it gives a subject a luminous, almost haloed quality that flat front light never produces.
The reason backlight works so well specifically in golden hour is that the sun is low enough to sit directly behind a standing person or a tree, at eye level rather than overhead, so the rim of light lands where you want it. Backlight a translucent subject, leaves, grass, hair, a flower, and the light passes through it and it glows from within like stained glass, an effect the fall-color version of which our autumn foliage field note explores in the same low light. The trick, covered in the exposure section above, is to expose for the subject, not the bright background, so the face or the foreground reads properly while the rim light glows.
The one thing to manage with backlight is contrast and flare control. Because you are shooting toward the sun, the light can wash across the frame and lower contrast, which is sometimes lovely and dreamy and sometimes just flat. To keep some contrast, add a little fill light back onto the shadowed front of your subject: a reflector, a white wall or sheet, or even a light-colored surface bounces the sun back into the face and opens the shadows. If you have no reflector, position your subject so a bright surface nearby does the bouncing for you, or accept the moody low-contrast look, which can be exactly right for the golden mood.
Shooting silhouettes at sunset
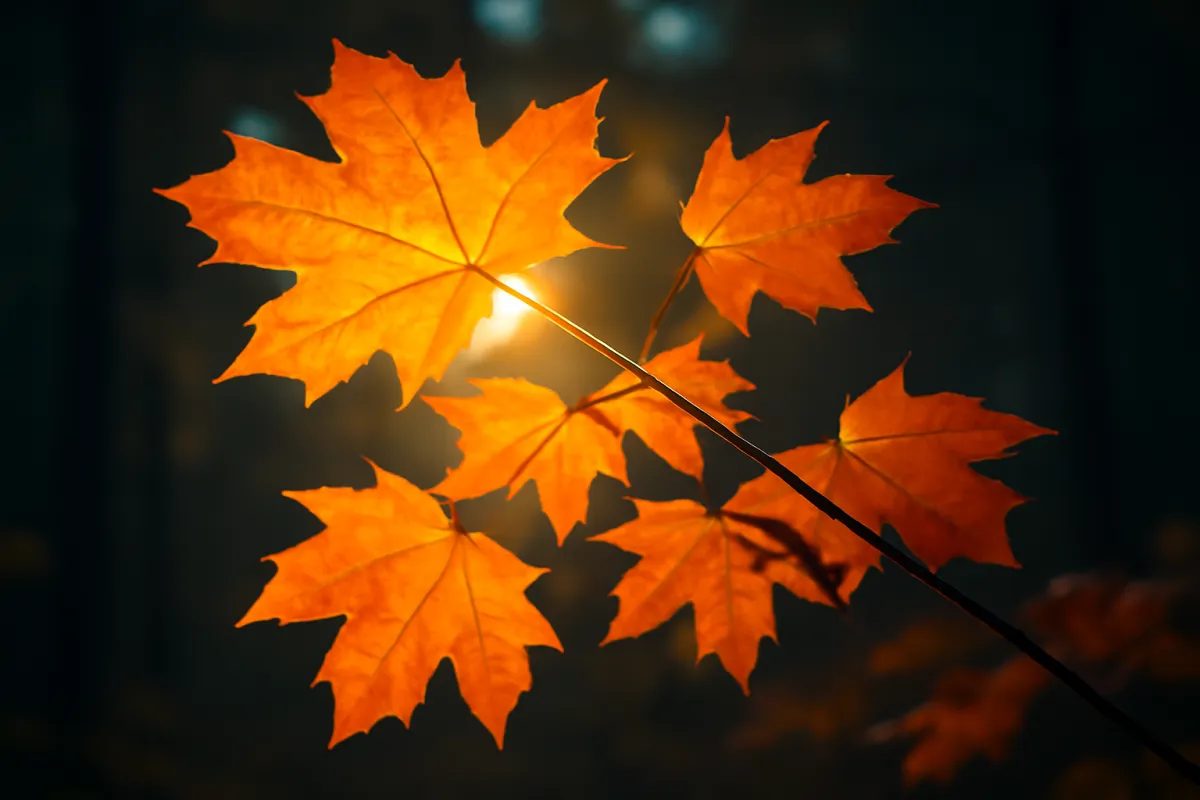
A silhouette is backlight taken to its extreme, and golden hour is the ideal time to make one because the sky behind is both bright and beautifully colored. The idea is the opposite of the backlit portrait above: instead of exposing to keep your subject visible, you expose for the bright, colorful sky and let the subject fall to a solid black shape against it. Done well, a silhouette is graphic and striking, reducing a person, a tree, or a skyline to a clean outline set against fire-colored clouds.
The craft of a silhouette is almost entirely in the shape and the exposure. For the shape, choose a subject with a clear, recognizable outline and keep it from merging with other dark elements: a person standing apart against open sky reads instantly, while the same person against a dark tree line disappears into it. Profiles work better than front-on poses because the outline is more descriptive, and a little separation, an arm held out, a gap between two figures, keeps the shape legible. Place the subject where the colored sky, not a dark hillside, sits directly behind it.
For the exposure, meter for the bright sky, which naturally pushes the subject to black. Spot metering on the brightest part of the sky, or dialing in negative exposure compensation, an illustrative minus one to minus two stops, deepens the silhouette and saturates the sky’s color at the same time. Turn off your flash so it does not accidentally light the subject you are trying to blacken. Because you are exposing for the sky, focus can be tricky in the dimming light, so focus on the subject’s edge or switch to manual as the earlier focusing section describes. A silhouette is one of the few shots that is easier the darker the subject and the brighter the sky get, which makes the end of golden hour, right at sunset, its perfect moment.
Lens flare and sun stars
Lens flare is the streaks, rings, and haze that appear when a bright light source shines into your lens, and in golden hour, with the sun low and often in the frame, it is a constant presence you can fight or use. Uncontrolled flare washes out contrast and drops distracting colored blobs across the image, which is why a lens hood and a clean front element are worth having. But controlled, intentional flare is a beloved golden-hour look, adding warmth, atmosphere, and a sense of the sun’s presence that makes a photo feel sunlit rather than merely bright.
To use flare deliberately, position the sun at the edge of your frame or let it peek from behind your subject, then move slightly while watching the viewfinder as the flare shifts, blooms, and streaks, and shoot when it looks good. Partly hiding the sun behind a subject, a person’s shoulder, a branch, the horizon, tames the intensity and often produces the most pleasing, controlled flare. A clean lens and a hood give you predictable flare; a cheap filter or a smudged front element gives you ugly, hazy flare, so wipe the glass before you shoot toward the sun.
A sun star, also called a starburst, is the related effect where the sun renders as a sharp multi-pointed star rather than a soft blob, and it is one of the most satisfying golden-hour tricks. The recipe is specific: stop your aperture down small, f/16 or f/22, and the blades of the aperture diffract the point of light into rays. The effect is strongest when the sun is a small, bright point, so it works beautifully when the sun is half-hidden behind the horizon, a building edge, or a tree trunk, leaving just a sliver to burst. Lenses with straight aperture blades make cleaner stars, but almost any lens produces some starburst at a small aperture, so it is worth trying at the moment the sun kisses the horizon.
Reflections and golden surfaces
Golden hour and reflective surfaces are a natural pairing, because the low warm sun paints color across anything that can bounce it back. Water is the obvious partner. A calm lake, a slow river, a tidal pool, or even a puddle mirrors the colored sky and doubles the impact of a sunset, giving you a symmetrical composition with warm color top and bottom and a subject floating between. The stillness matters: a glassy surface gives a crisp mirror, while a light breeze breaks the reflection into a shimmering wash of color that can be just as lovely in a softer way.
Beyond water, look for every surface the low sun can set alight. Wet sand on a beach turns into a golden mirror as a wave recedes. Windows and glass buildings catch the setting sun and blaze orange, turning a city block into a field of lit rectangles. Rain-slicked streets glow with reflected color and streak the light from cars and signs. Even a chrome bumper, a metal railing, or a pair of sunglasses can hold a small golden reflection that anchors a detail shot. Training your eye to hunt for these reflective moments is one of the ways a photographer sees more in golden light than a passerby does.
Two practical notes make reflection shots work. First, a low camera position exaggerates a reflection, so get down close to the water or the wet surface to give the mirror more of the frame; shooting from standing height often loses the reflection entirely. Second, a polarizing filter is a double-edged tool here, because it can cut the reflection you want just as easily as the glare you do not, so if a reflection is your subject, ease the polarizer off or remove it. Compose with the reflection as a deliberate element, not an accident, and the golden surfaces become half the picture rather than a lucky bonus.
Composing in the golden light
Great light does not compose the photo for you, and the most common way a golden-hour shot disappoints is a beautiful sky wrapped around a weak composition. The light is the setting; you still need a subject and a structure. The strongest golden-hour images give the frame a clear anchor, a person, a lone tree, a boat, a building, and let the warm light and colored sky be the stage rather than the whole show. A sky with nothing in front of it is a color swatch; a sky behind a strong subject is a photograph.
The low sun also hands you compositional tools that noon does not. Long shadows stretch dramatically away from every object, and you can use them as leading lines pointing into the frame or as graphic shapes in their own right, a row of long tree shadows across a field, the elongated shadow of your subject reaching toward the camera. The warm light itself can be a compositional element, a pool of gold falling across part of the scene that you place deliberately. And the directional light means the side you shoot from changes everything: front-lit for saturated color, side-lit for texture and shape, backlit for glow and silhouette, all available by simply walking around your subject.
Standard composition principles apply and are worth leaning on because the light is so forgiving that structure is what separates strong frames. Use the rule of thirds to place your subject and the horizon off-center, giving weight to either the colored sky or the lit foreground depending on which is stronger that evening. Look for a foreground element to build depth, especially in a landscape, so the eye travels from something near into the warm distance. For the deeper landscape-composition logic in this kind of wide golden scene, our best lens for landscape field note works the framing and depth choices in full.
Golden hour portraits
Golden hour is the most popular time to shoot portraits for good reason: the warm, soft, low light is flattering to skin in a way no other natural light matches, and it produces the glowing, dreamy look clients and subjects love. The warmth gives skin a healthy glow, the softness hides blemishes and reduces harsh texture, and the low angle avoids the raccoon-eye shadows of overhead sun. A portrait photographer who can only shoot at one time of day would choose the hour before sunset almost every time.
The core decision is where to put the sun relative to your subject, and each option gives a different look. Backlighting, the sun behind the subject, is the classic golden-hour portrait: it rims the hair and shoulders with light, glows warmly, and needs the positive exposure compensation from the metering section so the face stays bright. Side lighting rakes across the face for a more dramatic, textured, three-dimensional look with visible shape. Front lighting, the sun low and behind you, floods the face with even warm light and saturated color, easy and flattering, though it can make a subject squint into the sun, so keep it low and brief. Many photographers work all three in one session as the light drops.
Fill light is the one accessory that most improves a backlit golden-hour portrait, because it opens the shadowed front of the face that the backlight leaves dark. A reflector bounces the warm sun back into the face; a white wall, a light path, or a sandy beach does the same for free. Set aperture wide, f/2 to f/4, to soften the background into a warm blur and separate your subject, keep ISO low, and meter for the face. For the fuller portrait workflow, from posing to light placement, our portrait field note covers the craft that golden light then elevates. The light is doing you an enormous favor here; your job is mostly to not get in its way.

Golden hour landscapes
For landscapes, golden hour is the light that separates a snapshot from a photograph, and most of the iconic landscape images you have seen were made in the minutes around sunrise or sunset. The low sun rakes across the land, revealing every ridge, dune, furrow, and rock with the cross-light that a top-down noon sun hides, so the terrain gains depth and texture. The warm color washes the whole scene in gold, and the lower contrast lets you hold both a bright sky and a detailed foreground in a single frame, which is difficult or impossible at midday.
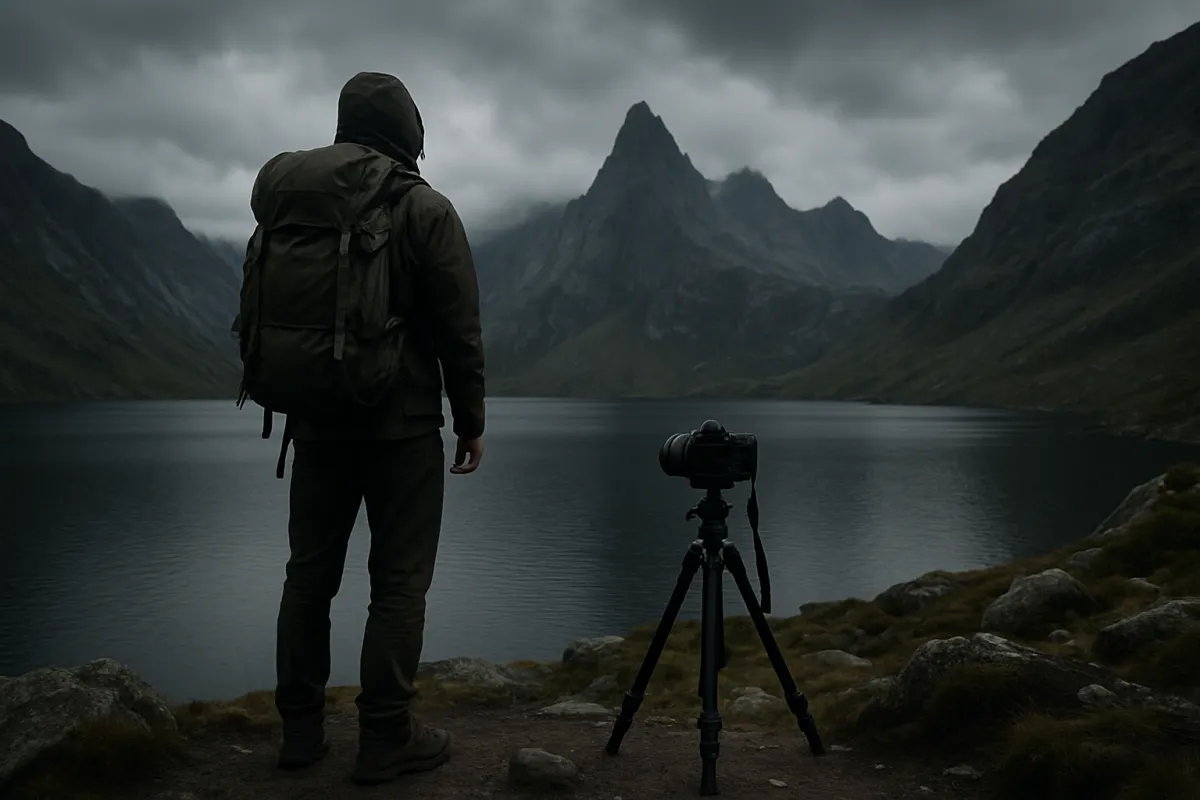
Settings for a golden-hour landscape favor depth and cleanliness. Stop down to f/8 to f/11 for front-to-back sharpness, keep ISO at base for the cleanest color in the sky, and put the camera on a tripod, because as the light drops the shutter speeds get too slow to hand-hold. A tripod also lets you stay out and keep shooting as golden hour fades into blue hour without raising ISO. Compose with a strong foreground, a rock, a flower, a leading line of shoreline, so the eye enters the frame near and travels back toward the lit horizon, and decide how much weight to give the colored sky versus the lit land based on which is stronger that evening.
The direction you face transforms a landscape as much as it does a portrait. Shooting with the sun behind you front-lights the scene for maximum saturated color across the land. Shooting toward the sun backlights ridgelines and trees, rims them with light, and sets up silhouettes and sun stars. Shooting across the light, with the sun to your side, gives the strongest sense of texture and three-dimensional form as shadows stretch sideways. Rather than committing to one, work the scene: shoot the colored sky in one direction, then turn around, because a great sunset often lights up the sky opposite the sun in soft pinks worth capturing too.
Blue hour: the bonus round after sunset
Blue hour is the reward for photographers who do not pack up when the sun goes down. It is the period just after sunset, and just before sunrise, when the sun is below the horizon but still lighting the sky from beneath, bathing the world in soft, even, blue-toned light. It typically runs twenty to forty minutes depending on your latitude and season, and it is a completely different mood from golden hour: where golden hour is warm and directional, blue hour is cool, calm, and shadowless, a gentle even light that suits a different set of subjects.
Blue hour is prime time for cities, architecture, and water. As the sky deepens to a rich cobalt, artificial lights, street lamps, shop windows, car trails, and building interiors, switch on and balance beautifully against it, so a skyline or a lit bridge glows against a colored sky rather than a black one. There is a sweet spot, often ten to twenty minutes after sunset, when the sky brightness roughly matches the artificial lights, and cityscapes made in that window have a luminous, balanced quality that a fully dark sky never gives. Water at blue hour goes glassy and reflects the cool sky and the warm city lights together.
The practical requirement is a tripod, because blue-hour light is dim and getting dimmer, which forces long shutter speeds a hand cannot hold steady. Set the camera on a tripod, keep ISO low for a clean file, and let the shutter run for the seconds it needs; a wide landscape at f/8 to f/11 in blue hour might expose for several seconds. Watch your white balance, since Auto can fight the blue you actually want, and shoot RAW so you can set the exact cool-warm balance later. This is where a golden-hour session and a low-light session overlap, and the same discipline our low-light field note teaches carries straight into the blue-hour bonus round. Stay out past sunset and you double the keeper shots from a single evening.
A worked example: one sunset shoot start to finish
Here is a single realistic sunset session run start to finish with illustrative settings, so the sequence is concrete. The plan is a portrait of one person by a lake on a clear mid-latitude evening in early autumn, staying out through blue hour for a cityscape across the water. The day before, a sun-planning app showed sunset at an illustrative 7:10 pm and the direction the sun would set, so golden hour is planned from roughly 6:10 to 7:10 and blue hour from about 7:15 to 7:45.
Arrival and setup. The photographer arrives at 5:50, twenty minutes before the window, and scouts positions in the still-bright light, choosing a spot where the low sun will sit behind the subject over the water. White balance is set to Cloudy to hold the warmth, ISO to 100, and the camera is in aperture priority at f/2.8 for the portraits. Early golden hour, around 6:15. The sun is still fairly high and warm. Front-lit and side-lit frames go first, with the subject turned so the low sun rakes across the face for shape. Exposure is close to the meter’s reading; the light is easy.
Peak golden hour, around 6:50. The sun is low and glowing, so the photographer moves the subject directly in front of it for backlit portraits, the hair rimmed in gold. The meter, seeing the bright sky, wants to darken everything, so plus one and a half stops of exposure compensation bring the face back up while the sky stays warm and bright. A white reflector bounces a little sun back into the shadowed side of the face. Sunset, 7:10. With the sun a sliver on the horizon, the aperture stops down to f/16 for a sun-star burst, and a few silhouette frames are made by metering for the sky and letting the subject go black against the color.
Blue hour, 7:20 onward. The warm light is gone and the sky deepens to blue, so the portrait wraps and the tripod comes out. ISO stays at 100, the aperture closes to f/8 for the cityscape across the water, and the shutter runs for several seconds as the city lights come on and balance against the cobalt sky. By 7:45 the sky is nearly dark and the session ends with both a set of warm backlit portraits and a cool, luminous blue-hour cityscape, from one evening and one location. Run your own scene’s kit and budget through the upgrade budget planner.
The stack below shows roughly how the evening’s shooting time divides across the three phases. Notice that the actual golden hour is a smaller slice than beginners assume, which is exactly why arriving early to set up and staying late for blue hour pays off so well.
One sunset session: where the shooting time goes
Illustrative split of a well-run evening across setup, the golden window itself, and the blue-hour bonus. The gold in the middle is the shortest and most valuable stretch.
Setup and blue hour together take more of the evening than golden hour itself, so the photographers who arrive early and stay late get the most from one sunset. Adjust the split with the companion above.
Common mistakes to avoid
Most disappointing golden-hour photos fail in a handful of predictable ways, and knowing them in advance is the fastest route to better results. These are the pitfalls that come up again and again:
- Arriving late or leaving early. The light comes and goes on the sun’s schedule and often faster than beginners expect, and blue hour follows sunset. Get there fifteen to thirty minutes before the window and stay well past sunset.
- Letting the meter underexpose your subject. A bright sky fools the camera into darkening everything, dropping a backlit face into shadow. Use positive exposure compensation or spot meter on the subject, unless you want a silhouette.
- Leaving white balance on Auto. Auto often neutralizes the very warmth that makes golden hour special. Set Cloudy or Daylight, or shoot RAW and warm the file later, so the gold survives.
- Cranking ISO too high. The soft light is clean, and a high ISO mottles the delicate gradients in a sunset sky. Keep ISO at or near base and use a tripod as the light fades rather than pushing ISO up.
- A gorgeous sky with no subject. Warm color alone is a swatch, not a photograph. Anchor the frame with a person, a tree, a building, or a strong foreground so the light has something to be about.
- Fighting the backlight instead of using it. Turning your back to the sun for safe front light throws away the rim light, glow, and silhouettes that make this hour unique. Shoot toward the low sun and control it.
Your golden hour checklist
Save this and run down it before and during your next golden-hour shoot:
- Look up today’s sunrise or sunset time and plan the hour after sunrise or before sunset; use a sun app for direction and exact length if you can.
- Arrive fifteen to thirty minutes early to scout the composition in calmer light and be ready when the window opens.
- Set white balance to Cloudy or Daylight to hold the warmth, and shoot RAW so you can fine-tune it later.
- Keep ISO low for a clean file; reach for a tripod as the light fades rather than pushing ISO up.
- Choose aperture for the picture: wide, f/1.8 to f/4, for a portrait with a soft background; stopped down, f/8 to f/11, for a sharp landscape.
- Meter for your subject, not the bright sky: dial in positive exposure compensation or spot meter the face so a backlit subject stays visible.
- Work the light in every direction: front for saturated color, side for texture, back for rim light, glow, and silhouettes.
- Try a sun star at f/16 with the sun half-hidden, and hunt reflections in water, glass, and wet surfaces from a low position.
- Stay out past sunset for blue hour: tripod down, ISO low, long exposures, cool white balance, and let the city lights balance the sky.
The bottom line
Golden hour for photography is the highest-return, lowest-cost skill you can build, because the warm, soft, low light does most of the work that gear and technique otherwise fight for. Show up in the hour after sunrise or before sunset, keep ISO low and lean your white balance warm to preserve the color, and use exposure compensation so a bright sky does not underexpose the subject you actually care about. Then embrace the light rather than avoid it: shoot toward the low sun for backlight and rim light, expose for the sky to carve out silhouettes, hunt sun stars and reflections, and give every frame a real subject so the gorgeous light has something to be about. When the warm color fades, do not leave, because blue hour hands you a second, cooler mood for cities and water if you have a tripod and the patience to wait. None of this requires an expensive camera; it requires being in the right place at the right hour and not fighting the light the sun is giving you for free. Check tonight’s sunset time, run your kit through the upgrade budget planner, and go chase the gold while it lasts.
This field note is written to teach a way of seeing and using natural light, not to sell any camera, lens, or filter: no brand paid for a placement and none is named on purpose, only the settings, angles, and timing that work across every system. Every aperture, ISO, shutter, and exposure-compensation value here is an illustrative starting point rather than a fixed rule, because the right exposure shifts minute to minute as the sun drops and changes with your scene, your subject, and your gear, so meter and judge each frame on its own. Sunrise and sunset times, and the exact length of golden and blue hour, vary widely by location, date, and latitude, so confirm your own with a local time or a sun app, mind your footing and the tide near water in low light, and let the sky in front of you, not any writer’s schedule, decide when you press the shutter.
Frequently asked questions
When is golden hour for photography?
Golden hour is the roughly one-hour window just after sunrise and just before sunset, when the sun sits low and its light turns warm, soft, and directional. The exact length is not fixed at sixty minutes: near the equator the sun climbs and drops steeply, so the warm window can be as short as thirty to forty minutes, while at higher latitudes and near the summer solstice it can stretch to a couple of hours. The safest habit is to check a sunrise and sunset time for your location and treat the hour bracketing it as your working window. Arrive early, because the best light often comes and goes faster than beginners expect.
What camera settings should I use for golden hour?
An illustrative starting point for a golden-hour portrait is aperture f/2.8 to f/4, ISO 100 to 400, and a shutter speed the meter sets, with white balance leaning warm on the Cloudy preset. For a wide landscape, stop down to f/8 to f/11 and keep ISO low, on a tripod if the light has dropped. The two settings that matter most are a low ISO, because the soft light is clean and you want to keep it that way, and exposure compensation, because a bright sky behind your subject will fool the meter. These are starting points, not rules: meter the actual scene, watch the highlights, and adjust as the light changes minute to minute.
How do I find golden hour where I am?
The simplest method is to look up today's sunrise and sunset time for your city, then plan to shoot in the hour after sunrise or the hour before sunset. Several free apps go further and show the exact direction the sun will set, the length of golden hour for your date and latitude, and how the light will fall on a specific location, which is invaluable for planning a landscape or a portrait spot in advance. A plain weather app that lists sunrise and sunset covers the basics for free. The one thing no app replaces is arriving early and watching the light yourself, because clouds, haze, and terrain change what actually happens.
Why does golden hour light look so good?
Three things happen at once when the sun is low. The light travels through much more atmosphere, which scatters away the blue and leaves a warm golden to orange tone that flatters skin and landscape alike. The low angle makes the light directional, raking across textures and faces to create gentle shadow and shape rather than the flat, top-down light of noon. And the same low angle, often combined with a little haze, softens the light so shadows are open and the contrast is easy to expose for. Together these turn harsh, hard-to-photograph midday conditions into soft, warm, three-dimensional light that needs very little help to look good.
What is blue hour and how is it different from golden hour?
Blue hour is the stretch of soft, cool, blue-toned light that comes just before sunrise and just after sunset, when the sun is below the horizon but still lighting the sky. It follows golden hour at dusk and precedes it at dawn, and it typically lasts twenty to forty minutes depending on your latitude and season. The light is even and shadowless, with a calm blue cast that suits cityscapes, water, and architecture, especially once artificial lights switch on and balance the sky. Blue hour needs a tripod because the light is dim, so shutter speeds get long, but it rewards photographers who stay out past the warm color instead of packing up at sunset.
How do I shoot into the sun without ruining the photo?
Shooting into a low sun is the heart of golden-hour work, and the trick is to control where the sun sits in the frame. Partly hide it behind your subject, a tree, or the horizon so only a sliver shows, which tames the brightness and can create a glowing rim of light or a sun star. Meter for your subject rather than the sky, using exposure compensation or spot metering so a backlit face does not fall into silhouette unless you want it to. Use a lens hood and keep the front element clean to control flare, and if flare washes out contrast, shade the lens with your hand just outside the frame. Manual focus helps when strong backlight makes autofocus hunt.
Do I need special gear for golden hour photography?
No, golden hour is one of the few situations where the light does the work and almost any camera or phone delivers, because the soft warm light is easy to expose and flattering by default. A reflector or even a white sheet helps bounce light back into a backlit face, and a tripod matters as the light fades into blue hour, but neither is essential to start. A lens hood is genuinely useful for controlling flare when you shoot toward the sun. Beyond that, the most valuable tools are free: a sunrise and sunset time, the habit of arriving early, and the patience to keep shooting as the color changes. Spend on being in the right place at the right hour before you spend on gear.
Is sunrise or sunset better for photography?
Both give the same quality of warm, low light, so the honest answer is that it depends on your subject and your schedule. Sunrise light is often cleaner, with less haze and dust in the air and far fewer people in popular locations, and the temperature and mist can add atmosphere, at the cost of a very early alarm and a fast-opening window you must be set up for in the dark. Sunset is easier to plan and shoot because you can arrive in daylight, watch the light build, and stay into blue hour, though popular spots get crowded and late-day haze can mute the color. Many photographers prefer sunrise for landscapes and solitude and sunset for convenience and the blue-hour tail.