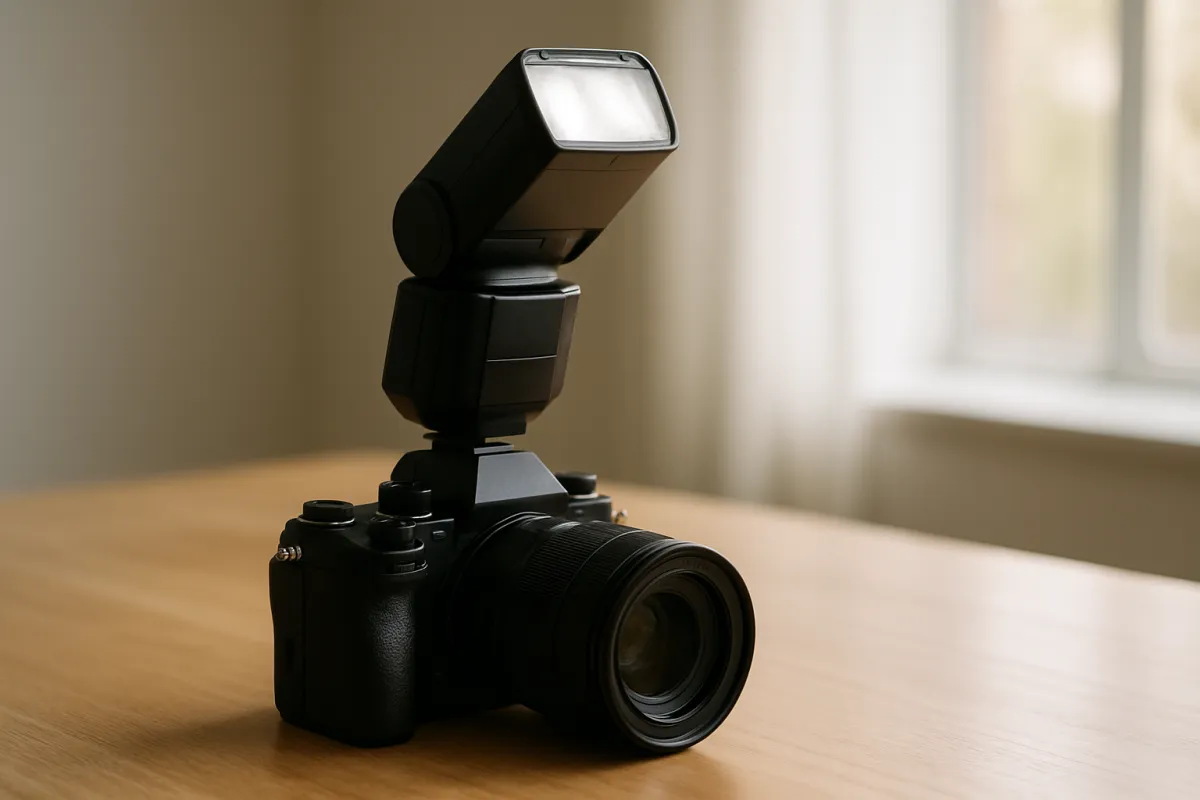
What's on this page
- Before you start
- What an external flash does that a built-in flash cannot
- Step 1: Mount the Flash and Confirm It Fires
- Step 2: Choose Between TTL and Manual Power
- Step 3: Dial In Flash Exposure Compensation
- Step 4: Bounce the Light Off a Ceiling or Wall
- Step 5: Balance the Flash Against the Ambient Light
- Step 6: Respect the Sync Speed, Then Reach Past It
- Step 7: Get the Flash Off the Camera
- Step 8: Diffuse and Shape the Light
- Guide numbers and power ratios, without the marketing figures
- Recycle time, flash duration, and the batteries that end a shoot
- A worked example: one dim reception room, start to finish
- Reading a flash-lit frame: the four zones to check
- Common mistakes to avoid
- Troubleshooting the flash problems that ruin a shoot
- Where an external flash fits in your gear budget
- Your external flash checklist
- The bottom line
Short answer: Use an external flash by pointing it somewhere other than at your subject: bounce it off a ceiling or wall so a small hard source becomes a broad soft one. Mount the unit, choose TTL or manual power, correct with flash exposure compensation, set shutter speed for the ambient light and aperture with flash power for the flash, stay at or below your camera's sync speed, then get the flash off camera and diffuse it.
The first photograph most people take with a new external flash looks worse than the one they took without it. The subject is bright and flat, a hard black shadow is stamped on the wall behind them, the background has fallen into darkness, and the whole frame has the unmistakable look of a picture taken in a hurry at a party. That result is not the flash failing. It is a flash pointed straight at a face at high power, which is the one thing the unit does badly, and it is exactly what the tiny pop-up flash on a camera body has been doing badly for decades. An external flash earns its place because of everything else it can do, and almost all of that starts with pointing it somewhere other than at your subject.
This field note turns a flash into eight steps you can work in order: mounting the unit and confirming it fires, choosing between automatic and manual power, correcting what the automation gets wrong, bouncing the light off a ceiling or a wall, balancing what the flash does against the light already in the room, staying inside the shutter speed the camera can sync at, getting the unit off the camera, and shaping the result with diffusion. It assumes you already understand how the three exposure controls interact; if that is shaky, our exposure triangle field note is the place to start, and the upgrade budget planner will show you where a flash sits against the rest of your gear spending.
Key takeaways
- The single most valuable thing an external flash does is point somewhere other than forward. Bounce turns a hard, tiny source into a broad, soft one and fixes most flash photos in one move.
- Shutter speed controls the ambient light and the aperture with flash power controls the flash. Once you separate those two jobs, mixing flash with a room stops being guesswork.
- TTL sets flash power for you and adapts as you move; manual gives identical output every frame. Neither is more advanced, and flash exposure compensation is what makes TTL usable.
- Bouncing costs light. An illustrative white ceiling at normal room height costs around two stops, which means the flash works about four times as hard and recycles more slowly.
- Above your camera's sync speed a normal flash leaves a dark band across the frame. High-speed sync gets past it, at a steep cost in effective power.
Before you start
Learning to use an external flash properly is a medium-difficulty job that takes about an hour of deliberate practice in a room at home, and then a few outings before the decisions become automatic. Nothing here requires an expensive unit. Every technique in this walkthrough works on the cheapest flash with a tilting head, and several of them work better on a modest flash used well than on an expensive one used badly.
Here is what you want in front of you before you start, roughly in order of how much it matters:
- A flash with a head that tilts and swivels. Tilt lets you aim at the ceiling, swivel lets you aim at a wall to either side. A unit that only points forward can do almost nothing in this walkthrough, and that limitation matters far more than power or price.
- A camera you can put in manual mode. Flash work means setting the ambient exposure and the flash exposure separately, which is much harder when the camera keeps changing settings underneath you. Our manual mode walkthrough covers the habit if it is new.
- Fresh batteries and a spare set. Flash is the most battery-hungry thing you will ever bolt to a camera, and recycle time gets noticeably slower as cells drain. Nothing ends a session faster.
- A room with a white or near-white ceiling at ordinary height. This is your practice space. A coloured or very high ceiling will teach you the wrong lessons on day one.
- A subject that does not mind repetition. A person is ideal, since faces show the difference between hard and soft light immediately, but a bottle, a plant, or anything with a nose and a shadow side will do.
- Your camera’s sync speed, looked up rather than guessed. It is in the manual, it varies by body, and knowing it saves you from a dark band you cannot explain.
Set aside an hour, work the eight steps in order in that one room, and shoot the same frame at each stage so you can see what each change did. Tell the companion above what you can bounce off and how much of the room you want in the picture, and it will carry your bounce cost, your flash to ambient split, and your sync speed check through every step below.
What an external flash does that a built-in flash cannot
Before the steps, it helps to be clear about why the upgrade is worth making, because “more powerful” is the least interesting part of the answer. A built-in flash and an external flash both make light, but they differ in three ways that decide how a photograph looks.
The first is direction, and it is by far the most important. A built-in flash is fixed, pointing wherever the lens points. An external unit has a head that tilts up and swivels sideways, which means you can choose to light a ceiling, a wall, or a reflector instead of your subject, and let that surface do the lighting for you. Nothing else on the unit matters as much.
The second is size, in the optical sense. Soft light comes from a source that is large relative to the subject, and hard light with sharp shadow edges comes from a small one. A flash tube is tiny, so aimed directly it is always hard. Bounced off a ceiling, the effective source becomes several square feet of ceiling, and the same flash suddenly produces soft, wrapping light with gentle shadow edges.
The third is power and control. An external unit has more output to spend, which is what makes bouncing viable at all, since bounce throws most of the light away. It also gives you real control: manual power fractions, exposure compensation, and usually the ability to fire while sitting somewhere other than on the camera. A built-in flash offers a fraction of that at best.
There is a fourth, quieter benefit. Because an external unit sits higher above the lens, even used directly it casts its shadow lower and produces less of the red-eye effect that comes from light travelling almost exactly along the lens axis. That is a small win compared to the other three, but it is a free one.

Step 1: Mount the Flash and Confirm It Fires
Start with the mechanical connection, because a surprising share of “my flash is broken” problems are a flash that is not seated or not switched to the right mode. Slide the foot of the unit into the hot shoe on top of the camera until it stops, then lock it. Most units use either a lever or a knurled ring that tightens against the shoe, and both should be firm rather than forced. A flash that is only half inserted makes intermittent contact, which produces the maddening symptom of a unit that fires sometimes.
Then check the electrical relationship, which is the part people skip. The centre pin in the shoe is the simple fire signal, and it is all a flash needs to go off. The smaller surrounding contacts carry the conversation between camera and flash: metering data, power commands, zoom position, and mode. If your flash and camera are from the same system, all of those contacts line up and the automatic modes work. If you are using a generic or older unit, the centre pin may work while the rest does not, which means the flash fires but only in manual, and that is a perfectly usable arrangement as long as you expect it.
Now test. Switch the camera to manual mode, set an illustrative starting point of ISO 200, f/5.6, and 1/60 of a second, switch the flash on, wait for the ready light, and take a frame of anything. You are not looking for a good photograph. You are looking for evidence that the flash fired and that the whole frame received light. If it fired, the exposure will be obviously brighter than the same frame without it.
The watch out here is voltage on old units. Some vintage flashes send a high trigger voltage down the centre pin that modern electronic shoes were never designed to receive, and the result can be a damaged camera rather than a dead flash. If you have picked up an old unit second hand and cannot confirm its trigger voltage is safe, do not put it on a modern body without checking. It is the one place in this walkthrough where curiosity is genuinely expensive.
Step 2: Choose Between TTL and Manual Power
With the unit firing, decide who chooses the power, because everything else follows from that. There are two answers and they are tools for different situations rather than beginner and advanced settings.
TTL, which stands for through the lens, works like this: when you press the shutter, the flash fires a brief measuring burst before the exposure begins, the camera reads how much of that burst comes back through the lens, calculates how much light the scene needs, and tells the flash what to give. It all happens in a fraction of a second and you see none of it. The strength of TTL is adaptation. Walk closer to your subject, and the power drops automatically. Turn to someone further away, and it climbs. At an event, where you cannot stop to meter and the distances change every frame, TTL is the only sane choice.
Manual means you set a power fraction yourself: full power, half, a quarter, an eighth, and so on down the range. The flash delivers exactly that, identically, on every frame, until you change it. The strength of manual is consistency. Nothing in the scene can fool it, so a black jacket, a white wall, or a bright window will not send your exposure wandering the way they can with a metered system. When the camera, the subject, and the light are all staying put, manual gives you a set of frames that match each other perfectly, which is worth a great deal when you come to edit them.
The rule of thumb worth internalising is about movement. If the distance between the flash and the subject keeps changing, use TTL. If it is fixed, use manual. Portraits on a stand, product work on a table, and anything repeatable belongs in manual, and our product photography field note leans on exactly that consistency.
The watch out is treating TTL as a solved problem. It is a metering system, and like any metering system it is guessing at what you meant, so it will regularly give you a subject brighter or darker than you wanted. That is not a fault to work around, it is the reason the next step exists.
Step 3: Dial In Flash Exposure Compensation
Flash exposure compensation is the most useful control on the unit and the one most new owners never touch. It adjusts the power TTL selected, up or down, in small increments, and, importantly, it changes only the flash. The ambient exposure your shutter, aperture, and ISO are producing stays exactly where you set it. That separation is the whole point.
Use it as a feedback loop rather than a setting. Take a frame in TTL, look at it, and ask one question: is the subject too bright, too dark, or right. If they are too bright, dial the compensation down a third or a half of a stop and shoot again. If they are too dark, dial it up. Two or three iterations gets you there, and the value you land on tends to hold for that whole situation until you move somewhere different.
Most people discover they live at a small negative value, an illustrative one third to one full stop down, more often than at zero. There is a good reason for that. TTL is trying to expose the subject correctly using flash as though the flash were the only light, but a great deal of the time you want the flash to be a supporting light that fills the shadows while the room provides the mood. Pulling the flash back is how you get a photograph that looks lit rather than flashed.
There is a second thing to keep straight. Your camera also has a regular exposure compensation dial, and in most modes that one moves the ambient exposure, not the flash. Two separate controls, two separate jobs. If your background is too dark, that is an ambient problem and the flash compensation will not touch it. If your subject is too bright while the background is fine, that is a flash problem and the exposure compensation dial is the wrong knob.
The watch out is the compensation you forgot. Flash exposure compensation is sticky: it stays where you left it after you switch the camera off, walk outside, and start a completely different scene. Checking it is worth building into your habits alongside checking ISO, and our camera settings reference is a good place to keep the rest of those habits.
Step 4: Bounce the Light Off a Ceiling or Wall
This is the step that changes everything, and if you only take one thing from this field note, take this one. Instead of pointing the flash at your subject, tilt the head up toward the ceiling. The burst travels up, spreads across a large area of ceiling, and that whole illuminated patch becomes your light source, pouring down onto the subject from above. A tiny hard source has become a large soft one, and the difference is not subtle.
Watch what happens to the shadows. Aimed forward, the flash puts a hard-edged black shadow on the wall directly behind your subject, because the light is coming from almost exactly where the camera is. Bounced, the shadow softens, moves down and behind, and often leaves the frame altogether. Faces stop looking flat, because light arriving from above creates a gentle gradient down the face rather than an even wash.
Swivelling is the other half of the technique. A ceiling bounce lights from directly above, which is good but can leave eye sockets a little dark. Swivel the head toward a wall to one side, or behind you at an angle, and the light arrives from that side instead, giving the face shape and direction. Bouncing off a wall behind and to your left, for instance, produces light that comes over your shoulder from the left, which is close to how a large window behaves.
The cost is light, and it is a real cost. Bounced light travels further and most of it scatters where you do not need it. As illustrative typical figures, a white ceiling at ordinary room height costs around two stops, which means the flash has to work about four times as hard as it would aimed straight ahead. A white wall to one side often costs about two and a half stops. A high or dark ceiling can cost four stops or more, at which point the flash simply cannot keep up.
The watch out has two parts. First, you cannot bounce off everything: a coloured ceiling tints the light it reflects, so a warm wooden ceiling gives your subject an orange cast that fights the rest of the room, and our white balance field note explains why that is harder to fix than it looks. Second, budget for the loss. Raise ISO or open the aperture to pay for the bounce rather than pushing the flash to full power, where it recycles slowly and eats batteries.

Step 5: Balance the Flash Against the Ambient Light
Now the part that separates people who own a flash from people who can use one. Any flash photograph is two exposures happening in the same frame: the light already in the room, and the burst from the flash. They are controlled by different things, and once you internalise which control does which, mixing them stops being guesswork.
Here is the division. Shutter speed controls the ambient exposure and has almost no effect on the flash. The flash burst is over in a tiny fraction of a second, so whether your shutter stays open for a sixtieth or a fifteenth, the flash contributes the same amount of light. The ambient, though, keeps accumulating for the whole time the shutter is open, so halving your shutter speed halves the room’s contribution. Meanwhile, aperture and ISO affect both, and flash power affects only the flash. Our shutter speed field note and aperture field note cover the underlying controls in more depth.
So the working method is: set the ambient first, then add flash. Turn the flash off. Set ISO, aperture, and shutter speed so the room looks the way you want it in the picture, which usually means darker than a correct exposure, an illustrative one to two stops under, so it reads as atmosphere rather than as the main light. Then switch the flash on and let it, in TTL or manual, bring the subject up to where you want them.
That single move fixes the classic flash failure where the subject is bright and the background is pitch black. The background is black because the shutter was too fast to record any of the room, not because the flash did anything wrong. Slow the shutter to a sixtieth or a thirtieth, brace yourself properly, and the room reappears behind your subject.
The watch out is subject movement at slow shutter speeds. When the shutter is open long enough for the ambient to register, a moving subject can record a soft ambient blur on top of the sharp flash-frozen image, which looks like ghosting. Sometimes that is a lovely effect and photographers create it deliberately. When it is not what you want, raise ISO so you can use a faster shutter, or accept a darker background. Rear curtain sync, which fires the flash at the end of the exposure rather than the start, at least makes any motion trail fall behind the subject rather than in front of them, which reads far more naturally.
Step 6: Respect the Sync Speed, Then Reach Past It
There is a ceiling on how fast your shutter can go while a normal flash is firing, and hitting it produces a symptom that looks like a hardware fault. Understanding it takes two minutes and saves a lot of confusion.
Most cameras use a shutter made of two curtains that travel across the sensor. At slower speeds the first curtain opens fully, the sensor sits entirely exposed for a moment, and then the second curtain closes. At faster speeds there is not time for that, so the second curtain starts closing before the first has finished opening, and what actually travels across the sensor is a moving slit. The exposure is still correct, because every part of the sensor gets the same slit passing over it, but at no single instant is the whole sensor uncovered.
A normal flash fires one very short burst. If the whole sensor is open at that instant, the entire frame receives it. If only a slit is open, only the strip under the slit receives it, and the rest of the frame comes back as a dark band. The fastest shutter speed at which the sensor is fully open at once is your sync speed. It is commonly somewhere around a two hundredth of a second on modern bodies, but the exact number belongs to your camera and is printed in its manual, so look it up rather than assuming.
High-speed sync is the escape hatch. Instead of one burst, the flash emits a rapid stream of small pulses for the entire time the slit is crossing the sensor, so every strip gets lit as it passes. That lets you shoot at a thousandth of a second or faster with flash, which matters outdoors when you want a wide aperture in bright sun and cannot slow down.
The watch out is what high-speed sync costs. Spreading the same stored energy across the whole shutter travel instead of releasing it in one instant means far less of it lands on your subject at any moment, so effective output falls sharply. In practice you move the flash closer, you open the aperture, your batteries drain quickly, and recycle times stretch. High-speed sync is a real tool, not a free upgrade, and if your shutter is above the sync speed only because you are shooting a static scene, a smaller aperture or a lower ISO is the cheaper fix.
Step 7: Get the Flash Off the Camera
Bounce moves the light away from the lens axis by using a ceiling as a middleman. Taking the flash off the camera removes the middleman and lets you put the light exactly where you want it, which is the largest single lever you have over how a photograph feels.
You need two things: a way to hold the flash, and a way to fire it. Holding it can be as simple as a friend, a table, or a small stand. Firing it is the part that needs kit, and there are three approaches. A dedicated cable runs from the hot shoe to the flash and keeps all the automatic functions, but it tethers you to a few feet of cord. Optical triggering has a flash on or near the camera set off the remote unit by light, which is free if your gear supports it and unreliable in bright sun or at distance. Radio triggering puts a small transmitter in the hot shoe and a receiver under the flash, works through walls and across a field, and is what most people settle on.
Then choose direction, which is the whole reason you did this. Light from roughly forty five degrees to one side and slightly above the subject is the classic portrait position, and it gives a face shape and a defined shadow side. Move further round to ninety degrees and you get dramatic side light that rakes across texture. Put the flash behind the subject aimed back toward the camera and you get a rim of light that separates them from the background. Our portrait field note works through what each of those does to a face.
Distance is the other half. Light falls off with the square of distance, so moving the flash twice as far away leaves you a quarter of the light, which is two stops. That sounds like a nuisance and it is actually a tool: a flash close to the subject falls off quickly, so the background goes dark and the subject pops, while a flash further away lights subject and background more evenly. You can dim a background by moving the light closer, without touching a single camera setting.
The watch out is that off camera work is a system, not a purchase. A single flash on a stand in a doorway will teach you more about light than a second unit will, so add the stand and the trigger, learn what one light does from six positions, and only then think about a second one.
Step 8: Diffuse and Shape the Light
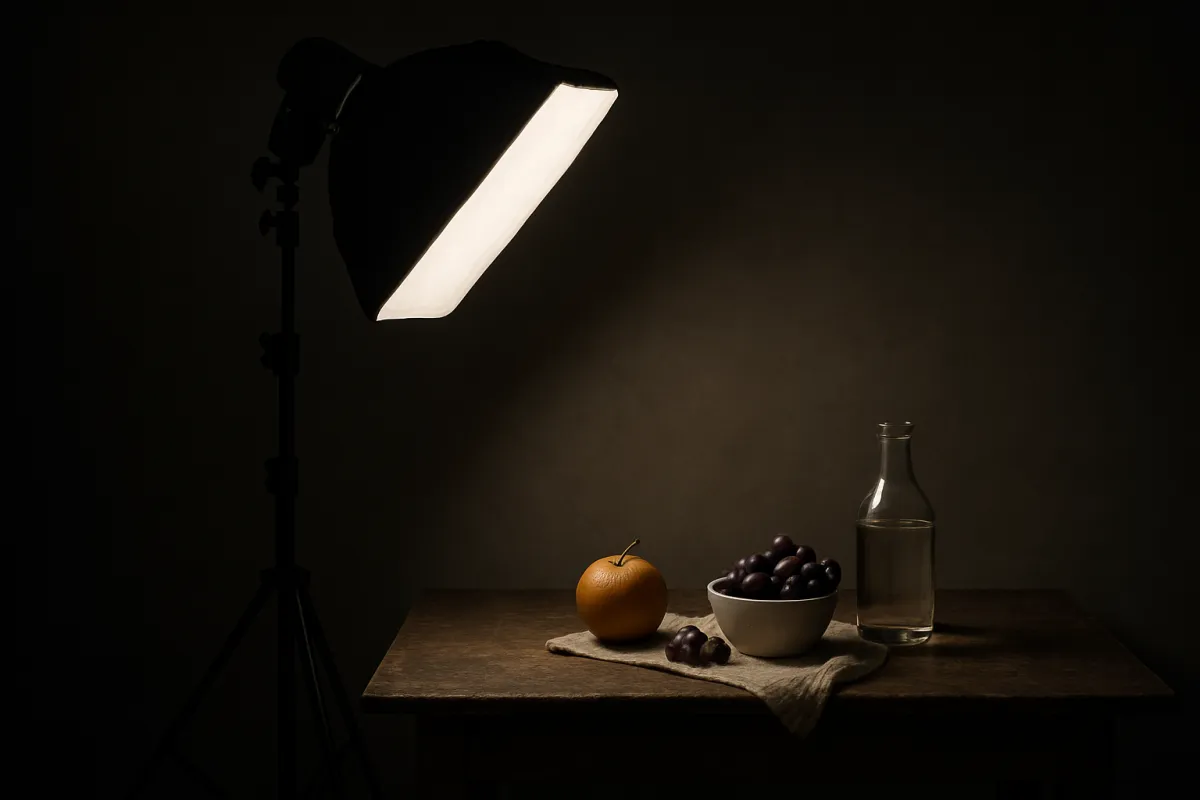
The last step is the accessory step, and it is worth doing last precisely because most of the improvement people credit to modifiers actually comes from the four steps before them. A modifier makes the source larger relative to the subject, which softens shadow edges, and it costs light in proportion to how much it spreads that light around.
Start with what does not work as well as advertised. The small plastic dome that clips over the flash head is genuinely useful in a small room with light-coloured walls, because it scatters light in every direction and lets the room bounce it back from all sides. In a large dark space, where there is nothing nearby to reflect off, it mostly throws light away and costs you around a stop for very little softening. Judge it by the room, not by the accessory.
The bounce card is better value than it looks. Many flash heads have a small white card that pulls out of the top; with the head tilted up, it kicks a portion of the light forward toward the subject while the rest goes to the ceiling. That forward portion puts a small catchlight in the eyes and lifts shadows under the brow and chin, which is exactly what a pure ceiling bounce leaves dark. A folded index card and an elastic band does the same job.
The real modifiers are the large ones: a shoot-through umbrella, a small softbox that mounts on the flash head, or a reflective umbrella that bounces the light back at the subject. These work because they genuinely enlarge the source, and as illustrative typical figures a shoot-through umbrella used close costs about a stop and a half. They all need the flash off camera or on a bracket, which is why this step follows the last one.
Gels belong here too. A coloured translucent sheet over the head shifts the flash’s colour, and the common use is correction rather than effect: put a warm gel on the flash in a room lit by warm bulbs and the flash matches the room, so you can set one white balance for the whole frame instead of fighting two colours of light. That is a small piece of plastic solving a problem that is genuinely painful to fix afterward.
The watch out is buying modifiers before technique. A photographer who bounces well with a bare flash beats one who fires a softbox straight at a face from six feet away. Master direction first, then buy the thing that makes it softer, and price the whole kit in the upgrade budget planner before you commit.
Guide numbers and power ratios, without the marketing figures
Two numbers get quoted constantly in flash discussions and both are worth understanding conceptually rather than memorising, because the specific values depend entirely on the unit in front of you.
The first is the guide number, which is a way of expressing how much light a flash produces. It works as a simple relationship: the guide number is roughly the subject distance multiplied by the f-number needed to expose it correctly, at a stated ISO and a stated zoom position on the flash head. Rearranged, it tells you the aperture for a given distance, or the distance for a given aperture. The reason to treat published guide numbers sceptically is that they are quoted at whatever ISO and head zoom position makes the number look best, so two units with the same claimed figure can behave quite differently. Use the relationship to understand the trade, and use your own test frames to learn your unit.
The second is the power ratio, and this one is genuinely useful. Manual flash power is expressed as fractions: full, one half, one quarter, one eighth, and onward. Each step down that ladder halves the light, which is exactly one stop. So moving from full power to one eighth is three stops less light, and if you want to keep the same exposure you would open the aperture three stops, or raise ISO three stops, or move the flash closer.
Combine that with the distance relationship and you have a complete mental model. Light falls off with the square of distance, so doubling the flash to subject distance costs two stops, and halving it gains two. That is why a bounce off a ceiling costs so much: the light travels up and back down, so the effective distance is far longer than the direct path, and the ceiling absorbs and scatters a share of it besides.
The practical payoff is that you can predict rather than guess. If a frame is one stop dark at one quarter power, go to one half. If you move from three feet to six feet from your subject, expect to need four times the power. None of this needs a meter, and all of it makes the flash feel like a control rather than a lottery.
Recycle time, flash duration, and the batteries that end a shoot
Two timing characteristics decide whether a flash keeps up with you, and neither appears in the headline specification most people shop on.
Recycle time is how long the unit takes after firing before it can fire again at the same power. It scales with how much energy you just spent, so a full power burst takes the longest and a low power burst can be nearly instant. This is the practical reason to avoid working near full power: at full power you may be waiting several seconds between frames, which is fatal at an event where the moment does not wait. Raising ISO one stop halves the power the flash needs, which roughly halves the recycle time, and that trade is almost always worth making.
Flash duration is how long the burst itself lasts, and it works the opposite way round to what people expect. At low power the unit dumps its energy quickly, so the burst is extremely brief, brief enough to freeze motion that your shutter could never catch. At full power the burst stretches out considerably. If you are trying to freeze a splash or a fast gesture with flash in a dark room, low power is your friend, and the freezing is being done by the flash duration rather than by the shutter speed.
Batteries tie both together. Flash is the hungriest accessory in photography, and as cells drain the recycle time stretches long before the unit stops working, so the symptom you notice is a flash that has become slow rather than one that has died. Rechargeable cells generally hold their voltage better under the heavy current a flash draws, which tends to keep recycle times shorter for longer. Carry a second set and swap them when the rhythm of the shoot starts to drag.
The habit worth building is to watch the ready light rather than trusting it. Many units light up as ready before they are fully charged, so a frame fired the instant the light appears can come back underexposed. If frames are randomly dark at a fast shooting pace, that is almost always what is happening, and the fix is either a fraction more patience or a lower power setting.
Light you give up to soften a flash, in stops
Illustrative cost of each way of enlarging or redirecting the source, compared with a bare flash aimed straight at the subject. Each stop means the flash must work twice as hard for the same brightness. These are typical working figures for ordinary rooms, not measured tests.
Every stop of softness is a stop the flash has to buy back with power, ISO, or aperture. A two stop ceiling bounce makes the unit work about four times as hard, which is why recycle time and battery life get worse the moment you start bouncing. Run your own room through the companion above.
A worked example: one dim reception room, start to finish
Theory into practice. Here is a single realistic scene run through all eight steps with illustrative settings, so the sequence is concrete. The scene is an evening gathering in a room with warm overhead bulbs, a white ceiling at ordinary height, and people standing and talking. Your first automatic frame came back with a bright, flat face, a hard shadow on the wall behind, and a background that went completely black.
Mount and confirm. The flash is seated and locked, the ready light is on, and a test frame shows the whole frame lit, so the connection is good. Choose the mode. People are moving and the distance between you and each subject changes constantly, so this is a TTL situation rather than a manual one. Set the compensation. A first frame comes back with the subject slightly too bright, so you pull flash exposure compensation down a third of a stop and it settles.
Bounce. You tilt the head up and swivel it slightly behind your left shoulder so the light arrives from above and to the left rather than straight on. The hard wall shadow disappears immediately. That bounce costs an illustrative two stops, so you raise ISO from 200 to 800 to buy it back, which is exactly two stops and keeps the flash working at a comfortable power with a quick recycle.
Balance the ambient. With the flash momentarily off, you set f/4 and 1/60 of a second at ISO 800 and find the room reads about right, dim and warm but clearly present. Switch the flash back on and it now lights the faces on top of a room that exists, roughly an even split between the two sources. Check the sync speed. Your body syncs at an illustrative 1/200, so 1/60 is comfortably inside it and no dark band appears.
Consider off camera. For a moving crowd you keep the flash on the hot shoe, since a stand cannot follow people around, and note that the two portraits you want later will be worth doing with the unit on a stand at forty five degrees. Shape it. You pull out the small bounce card so a little light comes forward and puts a catchlight in the eyes, and you clip a warm gel over the head so the flash matches the warm bulbs and the whole frame can share one white balance.
The result: f/4, 1/60, ISO 800, TTL at minus one third, bounced off the ceiling behind your left shoulder, gelled warm, with the bounce card up. Faces are softly lit from above and slightly to one side, the room glows behind them, there is no shadow stamped on the wall, and the pictures look like the evening actually looked. Run your own room through the companion above and it will do the same arithmetic on your ceiling and your ISO.
Where a good flash frame comes from
Illustrative share of the result that each group of decisions contributes to a flash photograph that does not look like a flash photograph. The three parts sum to the whole outcome, so no single control does it alone.
Most of what makes a flash photograph look natural is decided before you touch a power setting: where the light comes from, and how much of the room you let into the frame. Modifiers refine a frame those two already made good. Adjust the split to your own shooting with the companion above.
Reading a flash-lit frame: the four zones to check
Reviewing a flash frame is a skill of its own, and it goes faster if you check four zones in the same order every time rather than reacting to a general sense that something looks off.
The first zone is the subject’s bright side. Is it correctly exposed, blown out, or dark? A blown highlight on a forehead or a cheek is the most common flash failure, it cannot be recovered afterward, and the fix is flash exposure compensation down or a step down in manual power. Check it on the histogram and with the highlight warning rather than by eye on a small screen, because a bright screen in a dim room lies to you.
The second zone is the shadow side of the subject. Is there any shape at all, or is the face evenly lit from edge to edge? Flat, shapeless light usually means the source is too close to the lens axis, which means you either did not bounce or you bounced straight up in a room with nothing to the side. Swivel the head, or move the light.
The third zone is the background. Is it black, or does the room read? A black background is an ambient problem, not a flash one, so the fix is a slower shutter or a higher ISO rather than more power. If instead the background is bright and the subject is dark, the flash is not reaching, which usually means it is too far away or the bounce is costing more than the unit can pay.
The fourth zone is colour. Is the subject a different colour from the room? That is the signature of a flash of one colour temperature mixing with bulbs of another, or of bouncing off a coloured surface. Gel the flash to match the room, or move the bounce to a neutral surface. The white balance field note covers what to do with the file afterward when you could not fix it in the room.
Common mistakes to avoid
Most disappointing flash photographs fail in one of a handful of predictable ways, and recognising them in advance is the shortest route to better light. These are the pitfalls that come up again and again:
- Firing the flash straight at the subject. Direct on-camera flash produces flat faces, hard shadows stamped on the wall behind, and the party-snapshot look. Tilting the head up is a two second fix that solves most of it.
- Bouncing off a coloured ceiling. Wood, beige paint, and anything with a tint hands the colour back to your subject, and the resulting cast fights whatever white balance the rest of the room needs. Bounce off something neutral, or gel and correct deliberately.
- Blaming the flash for a black background. The background is dark because the shutter was too fast to record the room, not because the flash misfired. Slow the shutter or raise ISO, and the room comes back.
- Ignoring recycle time. Working near full power means waiting seconds between frames and getting randomly underexposed shots when you fire before the unit is truly ready. Raise ISO so the flash works at a lower power and keeps up with you.
- Leaving flash exposure compensation where you last set it. It survives switching the camera off, so yesterday’s minus one stop quietly ruins today’s first twenty frames. Check it with your ISO.
- Buying a modifier instead of learning direction. A large softbox aimed at a face from the camera position is still light coming from the camera position. Where the light comes from matters more than what is bolted to the front of it.
Troubleshooting the flash problems that ruin a shoot
Real rooms do not cooperate, so here is how to handle the situations that fight you. What if a dark band appears across part of every frame? That is the sync speed, and it means your shutter is faster than the speed at which the sensor is fully uncovered. Slow the shutter until the band disappears, or switch on high-speed sync and accept the power penalty. If the band appears only sometimes, check whether a mode on the camera is quietly raising the shutter speed for you.
What if the ceiling is too high, too dark, or the wrong colour to bounce off? Then bounce off something else. A wall behind you or to one side works well and gives directional light into the bargain. If there is nothing at all, a bounce card or a small reflector held to one side gives you a small usable source, and if the space is genuinely a black box, the honest answer is to take the flash off camera and bring your own surface, or to shoot the scene as a low-light frame instead. Our low-light field note covers that fallback in detail.
What if the subject is sharp but has a soft ghost around them? That is ambient blur layered over the flash-frozen image, which happens when the shutter is open long enough for the room to register while the subject is moving. Raise ISO so you can use a faster shutter, accept a darker background, or switch to rear curtain sync so the trail at least falls behind the movement rather than ahead of it.
What if flash is not allowed, at a ceremony, a performance, or a museum? Then the flash goes in the bag and every other tool comes out: the widest aperture you own, a high ISO, and a shutter just fast enough to stay sharp. Learning when not to use a flash is part of using one, and a bag that lets you stow the unit quickly matters more than you would expect, which our camera bag walkthrough covers.
What if TTL gives a different exposure on nearly identical frames? Something in the scene is moving the meter, usually a large bright or dark area entering and leaving the frame, or a reflective surface bouncing the measuring burst straight back. Switch to manual power for that setup, or lock the exposure, and the frames stop wandering.
Where an external flash fits in your gear budget
A flash competes for money with lenses, bodies, and everything else, so it helps to be honest about where it belongs in the queue. The short version: a flash is usually a better buy than a new body and usually a worse buy than your first upgrade lens, and it is one of the few purchases whose value comes almost entirely from technique rather than specification.
The reason it sits high is that light is the ingredient nothing else replaces. A better sensor gives you a cleaner file of badly lit subject; a faster lens gives you a shallower, brighter version of the same flat light. A flash lets you decide what the light does, and that is a different category of improvement. The reason it does not sit at the very top is that it only helps in situations where you are allowed and willing to add light, and plenty of photographers spend years happily working in whatever light exists.
When you do buy, the features that matter are the ones this walkthrough leaned on: a head that tilts and swivels, working automatic metering with your camera if you shoot events, manual power in fine increments if you shoot setups, and reasonable recycle time. Sheer maximum output matters less than people think, because you should rarely be near full power anyway. Sync features and off camera triggering matter if you plan to grow into a stand and a trigger.
Budget for the system, not the unit. A flash on its own is a flash on a camera; a flash with a trigger, a stand, and an umbrella is a lighting kit, and the accessories often total a meaningful share of the flash itself. Price the whole thing at once in the upgrade budget planner so you are not surprised halfway through, and remember that a stand and a trigger will teach you more than a second flash will.
Your external flash checklist
Save this and run down it before the next time you put a flash on the camera:
- Seat and lock the flash properly in the hot shoe, then fire one test frame to confirm it is talking to the camera.
- Check flash exposure compensation before anything else, because it survived from last time you used the unit.
- Pick TTL when the flash to subject distance keeps changing, and manual when the setup holds still.
- Tilt the head up or swivel it to a wall before you take a single frame aimed straight ahead.
- Confirm the bounce surface is bright and neutral, and expect an illustrative two stop cost from a white ceiling at room height.
- Raise ISO to pay for the bounce rather than pushing the unit to full power, which protects your recycle time.
- Set the ambient exposure first with the flash off, aiming for a room that reads roughly one to two stops under, then add flash.
- Keep the shutter at or below your camera’s sync speed unless you have deliberately switched on high-speed sync.
- Pull out the bounce card, or clip a warm gel on, when the room’s bulbs and the flash disagree about colour.
- Review each frame in four zones: the subject’s bright side, the shadow side, the background, and the colour match.
- Carry a spare set of batteries and swap them when recycle time starts to drag rather than when the unit dies.
The bottom line
An external flash is not a brightness button, and the frames that make people give up on flash are almost all the same frame: a small hard source fired straight down the lens axis at high power. Everything good about the tool comes from refusing to do that. Tilt the head so a ceiling or a wall becomes the real source and the light arrives broad and from above. Set the room’s exposure first with the shutter, which is the control the flash cannot touch, then let the flash bring the subject up on top of it, so the background stays part of the picture instead of falling into black. Let TTL do the work when distances keep changing, take manual when they do not, and treat flash exposure compensation as a feedback loop rather than a setting. Stay under the sync speed unless you genuinely need high-speed sync and can afford what it takes out of your power and your batteries. Then, when bounce has stopped being enough, put the unit on a stand at forty five degrees and discover that direction is the whole game. Work the eight steps in order in one room with a white ceiling, compare the frames, and the difference will make the case better than any specification ever could. Price the stand, the trigger, and the umbrella together in the upgrade budget planner before the kit grows past the plan.
This field note teaches a lighting technique rather than a product, which is why no unit, brand, or model appears anywhere in it: the steps hold on any flash with a head that tilts. Every stop, ISO, aperture, shutter speed, and power ratio quoted above is an illustrative starting point drawn from standard photographic practice, not a measurement of any particular flash, camera, or room, and your own results will shift with ceiling height, wall colour, room size, and the unit in your hand. Sync speeds and feature names differ between camera systems, so confirm yours in your camera’s own manual rather than taking a figure here as fact, and let the frames on your screen, not any writer’s recipe, settle where you end up.
Frequently asked questions
Do I need an external flash if my camera has a built-in one?
The two are not really the same tool. A built-in flash fires from a tiny surface a couple of inches above the lens and can only point one direction, straight at whatever you are photographing, which is the single least flattering direction light can come from. An external flash mounts higher, is far more powerful, and above all has a head that tilts and swivels, so you can send the light at a ceiling or a wall and let the room hand it back to your subject as a broad, soft source. That one ability, redirecting the light rather than blasting it forward, is the reason external units exist, and it is why a photographer who understands bounce gets better results at low power than someone at full power aimed straight ahead.
Should I use TTL or manual flash?
TTL means the camera fires a brief measuring burst, reads how much of it comes back, and sets the flash power for you, which is fast and adapts frame to frame as you and your subject move. Manual means you choose a power fraction yourself and the flash gives you exactly that, every single frame, until you change it. Use TTL when the distance between you and the subject keeps changing and you cannot stop to meter, such as at an event or a party. Use manual when the setup is stable, when you want every frame to match, or when something in the scene keeps fooling the meter, like a black jacket or a bright white wall. Neither is more advanced than the other; they solve different problems.
What is flash exposure compensation and when should I use it?
Flash exposure compensation adjusts only the flash power that TTL chose, leaving the ambient exposure alone, which is what makes it so useful. If TTL keeps making your subject too bright, you dial it down; if the subject is coming back dark against a bright background, you dial it up. In practice most people find they sit at a small negative value more often than not, because TTL tends to expose flash as though it were the only light in the room when you often want it to be a supporting one. Change it in small increments, a third or a half stop at a time, look at the result, and adjust again. It is the fastest control on the unit and the one worth learning first.
Why do my flash photos have a hard shadow on the wall behind the subject?
That shadow is the signature of a small light source close to the lens axis, which is exactly what a flash aimed straight ahead is. Because the light comes from almost the same place as the camera, the shadow it casts falls directly behind the subject and lands on whatever surface is there. There are three fixes and you can combine them. Move the subject further from the wall, so the shadow falls away out of frame or softens with distance. Tilt the head and bounce the light off a ceiling or side wall, which spreads the source out and moves it away from the lens axis. Or take the flash off the camera entirely and hold it to one side, which pushes the shadow sideways and out of the picture.
What is flash sync speed and why does it matter?
Most cameras use a shutter made of two curtains, and above a certain speed the second curtain begins closing before the first has finished opening, so the sensor is never fully uncovered at any instant. A normal flash fires one very short burst, so if the sensor is only partly exposed when that burst happens, part of the frame gets light and part gets a dark band. The fastest shutter speed at which the sensor is entirely open at once is the sync speed, and it is commonly somewhere around one two hundredth of a second on modern cameras, though the exact figure is printed in your manual and varies by body. Below the sync speed everything works normally. Above it you need high-speed sync, or a dark band appears across your frame.
What is high-speed sync and what does it cost me?
High-speed sync changes what the flash does: instead of one bright burst it emits a rapid stream of smaller pulses for the whole time the shutter slit is travelling across the sensor, so every part of the frame receives light. That lets you shoot at shutter speeds well above the sync speed, which matters mostly outdoors when you want a wide aperture in bright sun. The cost is significant and worth understanding: spreading the output over the whole shutter travel rather than firing it in one instant means far less of it reaches your subject, so effective power drops sharply and the flash works much harder for each frame. The practical consequences are shorter battery life, longer recycle times, and needing the flash much closer to the subject than you would otherwise.
Can I bounce flash off any ceiling?
No, and this catches people out constantly. Bounce works by turning a surface into a large light source, so the surface has to be close enough, bright enough, and neutral enough to do that job. A white ceiling at ordinary room height is close to ideal. A high ceiling in a hall or church is often too far away, since the light has to travel up and back down and loses a great deal on the way. A dark ceiling absorbs most of what you send it. And a coloured ceiling, wood, beige, painted, tints everything it reflects, so a warm ceiling gives your subject a warm cast that then fights the white balance for the rest of the room. When the ceiling will not cooperate, bounce off a side wall, use a bounce card, or take the flash off camera.
Do I need to take the flash off the camera to get good results?
Not to get good results, but yes to get the best ones. Bounce already improves things enormously while the flash sits in the hot shoe, because the ceiling or wall becomes the real source and it is nowhere near the lens axis. Taking the unit off camera goes further: it lets you choose the direction of the light independently of where you are standing, which is the single biggest lever on how a photograph feels. Light from the side gives shape and texture, light from above and slightly to one side is the classic portrait position, and light from behind the subject separates them from the background. If bounce has stopped being enough, off camera is the next step, and a trigger plus a stand is all it takes to start.