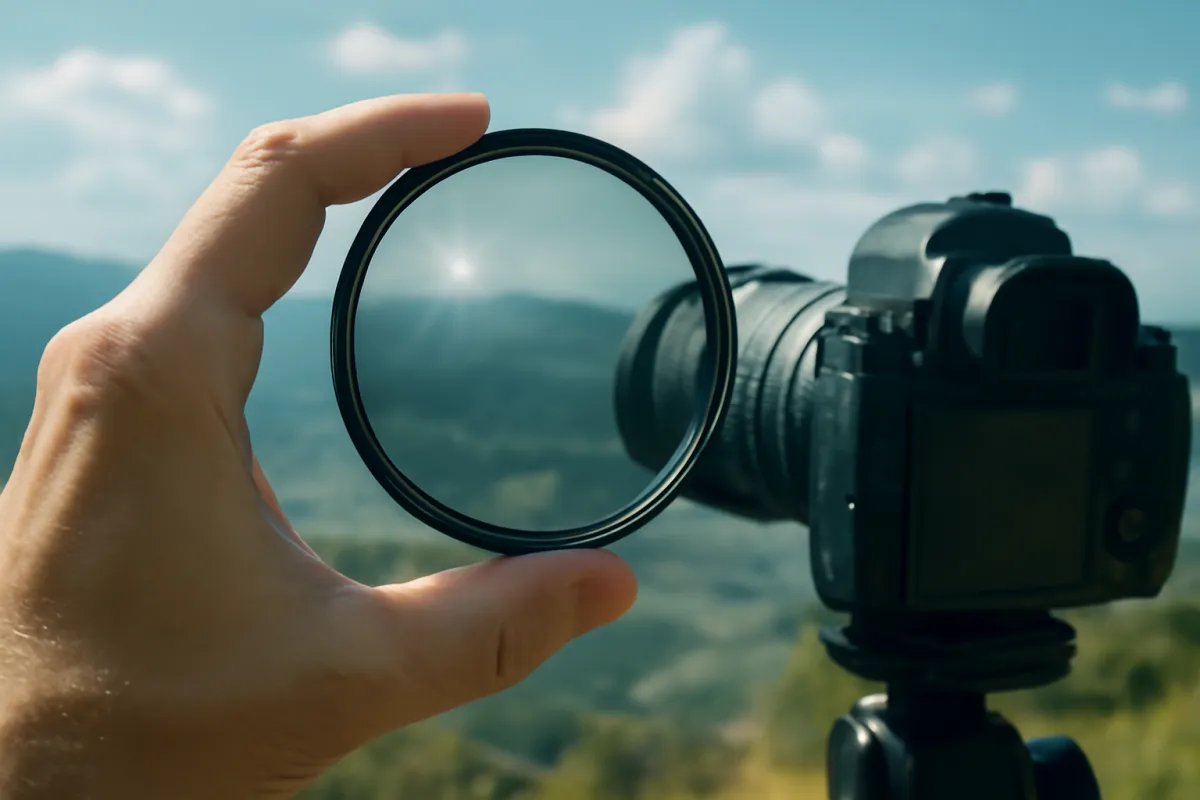
What's on this page
- What a filter actually does to light
- Neutral density: subtracting light without changing the colour
- The stops arithmetic, and the doubling table that runs it
- A worked conversion: from a metered reading to a chosen shutter speed
- How strong an ND you actually need
- Variable ND filters and the cross polarisation artefact
- Graduated ND against bracketing, now that raw files hold more
- What polarisation is, in one paragraph you can picture
- Why a polariser darkens a blue sky, and why the effect moves
- The wide angle uneven sky problem
- Reflections and glare: the one effect editing cannot copy
- The light cost of a polariser
- Why it is called a circular polariser
- UV filters: what they were for and what they do now
- The protection argument, taken seriously
- The image quality argument, taken just as seriously
- Close up filters and the cheap route to bigger magnification
- Diffusion filters and what they do to contrast
- The effect filters that rarely earn their place
- Screw in filters against square filter systems
- Thread sizes and the step up ring trick
- Stacking filters, and where vignetting comes from
- Filter quality: flatness, coatings and colour cast
- Flare and ghosting: the price of two more air to glass surfaces
- Building a filter kit in the order that pays
- Handling, storage and the stuck filter ring
- A field routine for using filters without slowing down
- The bottom line
Short answer: Lens filter effects split into two unrelated stories once you compare UV against CPL, because the two pieces of glass do unrelated jobs to the light. Camera filters in general are flat glass or resin that remove something from the light before it reaches the sensor. A neutral density (ND) filter subtracts light evenly so you can use a longer shutter or wider aperture, each stop doubling exposure time. A circular polariser (CPL) strips reflections from non metallic surfaces and darkens the sky about ninety degrees from the sun, while a UV filter is only a protective window on a digital camera with no optical effect on the file.
Almost every other decision in photography happens inside the camera, where you can undo it. Filters are the exception: they are a physical object bolted to the front of the optics, changing the light before the sensor ever gets a vote, and the choice you make in the field is the file you take home. That makes filters simultaneously the most old fashioned accessory in the bag and the only one that still does something an editor cannot reproduce afterwards.
This field note works through what each of the common filters actually does to light, in optical terms rather than as a list of use cases. It covers neutral density and the stops arithmetic that turns a filter strength into a shutter speed, variable ND and the cross shaped artefact it produces, graduated ND against exposure bracketing, circular polarisers and the two separate effects they have, UV filters and the honest protection argument, close up and diffusion filters, and then the mechanical side: thread sizes, step up rings, stacking and vignetting, and what separates cheap glass from good glass. Our shutter speed field note covers the exposure side in full and the landscape lens note covers the glass, so this article stays on the filters themselves.
Key takeaways
- A neutral density filter subtracts light evenly and buys you exactly one thing: a longer shutter speed or a wider aperture in light that would not otherwise allow it. Its strength is quoted in stops, and every stop doubles the exposure time.
- The conversion is pure doubling. Count how many times you must double your metered shutter speed to reach the one you want, and that count is the number of stops of ND you need.
- A polariser does two unrelated jobs: it removes reflections from non metallic surfaces, and it darkens the part of the sky that sits about ninety degrees from the sun. The sky effect changes as you turn, which is why wide lenses give uneven results.
- Only the polariser's reflection removal is genuinely impossible to recreate in editing. Sky darkening, graduated darkening and warmth are all edits; a reflection stripped from water is not.
- A UV filter does nothing optical on a digital camera. It is a protective window, and whether it earns its place is a trade between a cheaper repair and two extra air to glass surfaces in front of your best optics.
What a filter actually does to light
Every filter is a flat piece of glass or resin that sits in the light path and removes something from it. That is the whole category. What varies is which property of the light gets removed: a fixed fraction of every wavelength, one particular band of wavelengths, one orientation of vibration, or the spatial sharpness of the wavefront. Once you know which of those four a filter attacks, its behaviour stops being mysterious and becomes predictable.
There is also something every filter adds, whether or not you wanted it. Glass has a refractive index around 1.5, and at every boundary between air and glass a few percent of the light reflects instead of passing through. A bare uncoated surface bounces roughly four percent straight back, and a filter has two such surfaces, so an uncoated filter can lose around eight percent of the light before it does its intended job. That bounced light does not disappear. Some of it rattles between the filter and the front element and lands on the sensor as flare or ghosting.
Coatings exist entirely to fight that. A multicoated surface uses stacked thin layers whose thicknesses are tuned so reflections from the layer boundaries cancel each other, cutting surface reflection to a small fraction of a percent across most of the visible band. This is why coating quality, not the marketing name on the ring, is the specification that decides how much a filter costs you in contrast. It is also why a filter is worst exactly when the light is hardest: a bright source in or near the frame is what turns those small residual reflections into visible artefacts.
Neutral density: subtracting light without changing the colour
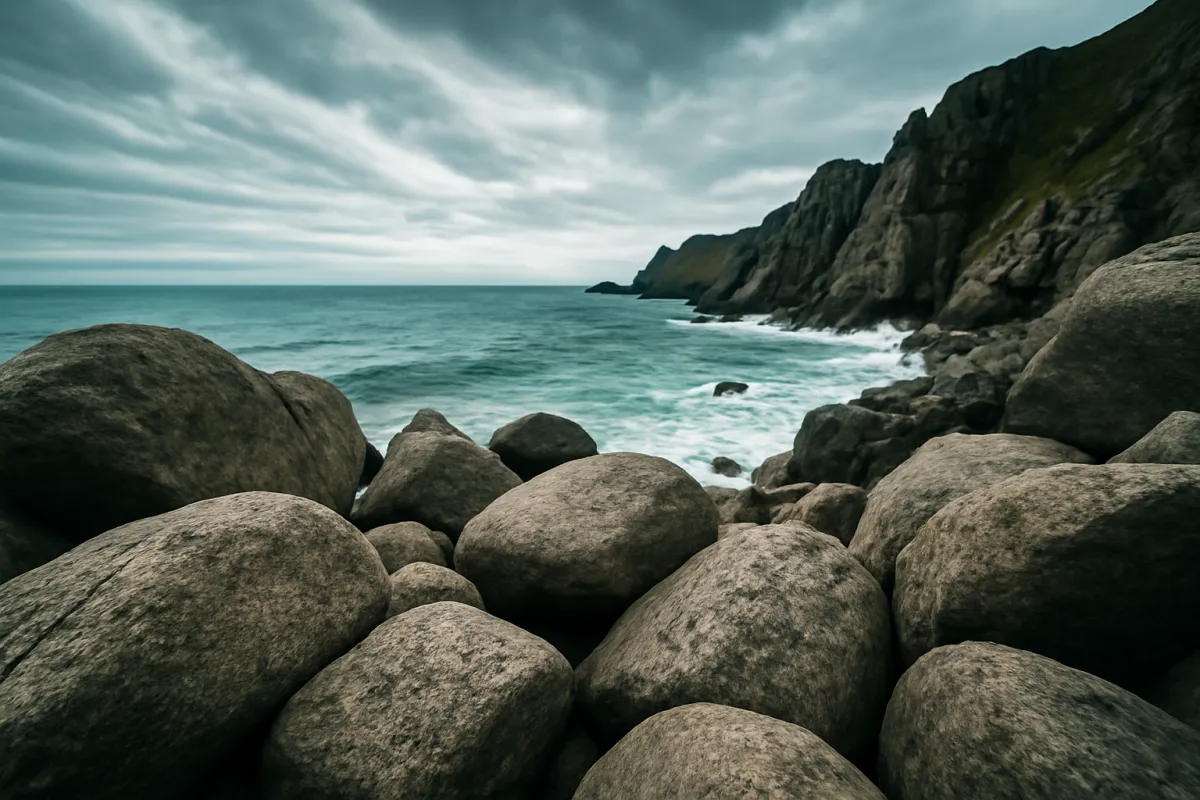
A neutral density filter is grey glass whose job description is to be boring. It reduces the amount of light reaching the sensor by a known factor, and the word neutral is a promise that it reduces red, green and blue by the same factor so the colour balance of the scene comes through untouched. That promise is the hard part of making one, and it is where cheap and expensive ND filters actually differ.
Why would you deliberately throw light away when so much of photography is spent chasing it? Because exposure is a three way constraint, and sometimes two of the three sides are pinned by the picture you want. If you want a two second shutter to smooth moving water, and you are already at your lowest ISO and a small enough aperture that diffraction is starting to soften the file, there is nothing left to give. The ND filter adds a fourth lever: it lets you set the shutter speed you want and then dial in whatever dimming makes that speed correct. Our exposure triangle note sets out why the other three run out.
The second use is the mirror image of the first. In bright light, a fast prime at its widest aperture may demand a shutter speed faster than the camera or the situation allows. Video makes this constant rather than occasional, because a video shutter is locked to roughly double the frame rate to keep motion looking natural, so a bright day and a wide aperture leave you with no legal setting at all. An ND is not a creative accessory there, it is the only way to shoot at all, which our video settings note works through in practice.
The stops arithmetic, and the doubling table that runs it
Filter strength is quoted three different ways and all three describe the same thing. The stop count is the useful one: a filter of N stops means the exposure time must be multiplied by two raised to the power N. The filter factor is the multiplier itself, which is why an ND8 blocks three stops rather than eight. The optical density figure is a logarithm base ten, where 0.3 is one stop, 0.9 is three, 1.8 is six and 3.0 is ten. Learn the stop column and you can translate the other two on sight.
The doubling table is the entire mathematics of neutral density, and it is worth having in your head rather than on your phone. One stop doubles, two stops multiply by four, three by eight, four by sixteen, five by thirty two, six by sixty four, seven by 128, eight by 256, nine by 512, ten by 1,024, and fifteen by 32,768. The numbers get large fast, which is the source of the most common surprise: the difference between a six stop and a ten stop filter is not a modest step, it is a factor of sixteen in exposure time.
To go the other way, from a shutter speed you want to a filter strength, divide the target time by the metered time and count the doublings in the result. A ratio of eight is three stops. A ratio of a thousand is ten. A ratio that lands between two entries means you need the next filter up plus a compensating stop somewhere else, which is normal and easily handled. The companion calculator at the top of the site will run that division and rounding for whatever numbers you type in.
What each ND strength does to one metered exposure
Starting from an illustrative reading of 1/250 of a second, with aperture and ISO held fixed. Bar length is the filter strength in stops as a share of the fifteen stop maximum shown; the figure at the right is the resulting shutter speed, computed as the metered time multiplied by two raised to the stop count.
The bars grow in a straight line and the shutter speeds explode, which is the whole point of counting in stops rather than in seconds. Notice that the jump from six stops to ten stops takes you from a quarter of a second to four seconds, a sixteen fold change, while the label only moved by four.
A worked conversion: from a metered reading to a chosen shutter speed
Take a real situation and run it end to end. You are at a small waterfall under bright overcast. You have set f/11 because you want the near rocks and the far trees both acceptably sharp, and ISO 100 because it is the base setting on the body. The meter reads 1/15 of a second, and a frame at that speed shows water that is neither frozen nor smooth, which is the least attractive of the three options.
You decide you want two seconds, long enough that the water reads as a continuous veil. The ratio between what you want and what you have is two divided by one fifteenth, which is thirty. Now count doublings: sixteen is four stops, thirty two is five stops, and thirty sits just under five. There is no five stop filter in most kits, so the practical choice is the six stop, which overshoots by roughly one stop.
Overshooting by a stop is easy to fix, and the fix is instructive. With the six stop filter fitted, the exposure time becomes one fifteenth multiplied by sixty four, which is about 4.3 seconds. That is one stop too long, so you need one stop more light from somewhere. Opening the aperture from f/11 to f/8 doubles the light and halves the time, landing you at roughly 2.1 seconds. You have your two second exposure, and you paid for it with a little depth of field, which the aperture field note explains how to price.
There is one practical wrinkle worth knowing before you try it. Beyond about six stops you generally cannot see through the filter well enough to focus or compose, so the working order is: compose, focus, switch to manual focus so nothing hunts, meter, then fit the filter and apply the correction from memory. Fitting the filter first and hoping the camera copes is the single most common reason a long exposure comes back out of focus.
How strong an ND you actually need
Photographers tend to buy the strongest filter available and then discover it lives in the bag. The strength you need is set by the gap between the light you are usually in and the shutter speed you usually want, and for most people that gap is smaller than the internet suggests. Three broad cases cover almost everything.
The first is moving water and cloud in soft light, at the edges of the day or under overcast. Metered speeds there are often somewhere between a thirtieth and a fifteenth of a second at a mid aperture, and targets are typically half a second to four seconds, which is a gap of about four to six stops. A six stop filter is the single most useful piece of neutral density most photographers own, precisely because it covers that band with one stop of headroom on either side.
The second case is midday sun, where metered speeds run into the hundredths of a second and any target measured in seconds is a gap of ten stops or more. That is what the ten stop filter exists for, and it is a specialist tool: it turns a sunlit street into an empty one and a choppy sea into fog, and it is nearly unusable for anything else. The third case is video and wide aperture stills in daylight, where the gap is usually two to four stops and constantly changing, which is the one situation where a variable ND genuinely earns its compromises.
Variable ND filters and the cross polarisation artefact
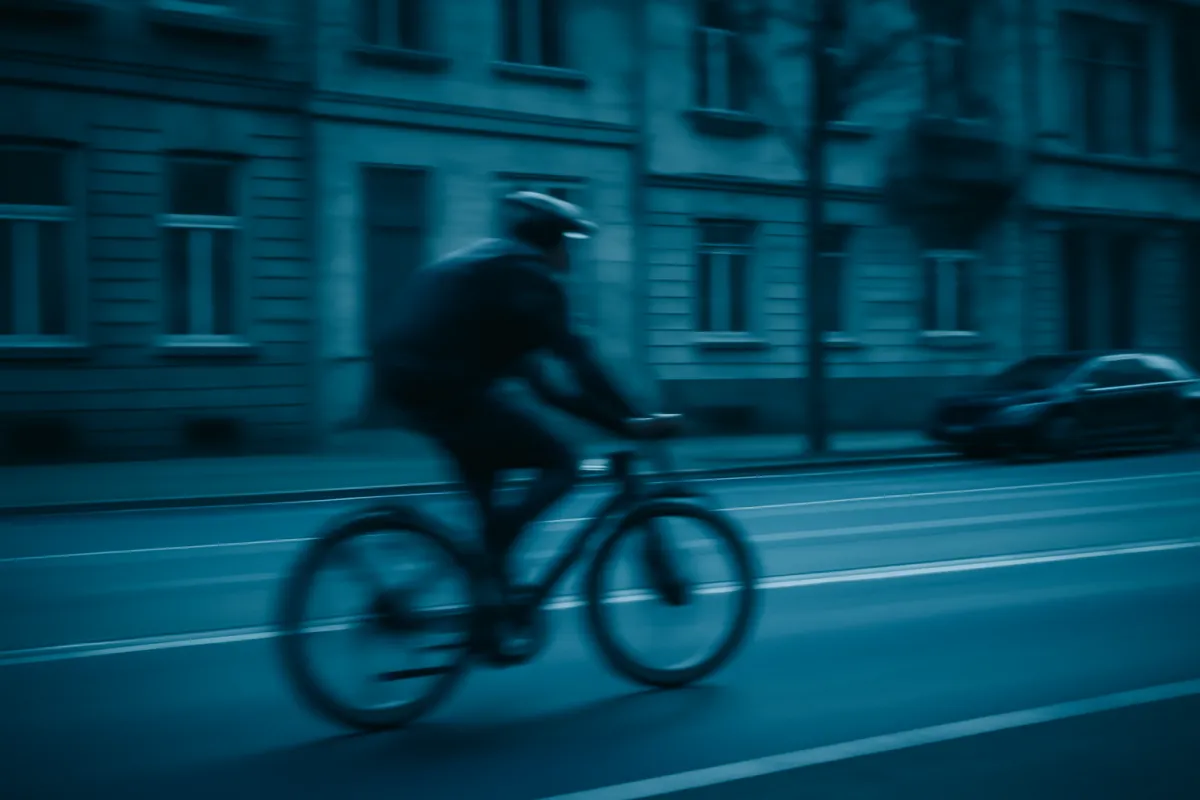
A variable ND looks like the obvious solution and is really a different device wearing the same name. Inside are two polarising layers, one fixed and one that turns with the outer ring. Light passing the first layer emerges vibrating in one orientation. The second layer passes only the component aligned with its own axis, and that component shrinks as the angle between the two axes grows. Turn the ring toward crossed and the light drops away smoothly, which is how one filter covers a range of strengths.
The mechanism explains every one of its problems. First, because polarisers are involved, the filter is also polarising your scene, so skies darken and reflections vanish whether or not you asked. Second, as the two axes approach ninety degrees the transmission becomes extremely sensitive to angle, and light reaching the corners of a wide frame passes through the layers at a measurably different angle than light reaching the centre. The result is the notorious dark cross or X band, uneven across the frame and impossible to correct convincingly afterwards.
Third, the colour neutrality tends to drift toward the strong end, giving casts that shift as you turn the ring, which is a nuisance when the shot is a video clip rather than a single frame. The working rules follow directly: stay away from the last third of the range, prefer a variable ND on lenses of about 35mm full frame equivalent and longer, treat the marked stop numbers as approximate, and keep a fixed ND for anything where the exposure has to be long. The convenience is real, and so is the ceiling.
Graduated ND against bracketing, now that raw files hold more
A graduated neutral density is clear at one end and grey at the other, with a transition in between. Its purpose is to darken a bright sky while leaving a darker foreground alone, so both land inside the range the sensor can record in one frame. The transition comes in hard, soft and reverse versions: hard for a flat horizon at sea, soft for a broken one with hills and trees, reverse for the specific case of a sun sitting on the horizon where the brightest band is at the middle rather than the top.
This is the filter category most changed by sensor progress. When digital cameras held only a handful of usable stops between clipped highlights and noisy shadows, a graduated filter was the only way to bring a sunset sky and a shaded foreground into one exposure. Current raw files commonly hold a good deal more range than that, enough that a single well judged exposure often has recoverable detail at both ends, and the difference can be pulled out at the desk. Our histogram field note explains how to read whether you actually have that detail or only hope you do.
Two situations still favour the filter. One is any scene where the bright part is genuinely beyond what the sensor can hold, which is common when the sun itself is in frame. The other is anything moving: bracketing three frames and blending them works beautifully on rock and works badly on branches, waves and pedestrians, because they moved between frames and the blend shows the seams. If your subject is still, bracket. If it is moving, or the range is extreme, use the glass.
What polarisation is, in one paragraph you can picture
Light is a wave, and the vibration that makes it a wave happens across the direction of travel, like a rope shaken side to side rather than pushed along. Ordinary light from the sun or a bulb is a jumble of waves vibrating in every orientation at once, which we call unpolarised. A polarising filter is, in effect, a grid of very fine parallel structures that passes the component of vibration aligned with one axis and absorbs the rest. Turn it and you choose which orientation survives.
The interesting part is that light does not always stay unpolarised. Two ordinary processes sort it. Bouncing off a smooth non metallic surface such as water, glass, wet leaves or painted metalwork preferentially reflects one orientation, so reflected light comes back partly polarised. And scattering off the molecules of the atmosphere does the same thing, which is why the blue of the sky is partly polarised and the polarisation is strongest at right angles to the incoming sunbeam.
That is the whole basis of the filter. Because reflections and skylight are partly polarised and the subject itself usually is not, a polariser can be turned to suppress the first two while leaving the third almost untouched. There is no editing operation that does this, because the selection is made physically, at the front of the lens, before the two kinds of light have been added together into a single pixel value.
Why a polariser darkens a blue sky, and why the effect moves
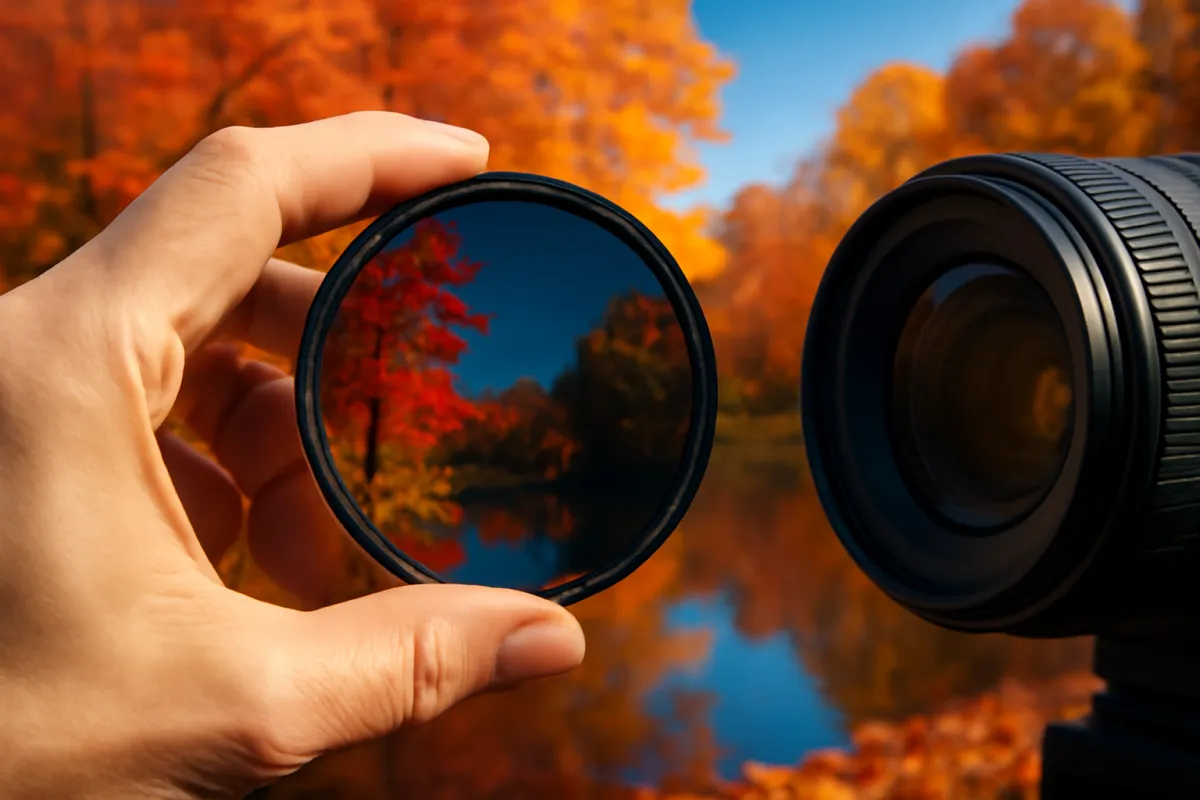
Sunlight entering the atmosphere scatters off air molecules, and that scattered light is what makes the sky blue rather than black. The scattering imposes a partial polarisation whose orientation and strength depend on the angle between the direction you are looking and the direction of the sun. The effect peaks when you are looking at ninety degrees to the sun and falls away to almost nothing when you look toward it or directly away from it.
That single fact predicts everything a polariser will do to your skies. With the sun off to your left or your right, the sky ahead of you sits in the strongly polarised band and a turn of the ring will visibly deepen it. With the sun behind you, sunset colours ahead of you barely change no matter how you rotate. Photographers who learn the ninety degree band stop being surprised by the filter and start positioning themselves relative to the sun on purpose, which is a habit our golden hour note leans on heavily.
It is worth being clear about what the deepening actually is. The filter is not adding blue. It is removing part of the whitish scattered light superimposed on the blue, so the remaining blue reads as darker and more saturated, and white clouds, which reflect light in a much less polarised way, stand out against it more strongly. That last part is the reason a polariser makes cumulus clouds look sculpted rather than flat, and it is a contrast effect rather than a colour effect.
The wide angle uneven sky problem
Here is where the ninety degree band becomes a practical hazard rather than a piece of trivia. A wide angle lens takes in a large slice of the sky at once. A 24mm lens on a full frame body covers about 74 degrees horizontally, and a 16mm covers around 97 degrees, which means one frame can easily contain both the strongly polarised part of the sky and the weakly polarised part. The filter treats them differently because they genuinely are different, and the result is a sky that is dark in one region and pale in another with a visible gradient between.
The dark patch is not a defect in the filter and no better filter fixes it. It is an accurate rendering of an uneven property of the actual sky, which our eyes simply do not see. Software correction is awkward because the gradient is curved and sits over the exact area you were trying to make look natural, so the practical answers are all about avoidance.
Three of them work. Use the polariser on lenses around 28mm full frame equivalent and longer, where the frame stays mostly inside one polarisation regime. When you must shoot wide, dial the filter back from its maximum so the difference between the strong and weak regions is smaller. Or compose so that the sky occupies a small band at the top rather than half the frame, which is often a better composition anyway. Our focal length field note has the angle of view figures if you want to check your own lenses against that threshold.
Reflections and glare: the one effect editing cannot copy
The sky trick gets the attention and the reflection control is the reason to own the filter. Light bouncing off water, wet rock, foliage, painted bodywork, or a shop window is partly polarised, which means a turn of the ring can suppress a large fraction of it. What is left behind is the light that came from underneath or behind that surface: the stones on a riverbed, the interior of the shop, the actual colour of a leaf rather than the white sheen sitting on it.
That last case is the underrated one. Foliage looks more saturated through a polariser not because the filter boosts green but because every leaf is a slightly glossy surface reflecting a thin white veil of skylight, and removing the veil reveals the pigment underneath. The same applies to wet rock, tree bark after rain, painted signage, and the shine on a person’s forehead outdoors. Autumn colour in particular changes dramatically, which is why the filter appears in our fall foliage note as the first thing to reach for.
The reason no editor can do this is worth stating plainly, because it is the strongest argument for carrying any filter at all. When reflected light and transmitted light arrive at the same pixel, the sensor records their sum. There is no record of how much of that value came from the reflection, so there is nothing to subtract. Local contrast and dehaze tools can make a reflective surface look moodier, but they cannot reveal what was underneath it, because that information was never captured.
The light cost of a polariser
A polariser is not free. It is passing roughly one orientation of vibration and absorbing the other, so even in a scene with no polarised light at all it removes a substantial share of what arrives. In typical use the loss commonly runs somewhere between one and two stops, and treating it as about one and a half stops is a reasonable working assumption until you measure your own. That is a real cost, and it is why a polariser should come off when the light gets low.
The cost interacts with the rest of your settings in the ordinary way. A stop and a half means either a shutter speed slowed to about a third of what it was, an aperture opened by a stop and a half, or an ISO raised by the same. In bright conditions where a polariser is most useful that is trivially absorbed. In the shade under a canopy, or in the last twenty minutes of usable evening light, it can be the difference between a sharp frame and a blurred one, which the sharp photos note treats as the main enemy.
There is one place the cost is actually an advantage. A polariser fitted to a lens in daylight functions as a mild variable neutral density of about one to two stops, which is occasionally exactly what you need for a slightly slower shutter without carrying anything extra. Just do not confuse that with an ND: the amount of dimming is not adjustable independently of the polarising effect, so you cannot get the light loss without also getting the sky and reflection changes.
Why it is called a circular polariser
The name misleads almost everyone, because it does not refer to the shape of the glass. Linear polarisers, the older kind, pass light vibrating along one straight axis. That is optically fine, but many cameras split off part of the incoming beam for autofocus or metering using a partially reflective surface, and such a surface responds differently to different orientations of vibration. Feed it linearly polarised light and the metering or focus system can be fed the wrong amount, producing exposure errors that shift as you turn the filter.
A circular polariser solves that with a second layer. The front layer is an ordinary linear polariser doing the actual work. Behind it sits a quarter wave retarder, a piece of birefringent material that delays one component of the wave relative to the other by a quarter of a cycle, which converts the linearly polarised light into circularly polarised light: still filtered, but no longer carrying a single fixed orientation for the beam splitter to react to.
Two practical consequences follow. The filter has a front and a back and only works correctly in one direction, which is why it is threaded and not reversible. And on a modern camera you should simply buy the circular version, since the price difference is small and linear polarisers exist mostly for older equipment and for specialised optical work. The filtering effect on your picture is identical either way; only the camera’s internal systems can tell the difference.
UV filters: what they were for and what they do now
Ultraviolet filters have a genuine history, and it is entirely a film history. Photographic emulsions were sensitive to ultraviolet light that human eyes do not register, and at altitude or over water, where ultraviolet is abundant, that extra exposure came back as a bluish haze that softened distant detail. A filter that absorbed ultraviolet and passed everything else cleaned it up. It was a real correction for a real problem.
Digital cameras removed the problem at the source. A sensor stack sits in front of the photosites and already contains filtering that blocks ultraviolet and infrared, because unfiltered response outside the visible band would wreck colour accuracy. By the time light reaches the pixels, the ultraviolet has already been dealt with by glass you cannot remove. Adding another ultraviolet absorbing layer in front of the lens therefore changes nothing you can see in the file.
This is why honest discussion of UV filters is not really about ultraviolet at all. What is being sold, and what people are actually buying, is a flat piece of clear glass in a threaded ring that sits in front of the front element. The optical question is whether that piece of glass costs you anything, and the practical question is whether it saves you anything, and those are two separate arguments that deserve to be made separately.
The protection argument, taken seriously
The case for a protective filter is strongest where the environment is hostile in a continuous, low grade way. Sea spray carries salt that etches coatings. Beach and desert work puts abrasive grit onto the front element, and the act of wiping grit off is itself what does the damage. Rain, sleet and blowing snow mean repeated cleaning cycles, and every cleaning cycle is a small amount of wear on a coating designed to last a long time under gentle treatment. A filter takes all of that and can be replaced for a fraction of what a front element repair costs.
The case is weaker against impacts, and this is where the argument usually gets overstated. A thin flat filter dropped onto a hard edge shatters, and the pieces are now sharp glass sitting against your coated front element. Whether the filter absorbed enough energy to save the lens or merely added shards to the accident is genuinely situation dependent, and stories exist on both sides. A lens hood, by contrast, is unambiguously good at deflecting impacts, costs no light and adds no surfaces, which is why the hood should be the default and the filter the supplement.
There is one clean case where the filter wins outright: anything that would land wet or sticky on the glass. Sea foam, mud from a passing wheel, a child’s fingerprint, an accidental thumb. Cleaning that off a flat filter is a thirty second job with none of the anxiety of working on a curved multicoated element, which our lens cleaning field note describes in detail for exactly that reason.
The image quality argument, taken just as seriously
The cost side is a matter of surfaces. Adding a filter puts two more air to glass boundaries in front of every other optical surface in the system, and it puts them at the very front where the light cone is widest and where any stray source in the scene has direct access. On a well coated filter that cost is small in ordinary light and effectively invisible in most photographs. In a specific set of conditions it is very visible indeed.
The conditions are predictable. A bright point source in or just outside the frame, a street lamp at night, a low sun, a strong specular reflection off chrome or water, can bounce between the filter’s rear surface and the lens’s front element and produce a ghost image, often a faint mirrored copy of the light source on the opposite side of the centre. Uncoated or single coated glass makes this far worse. A very flat, parallel filter also matters here: if the two faces are not parallel the filter acts as a weak prism, which shows up as softness toward one side of the frame.
The sensible resolution is behavioural rather than dogmatic. Use a good multicoated filter where the environment justifies it, and take it off the moment the light gets difficult. Night cityscapes, backlit portraits, sunsets with the sun in frame and anything involving strong specular highlights are the four situations where the filter comes off first and gets blamed last. Our night sky note makes the same recommendation for a related reason, which is that concentric ring artefacts around bright stars are often a filter rather than the lens.
Close up filters and the cheap route to bigger magnification
A close up filter, sometimes called a dioptre, is not a filter in the subtractive sense at all: it is a simple magnifying lens that screws onto the front thread. Its power is quoted in dioptres, written as +1, +2, +4 or +10, and the number is the reciprocal of its own focal length in metres. That gives you a genuinely useful rule: with your lens focused at infinity and a close up filter of D dioptres fitted, the camera focuses at roughly one divided by D metres. A +2 puts your focus plane at about half a metre; a +4 at about a quarter.
Magnification follows from the same arithmetic. With the lens at infinity, the magnification you gain is approximately the lens focal length in millimetres multiplied by the dioptre power and divided by one thousand. A 50mm lens with a +2 gives about 0.1 times life size; a 200mm lens with the same +2 gives about 0.4 times, which is close to what many dedicated macro lenses reach at their limit. Longer lenses gain far more from a close up filter than short ones do, which is the single most useful thing to know before buying one.
The honest cost is image quality at the edges. A single element close up filter introduces its own aberrations, worst in the corners and worst at wide apertures, so stopping down two or three stops from wide open is usually necessary. Two element achromatic versions correct much of the colour fringing at a higher price. Compared with the alternatives, this route is the cheapest and lightest way to get closer, and our macro field note sets out where extension tubes and true macro lenses become the better answer.
Diffusion filters and what they do to contrast
Diffusion filters go by several names, and the family includes light mist, black mist, pro mist style filters and old fashioned soft focus discs. What they share is a deliberately imperfect surface, usually tiny particles or an etched pattern embedded in or on the glass, which scatters a small fraction of the light passing through instead of transmitting it cleanly. That scattered fraction spreads across the frame as a low level veil.
The visible result is specific and worth naming precisely, because it is often described badly. Highlights bloom, growing a soft halo that extends past their real edges. Deep shadows lift slightly, because some scattered light lands in them, which lowers overall contrast. Fine texture is softened a little, particularly the micro contrast that makes skin look detailed. What does not happen is a general loss of focus: a diffusion filter is not a blur, and a frame shot through one is still sharp in the sense that matters for focus.
The reason people buy them is that the effect resists convincing imitation. Editing can add a glow, and a well made one gets close, but the filter’s version is generated by the actual highlights in the actual scene at capture time, including ones the file barely records, so the bloom sits in exactly the right places with the right falloff. It is also worth saying that the effect cannot be removed afterwards. Anything shot through diffusion stays that way, so the strength you choose in the field is permanent, and starting with the weakest grade is nearly always the right call.
An illustrative first filter kit, by share of what you spend
A sample allocation rather than a recommendation of any product or price, showing the proportion of a filter budget that tends to go furthest for someone buying their first set. Shares are shown as percentages of the total and sum to 100.
The lopsidedness is the point. Nearly half the money goes to the one filter whose effect no editor can reproduce, and the cheapest line on the list, the rings, is what stops you from having to buy the first two again for every lens.
The effect filters that rarely earn their place
A long tail of filters exists that were once necessary and now mostly are not, and it is worth knowing why so you can tell the two groups apart. Colour correction filters, the warming and cooling ones, existed because film had a fixed colour response baked into the emulsion and the only way to match it to a different light source was to filter at the lens. A raw file carries no fixed white balance at all, so the same correction is free, lossless and reversible at the desk, as our white balance note explains.
Star filters, which etch a fine grid into the glass to turn point lights into four or six pointed spikes, still do something real that editing approximates rather than duplicates. Whether you want it is a taste question, and the answer is usually no more than once. Coloured graduated filters, the tobacco and blue skies of an earlier era, are gradients and gradients are trivially added afterwards, in any colour, at any angle, with an undo button.
The two remaining categories that do still require glass are worth naming. Infrared filters block visible light and pass infrared, which is a genuinely different image no editor can construct from a normal file. And optical filters for specific technical work, like the ones used to shoot through glass at an angle, rely on the same polarisation physics as a standard polariser. Everything else in the effects drawer is best thought of as a preference for doing the work in the field rather than a necessity.
Screw in filters against square filter systems
There are two mechanical families and the choice between them is mostly about how many lenses you own and whether you use graduated filters. Screw in filters thread directly into the front of the lens, are compact, seal reasonably well against weather, and need no extra hardware. Their limitation is that the filter is locked concentric with the lens axis, which is fine for a polariser or an ND and useless for a graduated filter, since you cannot slide the transition to match your horizon.
Square systems use a holder that clamps to an adapter ring on the lens, and rectangular filters drop into slots in the holder. The holder rotates and the filters slide up and down, which is exactly what a graduated filter needs. One set of large filters serves every lens you own via cheap adapter rings, which is the argument that eventually wins for people with many lenses. The costs are bulk, slower fitting, more exposure to stray light entering the holder from the side, and more surfaces to keep clean in the field.
The pragmatic path for most people is screw in for polarisers and fixed neutral density, and a square system only if graduated filters become part of how you actually work. A common hybrid is worth knowing: many square holders accept a dedicated polariser that mounts behind the slots and rotates independently, so you can keep the polariser convenience while gaining the graduated capability. If you are carrying this on foot, the weight difference is not trivial, and our camera bag note is where that decision usually gets settled.
Thread sizes and the step up ring trick
The number stamped near the front of your lens after a circle with a line through it is the filter thread diameter in millimetres. Common sizes run through a standard series including 49, 52, 55, 58, 62, 67, 72, 77 and 82, and there is no relationship between that number and focal length or aperture that you can rely on: two similar lenses from the same maker can easily take different sizes. Check every lens you own before buying anything.
The naive approach is to buy each filter at each lens’s own size, which multiplies your cost by the number of lenses and gives you a bag full of glass that only fits one thing. The step up ring approach buys each filter once, at the largest thread you own or expect to own, and then buys a cheap metal ring for every smaller lens. A ring costs a small fraction of a decent polariser, weighs almost nothing, and means a single filter serves the whole kit.
Two details make the trick work smoothly. Buy the filters at a size one step above your current largest thread if you expect to add a bigger lens later, since the rings only go one direction. And accept that the lens’s own cap will no longer fit while the ring is attached, so buy a cap that matches the filter thread size instead and leave the ring on the lens permanently. Step down rings, which fit a smaller filter onto a larger lens, exist and should generally be avoided, because they push the filter into the light cone and cause exactly the vignetting described next.
Stacking filters, and where vignetting comes from
Vignetting from filters is a mechanical problem, not an optical one, and picturing it correctly makes the rules obvious. Light entering a lens does not arrive as a narrow beam. It arrives as a wide cone, and the wider the angle of view, the wider that cone. The metal ring of a filter is a small wall standing at the very front of that cone, and if the wall is tall enough and the cone is wide enough, the corners of the frame are looking at metal instead of at the world.
Every factor that matters follows from that. Wider lenses vignette sooner, because the cone is broader. Each additional filter adds ring height, so stacking a polariser on a UV on an ND is three walls tall and will vignette on lenses that would tolerate any one of them alone. Thicker mounts vignette sooner than slim mounts. And, counterintuitively, a larger filter on a step up ring vignettes less than a same size filter, because the larger ring sits further out from the axis and therefore out of the cone.
Practical rules that follow: run one filter at a time on anything wider than about 24mm full frame equivalent, and prefer slim mounts there. Check for vignetting at the widest aperture and the widest zoom setting, since both make it worse, and check at the corners of the actual frame rather than through the viewfinder. If you must stack, put the thinnest mount at the front. And remember that a lens hood and a stacked filter set often will not both fit, which is a hint that you are asking too much of the front of the lens.
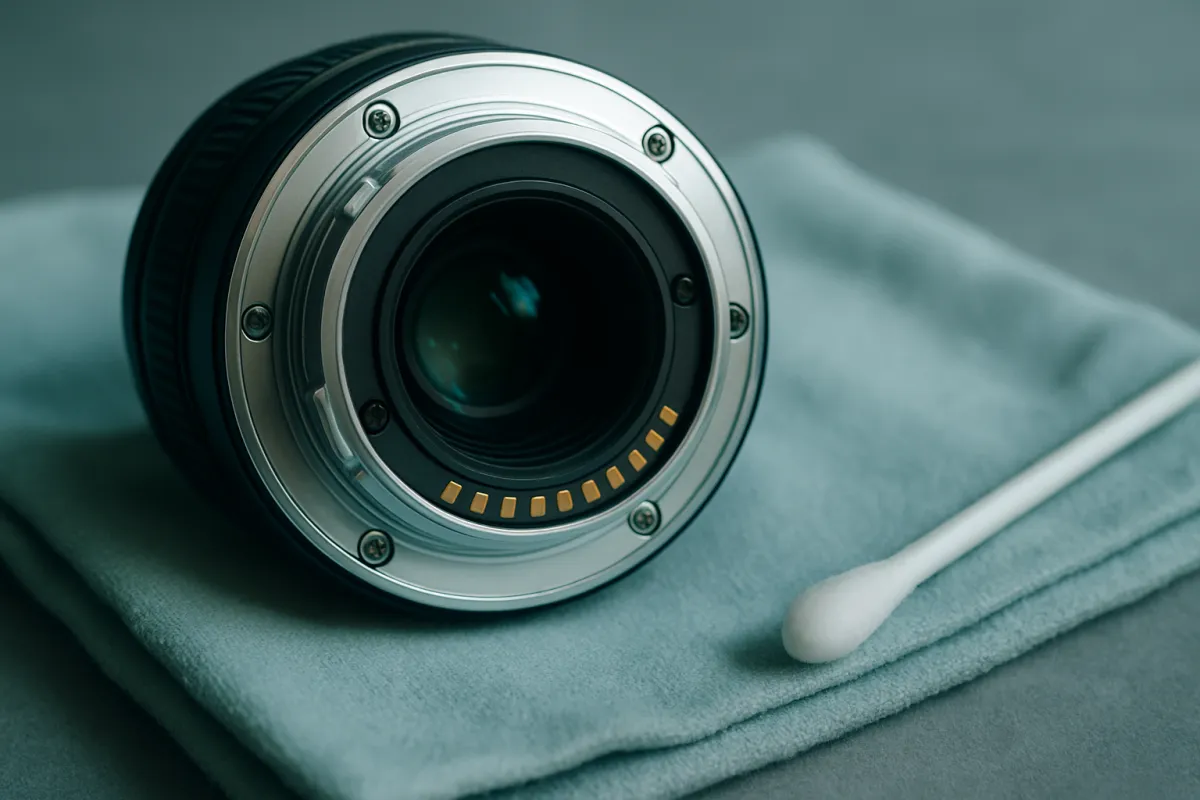
Filter quality: flatness, coatings and colour cast
Four measurable properties separate good filter glass from bad, and none of them are visible in a product photograph. The first is flatness and parallelism. A filter should be optically flat and its two faces should be parallel to a tight tolerance, because a wedge shaped filter acts as a weak prism and shifts part of the image sideways, showing up as softness or a slight doubling that is worst on one side of the frame. This is the single most common failing of very cheap filters and the hardest one to diagnose, because it looks like a lens problem.
The second is coating. Count the coatings if the maker states them and treat multicoated as a minimum for anything that lives on the lens. The difference between an uncoated and a well multicoated filter is the difference between losing several percent of the light to surface reflections and losing a fraction of a percent, and every one of those percentage points reappears somewhere in the frame as veiling flare or a ghost.
The third is colour neutrality, and it matters most for strong ND filters. Denser filters are harder to keep neutral, and a ten stop that pushes the file strongly blue or magenta costs you correction work on every frame, with the additional problem that the cast may not be uniform across the frame. The fourth is the mount itself: brass rings bind less than aluminium ones against an aluminium lens thread, and a knurled or textured edge is what lets you get a stuck filter off without tools. A test worth running once is to shoot the same frame with and without your filter on a tripod, at a mid aperture, and compare corner sharpness and colour at full magnification.
Flare and ghosting: the price of two more air to glass surfaces
It is worth separating the two artefacts, because they look different and have different fixes. Veiling flare is a general lifting of contrast across a whole area of the frame, caused by stray light scattering and washing across the sensor. It makes shadows grey and colour weak, and it is at its worst when a bright source is just outside the frame. A lens hood is the primary defence, and a clean filter surface is the secondary one, since dust and fingerprints scatter light far more than the coating does.
Ghosting is the discrete kind: distinct shapes, often polygonal, often mirroring the shape of the aperture blades, and often placed symmetrically opposite the light source across the centre of the frame. Ghosts come from light bouncing an even number of times between surfaces before landing on the sensor. Adding a filter adds two surfaces and therefore adds new bounce paths, and a filter’s flat parallel faces are particularly good at producing a clean, sharply defined ghost.
The diagnostic is simple. If you see a ghost you suspect is filter related, take the filter off and shoot the same frame again. Filter ghosts usually vanish entirely. If it survives, it belongs to the lens and you are looking at a design characteristic rather than an accessory problem. Either way the field fixes are the same: shade the front of the lens with your hand or the hood, move slightly so the source falls behind something, or accept the flare as part of the picture, which is sometimes the right answer.
Building a filter kit in the order that pays
If you are starting from nothing, the order matters more than the total. Buy the circular polariser first, at the largest thread size in your kit, and buy a decent one rather than three cheap ones. It is the only filter whose main effect cannot be reproduced afterwards, it works in ordinary daylight rather than in specialist conditions, and it will be on the lens on more days than everything else combined.
Buy step up rings second, because they are cheap and they are what turns one filter into a kit wide filter. Buy a six stop neutral density third, if and only if long exposure work is something you actually do rather than something you admire in other people’s pictures. That is the honest test, and applying it saves most people the cost of the ten stop, which is the filter most likely to be bought early and used twice.
Everything after that is a response to a specific problem you have hit. A ten stop when six stops repeatedly is not enough. A variable ND when daylight video becomes routine. A close up filter when you keep wanting to get nearer than your lens allows. Diffusion when you have a look in mind and have confirmed you cannot get it at the desk. A square holder and graduated filters when bracketing keeps failing because the scene moves. Sizing that spending against the rest of the kit is exactly what the upgrade budget planner is for, and the what to upgrade first note argues most of this money belongs later than people think.
Handling, storage and the stuck filter ring
Filters live at the front of the lens and take the abuse that implies, so a few habits keep them working. Store each in a hard case or a padded pouch rather than loose in a pocket, where a key or a memory card reader will scratch a coating in a single journey. Handle by the ring rather than the face, for the same reason you handle a photograph by the edges. And clean the way you would clean a lens: blow the loose grit off first, then use a proper cloth or wipe, because dragging a cloth across grit is how coatings acquire fine circular scratches.
The stuck filter is the classic filter emergency and it is nearly always cross threading rather than corrosion. Preventing it is a two second habit: seat the filter flat and turn it backwards, anticlockwise, until you feel the threads drop into alignment, then turn it forward. It should tighten with almost no force. If it needs force, it is not aligned. And never tighten a filter fully; snug is enough, because thermal changes and normal handling will tighten it further on their own.
If one is already stuck, the two things that work are grip and gentle differential expansion. A wide rubber band around the filter ring gives you enough purchase to turn without squeezing the ring out of round, and squeezing is what turns a stuck filter into a permanently jammed one. Purpose made filter wrenches spread the load around the whole circumference and are the right tool. Cooling the ring slightly can also help, since the metal contracts. Pliers, in every version of this story, make the situation worse.
A field routine for using filters without slowing down
The reason filters get left in the bag is rarely doubt about whether they help. It is that fitting one interrupts the rhythm of shooting, and an interrupted rhythm is how you miss the light. A short routine fixes that, and it is worth practising until it is automatic rather than deliberate.
For the polariser, leave it fitted on the lens you use in daylight and treat it as part of the lens. Before each frame, glance at where the sun is relative to where you are pointing, which tells you instantly whether the filter has anything to offer. If it does, turn the ring slowly through a half turn while watching the live view, stop at the point you like, and shoot. That whole check takes about three seconds and is the entire skill.
For neutral density, the order is fixed and skipping a step costs you the frame. Compose and focus without the filter. Switch focus to manual so nothing hunts once the view goes dark. Meter and note the shutter speed. Fit the filter. Apply the stop correction from the doubling table. Shoot, then check the histogram rather than the screen brightness, because a long exposure preview on a bright screen in the field lies about exposure in both directions. Then reset: filter off, focus back to automatic, so the camera is ready for the next ordinary frame rather than for the one you just made.
The bottom line
Filters are the last part of photography that is genuinely physical, and the shortlist of ones that still matter is short. A neutral density filter subtracts light evenly so you can choose a shutter speed the light would not otherwise allow, and its strength is nothing more than a count of doublings: work out the ratio between the exposure you want and the exposure you are metering, count how many times you must double to get there, and that is your stop count. A circular polariser does two separate jobs, darkening the band of sky about ninety degrees from the sun and stripping reflections off water, glass and foliage, and only the second of those is beyond the reach of any editor, which is what makes it the one filter worth buying properly. A UV filter does nothing optical on a digital camera and is a protective window, sensible in salt spray and blowing sand, unnecessary the rest of the time, and best removed whenever a bright light is in frame. Buy at your largest thread size, buy step up rings rather than duplicate filters, run one filter at a time on wide lenses, and remember that every surface you add is a surface that has to earn its place. When the question turns from filters to what else the kit needs, the upgrade budget planner is the place to price it.
This field note describes how filters behave optically and deliberately names no maker, model or price, because the physics of polarisation, transmission and surface reflection is identical everywhere while catalogues and costs are not. Every stop figure, dioptre, thread diameter and percentage above is an illustrative reference chosen to show a relationship, not a measured specification for any particular piece of glass, so run the tripod comparison described here and let your own frames decide what your filters are costing you. Light transmission, colour neutrality and coating performance vary widely between filters that look identical in a photograph, and the picture in front of you, not any chart, is the only thing qualified to judge whether the glass belongs on the lens.
Frequently asked questions
What do ND, CPL and UV actually stand for?
ND is neutral density, a piece of glass that dims every wavelength by roughly the same amount so the picture gets darker without the colours shifting. CPL is circular polariser, a filter that blocks light waves vibrating in one orientation, which is how it kills reflections and darkens part of a blue sky. UV is ultraviolet, originally a filter that absorbed ultraviolet light because film emulsions recorded it as haze. Only the first two change your picture in a way you cannot reproduce afterwards, and the third is essentially a protective window on a modern camera, since digital sensors already sit behind their own ultraviolet and infrared blocking glass.
How many stops of ND do I need for silky water?
It depends entirely on how bright the scene is and how long you want the shutter open, so the honest answer is a calculation rather than a number. Work out the ratio between the shutter speed you want and the shutter speed your meter is giving you, then count how many doublings fit inside that ratio. As an illustrative case, a metered 1/15 of a second and a target of two seconds is a ratio of thirty, which is between four and five doublings, so a six stop filter with the aperture opened one stop lands you very close. Bright midday sun and a target of thirty seconds is a different problem entirely and usually needs ten stops or more.
Does a polariser work everywhere in the sky?
No, and this is the property that surprises people most. Scattered skylight is most strongly polarised in a band roughly ninety degrees away from the sun, so that is where a polariser darkens the blue hardest. Point at the sun or directly away from it and the filter does almost nothing to the sky, no matter how far you turn the ring. On a wide lens the frame can span both the strongly polarised band and the weakly polarised part at once, which is why wide angle skies sometimes come back with an obvious dark patch.
Why does my variable ND make a dark X across the frame?
A variable ND is two polarising layers stacked together, and turning the ring rotates one against the other. Near the strong end of its range the two are close to crossed, and small differences in the angle at which light passes through the corners of a wide frame turn into large differences in how much gets through. The result is an uneven dark cross, usually visible as a band or an X shape. The fix is to stay off the last part of the range, avoid using one on very wide lenses, and switch to a fixed ND when you need the strongest settings.
Is a UV filter worth putting on a new lens?
It is a genuine trade rather than an obvious yes or no, and reasonable photographers land on both sides. On the protection side, a flat piece of glass takes the sand, salt spray, finger grease and cleaning cycles that would otherwise land on a curved coated front element, and replacing it is far cheaper than a repair. On the image quality side, it adds two more air to glass surfaces in front of everything, which is where flare and ghosting come from, and a cheap one can add a faint colour cast or soften fine detail. A reasonable compromise is a good multicoated filter for harsh environments, a lens hood the rest of the time, and the filter off whenever a bright light source is in or near the frame.
Do I need a different filter for every lens?
Only if you buy them at each lens's own thread size, which is the expensive way to do it. Filter threads come in a standard set of diameters, commonly running through 49, 52, 55, 58, 62, 67, 72, 77 and 82 millimetres, and a step up ring lets a larger filter sit on a smaller thread. Buy your polariser and your ND at the largest thread you own, then buy cheap rings to fit them onto everything smaller. The one thing you lose is the ability to use the original lens cap while the ring is fitted, which is a minor annoyance next to buying the same filter four times.
Can I just do all of this in editing instead?
Some of it, and not the parts that matter most. A darker sky, a graduated darkening across the top of the frame and a warmer or cooler cast are all straightforward edits on a raw file. What editing cannot do is remove a reflection off water or glass, because once the reflected light has landed on the sensor it is mixed into the same pixels as the light from underneath and there is nothing left to separate. It also cannot invent the motion blur that only a long exposure records, which is why an ND is a capture decision rather than a post decision.
Does stacking filters cause vignetting?
It can, and the cause is mechanical rather than optical. Each filter ring is a small wall of metal standing in front of the lens, and stacking two or three builds that wall taller. On a wide angle lens the cone of light entering the front element is very broad, so the corners of the frame start clipping against the stack and go dark. Slim mounted filters and step up rings both help, because a larger diameter ring sits further out of the light cone, and the general rule is to keep no more than one filter on a lens wider than about 24 millimetres of full frame equivalent view.