What's on this page
- What the best camera for photography actually is
- The one rule: glass outlasts bodies
- What a better lens actually buys you
- When a new body is actually worth it
- The upgrade almost everyone skips: lighting
- Where an upgrade dollar buys the most
- How to sequence upgrades on a real budget
- Prime or zoom: matching the lens upgrade to how you shoot
- How to tell whether the lens or the body is your limit
- The case for buying used glass
- Accessories that punch above their price
- Editing is an upgrade too
- Should a beginner buy full frame?
- Five upgrade mistakes that waste the most money
- Your gear is probably better than you think
- The upgrade that costs nothing
- The first upgrade changes with what you shoot
- Fund the upgrade by selling what you outgrew
- Test an upgrade before you commit to it
- When maintenance beats a new purchase
- How to tell the upgrade actually worked
- The bottom line
Short answer: Upgrade glass before bodies, light before megapixels, and skill before all of it. A good lens improves every photo and survives several camera changes, while a new body mostly raises file resolution unless it solves a named wall such as autofocus, high ISO noise, or a missing feature. On a tight budget a fast prime is usually the single biggest visible upgrade, and an off camera flash or reflector is the most underrated buy.
Almost nobody takes better photographs because they bought a new camera body. They take better photographs because they bought better glass, learned to control light, or put the camera on something stable. Yet the body is the upgrade most people reach for first, because it is the one the marketing is loudest about. This field note ranks where an upgrade dollar actually buys image quality, so you spend in the right order instead of the expensive one.
The short version: glass before bodies, light before megapixels, and skill before all of it. The sections below explain why, when the exceptions apply, and how to sequence real purchases on a real budget. You can map your own upgrade path in about a minute with our upgrade budget planner. And when the diagnosis says the body really is the wall, our field note on how to upgrade your camera walks that bigger decision step by step.
Key takeaways
- Upgrade glass before bodies. A good lens improves every photo and survives multiple camera changes; a body mostly raises the file resolution unless you are hitting a specific wall.
- Lighting is the most underrated buy in photography. A single off-camera flash or a reflector changes how a photo looks more than any sensor can.
- Buy a new body to solve a named problem: autofocus, high-ISO noise, resolution, or a missing feature. If you cannot name the wall, you do not need the body yet.
- On a tight budget, a fast prime lens is usually the single biggest visible upgrade you can make.
- Sequence matters. Each step should unlock the next, so you are never paying for capability you cannot yet use.
What the best camera for photography actually is
If you searched for the best camera for photography expecting a model name, here is the more useful answer: the best camera for photography is usually the capable body you already own, paired with better glass and better light. Camera makers sell the upgrade as a new body because that is the loudest product to market, but the sensor is rarely the reason a photograph disappoints. Spend the next dollar where it buys visible image quality, which this field note ranks in order, and the camera you have becomes the best one for the photographs you actually take.
The one rule: glass outlasts bodies
Here is the principle that should govern every photography purchase. Camera bodies are computers, and like all computers they lose their shine on a cycle of a few years. Lenses are optics, and a good one stays good for decades. The professional zoom you buy today can still be delivering images long after three camera bodies have come and gone underneath it.
That single fact reorders everything. Money spent on a body is money spent on a depreciating item you will replace. Money spent on glass is money spent on something you keep. When you eventually change camera systems, the body goes in the drawer and the lenses come with you, still worth most of what you paid. This is why seasoned photographers own modest bodies and serious glass, while beginners often do the reverse and wonder why their photos have not improved.
So the default answer to “what should I upgrade” is almost always the lens. You have to work hard to construct the exception, and the rest of this article is about the handful of times the exception is real.
What a better lens actually buys you
“Sharper” is the reason people think they want a better lens, and it is the least important one. A good lens buys four things that show up in every frame.
A wider aperture. A fast lens, one that opens to f/1.8 or f/1.4, lets in far more light and throws the background into soft blur. That single trait accounts for most of the “how did they get that look” separation between amateur and professional portraits. No sensor upgrade produces it; only the lens does.
Consistency across the frame. Cheap lenses are often sharp in the center and soft in the corners, and they can distort or fringe at the edges. A better lens holds up corner to corner, which matters enormously for landscapes, architecture, and anything with detail out to the edges.
Focus that keeps up. Better lenses focus faster, quieter, and more reliably, which is the difference between catching a moment and missing it. For anything that moves, the lens motor matters as much as the body’s autofocus brain.
Build and sealing. A metal barrel and weather sealing are not glamour features until the day rain or dust would have ended the shoot. Good glass is built to survive the years it will outlast your bodies.
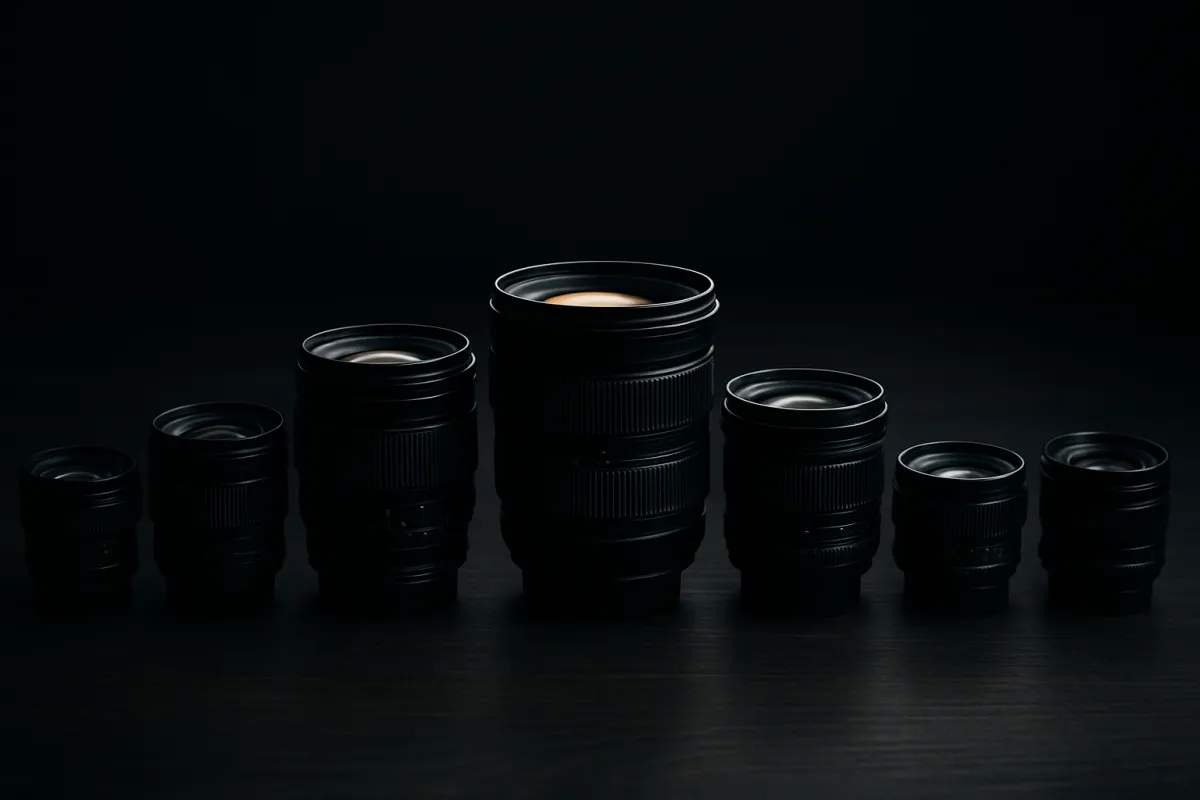
If you own one kit lens and nothing else, the single highest-impact purchase in photography is usually an inexpensive fast prime, a fixed focal length that opens wide. It costs a fraction of a new body and transforms low-light shooting and portraits overnight. That is the upgrade to make first, almost regardless of what body you own.
When a new body is actually worth it
Bodies are not worthless. They are just worth buying to solve a named problem rather than to feel current. Here are the walls that a body upgrade genuinely knocks down.
- Autofocus for action. If you shoot sports, wildlife, kids, or pets and your keeper rate is low because focus cannot track, a modern body with better subject tracking is a real fix that no lens fully substitutes for.
- High-ISO noise. If you routinely shoot in dim conditions and your files fall apart at the ISO you need, a newer or larger sensor buys cleaner low-light images. This is one of full frame’s genuine advantages.
- Resolution you actually use. If you print large or crop hard and are running out of pixels, more resolution helps. If you post online and never crop, it does nothing you will see.
- A missing feature. In-body stabilization, weather sealing, dual card slots, or much better battery life can each justify a body when your work depends on them.
The test is simple. Say out loud the limitation you are hitting. If you can name it and it appears on the list above, the body upgrade is worth it. If you find yourself saying “it is just getting old” or “the new one has more megapixels,” you are about to spend four figures to take the same photographs at a larger file size.
The upgrade almost everyone skips: lighting
Ask a room of new photographers what they want next and almost all will say a sharper lens or a better body. Almost none will say lighting. That is the single biggest blind spot in the hobby, because light quality is what actually makes an image look professional.
Think about why a portrait from a studio looks different from one snapped under a ceiling bulb. It is not the camera. It is that the studio light is soft, directional, and controlled, while the ceiling bulb is flat and harsh. You can buy that control for less than the price of most lenses. A single off-camera flash, a small softbox, or even a five-in-one reflector gives you the power to shape light instead of accepting whatever the room provides.
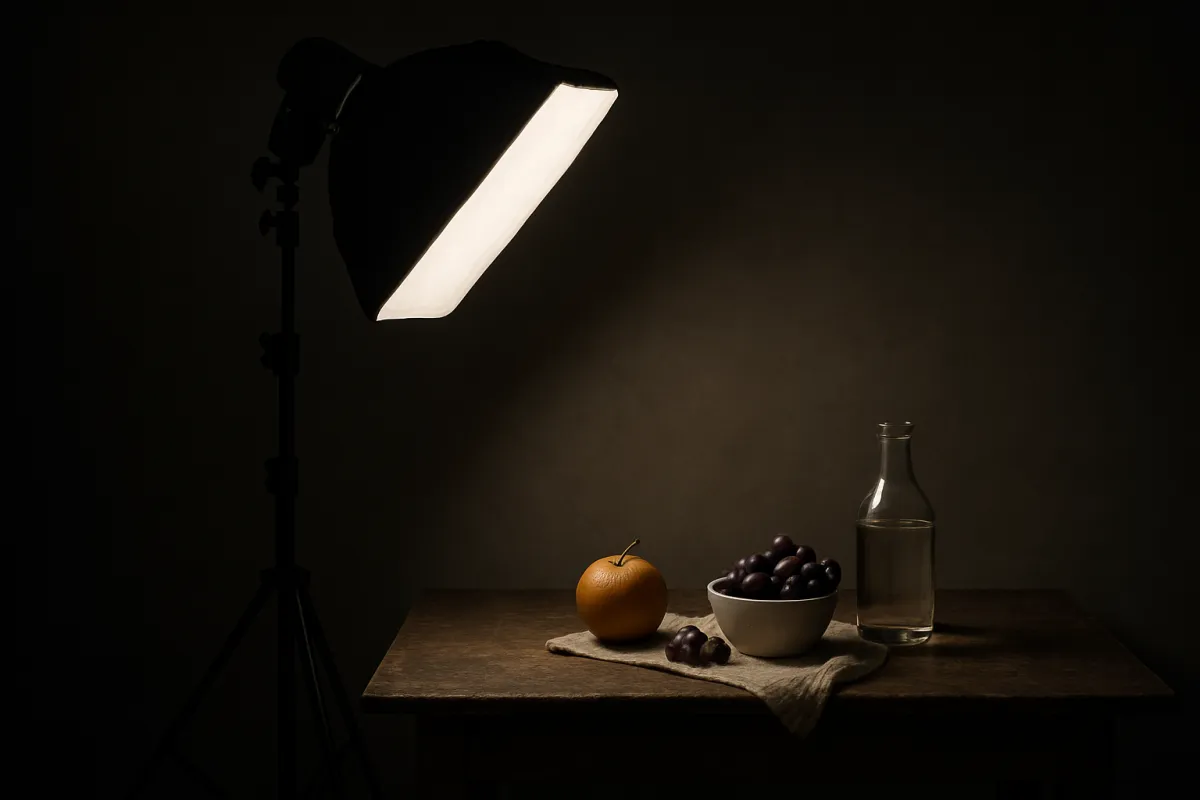
The reason lighting gets skipped is that it has a learning curve and no spec sheet to brag about. But it is the closest thing photography has to a cheat code. If your images look flat and you have decent glass already, a lighting upgrade will do more for them than any body ever could.
Where an upgrade dollar buys the most
Put a rough price on each meaningful upgrade and the priority order gets easier to see. These are typical illustrative costs for a genuine step up, not the cheapest thing on a shelf.
| Upgrade | Typical cost of a real step up | What it buys |
|---|---|---|
| Fast prime lens | $200 to $600 | Low-light ability, background blur, sharpness |
| Basic lighting kit | $150 to $350 | Control over how the photo actually looks |
| Tripod and support | $120 to $300 | Sharp long exposures, careful composition |
| Professional zoom lens | $700 to $1,500 | Range, consistency, build, sealing |
| New camera body | $1,000 to $2,500 | Autofocus, low-light, resolution, features |
Typical cost of a meaningful upgrade, by component
Midpoint of a real step up in each category. Illustrative.
The cheapest upgrades, a fast prime and a lighting kit, are usually the ones that change your photos the most. The most expensive, a new body, changes them the least unless it solves a named problem.
Notice the pattern. The two cheapest upgrades on the list, a fast prime and a lighting kit, are the two that most visibly improve your photos. The most expensive, a new body, is the one that improves them least in the typical case. Spending order and impact order run almost exactly opposite to how most people shop.
How to sequence upgrades on a real budget
Say you have a starter camera with a kit lens and a budget to improve over the next year. Here is the order that gets you the most visible improvement per dollar, each step unlocking the next.
- A fast prime lens. The biggest single jump for most people. Suddenly you can shoot in low light, blur backgrounds, and get sharper results than the kit lens ever gave you.
- A basic lighting setup. Once your glass can gather light, learn to shape it. A flash and a way to soften it will teach you more about photography than any other purchase.
- A tripod, if your shooting needs it. Essential for landscape, night, and product work; skippable if you only shoot handheld action. Small money, big unlock for the right subjects.
- A second lens that fills a gap. A wide angle for landscapes or a telephoto for distance, chosen because your actual shooting keeps running into that limit.
- A new body, last. By now you will know exactly which wall you are hitting, so you can buy the body that solves it instead of guessing. And every lens you bought along the way carries straight over.
Where a first-year upgrade budget does the most good
A sensible allocation for someone starting with a kit lens. Illustrative.
Notice what is missing: a new body. For someone on a kit lens, the budget does more good spread across glass, light, and support than poured into a camera the current one has not yet outgrown.
You can build your own version of this plan against your real budget with our upgrade budget planner. It helps you allocate across glass, light, and support in the order that buys the most improvement.
Prime or zoom: matching the lens upgrade to how you shoot
Once you have decided the lens is the upgrade, the next fork is prime versus zoom, and the right answer depends entirely on how you shoot rather than on which is “better.” A prime lens has a single fixed focal length, no zoom ring. In exchange for that inconvenience it gives you a wider maximum aperture, sharper results, lighter weight, and a lower price for the optical quality. A zoom lens covers a range of focal lengths, trading some aperture and often some sharpness for the convenience of not changing lenses or moving your feet.
For someone whose photos are mostly people, low light, or anything where background blur matters, the prime wins clearly. A fast fifty or a thirty-five is the classic first prime for exactly this reason, and it will teach you to compose with your feet, which is a skill in itself. For someone who shoots travel, events, or fast-changing scenes where missing a moment to swap lenses is unacceptable, a quality zoom earns its place despite the compromises. Wildlife and sports lean toward long zooms because subject distance keeps changing.
The honest middle path for most upgraders is one fast prime for the look and the low-light ability, then one versatile zoom for the days when flexibility matters more than the last stop of light. Buying both over time, in that order, covers almost every situation without duplicating capability. What you should avoid is owning three slow zooms that all do the same thing at slightly different ranges, which is how a lot of money leaves the wallet with no visible improvement in the photos.
How to tell whether the lens or the body is your limit
When your photos disappoint, the useful question is which piece of gear is actually holding them back, because the answer decides where the money goes. There is a quick diagnostic. Look at your disappointing shots and name the failure honestly.
If the problem is soft focus, weak background separation, dim or noisy low-light frames, or visible distortion and color fringing at the edges, the lens is your limit. Those are optical failures, and a body upgrade will reproduce every one of them at a higher resolution. If instead the problem is that focus cannot track a moving subject, that files fall apart at an ISO you cannot avoid, or that you are genuinely out of pixels for the prints you make, the body is your limit and a new lens will not touch it.
Most photographers who think they need a body actually fail this test, discovering their complaints are all optical, which points back to glass. A smaller group genuinely needs the body, and they can name the wall in one sentence. Run the diagnostic before you spend, because it is free and it is right far more often than the marketing that says the answer is always the newest camera.
The case for buying used glass
Because a good lens holds its quality for decades, the used market is one of the smartest ways to upgrade, and it is far safer for lenses than for almost any other category of gear. A lens has no shutter count to wear out and no sensor to age. Barring physical damage or fungus, a ten-year-old professional lens performs like a new one, and it often sells for a large discount off the current price.
The checks are straightforward. Inspect the front and rear glass for scratches and any hazy internal fungus, work the zoom and focus rings for smoothness, and if you can, mount it and take a few frames to confirm the autofocus drives properly. Light dust inside a lens is normal and does not affect images. Buying used, a photographer on a modest budget can often afford the professional-grade lens that would be out of reach new, which is exactly the upgrade that makes the biggest difference.
The same logic applies with more caution to bodies. A used body can be a bargain, but here the shutter count and sensor wear do matter, so you are buying a used computer rather than a timeless optic. The rule of thumb many upgraders settle on: buy glass used to save money on the thing that lasts, and be choosier about buying a body used since it is the thing that ages.
Accessories that punch above their price
A few small purchases deliver improvement out of all proportion to their cost, and they get overlooked precisely because they are cheap and unglamorous. They belong on an upgrade list ahead of a second body.
- Fast, reliable memory cards. A cheap slow card can bottleneck your camera’s burst shooting and, worse, fail and lose a shoot. A quality card is cheap insurance for images you cannot re-take.
- Spare batteries. Nothing ends a session faster than a dead battery with no backup. Two or three spares cost little and remove a real limit on how long you can shoot.
- A proper strap or an L-bracket. Comfort and stability sound trivial until you have carried a camera all day or needed to switch quickly between horizontal and vertical on a tripod. Small money, daily payoff.
- A polarizing filter. For anything with sky, water, or foliage, a polarizer does something no editing fully replicates: it cuts glare and deepens color at the moment of capture. It is one of the few filters that earns its place in the bag.
None of these will impress anyone on a spec sheet. All of them remove friction that quietly costs you photos, which is the definition of a good upgrade.
Editing is an upgrade too
The last piece of the upgrade puzzle is not hardware at all. The same raw file can look flat or striking depending entirely on how it is processed, and learning to edit is one of the highest-return upgrades available, at close to zero cost. A modest camera with a well-edited file routinely beats an expensive one straight out of the camera.
This matters for spending decisions because a lot of the “my photos are not sharp or punchy enough” feeling that sends people shopping for new gear is actually an editing gap. Basic adjustments to exposure, contrast, white balance, and selective sharpening transform an image, and none of them require a new sensor. Before you conclude the camera is the problem, spend a few evenings learning to develop your files properly. It is the cheapest upgrade on this entire list and, for many photographers, the one that finally makes their images look the way they hoped the last body would.
Should a beginner buy full frame?
This is the most common expensive mistake in the hobby, so it deserves a direct answer: usually not first. Full frame is a genuine upgrade, mainly for low-light performance and shallow depth of field, but it is a late upgrade, not a starting point. A crop-sensor body with one excellent lens will out-shoot a full-frame body saddled with only a kit lens, every time, because at that stage the lens and your skill are the limiting factors, not the sensor.
The right time to move to full frame is when you can feel your current sensor holding you back, when you keep needing cleaner high-ISO files or shallower backgrounds than your body can give. Buy it to break through a ceiling you are actually pressed against, not to start higher up the ladder than your skills have climbed.
Five upgrade mistakes that waste the most money
The fastest way to spend well is to recognize the patterns that make people spend badly. These are the ones that quietly drain the most money for the least improvement.
- Buying a body to fix a lens problem. The most common and most expensive mistake. Soft, dim, or flat photos are almost always optical, and a new body reproduces them faithfully at a higher resolution. Diagnose before you buy.
- Chasing megapixels you never use. More resolution only helps if you print large or crop hard. If your photos live online, extra pixels cost you storage and money and give you nothing you can see.
- Collecting overlapping slow zooms. Three kit-grade zooms that cover similar ranges at similar apertures is money spread across duplicated capability. One fast prime plus one quality zoom does more with less.
- Ignoring light while obsessing over sharpness. Spending thousands on glass and bodies while never buying a single flash or reflector leaves the biggest visible improvement on the table.
- Upgrading on a schedule instead of a need. The new model arrives every cycle, but your photos do not improve on that cycle. Upgrade when you hit a wall you can name, not when the calendar or the marketing says it is time.
Avoid these five and you will already be spending more wisely than most photographers, regardless of your budget.
Your gear is probably better than you think
Modern cameras, even entry-level ones, are extraordinarily capable, far beyond what most owners ever ask of them. The gap between a budget body from a few years ago and the newest professional model is smaller in real-world photos than the marketing implies, and it is dwarfed by the gap between a photographer who understands light and one who does not. This is worth internalizing before any purchase, because it reframes the whole question.
The practical consequence is that the ceiling you are bumping against is usually not where you think it is. Before concluding your camera is holding you back, spend a week shooting deliberately with one lens, controlling your light, and editing your files with care. Most photographers who do this discover their current gear had more to give than they realized, and the upgrade they were about to buy would have solved a problem they did not actually have. When you do hit a genuine wall after that, you will know exactly what it is, and the money you spend will go straight to knocking it down.
The upgrade that costs nothing
One more, because it outranks everything on the list and shows up on no invoice. The highest-return upgrade in photography is learning to use the gear you already own. Understanding light, composition, and exposure will improve your photos more than any purchase, and it is the one thing a new body can never do for you.
This is not a throwaway line. Every experienced photographer has watched a beginner with a modest camera outshoot someone with top-tier gear, because the beginner understood where to stand and how to wait for the light. Gear removes limits; it does not add vision. Spend on glass and light in the right order, yes, but spend at least as much attention on the free upgrade sitting behind the viewfinder.
The habit that pays off most is to shoot with intent rather than volume. Choosing one subject, one lens, and one kind of light for a week teaches you more than firing off a thousand frames on automatic ever will, and it costs nothing but attention. Study the work you admire and try to reverse-engineer where the light came from and where the photographer stood. That practice sharpens the eye faster than any purchase, and it compounds: the better your eye gets, the more every piece of gear you already own is able to deliver. A new lens raises your ceiling, but a trained eye is what fills the space beneath it.
The first upgrade changes with what you shoot
The order in this field note is the general case, glass first, then light, then support, then a body only when a wall forces it. The very first purchase, though, shifts with the photographs you actually take, and naming your genre sharpens the priority faster than any generic list. Match the upgrade to the subject and the money lands where your pictures are pinned.
Portraits reward glass above everything, so a fast prime is almost always the first buy: the wide aperture that lifts a face off its background is the whole look, and no body delivers it. Landscape work leans the other way, toward a stable tripod and a sharp wide lens, because front to back sharpness and long exposures matter more than a bright aperture, a trade our best lens for landscape note walks in full. Wildlife and sports are the rare case where a body can genuinely come first, since autofocus tracking and burst speed decide the keeper rate, though a longer lens still tends to buy more than a newer body. Travel favors compact, light glass and a bag that actually comes along, while video shifts a little toward the body for stabilization and reliable autofocus. Find your dominant subject, and the first line of the budget writes itself, which is exactly the diagnostic our field note on sharp photos applies to technique.
Fund the upgrade by selling what you outgrew
The cheapest upgrade money is the money already sitting in your bag as gear you no longer use, and the used market makes it easy to recycle. Because good glass holds its value, the kit lens you replaced, the body you moved on from, or the lens that never suited your shooting can be sold to fund the next purchase, often recovering a large share of what you paid, especially for lenses that barely depreciate once they have aged.
The habit that makes this work is honesty about what you actually reach for. Open your photo library and check which lenses recorded the frames you kept; the ones that never appear are candidates to sell, not to store for a someday that rarely arrives. Selling first also enforces discipline, because it turns every upgrade into a swap rather than an addition, which keeps the bag from filling with overlapping gear that does the same job at slightly different settings. Keep the boxes and receipts, photograph the condition honestly, and a clean sale funds a meaningful slice of the next lens. The gear treadmill runs on buying without selling; reverse the order and the upgrade path pays for much of itself, which is the quiet secret of photographers whose kit keeps improving without their spending ever seeming to rise.
Test an upgrade before you commit to it
Before any four figure purchase, the smartest cheap move is to try the gear on your own photography rather than trusting a review, because a spec that impresses on paper can leave your pictures unchanged. Rental services let you shoot a body or lens for a weekend at a small fraction of its price, and a borrowed piece from a friend costs nothing at all. Point it at your real subjects, in your real light, and compare the files against what you already own.
The test answers the only question that matters: does this upgrade fix a limit you actually hit, or does it just feel new in the hand. Renters come back with one of two clarities. Either the difference sang, the autofocus caught shots you had been missing or the lens gave a look your kit could not reach, and the purchase proceeds with confidence, or the weekend quietly showed that your photographs looked the same on either piece, and the money stays home or routes to glass and light where it shows. Both outcomes are wins, because a few dollars of rental spent to de-risk a large purchase is the best cost per use ratio in the hobby, and it doubles as a weekend of shooting you would have enjoyed anyway.
When maintenance beats a new purchase
Sometimes the gear holding your photos back is not outdated, it is dirty, worn, or slightly broken, and the fix costs a fraction of a replacement. A lens that suddenly seems soft may just have a smudged or hazy front element, and a careful clean, covered in our note on cleaning a camera lens, can restore it to like new. A sensor speckling your skies with dark spots needs a cleaning, not a new body. A focus ring gone stiff or a wobbly mount is often a modest repair rather than a reason to spend a month’s budget.
The discipline is to diagnose before you shop, the same rule that governs every section here. Before concluding that a piece of gear has failed you, rule out the cheap causes: clean the glass and the sensor, update the camera’s firmware, check that a soft image is not simply camera shake from a slow shutter, and confirm the problem follows the gear rather than the technique. A surprising share of upgrade urges dissolve under that checklist, because the limit turned out to be a five minute clean or a free firmware update rather than an aging camera. Spend the diagnosis first; it is the cheapest upgrade attempt on the list, and often the only one you needed.
How to tell the upgrade actually worked
An upgrade is only worth the money if it changes the photographs, and the honest way to know is to measure rather than to feel, because the glow of new gear flatters everything for a few weeks. Before you buy, name the specific problem the purchase is meant to solve, then after a month of real shooting, check whether that problem actually receded. If the fast prime was bought for dim indoor frames, count how many usable low-light keepers you get now versus before. If the body was bought for autofocus, look at your hit rate on moving subjects, not at how the camera feels in the hand.
This closes the loop that the gear treadmill leaves open. Most disappointing purchases fail the test quietly: the photos look the same, the named problem is still there, and the money bought a sensation rather than a result. Catching that honestly, once, teaches you to diagnose harder before the next purchase, which saves far more than any single upgrade costs. The photographers who spend well are not the ones with the most gear, they are the ones who can point at a specific improvement in their pictures and trace it to a specific purchase. Everything else was the marketing, or the newness, wearing off.
The bottom line
The order is clear once you stop listening to the marketing. Buy glass before bodies, because a good lens improves every photo and outlasts every camera. Buy light before megapixels, because light quality is what actually makes an image look professional. Buy a stable support if your shooting needs it. And buy a new body last, only when you can name the wall it will knock down. Follow that sequence and every dollar you spend buys more visible improvement than the one before it, which is the whole point of upgrading in the first place.
This field note exists to sharpen your judgment, not your shopping cart. It is educational, carries no sponsorships, and recommends no particular maker. The prices throughout are rounded illustrative figures for planning an upgrade sequence, not offers on any specific product, and street prices move with brand, condition, and where you shop. Check current listings, and weigh every purchase against how you actually shoot.
Frequently asked questions
What is the best camera for photography?
The best camera for photography is less a model than a match: the body that suits your subjects, wears affordable lenses, and comes along often enough to catch the picture. For most photographers the biggest jump in image quality comes not from a new body but from a fast prime lens, better light, and steadier technique, which is why a modest camera with one excellent lens routinely out-shoots an expensive body wearing a slow kit zoom. If you are choosing your first serious setup, a current mirrorless camera with interchangeable lenses gives you the most room to grow, because the mount, not the body, is the decision you live with for years. Buy the system whose lenses your photography will want, then spend in the order this field note lays out.
Should I upgrade my lens or my camera body first?
For almost everyone, the lens. A good lens improves sharpness, low-light ability, background separation, and build quality in a way you see in every photo, and it keeps working when you eventually change bodies. A new body mostly helps if you are hitting a specific wall your current one cannot pass, such as autofocus tracking for fast action or usable images at very high ISO. Glass first, body when a real limit forces it.
Do expensive lenses actually make a difference?
Yes, more than any other single purchase, though not always in raw sharpness. A better lens usually buys a wider aperture for low light and background blur, more consistent sharpness across the frame, faster and quieter focus, and weather sealing. On a modest budget, an inexpensive fast prime lens is often the biggest visible jump you can make, well ahead of a new body.
Is upgrading to a new camera body worth it?
It is worth it when you can name the specific limitation you are hitting: autofocus that misses moving subjects, noise at the ISO you actually shoot, not enough resolution for the prints or crops you need, or a missing feature like in-body stabilization. If you cannot name the wall, a new body will give you the same photos at a higher file resolution. Upgrade the body to solve a problem, not to feel new.
Why is lighting an underrated upgrade?
Because light quality, not the camera, is what separates a snapshot from a professional-looking image. A single off-camera flash or even a reflector gives you control that no sensor can replicate, and a basic lighting kit often costs less than a lens. Most people spend thousands chasing sharpness while ignoring the one upgrade that changes how a photo actually looks.
How much should I spend to meaningfully upgrade?
A meaningful lens upgrade often starts around a few hundred dollars for a fast prime and runs higher for professional zooms. A basic off-camera lighting setup can start near $150 to $300. A body upgrade that solves a real problem is usually the most expensive step, often four figures. Spend in that order and each dollar buys more visible improvement than the last.
Should beginners buy a full-frame camera?
Usually not first. A crop-sensor body with one good lens will teach you more and produce better photos than a full-frame body with only a kit lens, because the lens and your skill matter more at that stage. Full frame is a worthwhile upgrade later, once you are hitting the limits of your current sensor in low light or depth of field, not as a starting point.
Does a tripod count as a real upgrade?
For landscape, night, and product work, absolutely. A stable support unlocks sharp long exposures and careful composition that handheld shooting cannot match, and a decent one lasts for decades across every camera you own. It is a small spend with an outsized effect for the right kind of shooting, which is why it belongs on any upgrade list before a second body.