What's on this page
- The best camera for real estate photography, in one answer
- What makes a good real estate camera and lens pairing
- Choosing a wide-angle lens for interiors
- Crop sensor vs full frame for real estate photography
- Dynamic range and HDR for bright windows and dim rooms
- Why a tripod matters as much as the camera here
- Keeping verticals straight, lens and technique together
- Flash and supplemental lighting for dim interiors
- Editing workflow and what it demands of your camera
- Shooting settings that matter more than the camera body
- Real estate camera and lens by budget tier
- Smartphone real estate photography, when it is enough
- Autofocus, resolution and the specs you can deprioritize
- What agents and clients actually notice in finished photos
- Mistakes people make choosing real estate gear
- Renting gear before a bigger commitment
- Buying real estate gear used
- Shooting exteriors and twilight shots with the same kit
- The worked recommendation, three real estate scenarios
- The bottom line
Short answer: The best camera for real estate photography is any capable mirrorless or DSLR paired with a wide-angle lens, roughly 16mm to 24mm on full frame or 10mm to 16mm on crop, shot on a tripod at f/8 to f/11 with the camera held level. The lens and the tripod matter more than the camera body or sensor size.
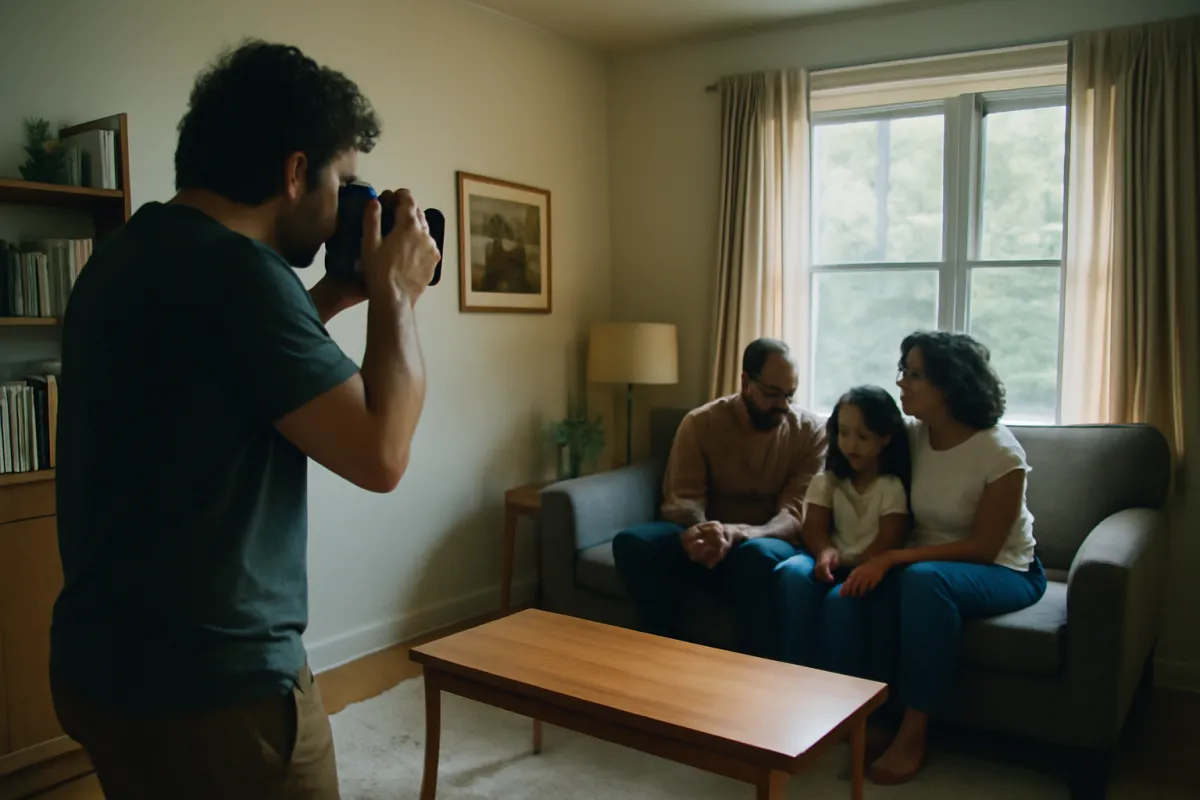
The best camera for real estate photography is not primarily a camera question at all, it is a lens and technique question that happens to need a reasonably capable body behind it. The single property that makes an interior photo work, fitting an entire room in frame from a normal standing position without a distorted, stretched look, comes from a wide-angle lens, not from any camera body feature. Get the lens right and almost any modern mirrorless or DSLR camera will produce professional-looking real estate photos.
This is the gear-recommendation half of a pair. Our real estate photography field note covers the full technique, the settings, the bracketing workflow, and the editing habits that make a listing’s photos sell the space; this one is purely about the camera and lens choice behind that technique. It leans on the field-of-view math in our wide-angle lens field note, the sensor tradeoffs in our full-frame versus crop field note, and the support gear in our tripod field note. Price your own kit as you read in the upgrade budget planner.
Key takeaways
- A wide-angle lens, 16mm to 24mm on full frame or 10mm to 16mm on crop, is what actually makes an interior photo work, more than any camera body feature.
- Full frame is not required for real estate work: a crop sensor with a crop-specific wide zoom covers the same interior framing need at a lower cost.
- A tripod is close to essential, not optional, since it keeps the camera level, enables narrow apertures without shake, and makes HDR bracketing possible.
- Shoot interiors at f/8 to f/11 for front-to-back sharpness, and keep the camera level to avoid converging vertical lines, the single biggest visible quality signal in this genre.
- Exposure bracketing for HDR, not a specific camera model, is what solves the bright-window-against-dim-room problem that defines most real estate interiors.
The best camera for real estate photography, in one answer
The best camera for real estate photography is whichever capable mirrorless or DSLR body you can pair with a true wide-angle lens, because the lens, not the camera, is what lets you fit a whole room in frame without backing into a closet or distorting the space. On full frame, that means roughly 16mm to 24mm; on a crop sensor, roughly 10mm to 16mm, which frames the same way once the crop math is applied. Beyond the lens, the camera’s job is to deliver good dynamic range, handle exposure bracketing reliably, and mount to a tripod securely, all of which the large majority of current mirrorless and DSLR bodies already do well.
This is a genuinely different priority order from most other photography genres covered elsewhere on this site. Autofocus speed, burst rate, and even sensor resolution beyond a sensible baseline matter far less here than they do for sports, wildlife, or even portrait work, because real estate interiors are static scenes shot deliberately from a tripod, with time to get the exposure and composition right rather than reacting to a fast-moving subject. Keeping that priority order straight from the start saves real money, since it points the budget toward the lens and the tripod rather than toward camera body features this genre barely uses.
- Already own a camera: buy a wide-angle lens before anything else. It is the single highest-value purchase for this genre.
- Starting from nothing: any recent mirrorless body with good dynamic range, paired with a 16-24mm or equivalent wide zoom.
- Tight budget: a crop-sensor body with a 10-18mm style ultra-wide zoom, which is less expensive than full-frame wide glass.
- Working professionally: consider a dedicated architecture or tilt-shift lens for automatic vertical correction, once the basics are solid.
- Every budget tier: a sturdy tripod, close to as important as the lens itself for this specific genre.
What makes a good real estate camera and lens pairing
A real estate camera and lens pairing is judged on four things, and the order surprises people coming from other genres. First, field of view: does the lens actually fit the room, which is a function of focal length and sensor size rather than optical quality. Second, control over distortion: does the lens keep straight lines straight, since a bowed horizon is forgivable in a casual photo but an obviously curved doorframe reads as unprofessional in a listing photo meant to sell a space.
Third, dynamic range: can the camera, or the bracketed sequence it captures, hold detail in both a bright window and a shadowed interior corner at once, which is the single most common lighting challenge in this genre. Fourth, and the one most overrated for this specific use, autofocus sophistication and burst rate, since real estate interiors are shot static from a tripod with time to nail focus manually or with a single confident autofocus point, not tracked through a fast sequence. Weigh your own priorities in the companion above and price the result in the upgrade budget planner.
Choosing a wide-angle lens for interiors
The workhorse real estate focal range is 16mm to 24mm on full frame, and within it, 16mm to 20mm is where most interior work actually lives, since the goal is fitting an entire room, not just a wide view of part of it. Our wide-angle lens field note covers the format in general; for real estate specifically, treat the widest end of that range as the default rather than the exception, which is the reverse of landscape work, where the widest option is often too wide.
The chart below shows how much more of a room a wider lens captures from the same spot, which is the entire reason this genre leans as wide as it does. A standard 35mm or 50mm lens, excellent for a portrait, simply cannot fit a bedroom or living room in frame from a normal standing position, which is the single most common reason an amateur real estate photo looks cramped and amateurish next to a professional one.
Field of view by focal length, for interiors
Approximate diagonal angle of view on a full-frame camera, in degrees. A wider lens fits far more of a room from the same standing position.
A 16mm sees more than twice the angle of a 50mm, which is the entire difference between a room that reads spacious and one that reads cramped. Interiors live at the wide end of this range, not the middle.
Crop sensor vs full frame for real estate photography
A crop sensor is a perfectly sound choice for real estate work, and in some ways it is the more budget-friendly path, since crop-specific ultra-wide zooms, often in the 10-18mm or 10-20mm range, are typically smaller, lighter, and less expensive than full-frame wide zooms that reach the same effective field of view. The crop math is straightforward: a 10mm to 16mm lens on a crop body frames like a 15mm to 24mm lens on full frame, squarely in the interior wide-angle range this genre needs.
Full frame’s usual advantages, cleaner high-ISO performance and shallower depth of field, matter far less here than in portrait or low-light work, since real estate interiors are shot at narrow apertures, f/8 to f/11, with the camera on a tripod, which removes most of the high-ISO pressure a handheld low-light shot would otherwise create. The honest takeaway is that sensor size is one of the least important decisions in this whole field note, well behind the lens’s actual field of view and the tripod that supports the shot. Our full-frame versus crop field note works the full arithmetic if you want to translate any focal length here to your own sensor.
Dynamic range and HDR for bright windows and dim rooms
The single most common lighting problem in real estate interiors is a bright window next to a comparatively dim room, a contrast range wider than one exposure can capture without either a blown-out, detail-less window or a dark, muddy interior. This is solved with exposure bracketing, capturing the same frame at several different exposures and blending them in software, commonly called HDR, rather than by any single camera setting or body feature.
A camera with strong native dynamic range can sometimes recover a usable image from a single raw file in moderate contrast situations, which saves time, but for a genuinely bright window against a dim room, bracketing three to five exposures and blending them remains the standard, reliable approach used by working real estate photographers regardless of how advanced their camera’s single-shot dynamic range is. What the camera needs to support this well is a reliable auto-bracketing mode and a tripod to hold the frame perfectly still across the sequence, more than any specific sensor specification. Nearly every mirrorless and DSLR body sold in the last decade includes some form of auto-bracketing, so this is rarely a reason to buy a new camera on its own.
What makes a real estate camera and lens kit
Illustrative weighting of what moves a real estate kit from amateur-looking to professional. The lens and support gear carry the decision, not the camera body.
The camera body itself, apart from supporting these three things, barely registers in this weighting, which is the central idea of this entire field note.
Why a tripod matters as much as the camera here
A tripod does three separate jobs in real estate photography, and any one of them alone would justify the purchase. First, it keeps the camera perfectly level, which prevents the converging vertical lines, a doorframe or a wall edge that appears to lean, that are one of the fastest ways an interior photo reads as amateur rather than professional. Second, it allows the narrow apertures interiors need, f/8 to f/11, without the camera shake a slower handheld shutter speed would otherwise introduce in dimmer rooms.
Third, and specific to this genre, it holds the frame perfectly still across the multiple bracketed exposures HDR blending needs, since even small handheld movement between frames makes a clean blend noticeably harder and can introduce ghosting around any object that moved, including curtains in a breeze. Our tripod field note covers choosing one in general; for real estate specifically, a model with a bubble level or a camera with a built-in electronic level is worth prioritizing given how much the genre depends on a perfectly level frame.
Keeping verticals straight, lens and technique together
Converging verticals, where a doorframe or wall appears to lean inward or outward, happen when the camera is tilted up or down rather than held perfectly level, and they are one of the fastest visual signals that separate an amateur interior photo from a professional one. The fix starts with the camera itself: keep the lens pointed straight ahead, using a bubble level or an electronic level display, rather than tilting up to fit a tall ceiling or down to exclude a cluttered floor.
A dedicated architecture or tilt-shift lens corrects this optically at the moment of capture, which is a genuine professional upgrade, but it is a specialist and comparatively expensive purchase that most beginners do not need before mastering a level camera and the vertical-straightening tools available in nearly every photo editor. For the large majority of real estate work, a level tripod and a quick edit correct verticals convincingly enough that a tilt-shift lens is a later-stage purchase rather than a starting requirement.
Flash and supplemental lighting for dim interiors
Some interiors, a windowless bathroom, a dark basement, or a hallway with no natural light, are dim enough that exposure bracketing alone cannot recover a clean, bright result without pushing ISO uncomfortably high or a shutter speed so slow that even a tripod cannot fully prevent subject movement from a ceiling fan or a curtain in a draft. For these rooms, a simple off-camera flash or a continuous LED panel, bounced off a ceiling or wall rather than aimed directly at a surface, adds clean, even light without the harsh shadows a direct, on-camera flash produces.
This is a genuinely optional step for most listings, since the bulk of a home’s main living spaces and bedrooms usually have enough window light to bracket successfully, but it is worth budgeting for if a property has several genuinely dark interior spaces, since those rooms are exactly the ones a buyer skips past quickly if the listing photo renders them as a dim, uninviting afterthought rather than a usable space. A single bounce flash and a stand, an illustrative $100 to $200 combined, covers this need without approaching the cost of a full studio lighting setup most real estate work never requires, and it packs down small enough to carry alongside the tripod on every shoot without much extra weight.
Editing workflow and what it demands of your camera
Real estate photography leans more heavily on post-processing than most genres, since the HDR blend, the vertical correction, and the color and white balance consistency across an entire listing’s worth of rooms all happen after the shutter clicks, not in camera. This means shooting in raw format rather than JPEG is worth prioritizing on whichever camera you use, since a raw file holds far more recoverable detail in a blown-out window or a shadowed corner than a compressed JPEG does, which matters enormously when a bracketed exposure still falls short of the room’s full contrast range.
A camera’s in-camera HDR or bracketing mode is a convenience, but the real work of blending exposures and straightening verticals happens in dedicated editing software afterward, which is worth knowing before assuming a camera’s automatic HDR JPEG output is good enough for professional listing photos. Budget time and, eventually, editing software into your real estate workflow as seriously as the camera and lens, since a mediocre camera with a disciplined bracket-and-edit workflow consistently beats an excellent camera shot carelessly in a single frame per room.
Shooting settings that matter more than the camera body
Aperture and ISO matter more for a sharp, clean real estate interior than almost any camera body spec. A narrow aperture, typically f/8 to f/11, keeps the whole room sharp from a near foreground object to the far wall, since interiors need front-to-back depth rather than the shallow focus a portrait lens chases. Because a narrow aperture lets in less light, the resulting slower shutter speed is exactly why the tripod from two sections ago is not optional.
Keep ISO as low as the lighting allows, since a tripod removes the usual reason to raise it, and a clean, low-noise file matters for the close inspection a potential buyer gives listing photos online. Our camera settings reference is a useful lookup for the aperture numbers this field note references, and the exposure triangle field note explains why a tripod changes the whole calculation by removing shutter speed as a constraint.
Real estate camera and lens by budget tier
Budget changes which purchase does the most for your real estate photos, and at every tier the lens and the tripod outrank the camera body. At the tightest budget, an illustrative $300 to $500, a crop-sensor ultra-wide zoom paired with the camera already in the bag, plus an inexpensive tripod, an illustrative $40 to $80, covers the core technical need of this entire genre.
At a mid tier, an illustrative $800 to $1,500, a full-frame-capable wide zoom in the 16-24mm or similar range, or a used full-frame body if you do not already own one, adds a bit more dynamic range headroom for tricky HDR scenes. At a higher tier, an illustrative $2,000 and up, a dedicated architecture or tilt-shift lens automates the vertical correction that editing otherwise handles manually, a genuine time saver for a working photographer shooting many listings a week rather than a visible quality jump for an occasional shooter. Price any of these tiers in the upgrade budget planner.
Smartphone real estate photography, when it is enough
A modern smartphone with an ultra-wide lens mode is a real, usable option for a quick, low-stakes listing or a for-sale-by-owner post, and the ultra-wide field of view on many phones now approaches what a dedicated 16mm to 20mm lens delivers on a larger sensor. Where a phone falls short is dynamic range in tricky bright-window scenes compared to a proper bracketed HDR sequence, control over distortion correction, and the ability to shoot reliably on a tripod with manual settings for a consistent, professional-grade result across an entire listing.
For a professional listing, especially for a higher-value property where photo quality visibly affects buyer interest, the gap between a phone and a dedicated wide lens plus tripod setup is large enough to matter, both in the final image quality and in the perceived professionalism of the listing itself. For a casual, personal, or very low-budget use case, a phone’s ultra-wide mode is a legitimate starting point, and the technique habits, keeping the camera level and shooting multiple exposures in tricky light, transfer directly once you do upgrade to a dedicated camera and lens later on.
Autofocus, resolution and the specs you can deprioritize
It is worth naming plainly what this genre does not need, since beginners coming from other kinds of photography often shop for specs that simply do not apply here. Fast, sophisticated subject-tracking autofocus, the headline feature on most current camera marketing, matters almost not at all for a static interior shot on a tripod, where a single confident autofocus point or careful manual focus on the room’s midpoint handles the job completely. A high continuous burst rate is similarly irrelevant, since you are capturing a deliberate bracketed sequence from a fixed position, not chasing a fast-moving subject.
Resolution beyond a sensible modern baseline, roughly 20 megapixels and up, also matters less than people expect, since listing photos are typically viewed on a phone or a browser window rather than printed large or cropped aggressively, and the lens’s distortion control and the room’s lighting affect the final impression far more than an extra ten megapixels would. This is not an argument against a capable modern camera, it is a reminder to spend the marginal dollar on the wide lens and the tripod rather than chasing autofocus or resolution specs built for an entirely different kind of photography.
What agents and clients actually notice in finished photos
If real estate photography is work you do for others rather than only your own listings, it is worth knowing what a client or an agent actually notices in a finished set of photos, since it rarely matches the spec sheet concerns this field note has otherwise focused on. A level horizon and straight verticals register, even to someone who could not name why a photo looks professional, as the single clearest signal of quality. Bright, evenly lit rooms with a visible, detailed window rather than a blown-out white rectangle register just as strongly.
What clients notice far less is sensor size, megapixel count, or camera brand, none of which show up in a finished, edited photo in any way a viewer can perceive, no matter how closely they look or how many listings they compare side by side. This is useful context for where to actually invest a limited budget: the wide lens, the tripod, and the bracket-and-edit workflow all show up directly in what a client sees and judges, while a more expensive camera body, absent those three things, frequently produces a worse-looking final result than a modest body used correctly.
Mistakes people make choosing real estate gear
Four recurring errors account for most of the disappointing real estate photos taken with perfectly capable gear. Using a standard 35mm or 50mm lens because it is what came with the camera, which simply cannot fit most rooms in frame from a normal position and forces either a cramped composition or backing into a hallway. Shooting handheld in dim rooms, which forces a higher ISO or a wider aperture than the scene’s needed depth of field allows, trading sharpness for convenience.
Ignoring the level, tilting the camera up to fit a tall ceiling or down to exclude clutter, which introduces converging verticals that read as unprofessional regardless of how good the lens is. And skipping exposure bracketing in a room with a bright window, accepting either a blown-out window or a dark interior rather than taking the extra thirty seconds to capture and blend a proper HDR sequence. None of these four mistakes require new gear to fix, only a tripod, a wider lens, and a slower, more deliberate shooting habit.
Renting gear before a bigger commitment
If real estate photography is a trial for a potential side business rather than a certain long-term pursuit, renting a wide-angle lens for a weekend, an illustrative $25 to $50, is a sound way to test whether the genre suits you before buying anything. This is particularly useful for testing a specific focal length against the actual rooms you shoot most, since a 16mm might feel too extreme for a smaller row of listings dominated by modest bedrooms, while a 20mm or 24mm might leave a larger open-plan living space feeling tighter than expected.
A rental also lets you test a tilt-shift or architecture lens before committing to its higher price, since that specialist purchase only pays off once you have confirmed the volume of work and the workflow habits that make its automatic vertical correction worth the cost over manual straightening in software. For an occasional or first-time shoot, renting the wide lens for that single job and buying only once a pattern of repeat work emerges is a reasonable, low-risk way to approach this entire category of gear, and it avoids the common mistake of buying specialized equipment before you actually know how often you will use it.
Buying real estate gear used
A used wide-angle lens is a sound real estate purchase, since the properties that matter most for this genre, focal length coverage and distortion control, do not degrade with age in a lens that has not been damaged, and a wide zoom used primarily on a tripod for static interiors lives an easier mechanical life than one used for fast action work. Check a used wide lens for the same things any used lens buying guide recommends: fungus or haze on the internal elements, smooth focus and zoom rings, and a mount free of play or damage.
A used tripod is an even safer buy, since there is very little to wear out beyond the leg locks and the head, both of which are easy to test in person by extending and locking each leg section and checking the head holds a camera’s weight without slowly drifting over a minute or two of observation. Spending saved money here on a slightly better lens or a sturdier tripod is usually a better use of the same budget than putting it toward a newer camera body, which this field note has argued throughout matters less than the glass and the support gear around it.
Shooting exteriors and twilight shots with the same kit
The same wide-angle lens that serves interiors also handles a property’s exterior and curb-appeal shots, though the framing problem is less extreme outdoors since you can usually back up across a yard or a street to fit the whole facade in frame, which means a standard 24mm to 35mm lens is often perfectly adequate outside even when the interiors demanded a true wide angle. A polarizing filter is a genuinely useful addition here, cutting glare off windows and a car’s paint in the driveway and deepening a blue sky behind the roofline, an effect our camera filters field note covers in more depth.
Twilight exterior shots, taken in the window of time after sunset when the sky still holds color and interior lights can glow warmly through windows, are a genuine professional upgrade many listings benefit from, and they ask nothing new of the camera beyond what interior work already requires: a tripod for the longer exposure the dimmer light demands, and the same narrow-to-moderate aperture for a sharp, detailed facade. This is a technique and timing skill more than a gear purchase, and the same kit recommended throughout this field note handles it without modification.
The worked recommendation, three real estate scenarios
Theory into practice: three composite photographers, each with a different real estate goal, each landing on a different correct kit for the same underlying reasons. Scenario one is an agent photographing their own listings occasionally on a tight budget. The verdict is the crop-sensor camera already owned, paired with a 10-18mm ultra-wide zoom, an illustrative $300 to $400, and a basic tripod, an illustrative $50, shot at f/8 with three-exposure bracketing for any room with a bright window.
Scenario two is a part-time photographer building a small real estate photography side business. The verdict is a full-frame or strong crop-sensor mirrorless body paired with a 16-24mm equivalent wide zoom, an illustrative $800 to $1,200 combined, a sturdy tripod with a bubble level, and a consistent bracket-and-blend workflow for every room. Scenario three is a working professional shooting multiple listings weekly who wants to minimize editing time. The verdict is the same solid body and wide zoom, with the addition of a dedicated architecture or tilt-shift lens, an illustrative $1,500 to $2,500, to correct verticals optically at capture and cut manual straightening out of the editing workflow entirely. Three different answers, one identical logic: the lens and the tripod decide the photo, and the camera body supports them.
The bottom line
The best camera for real estate photography is whichever capable mirrorless or DSLR body you pair with a wide-angle lens, roughly 16mm to 24mm on full frame or 10mm to 16mm on crop, because the lens is what actually fits a room in frame without distortion, not the camera itself. Sensor size matters far less here than in most other genres, so a crop sensor with the right wide zoom is a perfectly sound, often more affordable choice. A tripod is close to essential, not optional, since it keeps the camera level, enables the narrow apertures interiors need, and makes exposure bracketing for HDR possible. Shoot at f/8 to f/11, keep the camera level to avoid converging verticals, and bracket exposures for any room with a bright window against a dim interior. Buy the wide lens and the tripod first, let your own listings tell you whether a dedicated architecture lens is worth the next step, and price the plan in the upgrade budget planner. Rent before you buy if the whole genre is still a trial, and remember through every decision in this field note that a client judges the finished photo, not the camera that made it.
This field note is written to teach a real estate camera and lens decision rather than to push any particular product: no brand paid for a mention, and none is named on purpose, only the focal lengths, sensor formats and techniques that exist across camera systems. All dollar amounts are illustrative planning figures rather than quotes, because real prices swing with brand, mount, condition, and when you shop. Confirm which lenses your specific camera mount actually offers, and let the rooms you actually shoot, not any writer’s preference, decide how wide a lens your kit truly needs.
Frequently asked questions
What is the best camera for real estate photography?
The best camera for real estate photography is any capable mirrorless or DSLR body paired with a wide-angle lens, roughly 16mm to 24mm on full frame or 10mm to 16mm on crop, because the lens, not the camera body, is what lets you fit a whole room in one frame without a distorted, stretched look. Beyond the lens, a body with good dynamic range and reliable HDR or exposure bracketing helps balance a bright window against a dim interior, which is the single most common lighting problem in this genre.
What lens is best for real estate photography?
A wide-angle zoom in the 16mm to 24mm range on full frame, or a 10mm to 16mm range on a crop sensor, is the best lens for real estate photography for most rooms, because it fits an entire space in frame from a realistic standing position without needing to back into a hallway or a closet. A dedicated architecture or tilt-shift lens corrects converging vertical lines automatically and is a genuine upgrade for professional work, but it is a specialist purchase most beginners do not need before mastering the wide zoom and straightening verticals in editing.
Do you need a full frame camera for real estate photography?
No. A crop sensor camera paired with a crop-specific wide-angle lens, such as a 10-18mm, covers the same interior wide-angle need as a full-frame 16-24mm lens, and real estate photography rarely depends on the shallow depth of field or extreme low-light performance that most favor full frame elsewhere. What matters more than sensor size here is the lens's actual field of view and the camera's dynamic range for handling a bright window against a dim room, both of which are achievable on a well-chosen crop body.
Is HDR necessary for real estate photography?
HDR, or exposure bracketing merged in post-processing, solves the single most common lighting problem in real estate interiors: a bright window alongside a comparatively dim room, a contrast range wider than a single exposure can capture without either a blown-out window or a dark, muddy interior. It is not strictly necessary for every room, a space with even, diffused light can work from one correctly exposed frame, but for a mix of window light and interior shadow, which describes most listings, bracketing several exposures and blending them is the standard, reliable approach.
What is the best budget camera for real estate photography?
The best budget setup for real estate work is the camera already in the bag, paired with an inexpensive wide-angle lens, an illustrative $300 to $500 for a crop-sensor ultra-wide zoom, since the wide lens is what actually unlocks interior photography and a new camera body changes far less about the result. A tripod, an illustrative $40 to $100, is the second budget priority, since it enables both the long shutter speeds dim rooms often need and the exposure bracketing HDR interiors rely on.
What camera settings matter most for real estate photography?
Aperture and verticals matter most. A narrow aperture, typically f/8 to f/11, keeps an entire room sharp from near foreground to the far wall, since real estate interiors ask for front-to-back depth rather than a blurred background. Keeping the camera level, with the lens pointed straight ahead rather than tilted up or down, keeps vertical lines like doorframes and walls straight rather than converging, which is a bigger visible quality signal in real estate photos than almost any other single habit.
Do real estate photographers use tripods?
Yes, a tripod is close to essential for real estate interior work, for three separate reasons that all point the same direction: it keeps the camera perfectly level, which prevents converging vertical lines; it allows the narrow apertures interiors need without the camera shake a slower handheld shutter speed would introduce; and it allows the multiple bracketed exposures HDR blending needs to be captured from the exact same position, since even small handheld movement between frames makes a clean blend much harder.