What's on this page
- What real estate photography is (and what makes it sell)
- The gear you actually need for real estate photography
- Why a wide-angle lens is the key piece
- Why a tripod matters for real estate photography
- Flash and off-camera lighting, briefly
- Camera settings for real estate photography
- Aperture and depth of field for interiors
- ISO, shutter, and why you shoot from a tripod
- Bracketing and HDR for windows
- Lighting an interior: turn the lights on
- Balancing window exposure
- The flambient technique, explained
- Composition: keep your verticals straight
- Shooting height: from chest height
- Declutter and stage before you shoot
- Interior shots, room by room
- Exterior shots and curb appeal
- Twilight shots, the premium look
- Room-by-room settings and tips
- A worked example: shooting one room
- Editing real estate photos
- Your real estate photography workflow
- Common real estate photography mistakes
- The bottom line
Short answer: Real estate photography is photographing a property so a viewer understands the space and wants to see it. The essentials are a wide angle lens in the full frame 16mm to 24mm range (about 10mm to 16mm on crop), a tripod for straight verticals and base ISO, bracketed exposures blended to hold both a bright window and the room, a level camera at chest height, and a decluttered, lightly staged room with every light on.
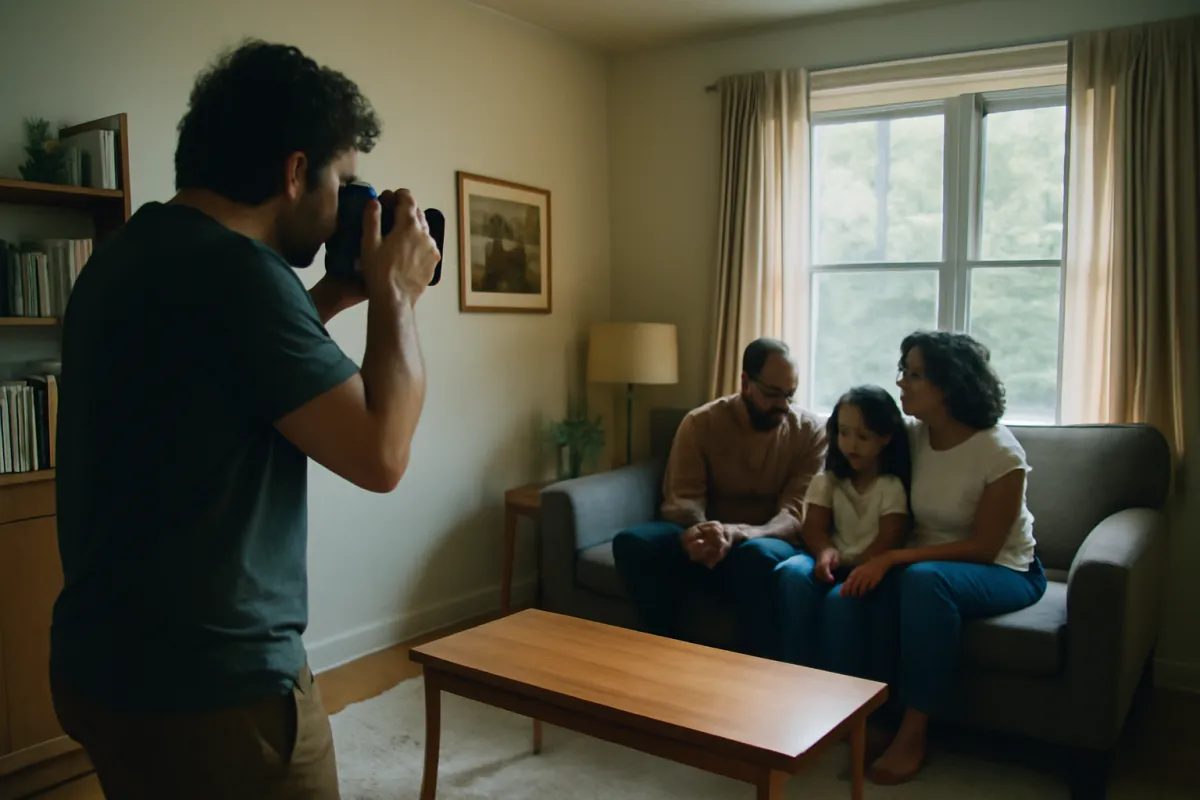
Real estate photography is the skill of photographing a home so that a viewer scrolling a listing stops, understands how the space works, and wants to see it in person, and it is one of the most learnable and highest-return techniques an agent, host, landlord, or aspiring photographer can pick up. The gap between listing photos that look dark, crooked, and cramped and ones that look bright, straight, and spacious is rarely the camera. It is a short, repeatable set of decisions about a wide lens, a tripod, camera settings, interior light, straight verticals, and a careful blend in editing, and every one of them can be practiced in your own living room with gear you may already own.
This field note is written for people photographing property they want to sell, rent, or show: an agent building a listing, a host preparing a short-term rental, a landlord filling a vacancy, a homeowner selling privately, or someone hoping to shoot real estate for a living. It stays at the level of technique rather than naming camera brands or quoting prices, because the principles hold across every body and phone. Where a setting or a habit overlaps a skill covered elsewhere, it leans on our reference field notes rather than repeating them: the wide-angle choices below build on our landscape lens field note, the exposure work runs through our manual mode field note and exposure triangle field note, the dim-room habits come from our low light field note, and the twilight timing draws on our golden hour field note. Price any gear you are tempted by against the upgrade budget planner before you assume equipment is the problem.
Key takeaways
- A wide-angle lens is the defining tool: the full-frame 16mm to 24mm range (about 10mm to 16mm on a crop sensor) fits a room without the distortion of an extreme ultrawide or fisheye.
- A tripod is not optional: it keeps verticals straight, holds the identical frame for bracketing, and lets you shoot at base ISO and a small aperture for a clean, sharp, deep-focus file.
- Windows are the central problem, and bracketing several exposures then blending them, or the flash-and-ambient flambient technique, is how you hold both a bright window and a well-lit room.
- Keep verticals dead straight and shoot from roughly chest height, because a level camera and a lower viewpoint are most of what makes a room look professional rather than crooked and cramped.
- Prep beats gear: turning on every light, decluttering, and lightly staging a room does more for a listing photo than any lens, and it costs nothing.
What real estate photography is (and what makes it sell)
Real estate photography is simply photographing a property so a viewer can understand the space and want to see it, and that plain definition points at the two jobs every listing photo has to do at once. It has to be accurate, so the space reads honestly and a buyer who visits is not disappointed by a room that looked twice its real size online, and it has to be appealing, so the listing stands out in a feed of dozens of others and earns the click and the showing. Those two goals pull gently against each other, and learning real estate photography is largely learning to make a home look its best without misrepresenting it.
The payoff is unusually direct. For almost every property that changes hands or gets rented today, the photos are the storefront, the thing a shopper judges in a fraction of a second before reading a word of the description. Bright, straight, spacious photos read as a well-kept home and a serious listing, while dark, crooked, cluttered snapshots read as neither, regardless of how good the actual property is. A listing with strong photos gets more clicks, more saves, and more showings, which is why real estate photography is one of the few photography skills with a clear, measurable return.
What makes this such a rewarding skill to learn is that the returns come from care and understanding, not from spending. A thoughtfully lit, level, decluttered room shot on a modest camera routinely beats an expensive body used carelessly at eye level in a messy room. The rest of this field note walks the whole workflow: the gear that actually helps, why the wide lens and the tripod matter, the camera settings that keep a room sharp, bracketing and lighting an interior, keeping verticals straight, staging, interior and exterior and twilight shots, a room-by-room reference, editing, and the mistakes to avoid. Run your own kit and budget through the upgrade budget planner as you read, because most of what makes a listing photo work is decisions, not price tags.
The gear you actually need for real estate photography
The honest starting list for real estate photography is short, and you probably own more of it than you think. In rough order of how much each one helps, you need a wide-angle lens or a phone with an ultrawide camera, a tripod, a camera you can set to manual, and, later, a flash. Everything beyond that is refinement. A beginner who owns a camera with a kit lens set to its widest, mounts it on a tripod, turns on the room lights, and brackets a few exposures is already equipped to make listing photos that look professional, and a modern phone on a small tripod is not far behind.
The wide-angle lens is the piece that defines the genre, and we give it its own section next, because fitting a room into the frame without distorting it is the single most specific requirement of the work. The tripod matters more than beginners expect: it is what keeps the walls straight, holds the identical composition across a bracketed set so the frames combine cleanly, and lets you shoot at a low ISO and a small aperture for the cleanest, deepest-focus file, which our sharp photos field note explains in full. The camera can be a mirrorless body, a DSLR, or a capable phone; a body you can set to manual gives you the control the blend and the window recovery need, but the light and the framing matter far more than the badge.
A few small extras punch above their weight. A remote release or the camera’s two-second self-timer removes shutter shake from a long exposure. A bubble level or your camera’s electronic level keeps verticals honest. A wide-brush understanding of your editing software matters more than any accessory, because real estate photos are made as much in the blend as in the capture. Resist the urge to buy a big kit before you have shot anything: set up with what you have, learn what each element does, and let the gaps you actually hit tell you what to buy next. Price the tempting upgrades against the upgrade budget planner first.
Why a wide-angle lens is the key piece
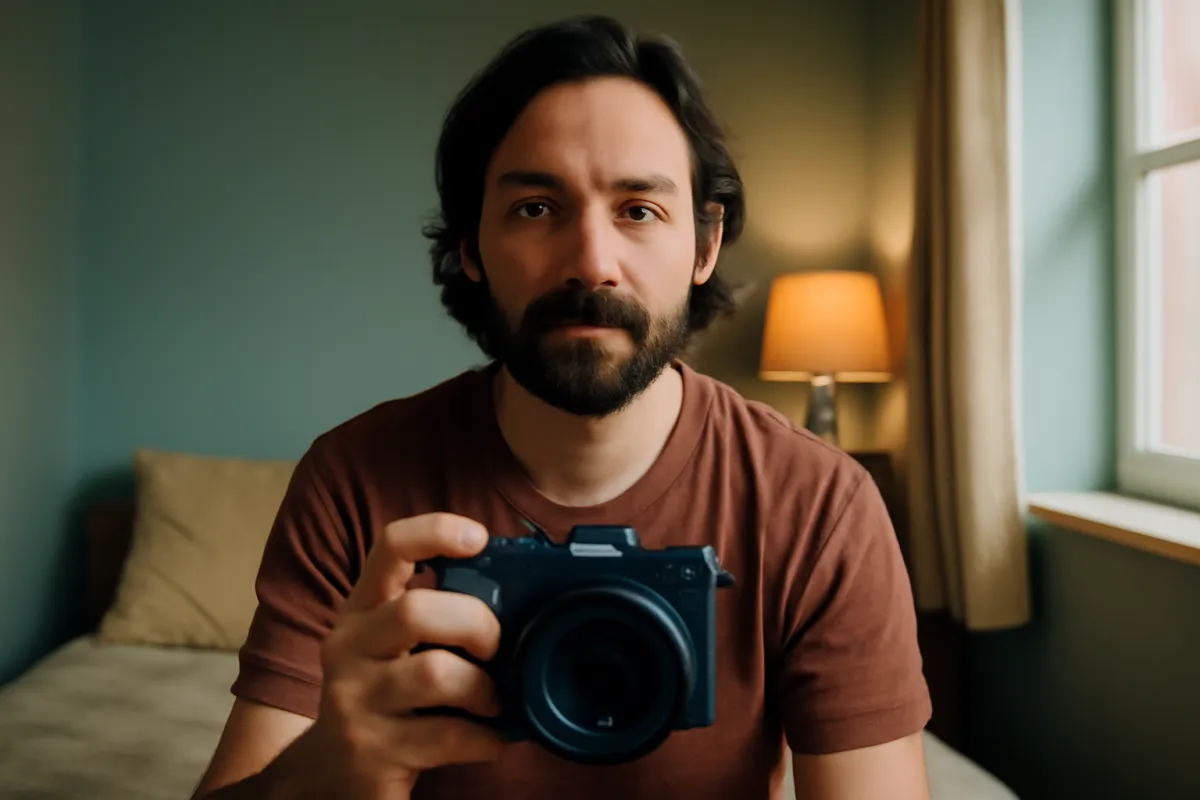
The wide-angle lens is the one truly non-negotiable tool in real estate photography, because ordinary rooms are small and a normal lens simply cannot fit enough of a room into the frame to show how the space works. Stand in a typical bedroom with a standard 50mm lens and you see one corner and a slice of bed; switch to a wide lens and the whole room, the window, the bed, and the flow of the space appear in a single honest frame. The wide field of view is what lets a photo answer the question every viewer is really asking, which is how the room is laid out and how it would feel to stand in it.
The workhorse range is roughly 16mm to 24mm on a full-frame camera, and about 10mm to 16mm on a crop-sensor body, which gives the same angle of view once you account for the crop factor our full-frame versus crop field note explains. That range covers nearly every interior you will meet, from a cramped bathroom to a large open-plan living space. Many kit zooms already reach the wide end of this, so a beginner can often start without buying anything, simply by zooming out to the lens’s widest setting and stepping back.
The important discipline is not going too wide. It is tempting to think wider is always better, but a fisheye or an extreme ultrawide bows the walls, stretches the furniture nearest the edges, and makes a room look distorted and dishonest, which reads as amateur and can actively mislead a buyer. Most working real estate shots land between the equivalent of 16mm and 20mm: wide enough to show the room, not so wide that it warps. When a room is too small to fit even at your widest without distortion, the answer is to shoot from a doorway or a corner rather than to reach for a more extreme lens. Our landscape lens field note covers wide lenses in more depth, and a phone’s ultrawide camera, discussed later, is a genuine stand-in for casual listings.
Why a tripod matters for real estate photography
A tripod is the least glamorous item in real estate photography and one of the most valuable, because it does three separate jobs that together transform the look of a listing. First, it keeps the camera level, which is what keeps the vertical lines of walls, doorframes, and cabinets dead straight, the single biggest thing that separates a professional interior from a snapshot. A handheld wide-angle shot almost always tilts a little, and a tilted wide lens makes the walls lean and the room look like it is toppling, a flaw the eye catches instantly even when it cannot name it.
Second, the tripod holds the identical composition across a set of frames, which is what makes bracketing and the flambient blend possible at all. To combine a bright-window exposure with a well-lit-room exposure, the frames must line up pixel for pixel, and only a locked-down camera delivers that; the tiny movement of handholding between frames leaves ghosting and misalignment that no software fully rescues. Third, locking the camera down lets you shoot at your camera’s base ISO for the cleanest file and at a small aperture like f/8 or f/11 for deep front-to-back sharpness, letting the shutter stay open as long as the dim interior needs without a trace of shake, exactly as our low light field note describes.
You do not need an expensive tripod to start, but you do want a stable one, because a flimsy tripod that drifts between bracketed frames defeats the purpose. A solid tripod with a head you can level precisely, ideally with a built-in bubble level, and a remote release or the two-second self-timer to remove the shake of pressing the shutter, covers everything. A phone simply needs an inexpensive holder to attach to a small tripod, which our phone tripod field note covers in detail. If you buy one thing for real estate photography before any lens or flash, make it whatever holds the camera perfectly still and perfectly level, because it improves every single frame.
Flash and off-camera lighting, briefly
Flash is the piece of gear beginners worry about most and need least at the start, so it helps to be clear about what it does and when it earns its place. A flash exists to add clean, controllable light to a room, which matters because the mixed indoor lighting of a typical home, warm bulbs, cool daylight through the windows, and greenish overhead fixtures all at once, produces uneven brightness and clashing color casts that are hard to fix. A single off-camera flash bounced off a white ceiling floods the room with soft, neutral, even light that overrides the mess and renders the space cleanly, which is the foundation of the professional flambient look covered later.
The crucial technique detail is that the flash is bounced, not aimed. A flash pointed straight ahead from the camera produces the flat, harsh, shadow-behind-everything look that screams amateur snapshot, the opposite of what you want. Bouncing the flash off a large white surface, usually the ceiling or a wall behind the camera, turns that small hard source into a large soft one that lights the room the way a giant softbox would, wrapping gently around the furniture and leaving no ugly shadows. This is the same soft-light principle that governs product photography and portraits, applied to a whole room.
For a beginner, though, the honest advice is to leave flash for later. On a bright day, natural window light plus bracketing produces clean, professional interiors with no flash at all, and learning to see and balance natural light is the more fundamental skill. Add a single off-camera flash only when the lack of it is actually limiting you: when rooms are consistently dim, when you shoot in all weather and need a repeatable look regardless of the sun, or when real estate becomes a regular paid part of what you do. One flash and a way to trigger it off-camera covers a huge amount of professional work; you do not need a bag full of lights. Sanity-check any purchase against the upgrade budget planner first.
Camera settings for real estate photography
Because a room sits still and the camera is locked on a tripod, you get to use the settings that produce the cleanest, sharpest, most detailed file, without the compromises that moving subjects force. The three that matter are aperture, ISO, and white balance, and the shutter speed simply falls wherever the exposure needs once the other two are set, since the tripod absorbs any length of exposure. If you shoot in manual mode, our manual mode field note walks the full routine, and the exposure triangle field note explains how the three trade off.
Set aperture to hold the whole room sharp. Interiors want deep depth of field so the near furniture and the far wall are both crisp, which points to a middle aperture, commonly f/8 to f/11, that keeps the room sharp while staying near the lens’s best performance. Avoid going past about f/11 or f/16, because very small apertures soften the image through an optical effect called diffraction, trading the sharpness you were chasing. Set ISO to your camera’s base, usually ISO 100, because a still room on a tripod never needs a higher one and a low ISO gives the cleanest, least noisy file, which matters when a buyer views the photo large. Let the shutter fall where the meter lands, even to a second or more in a dim room, since the tripod holds it steady.
White balance deserves care in real estate work because of the mixed light problem. A room lit by warm bulbs, daylight through a window, and a cool overhead fixture has no single correct white balance, so set it to the dominant light source rather than leaving it on auto, which guesses and drifts frame to frame, and correct the rest in editing. Shoot RAW whenever you can, because it records the full color and tonal data and lets you set white balance, recover the bright windows, and blend exposures precisely afterward, which is exactly what interiors demand. And bracket: for any room with a bright window, take several exposures of the identical frame at different brightnesses so you can blend them later, a habit covered in its own section below. Treat every number here as an illustrative starting point to meter from, then judge the result on screen.
Aperture and depth of field for interiors
Depth of field, the front-to-back zone that appears sharp, works differently for interiors than for the portraits and product shots where photographers first learn about it, and understanding that difference keeps your rooms crisp. In a portrait you want a shallow zone so the background melts away, but in a room you want the opposite: everything from the coffee table in the foreground to the artwork on the far wall should be sharp, because the viewer is judging the whole space, not one subject. That need for deep, even sharpness is why interiors are almost always shot at a middle aperture rather than wide open.
The reliable range is f/8 to f/11, which for a wide-angle lens focused into the room gives sharpness that runs from just in front of the camera all the way to the far wall. Wide-angle lenses help here, because the wider the lens the more depth of field it delivers at any given aperture, so a 16mm lens at f/8 already holds a huge range in focus. Where you place the focus point matters less than with a long lens, but a good habit is to focus roughly a third of the way into the room rather than on the nearest object, which spreads the sharp zone efficiently through the space.
Resist two temptations at the extremes. Shooting wide open at f/2.8 to let in more light in a dim room throws the far side of the room out of focus and looks wrong for interiors, so keep the aperture small and raise the exposure with a longer shutter on the tripod instead. Stopping all the way down to f/22 to chase maximum depth backfires, because diffraction softens the whole image and you lose more sharpness than you gain in depth. Stay in the f/8 to f/11 band, let the tripod handle the long shutter that a small aperture in a dim room requires, and the room stays sharp corner to corner. The exposure triangle field note explains why these trades work the way they do.
ISO, shutter, and why you shoot from a tripod
ISO and shutter speed are where the tripod pays for itself, because together they let you keep the file clean while a small aperture and a dim room push the exposure long. The rule is simple: keep ISO at its base value, usually ISO 100, for the cleanest, most detailed, least noisy image, and let the shutter speed grow as long as it needs to make a correct exposure. In a bright room that shutter might be a fraction of a second; in a dim room at f/11 it might be a full second or several, and none of that matters because the camera is locked down and nothing in an empty room is moving.
This is the exact opposite of the compromise handheld shooting forces. Without a tripod you would have to raise the shutter speed to avoid blur from your own movement, and to keep the exposure correct you would then have to raise the ISO, introducing the noise and lost detail that mark an amateur file, or open the aperture, losing the depth of field the room needs. The tripod removes that whole chain of compromises: it lets you hold base ISO and a small aperture and simply pay for the correct exposure in time, which an empty room has all of. Our low light field note covers this trade in general, and interiors are one of the purest cases for it.
A couple of habits protect the sharpness a long exposure gives you. Trigger the shutter with a remote release or the two-second self-timer so the act of pressing the button adds no shake at the start of the exposure. If your camera has an electronic front-curtain or a silent shutter mode, it further reduces vibration. And check the corners of your frames at full magnification, because the sharpness you paid for with base ISO and a small aperture only shows if the tripod was truly stable and nothing drifted during a long exposure. Get these right and every frame is as clean and detailed as the camera can make it, which is exactly what a large listing photo needs.
Bracketing and HDR for windows
The bright window is the defining technical problem of interior real estate photography, and bracketing is the most reliable way to solve it. The trouble is dynamic range: the view outside a window on a sunny day can be many times brighter than the room, far more range than a camera can capture in one exposure, so a single frame gives you either a well-lit room with a blown-white window showing nothing, or a perfect window view over a dark, murky room. Neither sells the space, because the room looks either dim or like it has no view.
Bracketing captures the whole range across several frames. With the camera locked on the tripod, you take a series of shots of the identical composition at different exposures, most cameras can do this automatically with an auto-exposure-bracketing mode, ranging from a dark frame that holds detail in the bright window to a bright frame that opens up the dark corners of the room. Three to five frames spaced a stop or two apart usually covers a typical room; a very contrasty scene with strong sun outside might need more. Because the camera never moves, the frames line up perfectly and can be combined afterward.
In editing you blend the brackets so both the room and the window look natural, either with an HDR merge tool or, for more control and a cleaner look, by manually masking the well-exposed window from the darker frame into the brighter room frame. The goal is a balanced, believable photo that looks like what your eye saw standing in the room, where the space is bright and inviting and the window shows a real view. The trap to avoid is the garish, over-cooked HDR look, with halos, unnatural colors, and crushed contrast, that comes from pushing an automatic HDR merge too hard; real estate wants natural and clean, not surreal. Bracketing is the single most useful interior habit a beginner can build, so turn on auto-bracketing and use it in every room with a window.
Lighting an interior: turn the lights on
The simplest, cheapest thing you can do to improve an interior photo is also the one beginners most often skip: turn on every light in the room before you shoot. A room lit only by whatever daylight leaks through the windows tends to look dim, flat, and cave-like in the shadowed areas away from the glass, while turning on the ceiling fixtures, the lamps, and any accent lighting fills those shadows, adds warmth and life, and makes the space feel lived-in and inviting. The warm pools of light from lamps are part of what makes a home feel like a home rather than an empty box, so let them show.
Turning the lights on interacts with the window problem and with white balance, which is why bracketing and RAW capture matter alongside it. The room lights are usually warmer, and often a different color, than the daylight from the windows, so a room with both on has mixed color that you set for the dominant source and finish in editing. The lights also add their own bright spots that the bracketed exposures capture cleanly. The payoff is a room that reads warm and welcoming rather than cold and dim, and it costs nothing but the walk around the room flipping switches, which should be the first thing you do when you enter any space.
A few refinements make the difference cleaner. Replace any obviously dead or mismatched bulb before shooting, because one cool-white bulb in a room of warm ones creates a color patch that is tedious to fix. Where a lamp is in the frame, position it so its glow reads as a warm accent rather than a blown-out hot spot, which the bracketing helps control. And decide, room by room, whether a particular overhead fixture helps or creates an ugly bright reflection or shadow; sometimes a single harsh ceiling light is better off while the lamps and daylight carry the room. The general rule holds, though: lights on, curtains open, and let the room glow.
Balancing window exposure
Balancing the window against the room is the finishing craft that separates a good interior from a great one, and it builds directly on turning the lights on and bracketing. The aim is a photo where the room is bright and inviting and, at the same time, the windows show a clear, natural view of what is outside rather than a featureless white glare. That balance is almost never achievable in a single exposure on a sunny day, which is why the bracketing and blending habit exists, but understanding what you are balancing makes the blend far easier.
Think of it as two separate exposures that you will marry: one for the room and one for the view. The room exposure, with the lights on, makes the interior bright and warm and correctly lit. The window exposure, several stops darker, holds the detail and color of the trees, sky, or street outside. In the blend you take the well-exposed room as your base and paint in the darker, detailed window from the underexposed frame, so the finished photo shows a bright room with a real view, exactly as a person standing there would perceive both at once because the human eye adapts across that range effortlessly.
Two judgment calls keep the result honest. First, how much window detail to show: a fully detailed, perfectly exposed view can look unnatural and pull the eye out of the room, so a slightly bright, gently detailed window often reads more naturally than a heavily recovered one. Second, color: the light outside is cooler than the warm room, and letting a little of that difference remain, a cooler window against a warmer room, looks natural, while forcing them to match looks flat. The overarching goal, as with all real estate editing, is a believable photo that matches the felt experience of the space, not a technical showpiece. When the natural range is simply too extreme, the flambient technique in the next section adds flash to light the room while a natural frame holds the window.

The flambient technique, explained
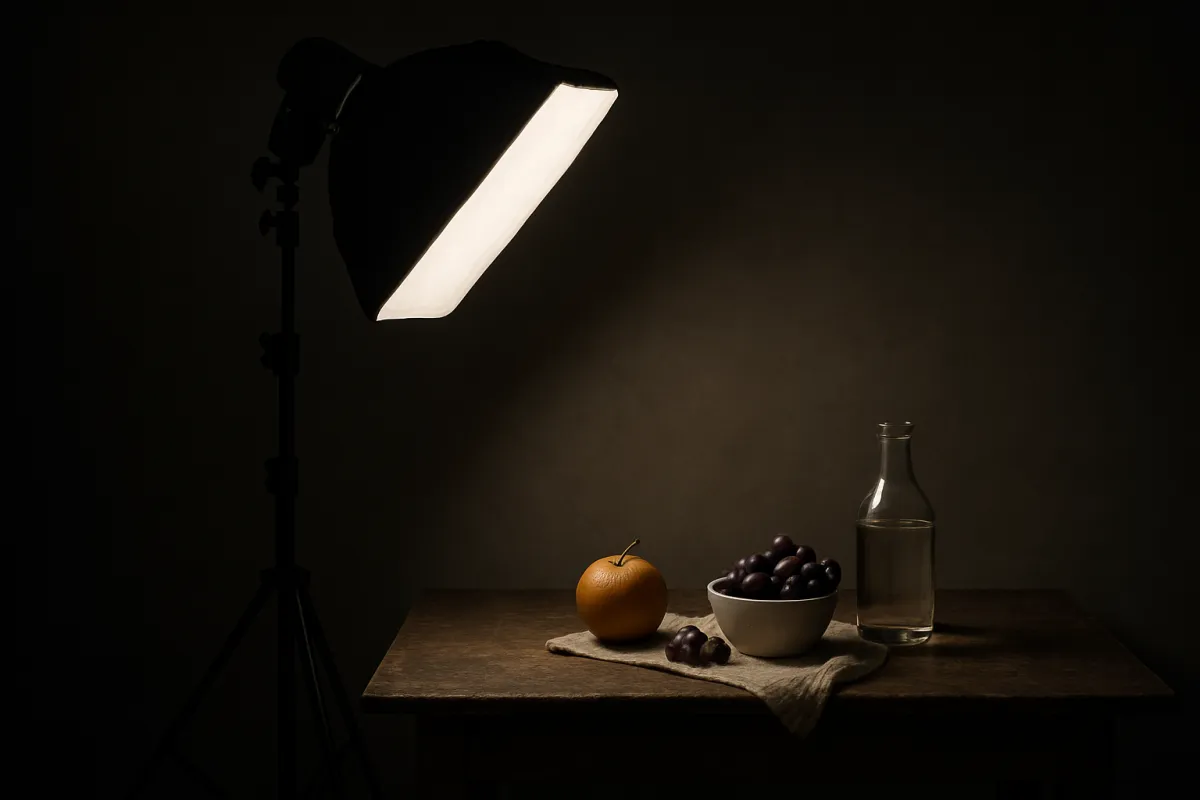
Flambient, a blend of the words flash and ambient, is the method many professionals use to get consistently clean, bright, natural interiors, and while it is more advanced than simple bracketing, understanding it is worth your time even before you try it. The idea is to combine two kinds of frame that each do one job well. The ambient frame is a natural-light exposure, often itself a bracketed blend, that captures the warm glow of the lamps and the true view through the windows. The flash frame or frames use an off-camera flash bounced off the ceiling or a wall to flood the room with clean, soft, neutral, color-accurate light.
The magic is in the blend. The flash frame gives you a room lit evenly, with no harsh shadows and no clashing color casts from the mixed household bulbs, because the bounced flash overrides all of that with one clean source. But a pure flash frame can look a little sterile and loses the cozy warmth and the window view. So in editing you blend the clean, neutral light of the flash frame with the warmth and the window detail of the ambient frame, taking the best of each: clean even light on the room, warm glow from the lamps, and a real view outside. The result looks bright and natural and true to the space, which is exactly the magazine-style look strong listings have.
Flambient takes practice, which is the honest caveat. Blending flash and ambient frames well, deciding how much of each to use, masking areas so the flash lights the room without flattening the mood, and keeping color natural, is a skill that develops over many shoots, and a clumsy blend can look worse than a clean bracket. That is why the sensible path is to master natural-light bracketing first, get comfortable with the blend on simpler frames, and add a single bounced flash into the workflow once the fundamentals are solid. When you do, one off-camera flash and the flambient method will give your interiors a consistency and cleanliness that natural light alone cannot match in every room and every weather. The low light field note covers the ambient half of the equation.
Composition: keep your verticals straight
Straight vertical lines are the most important compositional rule in real estate photography, and getting them right is most of what separates a professional interior from a snapshot. Walls, doorframes, cabinets, and window edges are vertical in the real world, and when they stay vertical in the photo the room looks solid, calm, and correctly proportioned. The moment a wide-angle lens tilts up or down, those verticals converge, the walls appear to lean in or splay out, and the room looks like it is collapsing or ballooning, a distortion the eye notices instantly even when a viewer cannot name what is wrong.
The primary fix is at capture: keep the camera perfectly level, both side to side and front to back, so the sensor plane is parallel to the walls and the verticals stay vertical. A tripod head with a bubble level, or your camera’s built-in electronic level, makes this easy and repeatable, and it is the main reason interiors are shot on a tripod rather than handheld. When the camera is level, the vertical lines in the room render as true verticals in the frame, and you have solved ninety percent of the problem before you press the shutter.
Whatever small tilt remains, or the mild converging you sometimes accept to fit a tall room, is corrected in editing with a lens-correction or vertical-transform tool that straightens the lines. The important point is that this correction should be a small nudge, not a heavy rescue, because straightening a badly tilted frame in software stretches and crops the image, throwing away resolution and pushing the corners soft. Get the camera level at capture and the edit is trivial; shoot carelessly handheld and no amount of correction fully saves it. Horizontals matter too, so keep the horizon and the lines of countertops and shelves level, but verticals are the ones a viewer judges a room by, so guard them above all.
Shooting height: from chest height
Camera height is a small decision with an outsized effect on how natural a room looks, and the reliable answer for most interiors is to shoot from roughly chest height, noticeably lower than standing eye level. Shooting from a standing eye-level position with a wide lens tends to point the camera slightly downward to include the floor, which tilts the verticals and gives an unnatural, looming perspective that emphasizes the floor and shrinks the walls. Dropping the camera to around chest height, roughly four to four and a half feet off the floor, keeps the lens closer to level and gives a more natural, balanced view that shows the room the way a person perceives it.
This lower height does several good things at once. It keeps the verticals straighter because the camera is not tilted as much to frame the room, it balances the amount of floor and ceiling in the frame so neither dominates, and it tends to make the space feel more open and grounded. It is one of those adjustments that costs nothing, takes a moment on the tripod, and immediately makes a room look more professional, which is why experienced real estate photographers settle on a consistent chest-height default and only deviate deliberately.
The exact height flexes with the room and the subject. Kitchens and bathrooms with important countertop surfaces sometimes want the camera a touch higher to show the counters; a room you want to feel grand and spacious can go a little lower; a detail shot of a feature might sit at whatever height frames it best. The principle, though, is to start lower than your standing eye level and near level, rather than defaulting to shooting from a standing position with the camera angled down. Combined with a level camera and straight verticals, a consistent chest-height viewpoint is a large part of the polished, cohesive look that runs through a strong set of listing photos.
Declutter and stage before you shoot
The single highest-return thing you can do for a listing costs nothing and happens before the camera comes out: clear the clutter and lightly stage the room. A camera, especially a wide-angle lens that takes in the whole space, records everything, and the personal clutter that the eye politely ignores in daily life, the crowded countertop, the fridge magnets, the tangle of cables, the overflowing bin, the family photos, jumps out in a photo and makes a home look small, messy, and hard to imagine living in. Removing it does more for the final image than any lens or lighting trick.
Work room by room before you shoot each one. Clear kitchen and bathroom counters down to a very few tidy items, put away personal photos and knick-knacks that make it hard for a viewer to picture themselves in the space, hide cables and chargers, empty bins, and remove anything that reads as clutter or wear. Then lightly stage: straighten the furniture, plump and square the cushions and pillows, fold and hang towels neatly, add a simple touch like a bowl of fruit or a folded throw where a room feels bare, and make beds crisply. The aim is a space that looks clean, cared for, and aspirational but still real, not a stripped, sterile box.
Two habits make staging efficient. First, do a full walk-through of the property before you photograph anything, opening blinds, turning on lights, and doing the decluttering and tidying for the whole home up front, so you are not stopping to clean mid-shoot. Second, look through the actual viewfinder or screen as you tidy, because the wide lens sees more than you expect, including the corner of a cluttered adjacent room through a doorway or an object just inside the frame edge, and it is far quicker to move something than to clone it out later. Time spent preparing a room is repaid many times over in the final photo, which is why professionals treat staging as part of the shoot, not an afterthought.
Interior shots, room by room
Different rooms have different jobs in a listing, and shooting them with that in mind produces a set that tells the story of the home rather than a pile of disconnected frames. The general routine is the same everywhere, level camera on a tripod at chest height, lights on, wide lens, bracketed exposures, verticals straight, but each room has an emphasis. The guiding idea is to shoot each room from the angle that best shows its size and how it connects to the rest of the home, usually from a corner or a doorway looking across the longest sightline, which makes the space read as large and shows the flow.
Living rooms and open-plan spaces are the hero shots, so give them the widest, most inviting angle that shows the seating, the light, and the connection to adjoining spaces, and consider a second angle from the opposite corner. Kitchens sell homes, so shoot them to show the counter space, the appliances, and the layout, often from a corner that takes in the whole work triangle, and clear the counters ruthlessly first. Bedrooms want to feel restful and spacious, shot from a corner to show the bed, a window, and the sense of room around the bed. Bathrooms are small and tricky, usually shot from the doorway or a corner with the toilet lid down and the counter clear, and mirrors demand care so you and the camera do not appear in the reflection.
A strong set also includes the connective and detail frames that a listing needs. Shoot hallways and entryways to show how the home flows together, capture any special feature, a fireplace, a view, built-in shelving, a walk-in closet, with its own frame, and include the practical spaces like the laundry and garage that buyers look for. The room-by-room reference table below pairs each of these with a starting approach. Throughout, keep the look consistent, the same height, the same straight verticals, the same natural brightness, so the set feels like one cohesive tour rather than a jumble, which is a large part of what reads as professional.
Exterior shots and curb appeal
The exterior shots frame the whole listing, because the front of the house is usually the first photo a viewer sees and the one that sets the expectation for everything inside, so they deserve as much care as any interior. The goal is a clean, straight, well-lit image that shows the house at its best and gives an honest sense of the property, the yard, and the setting. As with interiors, straight verticals matter, so keep the camera level and correct any lean in editing, and a wide lens helps show the full facade and the land around it without you having to back impossibly far away.
Light and timing carry an exterior. The harsh overhead sun of midday casts hard shadows across the facade and blows out the sky, so the flattering times are the softer light of morning or late afternoon, and the direction matters: you generally want the sun on the front of the house, lighting the facade, rather than behind it, which throws the front into shadow and turns the sky into glare. A bright but slightly overcast day is often ideal, giving even light with no harsh shadows. Our golden hour field note covers reading this changing light, which applies directly to exteriors.
Preparation matters outside just as it does inside. Tidy the yard, mow the lawn, clear cars from the driveway and the street in front where you can, coil the hose, put away bins and toys, and open or close the garage door to whichever looks better. Shoot the front from an angle that shows the house and a little of the property rather than dead straight on, which can look flat, and take in any strong feature like a porch, landscaping, or a view. Include the backyard, any outdoor living space, and the wider setting, because buyers want to understand the whole property, not just the walls. The most premium exterior of all, the twilight shot, gets its own section next.
Twilight shots, the premium look
The twilight exterior shot is the most premium image in real estate photography, the one that makes a listing look aspirational and stops a scroll, and while it takes planning it is well within a careful beginner’s reach. Shot in the roughly twenty to thirty minute window just after sunset, a twilight photo combines a deep blue sky, the warm glow of the interior lights spilling through the windows, and the exterior and landscape lighting into an image that feels like a magazine cover. That combination of cool sky and warm light is what gives twilight shots their emotional pull, and it is why a single good twilight frame often becomes the headline photo of a listing.
The technique is a blend of exposures, much like an interior. Scout the composition in daylight and set the camera on a tripod well before sunset, because the light changes fast and you cannot recompose in the moment. Turn on every interior light, the exterior lights, and any landscape lighting so the house glows. Then, as the sky deepens, shoot a series of bracketed frames: one exposed for the bright windows and lights so they are not blown out, and one exposed for the deepening sky so it keeps its rich blue. In editing you blend them so the sky stays blue, the windows glow warm without flaring, and the house reads as clearly, invitingly lit.
Timing is the hard part, because the perfect balance between the artificial lights and the natural sky lasts only a few minutes. Too early and the sky is still bright and washes out the effect; too late and the sky goes black and the magic is gone. So set up early, start shooting before you think the light is right, and keep shooting through the window, because the best frame is often one you would not have guessed while standing there. The golden hour field note and the night sky field note both cover reading and working in this fading, blue-hour light, which is exactly the light a twilight shot lives in.
Room-by-room settings and tips
The table below pulls the workflow together into a quick reference, pairing each common room or shot with a starting approach and the one tip that matters most for it. The settings are illustrative starting points to meter from on a tripod at base ISO, not fixed rules, and the aperture assumes a wide-angle lens and the deep depth of field interiors need. Read it as a checklist to run down as you move through a property, adjusting to the actual light in front of you.
| Room or shot | Starting approach | The tip that matters most |
|---|---|---|
| Living / open-plan | f/8, ISO 100, bracket, wide angle from a corner | Shoot the longest sightline so the space reads as large and connected |
| Kitchen | f/8 to f/11, ISO 100, bracket, lights on | Clear every counter first, then shoot to show the layout and counter space |
| Bedroom | f/8, ISO 100, bracket from a corner | Frame the bed, a window, and the room around it so it feels restful and open |
| Bathroom | f/8 to f/11, ISO 100, from the doorway | Keep yourself out of the mirror, lid down, counter clear, and check the reflection |
| Bright window room | f/8, ISO 100, bracket 3 to 5 frames | Bracket wide and blend so the room is bright and the window keeps its view |
| Dim / windowless room | f/8, ISO 100, long shutter or bounced flash | Turn on every light, then bracket long or add a bounced flash to lift the shadows |
| Exterior facade | f/8 to f/11, ISO 100, level camera | Shoot with soft side light on the front, tidy the yard, clear cars from view |
| Twilight exterior | f/8, ISO 100, bracket as the sky darkens | Set up early, all lights on, and shoot through the short blue-hour window |
| Detail / feature | f/8, ISO 100, or open up a little | Give the feature its own clean frame that shows why it matters |
Read the table as a sequence for a shoot, not a set of rigid prescriptions. The through-line is constant, tripod, level camera, chest height, lights on, wide lens, bracket for windows, and the per-room notes are refinements on that foundation. Run your own kit and the time a shoot will take through the upgrade budget planner, and lean on the interactive companion above, which turns your own room, device, and light into the specific settings and the one move that matters for each section as you read.
A worked example: shooting one room
Theory into practice: here is a single realistic session, with illustrative settings, so the whole workflow is concrete. The subject is a living room in a home being listed, shot on a mirrorless camera with a wide lens at the equivalent of about 18mm, on a tripod, on a bright but slightly overcast afternoon with large windows on one wall. You want a bright, straight, inviting hero photo that shows the whole space and holds the view through the windows.
Prep the room. You walk the room first: turn on the ceiling lights and the lamps, open the blinds, straighten the sofa and square the cushions, clear the coffee table down to one tidy item, hide a phone charger, and empty a small bin, checking through the lens for clutter creeping in at the edges and in the doorway to the next room. Place the camera. You set the tripod in a corner looking across the longest diagonal of the room, drop it to chest height at about four feet, and use the electronic level to get it dead level side to side and front to back so the verticals stay straight. Frame. You compose the sofa, the coffee table, a window, and the flow into the space, leaving a natural balance of floor and ceiling, and focus about a third of the way into the room.
Dial the settings. You set ISO 100 for the cleanest file, f/8 to hold the whole room sharp front to back, and white balance to the warm room light, then let the shutter fall where the meter lands. Bracket. Because the windows are bright, you turn on auto-exposure bracketing and shoot five frames, from one dark enough to hold the view outside to one bright enough to open the shadowed corners, firing with the two-second timer so pressing the shutter adds no shake. Blend and finish. At the computer you blend the brackets so the room is bright and warm and the windows keep a natural view, straighten the last hint of vertical lean, correct the mixed color to a clean, natural white balance, gently lift the shadows, and crop lightly to a consistent framing. One room, one tripod position: ISO 100, f/8, level at chest height, five brackets blended. Run your own property’s kit through the upgrade budget planner before assuming you need more gear.
What makes a strong real estate photo
Illustrative weighting, out of 100, of how much each element contributes to a listing photo that looks professional and earns showings. This is a mental model from common experience, not a measured study, so read it as where to spend your attention first.
Level framing, light, and a clean room carry a listing photo, which is why the free skills matter most. The lens, the bracketing, and the edit refine a frame those three already made good. Tune the model to your own shooting with the companion above.
Where the work goes in a real estate shoot
Illustrative share of the effort that each stage contributes to a finished set of listing photos. The four parts sum to the whole result, so no single stage does it alone.
Most of a listing photo is made before you edit: the room you prepare and the light you balance do the majority of the work, with the camera and framing holding it straight and sharp. Editing finishes a frame those stages already made good. Adjust the split to your own work with the companion above.
Editing real estate photos
Editing is the final stage, and for real estate the guiding rule is natural believability: the edit should make the space look bright, clean, and true, never fake or garishly processed. Most listing photos need a consistent, repeatable edit rather than a heavy one, and the two jobs that dominate are the blend, combining your bracketed frames so the room and windows both look right, and the corrections that straighten and clean the image. Editing enhances a well-shot, well-lit frame; it cannot rescue a crooked, dark, or cluttered one, which is why the prep and capture work matter far more than any slider.
Start with the blend and the big corrections. Combine your brackets so the room is bright and the windows keep a natural, detailed view, either by HDR merge or by masking the window in from the darker frame for a cleaner result. Then straighten the verticals with a lens-correction or transform tool so the walls stand true, correct the mixed-light white balance to a clean, natural neutral so the room does not read too orange or too blue, and lift the overall exposure so the space feels bright and open. Crop lightly to a consistent framing and aspect ratio across the whole set, since matching, straight, bright frames are a large part of what reads as a professional listing.
Then finish with restraint and, above all, honesty. Clean up small distractions you missed, a stray cable, a light switch smudge, a spot on a window, and gently even out the brightness across the room. The line you must not cross is misrepresenting the property: do not stretch a room to look larger than it is, do not remove or add permanent features, do not replace a gray sky with a fake blue one in a way that misleads, and do not edit away real defects a buyer has a right to see. Some cosmetic sky replacement and virtual decluttering are common, but the ethical test is whether the photo still honestly represents what a visitor will find. Keep the edit natural, consistent, and true, and it will make an accurate set of photos look its best rather than fabricate a home that does not exist.
Your real estate photography workflow
Pulling it all together, a real estate shoot runs smoothest as a repeatable workflow you follow the same way every time, which is what lets you move through a whole property efficiently and come away with a consistent set. The pattern is prepare the whole home first, then shoot room by room to the same recipe, then blend and finish in one editing pass. Building the habit is what turns a nervous first shoot into a calm, quick routine, and it is exactly what the companion above mirrors for your own room, device, and light.
Before you shoot anything, walk the entire property and prepare it: open all the blinds, turn on every light, and declutter and lightly stage each room, so you are not stopping to tidy once you start shooting. Scout the exterior and note the twilight composition if you plan one, and check where the sun will be. Then set up the camera once to your standard recipe, wide lens, tripod, chest height, level, base ISO, f/8 to f/11, RAW, auto-bracketing on, and carry that same setup from room to room, changing only the position and the fine exposure.
Shoot each room from the angle that best shows its size and flow, usually a corner along the longest sightline, bracketing every frame with a window, and capture the connective spaces, the features, and the details as you go. Work through the home in a logical order so you do not miss a room, and glance at the back screen to confirm the verticals are straight and nothing is blown out before you move on. Then do the editing in one consistent pass: blend the brackets, straighten, correct color, and crop to a matching set. Run the whole plan and your kit through the upgrade budget planner so the time and any gear you add follow the results rather than leading them.
Common real estate photography mistakes
Most real estate photos fail in one of a handful of predictable ways, and knowing them in advance is the fastest route to better listings. These are the pitfalls that come up again and again, and nearly all of them are free to fix:
- Crooked, tilted verticals. A handheld or angled wide-angle shot makes the walls lean and the room look like it is falling over. Put the camera on a tripod, level it precisely, shoot from chest height, and straighten the last bit in editing.
- Blown-out or dark windows. A single exposure gives you a bright room with a white window or a good window over a dark room. Bracket several frames on the tripod and blend them so both the room and the view look natural.
- A dim, flat, cave-like room. Shooting with the lights off and the blinds half closed leaves a room dark and lifeless. Turn on every light, open the blinds, and expose so the space reads bright and warm.
- Going too wide. A fisheye or an extreme ultrawide distorts the walls and furniture and misrepresents the size of the room. Stay near the equivalent of 16mm to 20mm and step back or shoot from a doorway instead of reaching for a wider lens.
- Clutter left in the frame. The wide lens records the crowded counter, the cables, and the personal photos that the eye ignores in person. Declutter and lightly stage every room before you shoot it.
- Shooting from standing eye level. A standing viewpoint tilts the camera down, warps the verticals, and gives an unnatural, floor-heavy view. Drop the tripod to chest height and keep the camera level.
- Over-processed, garish HDR. Pushing an automatic HDR merge too hard produces halos, unnatural colors, and a surreal look that reads as fake. Blend gently for a natural, believable result that matches what your eye saw.
- Dishonest editing. Stretching rooms, removing real defects, or replacing skies in ways that mislead can cross into misrepresenting the property. Keep the edit natural and true to what a visitor will actually find.
The bottom line
Real estate photography is not about owning an expensive camera; it comes from a short, repeatable set of decisions worked in order, most of which cost nothing. A wide-angle lens in the honest 16mm to 24mm range fits the room without distorting it, and a tripod keeps the walls straight, holds the frame for bracketing, and lets you shoot at base ISO and f/8 to f/11 for a clean, deep-focus file. Windows are the central problem, so turn on every light, bracket several exposures, and blend them, or step up to the flash-and-ambient flambient technique, so the room is bright and inviting and the view outside stays real. Keep your verticals dead straight, shoot from roughly chest height, and above all declutter and lightly stage each room before you press the shutter, because a clean, level, well-lit space photographs better than any lens can rescue a messy, crooked, dark one. Finish with a natural, consistent edit that blends, straightens, and corrects color without ever misrepresenting the home. The freeing realization is how little of this requires money: the biggest gains come from preparation, a level camera, and turning on the lights, not from gear. Work the room-by-room routine in order, and the camera or phone you already own will start returning listing photos that look professional and earn the showing. Price any upgrade you are still tempted by in the upgrade budget planner, then go photograph a room and keep the camera level, the lights on, and the space looking like itself.
This field note teaches a photographic workflow, not a product: no brand paid for a placement and none is named on purpose, only the lenses, settings, lighting, and staging habits that hold across every camera and phone. Every camera setting, aperture, and ISO here is an illustrative starting point to meter from rather than a fixed rule, because the exposure and depth of field that render a room well change with your sensor, your lens, your light, and the space in front of you. The one firm principle is honesty: a listing photo must represent the real property accurately in size, condition, and features, so treat the editing advice here as permission to make an accurate space look its best, never to fabricate a home a visitor will not find, and check the local norms and any professional obligations that apply where you photograph and market property.
Frequently asked questions
What lens do you need for real estate photography?
A wide-angle lens is the one piece of gear that defines real estate photography, because ordinary rooms are small and a normal lens cannot fit enough of a room into the frame to show how the space works. On a full-frame camera the workhorse range is roughly 16mm to 24mm, and on a crop-sensor camera the equivalent is about 10mm to 16mm, which covers almost every interior you will meet. The mistake to avoid is going too wide: a fisheye or an extreme ultrawide stretches walls, bows furniture, and makes rooms look distorted and dishonest rather than spacious. Most working shots land between the equivalent of 16mm and 20mm, wide enough to show the room but not so wide that it warps, and you simply step back or shoot from a doorway when you need to fit more in. A phone's ultrawide camera can stand in for a wide lens for casual listings, which our phone camera lens field note covers.
What camera settings should I use for real estate photography?
Because a room sits still and the camera is on a tripod, you use the settings that give the cleanest, sharpest, most detailed file. Start at base ISO, usually ISO 100, since a still interior on a tripod never needs a high ISO and a low one keeps the image clean. Choose an aperture in the f/8 to f/11 range so the whole room stays sharp from the near furniture to the far wall, which is the deep depth of field interiors need. Let the shutter speed fall wherever the exposure requires, often to a fraction of a second or longer, because the tripod holds everything still through a long exposure. Set white balance to match the room's dominant light rather than leaving it on auto, shoot RAW so you can correct color and recover the windows afterward, and bracket several exposures for any room with a bright window. Treat these as illustrative starting points to meter from, not fixed rules.
How do you photograph a room with a bright window?
A bright window is the central problem of interior real estate photography, because the view outside is often many times brighter than the room, so a single exposure either shows a nicely lit room with a blown-white window or a correctly exposed window with a dark, murky room. The fix is to capture the range in more than one frame. The simplest method is bracketing: put the camera on a tripod, take several shots of the identical composition at different exposures, from one that holds detail in the bright window to one that opens up the dark corners, then blend them in editing so both the room and the view outside look natural. A more advanced method, the flambient technique, blends a natural ambient frame with a flash frame to light the room while keeping the window view. Either way the tripod is essential, because the frames must line up perfectly to combine, and the goal is a balanced photo that looks like what your eye saw, not a garish over-processed one.
What is the flambient technique in real estate photography?
Flambient is a blend of the words flash and ambient, and it names a popular real estate lighting method that combines the best of two kinds of frame. You shoot one ambient frame that exposes for the natural light and the window view, then one or more flash frames where an off-camera flash bounced off the ceiling or a wall lights the room cleanly and neutrally. In editing you blend the flash frame, which gives clean, shadow-free, color-accurate light on the room, with the ambient frame, which preserves the warm glow of the lamps and the view through the windows. The result looks bright, natural, and true to the space, avoiding both the harsh look of direct flash and the color casts of mixed room lighting. Flambient is more advanced than simple bracketing and takes practice to blend well, so most beginners master bracketing first and add flash later. It is the method many professionals use to get consistently clean, magazine-style interiors.
Do you need a flash for real estate photography?
No, you do not need a flash to start, and many good listing photos are shot with natural light and bracketing alone. On a bright day, turning on the room lights, opening the curtains, and bracketing several exposures to hold both the room and the window view will produce clean, professional interior photos with no flash at all. Flash earns its place when you want the cleanest possible light in every room regardless of the weather, when rooms are dim or windowless, or when you shoot interiors for a living and need a fast, consistent, repeatable look. The professional flambient technique uses one or more off-camera flashes bounced off the ceiling, which lights a room evenly without the harsh, flat look of a flash pointed straight ahead. The honest path for a beginner is to master natural light and bracketing first, because they cost nothing and cover most situations, and to add a single flash only once the lack of it is actually limiting your work.
Can you do real estate photography with a phone?
Yes, a modern phone can produce genuinely usable real estate photos, especially for rentals, casual listings, and a portfolio, and its built-in ultrawide camera stands in for a wide lens. The keys are the same as for any camera: mount the phone on a tripod so the shot is sharp and the walls stay level, use the ultrawide lens to fit the room, turn on the room lights, and let the phone's HDR mode blend a bright window with the room the way bracketing does on a camera. Tap the screen to set focus and exposure, keep the phone level so the vertical lines stay straight, and shoot from roughly chest height rather than eye level. The phone's limits show in very dim rooms, in the amount of window detail it can recover, and in the control a dedicated camera gives you over the blend, but next to a bright window for a straightforward listing those rarely matter. Our phone camera lens and phone tripod field notes go deeper on getting the most from a phone.
How do you keep the walls straight in real estate photos?
Straight vertical lines are one of the biggest things that separate a professional interior photo from a snapshot, because a wide-angle lens tilted up or down makes the walls lean inward or outward and the room look like it is falling over. The first fix is at capture: keep the camera perfectly level, both side to side and front to back, so the sensor is parallel to the walls, which a tripod with a built-in bubble level or your camera's electronic level makes easy. Shooting from roughly chest height rather than standing eye level also helps, because a lower, more central position keeps the lens closer to level and gives a more natural view of the room. Whatever small tilt remains is corrected in editing with a lens-correction or vertical-transform tool that straightens the converging lines. Get the camera level at capture and the correction becomes a tiny nudge rather than a heavy fix that crops away half the frame.
How do you shoot twilight real estate photos?
Twilight exterior shots, taken in the roughly twenty to thirty minute window just after sunset, are the premium look in real estate photography because the deep blue sky, the warm glow of the windows, and the exterior lights combine into an image that feels aspirational and stands out in a listing. The technique is a blend, much like an interior: put the camera on a tripod, turn on every interior and exterior light in the house, and shoot several bracketed frames as the sky darkens, from one exposed for the bright windows and lights to one exposed for the deepening sky. In editing you blend them so the sky keeps its rich blue, the windows glow warm without blowing out, and the house is clearly lit. Timing is everything and the window is short, so scout the composition in daylight, set up early, and start shooting before the sky goes fully dark, because the balance between sky and artificial light lasts only a few minutes. Our golden hour field note covers reading that changing light.