What's on this page
- What aperture actually is
- The f-number: why smaller means wider
- Stops: how aperture measures light
- Depth of field: aperture’s signature side effect
- The other three levers that shape depth of field
- Bokeh: the quality of the blur
- Maximum aperture: what a fast lens buys you
- Variable aperture: the kit zoom fine print
- The sweet spot: where lenses are sharpest
- Diffraction: why f/22 goes soft
- Choosing an aperture for portraits
- Choosing an aperture for landscapes and scenes
- Everyday apertures: events, streets, and travel
- Aperture priority: the practical way to learn
- How aperture trades against shutter speed and ISO
- Aperture on phone cameras
- Aperture and sensor size
- A worked example: one scene, three apertures
- Common aperture mistakes
- How to practice aperture in one afternoon
- The bottom line
Short answer: Aperture is the adjustable opening inside the lens that lets light through to the sensor, measured in f-stops. A wide opening (small f-number like f/1.8) passes lots of light and blurs the background; a narrow opening (large f-number like f/11) passes little light and keeps the whole scene sharp. Each full stop, f/1.4, f/2, f/2.8, f/4, f/5.6, f/8, f/11, f/16, halves the light, and depth of field is its signature side effect.
Aperture is the opening inside your lens that lets light through to the sensor, and the size of that opening is the single most creative decision a camera hands you. Widen it and the background melts into blur behind a sharp subject; narrow it and a whole valley snaps into focus from the flowers at your feet to the ridge on the horizon. Every f-number on the dial is really an answer to one question: how much of this picture do I want to be sharp, and how much light am I willing to trade to get it?
This field note explains aperture from the ground up: what the opening physically is, why the f-numbers seem to run backwards, how a stop of light works, and how aperture controls depth of field, background blur, and low-light ability. It is a deep companion to our exposure triangle field note, which shows how aperture trades against shutter speed and ISO, and to the camera settings reference, which collects the full stop scales in one place. By the end, the f-numbers should read less like code and more like a dial for sculpting a photograph.
Key takeaways
- Aperture is the adjustable opening in the lens. A wide opening (small f-number like f/1.8) passes lots of light and blurs the background; a narrow opening (big f-number like f/11) passes little light and keeps the scene sharp throughout.
- The f-number is a fraction, focal length over opening diameter, which is why lower numbers mean wider openings: one half is bigger than one eighth.
- Each full stop on the scale (f/1.4, f/2, f/2.8, f/4, f/5.6, f/8, f/11, f/16) halves the light. Aperture shares the stop as a unit with shutter speed and ISO, so they trade evenly.
- Depth of field, the zone of acceptable sharpness, is aperture's signature side effect: wide equals shallow, narrow equals deep. Distance and focal length shape it too.
- Most lenses are sharpest two or three stops down from wide open, and go soft again past f/16 from diffraction, so the middle apertures are the technical sweet spot.
What aperture actually is
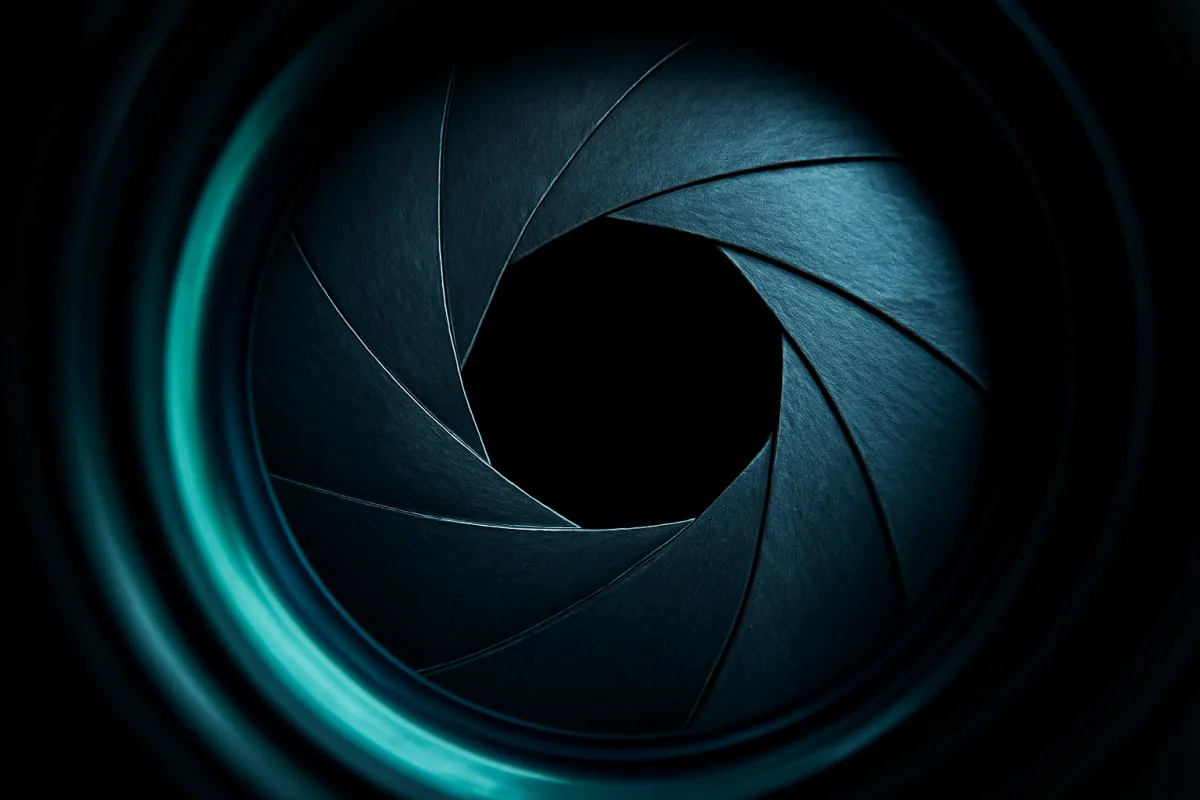
Inside every interchangeable lens sits a ring of overlapping metal blades called the diaphragm. The blades pivot together to form a roughly circular hole, and that hole is the aperture. Turn the aperture wider and the blades swing out of the way, leaving a large opening for light to pour through. Turn it narrower and the blades slide inward, shrinking the hole to a small opening that admits only a trickle. The sensor never sees the scene directly; it sees whatever light makes it through this adjustable gate.
The comparison everyone reaches for is the pupil of an eye, and it holds up well. In a dark room your pupils dilate wide to gather every scrap of light; in bright sun they contract to pinpoints. A camera aperture does exactly the same job, except you control it deliberately instead of by reflex, and the size you choose changes more than brightness. It also decides how much of the scene, from near to far, renders sharp, which is where the creative power lives.
One practical detail worth knowing early: on most modern cameras the lens sits wide open while you compose, so the viewfinder always shows the shallow, bright, wide-aperture version of the scene, and the blades snap to your chosen setting only at the instant of exposure. That is why a frame shot at f/11 can look different from what you saw through the finder. Many bodies offer a depth of field preview button that stops the lens down live, and mirrorless cameras can simulate the result on screen, which makes the effect much easier to learn.
The f-number: why smaller means wider
The f-number trips up every beginner because it seems reversed: f/1.8 is a huge opening and f/16 is a tiny one. The confusion dissolves the moment you see that the number is a fraction. An f-number is the focal length of the lens divided by the diameter of the aperture opening. On a 50mm lens, f/2 means the opening is 50 divided by 2, or 25mm across. At f/8 the opening is 50 divided by 8, about 6mm. The bigger the number under the line, the smaller the resulting hole, exactly as one eighth of a pizza is smaller than one half.
Writing aperture as a ratio rather than a raw size is what lets the same numbers mean the same brightness on every lens. A 200mm lens at f/4 has a physical opening four times wider than a 50mm lens at f/4, but because the longer lens spreads its view across a narrower angle, the light arriving at the sensor per unit of area is the same. Set any lens on any camera to f/5.6 and you can expect the same exposure from it, which is the entire point of the system.
Say the numbers out loud as fractions for a week, “f over two,” “f over eleven,” and the backwards feeling disappears for good. Low number, wide hole, bright frame, blurry background. High number, narrow hole, dim frame, sharp scene. Everything else in this field note builds on that one sentence.
Stops: how aperture measures light
Photography measures light in stops, and one stop is a doubling or halving of the light reaching the sensor. The full-stop aperture scale runs f/1.4, f/2, f/2.8, f/4, f/5.6, f/8, f/11, f/16, f/22, and each step in that list halves the light of the one before it. The numbers look irregular because the light depends on the area of the opening, not its width. To halve a circle’s area you divide its diameter by the square root of two, about 1.4, which is why the scale multiplies by 1.4 at every step: 1.4, 2, 2.8, 4, and so on. Multiply any f-number by 1.4 and you land on the next full stop.
Modern cameras click in third-stops between the full stops, which is why the dial shows values like f/3.2, f/3.5, and f/4.5. Those in-between clicks are fine adjustments; the full stops are the reference points worth memorizing, and the camera settings reference lays out the complete scale alongside the shutter and ISO stop tables if you want the whole system on one page.
The stop matters because it is the shared currency of exposure. Shutter speed and ISO double and halve in stops too, so a stop given up on one setting can be repaid exactly by a stop gained on another. Open the aperture from f/8 to f/5.6 and you may shorten the shutter from 1/60 to 1/125 with no change in brightness at all. That even trade is the machinery underneath every exposure decision you will ever make, and it is covered in full in our exposure triangle field note.
How much more light a wide aperture gathers (relative to f/8)
Illustrative multiples of the light an f/8 aperture passes, computed from the area of the opening. Each full stop doubles the light.
An f/1.8 prime gathers roughly twenty times the light of the same scene at f/8, which is why fast lenses transform low-light shooting. The multiples follow from the geometry of the opening, so they hold for any lens.
Depth of field: aperture’s signature side effect
If aperture only controlled brightness it would be housekeeping. Its creative power comes from a side effect: the size of the opening decides how deep the zone of sharp focus is. A lens can only focus perfectly at one distance at a time, but a region in front of and behind that distance still looks acceptably sharp to the eye. That region is the depth of field, and aperture is its main control. Wide apertures produce a shallow depth of field, sometimes just a sliver, and narrow apertures produce a deep one that can run from near your feet to the horizon.
The physics is easier than it sounds. Light from a point you focused on converges through the lens to a point on the sensor. Light from things nearer or farther converges slightly in front of or behind the sensor, so it lands as a small disc rather than a point. A wide aperture accepts steep, spreading cones of light, so those discs grow quickly and things go blurry fast as they leave the focus distance. A narrow aperture trims the cones down, the discs stay small, and things stay acceptably sharp much farther from the focus plane.
What matters in practice is the vocabulary this gives you. Shallow depth of field isolates: a face sharp against a melted background, a product floating clear of clutter, one flower singled out of a bed. Deep depth of field includes: a family and the mountain behind them, a room from table edge to far wall. Neither is better. They are different sentences, and the f-ring is how you choose which one to write.

The other three levers that shape depth of field
Aperture is the headline control on depth of field, but three other factors pull on it just as hard, and knowing them saves you from fighting the f-ring for a look it cannot deliver alone. The first is distance to the subject. The closer you focus, the shallower the zone of sharpness becomes at any aperture, which is why a close-up of a coffee cup at f/5.6 can show more background blur than a portrait at f/2.8 taken from across the room. Step closer for more blur; step back for more depth.
The second is focal length. Longer lenses appear to compress and magnify the background blur, so an 85mm at f/2.8 renders a far creamier background than a 24mm at the same f-number and framing. This is a large part of why classic portrait lenses live in the 85mm range, a comparison we work through in the 50mm versus 85mm field note. The third is the background’s own distance. A subject standing one step in front of a wall will never get a melted background at any setting, while the same subject moved ten steps from the wall blurs beautifully even at moderate apertures.
Put the levers together and you get recipes rather than single numbers. Maximum blur: longest lens you own, widest aperture, close to the subject, background far away. Maximum depth: wide lens, narrow aperture, subject not too close. Once you think in terms of all four levers, you can produce subject separation with a modest kit zoom, and you can keep a whole scene sharp with a fast prime, because the f-number was only ever one voice in the choir.
Bokeh: the quality of the blur
Bokeh is the word photographers use for the character of the out-of-focus areas, how the blur looks rather than merely how much of it there is. Point lights are where it shows most clearly: distant streetlamps, fairy lights, sun through leaves all render as soft discs when defocused, and the size, shape, and smoothness of those discs is the lens showing you its bokeh. Smooth, evenly bright discs read as calm and creamy; discs with hard bright edges can make a background feel busy or nervous.
Aperture shapes bokeh twice over. Wide open, most lenses draw round highlight discs because the opening itself is round. Stopped down, the diaphragm blades define the shape, so a seven-bladed lens draws subtle heptagons and lenses with more, curved blades keep the discs rounder. This is why lens spec sheets bother to mention rounded aperture blades, and why the same scene can render differently on two lenses set to the identical f-number.
For a beginner the practical takeaway is simple: if you love the glowing-background look, you get it with the recipe from the previous section, wide aperture, close subject, distant background with some lights in it. Chasing the last few percent of bokeh smoothness is a rabbit hole best left until the fundamentals pay rent. The blur’s existence comes from your technique; only its fine texture comes from the glass.
Maximum aperture: what a fast lens buys you
Every lens has a maximum aperture, the widest its blades open, printed right in its name: a 50mm f/1.8 opens to f/1.8, a 70-200mm f/4 to f/4. Photographers call a lens with a large maximum aperture fast, because all that light lets you use faster shutter speeds. The maximum aperture is the single most consequential number in a lens’s spec sheet, and it is the main thing you pay for: the difference between an f/4 zoom and an f/2.8 zoom of the same range is typically a doubling of price, size, and weight for one extra stop.
What the stop buys is room. In dim light, f/1.8 gathers roughly twenty times the light of f/8, which can be the difference between a sharp frame at a reasonable ISO and a choice between blur and noise. In bright light, the wide end is your blur machine for portraits and detail shots. Our best lens for low light field note works through this in depth, and the short version is that an inexpensive fast prime is the most transformative first purchase in photography, a case the kit lens versus prime field note makes at length.
Speed has diminishing returns, though. The jump from a kit zoom’s f/5.6 to a prime’s f/1.8 is enormous, three and a third stops. The jump from f/1.8 to f/1.4 is two thirds of a stop, and it can cost several times as much. Fast glass rewards you most at the affordable end of the range, which is convenient, because that is where beginners shop. If you are budgeting an upgrade path, the upgrade budget planner will show what a fast prime does to a year’s gear money.

Variable aperture: the kit zoom fine print
Look at the name of a typical kit zoom, 18-55mm f/3.5-5.6, and you will see two f-numbers. That is a variable maximum aperture: the lens opens to f/3.5 at its wide 18mm end but only to f/5.6 zoomed in to 55mm. The design keeps the lens small and inexpensive, but it means the lens gets slower exactly when you zoom in, which is often exactly when you want light most, indoors at an event, reaching across a room.
This fine print explains a common beginner mystery: photos that look fine at the wide end turn dim or blurry when zoomed. The camera lost more than a stop of light on the way to 55mm and had to slow the shutter or raise ISO to cover it. It also explains what constant-aperture zooms cost more for: a 24-70mm f/2.8 holds f/2.8 across the whole range, so its exposure and its look do not shift as you zoom.
None of this makes a variable kit zoom bad. It is a sensible design for daylight, travel, and learning. It simply means you should know your lens’s honest speed at the focal length you actually use. If your favorite framing is the long end at f/5.6, then f/5.6 is your real maximum aperture, and a fast prime near that focal length is the cheapest way to buy the missing stops.
The sweet spot: where lenses are sharpest
Aperture affects sharpness through a second, quieter channel: the optical quality of the lens itself changes across the range. Nearly every lens is a little soft at its maximum aperture, especially toward the corners, because wide open the whole surface of the glass contributes to the image and every design compromise shows. Stop down two or three stops and performance climbs to its peak, the so-called sweet spot, which for most lenses lands somewhere around f/5.6 to f/8.
You can find your own lens’s sweet spot in ten minutes. Put the camera on a tripod, or brace it solidly, aim at something flat and detailed like a bookshelf or a brick wall, and shoot the same frame at every full stop from wide open to f/16. Zoom to 100 percent on the results and compare the fine detail at the center and the corners. The middle apertures will almost certainly win, and now you know your lens rather than a generalization about lenses.
Do not let the sweet spot become a superstition. The difference between f/1.8 and f/5.6 sharpness on a decent prime is visible at full magnification and irrelevant in most finished photos, while the difference between a blurred and a sharp background changes the entire picture. Shoot wide open whenever the look calls for it. The sweet spot is for the frames where maximum crispness is the point, a flat landscape, a product shot, a scan of a document, and for those it is free quality.
Diffraction: why f/22 goes soft
If narrow apertures give more depth of field, why not shoot everything at f/22? Because a second piece of physics, diffraction, pushes back. When light squeezes through a very small opening, its waves bend and interfere at the edges, spreading each point of the image into a slightly fuzzy disc no matter how good the glass is. The narrower the opening, the worse the spreading, so somewhere past f/11 on most cameras the whole frame begins to lose fine detail, gently at f/16, noticeably at f/22.
This creates the aperture paradox: depth of field keeps increasing as you stop down, but overall sharpness peaks and then declines. The zone of focus at f/22 is deep, yet everything inside it is slightly softer than it would be at f/8. Cameras with smaller, denser sensors hit the effect earlier, which is one of several sensor-size trade-offs covered in the full-frame versus crop sensor field note.
The working rule that falls out: use the widest aperture that still gives you the depth of field the scene needs, and treat f/16 and beyond as special-purpose territory. Legitimate reasons to go there exist, extreme near-to-far compositions, deliberately long shutter speeds in daylight, the pointed sun-star effect that narrow apertures draw around bright lights. Just go there knowing the price, rather than assuming a bigger number is automatically sharper.
Choosing an aperture for portraits
Portraits are where aperture choice shows most dramatically, because the whole genre turns on separating a person from a background. The classic single-subject recipe is a wide aperture, roughly f/1.8 to f/2.8, a moderate telephoto framing, and a background with some depth behind the subject. The blur does two jobs at once: it removes distraction, and it signals unmistakably that the person is the picture’s subject. Focus on the nearer eye, always, because at these apertures the zone of sharpness can be shallower than a face.
Wide open is not automatically best. At f/1.4 on a close subject, the depth of field can be so thin that one eye is sharp and the other soft, and a slight sway of your body after focusing is enough to miss entirely. Stopping down to f/2 or f/2.8 keeps nearly all the blur while multiplying your margin for error, which is why experienced shooters often hover a stop down from the maximum. Our portrait field note builds the full recipe around this trade.
Groups change the arithmetic completely. Two people can rarely stand in exactly the same focal plane, and a wide aperture will render one of them soft. For couples, f/2.8 to f/4 with careful posing works; for a row of family members, f/5.6 to f/8 is the honest choice, and you buy separation back with the other levers, longer lens, distant background, rather than with a razor-thin focus zone. A slightly busier background is a smaller failure than a blurry grandmother.
Choosing an aperture for landscapes and scenes
Landscape photography usually wants the opposite sentence: everything sharp, from the foreground texture that anchors the frame to the horizon that gives it scale. The workhorse range is f/8 to f/11, deep enough for most compositions, still comfortably clear of diffraction, and inside the sweet spot of most lenses. Wide-angle lenses make this easier than beginners expect, because short focal lengths carry generous depth of field at any given f-number, a theme the best lens for landscape field note explores lens by lens.
Focus placement matters as much as the f-number. Depth of field extends both in front of and behind the focus distance, roughly one third in front and two thirds behind in many scenes, so focusing on the very nearest object or on the far horizon wastes part of the zone. Focusing about a third of the way into the scene stretches the sharp region efficiently across it. When a huge near foreground truly demands more, stop down to f/16 and accept the mild diffraction, or focus slightly behind the foreground object and let the zone cover it.
Light, not depth, is usually the practical constraint. At f/11 in early evening the shutter stretches long, and handholding stops being realistic. The landscape answer is a tripod, which unhooks the aperture choice from the light level entirely: you pick the f-number for the picture, let the shutter run as long as it needs, and keep ISO at base. That one accessory is why landscape shooters get to treat aperture as a purely creative decision.
Everyday apertures: events, streets, and travel
Between the portrait’s f/2 and the landscape’s f/11 lies everything else, and most general shooting settles into the middle. A useful default for walking around is f/4 to f/5.6: enough depth of field that a quickly grabbed frame is forgiving, enough width that indoor light is workable, and near the sweet spot of most lenses. Street photographers often go a step further to f/8 in daylight, because deep focus means the moment matters more than the focusing.
Indoor events pull toward the wide end out of necessity. Dim reception light at f/5.6 forces either slow shutters or very high ISO, so the wide aperture becomes the least-bad source of exposure even when you might prefer more depth of field. This is exactly the situation covered in the low-light shooting field note: open up, hold the shutter at a safe handheld speed, and let ISO absorb what remains.
Travel shooting is the art of switching between these modes quickly, market portrait at f/2.8, alley scene at f/8, dim chapel interior back at f/2. The photographers who make this look effortless are not calculating; they have internalized three or four aperture presets and the situations that call for each. Building that reflex is a fair summary of what learning aperture means.
Where an illustrative hobbyist's frames land across the aperture range
An illustrative split of a typical enthusiast's shooting by aperture zone. The middle of the range does the everyday work; the extremes are deliberate choices.
The split is illustrative, not a prescription, but the shape is common: most frames live in the flexible middle, the wide end earns its keep on people and dim rooms, and the narrow end is a deliberate landscape tool.
Aperture priority: the practical way to learn
You do not need full manual mode to take control of aperture, and for learning purposes you are better off without it at first. Aperture priority, marked A or Av on the mode dial, lets you set the f-number while the camera meters the scene and picks a matching shutter speed. You make the one decision this field note is about, depth of field, and the camera handles the brightness housekeeping. Most experienced photographers shoot the majority of their frames in exactly this mode.
The mode teaches you cause and effect at no risk. Set f/1.8 and watch the camera answer with 1/1000 in daylight; stop down to f/11 and watch the shutter stretch to 1/60. You are seeing the exposure triangle negotiate in real time, one stop traded for one stop, and the lesson sticks because you triggered it. Add auto ISO with a sensible maximum and the camera will also protect you from impossibly slow shutters as light fades.
The step beyond, when you want it, is full manual, where you set aperture and shutter both and use the meter as a guide rather than a chauffeur. Our manual mode field note walks that road in detail. But there is no rush and no shame in staying: aperture priority with exposure compensation is a complete, professional way to photograph, and it keeps your attention on the decision that changes the picture.
How aperture trades against shutter speed and ISO
Aperture never acts alone. Every frame is a three-way settlement between aperture, shutter speed, and ISO, and the stop is the currency they settle in. Open the aperture one stop and you have doubled the light; the camera, or you, can spend that surplus as a shutter twice as fast, an ISO half as high, or simply a brighter frame. Close it a stop and something else must pay: a slower shutter that risks blur, or a higher ISO that adds grain.
This is why the wide end of the lens matters far beyond blur. In a dim room, f/1.8 versus f/5.6 is more than three stops, which is the difference between 1/125 at a clean ISO and 1/15 at the same ISO, or between clean and grainy at the same shutter. The aperture you can reach sets the terms every other setting negotiates under. Photographers who seem to conjure sharp, clean frames out of dark receptions are mostly just holding a wider aperture than the kit zoom next to them can.
The reverse trade appears in bright light. At f/1.8 in midday sun, even 1/4000 of a second may overexpose, which is why you sometimes see a wide-open shooter’s frames washed out at the beach. The fixes are stopping down, using the camera’s electronic shutter speeds if it offers faster ones, or threading a neutral density filter on to remove light. The deeper point is the same in both directions: aperture is one corner of a triangle, and our shutter speed field note covers the corner it trades with most directly, while the ISO field note covers the third corner, the one that absorbs whatever the first two cannot supply.
Aperture on phone cameras
Phone cameras have apertures too, printed in the spec sheet as f/1.6 or f/1.8, but with a twist: on almost all phones the aperture is fixed. There are no blades to stop down; the lens shoots wide open, always, and the phone balances exposure entirely with shutter speed and ISO. Those f-numbers also cannot be compared with camera f-numbers head-on, because the sensor behind them is tiny, and a tiny sensor makes deep depth of field the default no matter how wide the glass.
That is why phone photos are sharp front to back even at f/1.6, and why portrait mode exists: the background blur a large sensor produces optically, the phone reconstructs computationally, estimating depth and blurring by software. The results improve every generation and still stumble on the edges that real optics never get wrong, stray hairs, eyeglass rims, the gap under an arm. Understanding real aperture is exactly what lets you see both what the software is imitating and where the imitation shows.
The practical reading of this: if the shallow-focus look matters to you, it remains the single strongest reason to carry a dedicated camera and a fast lens, a comparison our iPhone camera lens field note treats honestly. And if the phone is the camera you have, the levers that are not the f-ring still work: get close to your subject, put distance behind them, and portrait mode has far less inventing to do.
Aperture and sensor size
The same f-number behaves differently across sensor sizes, and knowing why saves confusion when comparing systems. Exposure does not change: f/2.8 delivers the same brightness per unit of sensor area on a phone, a crop body, or a full-frame camera. Depth of field does change: for the same framing, a larger sensor produces a shallower zone of focus at the same f-number. A portrait framed identically at f/2.8 shows noticeably more background blur on full frame than on a crop body, and enormously more than on a phone.
The reason hides in the framing. To fill a bigger sensor with the same composition you use a longer focal length or stand closer, and both moves, as covered earlier, shallow the depth of field. Photographers summarize the effect with equivalence: multiply the f-number by the crop factor to estimate the full-frame-equivalent depth of field, so f/2.8 on a 1.5x crop body renders roughly like f/4.2 does on full frame. Light per area, and thus exposure, still follows the plain f-number; only the look converts.
This is one honest advantage large sensors hold and one honest defense of small ones. Full frame buys blur and low-light headroom; crop bodies get more of the scene in focus at any given f-number, which sports, wildlife, and travel shooters often actively want. The full-frame versus crop sensor field note weighs the whole trade; for this field note the point is narrower: an f-number describes the lens, and what it looks like depends on the sensor behind it.
A worked example: one scene, three apertures
Put the ideas together on a single concrete scene. A friend sits at a cafe table by a window, fairy lights strung along the back wall five meters behind her, and you have a 50mm f/1.8 prime on a crop-sensor body. Same seat, same light, three apertures, three different photographs.
At f/1.8, the frame is a portrait. Her nearer eye is critically sharp, the far shoulder already softening, and the fairy lights have melted into large glowing discs. The meter reads 1/250 at ISO 400, comfortable numbers for handholding indoors. The picture is about her, and the room is reduced to atmosphere. The risks are the ones the portrait section flagged: focus must land on the eye, and a lean forward after focusing is enough to spoil it.
At f/5.6, ten times less light, the same frame becomes an environmental portrait. Both eyes and her hands around the cup are sharp, the chair and table read clearly, and the lights behind are small, soft circles rather than dreamy orbs. The meter now wants 1/25 at ISO 400, too slow to handhold safely, so you pay from another pocket: ISO 1600 buys the shutter back up to 1/100. The picture now says person in a place, at the cost of some grain.
At f/11, four times less light again, the frame is a documentary photograph of a cafe that happens to contain your friend. Nearly everything from the table edge to the back wall sits inside the zone of focus, and the fairy lights are sharp pinpricks. Handholding is off the table without flash; this frame wants a tripod or a windowsill and 1/6 of a second at a moderate ISO. Three photographs, one scene, and the only setting that moved first was the aperture. That is the dial doing its actual job: deciding what the picture is about.

Common aperture mistakes
The most common beginner mistake is shooting everything wide open because the blur is intoxicating. The result is a stream of frames with one sharp eyelash and a soft everything else, missed focus on moving subjects, and group shots where someone is always fuzzy. The fix is the working habit from the portrait section: hover a stop or two down from maximum unless the shot specifically demands the razor edge, and match the aperture to the number of people in the frame.
The opposite mistake is the f/22 superstition, stopping all the way down for sharpness and getting diffraction softness plus a slow shutter for the trouble. Related is ignoring the shutter side of the trade entirely: choosing f/11 indoors, letting the shutter drift to 1/15, and blaming the lens for the blur that follows. Depth of field is worthless if camera shake smears the whole frame; the sharp photos field note ranks shutter discipline above aperture choice for exactly this reason.
Two quieter mistakes round out the list. Forgetting the variable aperture on a kit zoom, and wondering why the long end underexposes or blurs, is one; the fix is knowing your honest maximum at the focal length you use. Chasing blur with the f-ring alone is the other, when the subject is standing against a wall and no aperture can save the background; the fix is the four-lever recipe, move the subject, not just the dial.
How to practice aperture in one afternoon
Aperture is learned in the fingers, not the head, and one structured afternoon will do more than a week of reading. Start with the pair that teaches the core idea: set aperture priority, put a subject three meters in front of a background with some depth, and shoot the identical frame at your widest aperture and at f/11. Compare the two on a big screen. That pair is the entire concept of depth of field in two files.
Next, run the full ladder. Same subject, every full stop from wide open to f/16, and watch two things as you review: how the background changes step by step, and what shutter speed the camera answered with at each stop. You are learning depth of field and the exposure trade in one exercise. Then run the other levers: at a fixed middle aperture, take one frame close to the subject and one from across the room, then one with the subject near the background and one far from it. The blur will move without the f-number changing, which is the lesson.
Finish by building your presets. Decide, based on what you saw, your personal starting apertures for one person, for a group, for a scene, and for a dim room, write them down, and use them for a week. When the exposure triangle field note talks about balancing settings, and when lens reviews obsess over maximum aperture, you will now be reading about decisions you have made with your own hands.
The bottom line
Aperture is the opening in the lens, written as a fraction, measured in stops, and responsible for two things at once: how much light reaches the sensor and how deep the zone of sharpness runs. Small f-numbers mean wide openings, more light, and shallow focus that isolates a subject; large f-numbers mean narrow openings, less light, and deep focus that holds a scene together. Around that core sit the practical truths: most lenses are sharpest a few stops down, diffraction softens the far end, depth of field also obeys distance, focal length, and background, and every stop you spend on aperture is repaid or collected by shutter speed and ISO. Learn it in aperture priority with your own subjects, hover a stop down from wide open until precision earns the risk, and let the f-ring do what it was built for: deciding what the photograph is about. When the concept clicks, the lens catalog suddenly reads differently too, and the upgrade budget planner can tell you what the fast glass you now covet does to the year’s budget.
This field note teaches how an aperture behaves, not what any particular lens is worth buying, and it names no brands on purpose. Every f-number, shutter speed, ISO value, and percentage in it is an illustrative starting point chosen to make the relationships visible, not a measured spec or a rule for your scene, since depth of field and exposure shift with sensor size, focal length, distance, and light. Test the ideas on your own camera, trust what your files show over what any table implies, and treat the picture in front of you as the final authority on which f-stop was right.
Frequently asked questions
What is aperture in simple terms?
Aperture is the opening inside a camera lens that light passes through on its way to the sensor, and you can make that opening wider or narrower. A wider opening lets in more light and blurs the background more; a narrower opening lets in less light and keeps more of the scene in focus. The size of the opening is written as an f-number such as f/1.8 or f/8, and, counterintuitively, a smaller number means a bigger opening. Aperture is one of the three settings in the exposure triangle, alongside shutter speed and ISO, and it is the one that controls how much of your photo is sharp from front to back.
Why does a lower f-number mean more light?
Because the f-number is a fraction, not a plain size. It is the focal length of the lens divided by the diameter of the opening, so f/2 on a 50mm lens means the opening is 25mm across, while f/8 means it is about 6mm across. Just as one half is bigger than one eighth, f/2 is a wider opening than f/8. Once you read the number as the bottom of a fraction, the scale stops feeling backwards: a small f-number is a wide, bright opening, and a big f-number is a narrow, dim one.
What aperture is best for portraits?
A wide aperture in the range of roughly f/1.8 to f/2.8 is the classic portrait choice, because it throws the background into soft blur and pulls attention to the face. On a very fast lens, stopping down slightly from wide open, say from f/1.4 to f/2, usually sharpens the eyes while keeping the blur. For portraits of two or more people, f/4 or narrower is the safer call so every face sits inside the zone of focus. These are starting points rather than rules: distance to your subject and the background matter as much as the number on the dial.
What aperture is best for landscape photography?
Most landscape work lives between f/8 and f/11, which keeps the scene sharp from the foreground to the horizon on most lenses while staying clear of the softness that very narrow apertures introduce. Going all the way to f/16 or f/22 buys a little more depth of field but costs fine detail to diffraction, so it is reserved for cases that truly need it, such as a very close foreground rock under a distant peak. If light is fading, a tripod lets you keep f/8 and simply use a longer shutter speed rather than compromising the aperture.
What is a fast lens?
A fast lens is one with a large maximum aperture, such as f/1.4, f/1.8, or f/2. The name comes from the shutter speed: because the wide opening passes so much light, you can use a faster shutter in the same scene than a narrower lens would allow. Fast lenses are the tool for low light and for strong background blur, which is why an inexpensive f/1.8 prime is so often the first lens photographers add to a kit. The trade is that speed costs money, size, and weight as the maximum aperture grows, especially in zooms.
Does aperture affect sharpness?
Yes, in two separate ways. First, aperture sets depth of field, so a wide opening can leave parts of your subject outside the zone of focus and looking soft even though nothing went wrong. Second, the lens itself performs differently across the range: most lenses are slightly soft wide open, sharpest two or three stops down in the middle apertures around f/5.6 to f/8, and soft again at f/16 and beyond because of diffraction. If maximum crispness is the goal, the middle of the aperture range is where most lenses do their best work.
What aperture should a beginner use?
A practical starting recipe is aperture priority mode with the aperture matched to the subject: around f/1.8 to f/2.8 for a single person or an object you want isolated, around f/5.6 for general shots, and around f/8 for scenes you want sharp throughout. Aperture priority, marked A or Av on the mode dial, lets you choose the f-number while the camera sets the shutter speed, so you learn the one creative decision without juggling everything at once. Shoot the same subject at the widest and narrowest settings your lens offers and compare the backgrounds; that pair of frames teaches aperture faster than any chart.
What is bokeh and how do I get it?
Bokeh is the look of the out-of-focus areas in a photo, the soft rendering of blurred backgrounds and the round shapes that lights melt into. You get more of it by opening the aperture wide, moving closer to your subject, putting more distance between the subject and the background, and using a longer focal length. A fast prime lens at f/1.8 with the subject a few steps ahead of a distant background produces the strong, creamy version most people picture. Bokeh describes the quality of the blur as well as the amount, and lens design affects that quality, which is one reason two lenses at the same f-number can render backgrounds differently.