What's on this page
- What the exposure triangle actually is
- Aperture: the light and blur control
- Shutter speed: the light and motion control
- ISO: the light and noise control
- Stops: the doubling and halving that ties it together
- How the three settings balance
- What each setting controls, and its side effect
- Which setting to prioritize by shot type
- A balanced exposure, split three ways
- Aperture priority and shutter priority
- Why full manual still matters
- Depth of field, a little deeper
- Metering: how the camera guesses
- Reciprocity and equivalent exposures
- One scene, three correct exposures
- The beginner mistakes that ruin exposures
- How the triangle ties the whole kit together
- The histogram: reading exposure without guessing
- The bottom line
Short answer: The exposure triangle is the relationship between the three settings that decide every exposure: aperture, shutter speed, and ISO. Each changes brightness and brings a side effect, aperture with depth of field, shutter speed with motion, ISO with noise. A stop is a doubling or halving of light shared by all three, so a stop lost on one can be repaid on another. Set the setting that matters most first, then balance the other two.
Every photograph you will ever take is decided by three settings, and only three. Aperture, shutter speed, and ISO together control how bright the image is, and once you understand how they trade against each other, the intimidating dials on a camera turn into a simple balance you can read at a glance. Photographers call the relationship the exposure triangle, and it is the single most important thing to learn before any lens, body, or accessory can help you.
This field note explains the triangle from the ground up: what each of the three settings does to the brightness of a frame, the side effect each one brings along whether you asked for it or not, and the core skill of changing one setting and paying it back with another. It is the technique piece that sits underneath all of our gear coverage. When our field note on upgrade order says a fast prime is the biggest jump per dollar, it is really saying the prime hands you more room to move inside this triangle. Master the settings here and every buying decision on the site starts to make sense. Price your own kit against the reasoning with our upgrade budget planner once the ideas land.
Key takeaways
- Three settings control every exposure: aperture, shutter speed, and ISO. Each one changes brightness, and each one brings a side effect, so you never change just the brightness.
- Aperture controls light and depth of field, shutter speed controls light and motion, ISO controls light and noise. Learning the triangle is learning those three side effects cold.
- A stop is a doubling or halving of light, the shared currency of all three settings. A stop lost on one can be repaid by a stop gained on another, which is the whole skill.
- Set the one setting that matters most for the shot first, then balance the other two around it: aperture for portraits, shutter for sports, ISO for low light.
- The same scene has many correct exposures. Choosing which one, blurred background, frozen motion, or clean file, is the creative decision the triangle exists to serve.
What the exposure triangle actually is
Start with what a photograph physically is: a measured amount of light collected by the sensor over a measured slice of time. Too little light and the frame is dark, or underexposed; too much and it is washed out, or overexposed. The exposure triangle is simply the three controls a camera gives you over that amount of light. Aperture sets how wide the opening in the lens is. Shutter speed sets how long the sensor is exposed. ISO sets how strongly the sensor amplifies what it gathers. Between them, those three cover every path light takes from the scene to the file.
The reason it is drawn as a triangle, rather than listed as three unrelated dials, is that the three are locked together by a shared budget. A scene needs a certain total amount of light to look right. If you take some away on one setting, you have to add it back on another to keep the brightness, which pulls the third into the conversation. That interdependence is not a nuisance to be automated away. It is the entire craft, because each of the three settings changes the look of the photo in its own distinct way while it changes the brightness. Move light between them and you are choosing what the picture emphasizes.
Aperture: the light and blur control
Aperture is the size of the hole inside the lens that light passes through, and it is measured in f-stops: f/1.8, f/2.8, f/4, f/5.6, f/8, and so on. The counterintuitive part trips up every beginner: smaller f-numbers mean a bigger opening and more light. f/1.8 is a wide, bright opening; f/16 is a tiny one. The number is a ratio, focal length divided by opening diameter, which is why it runs backwards to intuition. Learn to read low as bright and the rest follows.
Aperture’s job in the brightness budget is straightforward: open it up and more light floods in, close it down and less does. But aperture carries the most visually dramatic side effect of the three, and it is called depth of field, meaning how much of the scene front to back is in sharp focus. A wide aperture like f/1.8 gives a thin slice of focus, so a portrait subject is razor sharp while the background melts into soft blur. A narrow aperture like f/11 keeps nearly everything sharp, which is why landscapes are shot stopped down. This is the look people point at when a photo looks professional, and it is the exact advantage our field note on prime versus zoom is built around: a cheap f/1.8 prime buys wide apertures no kit zoom can reach. For the full story of the f-ring, from the sweet spot to diffraction, our field note on what aperture is goes stop by stop.

Shutter speed: the light and motion control
Shutter speed is the length of time the sensor stays exposed to light, measured in fractions of a second: 1/1000, 1/250, 1/60, 1/15, and on into full seconds. A fast shutter like 1/1000 opens and closes in a blink and lets in little light. A slow shutter like 1/15 stays open thirteen times as long and gathers far more. In the brightness budget, shutter speed is the most intuitive of the three: longer exposure, more light, exactly as you would expect.
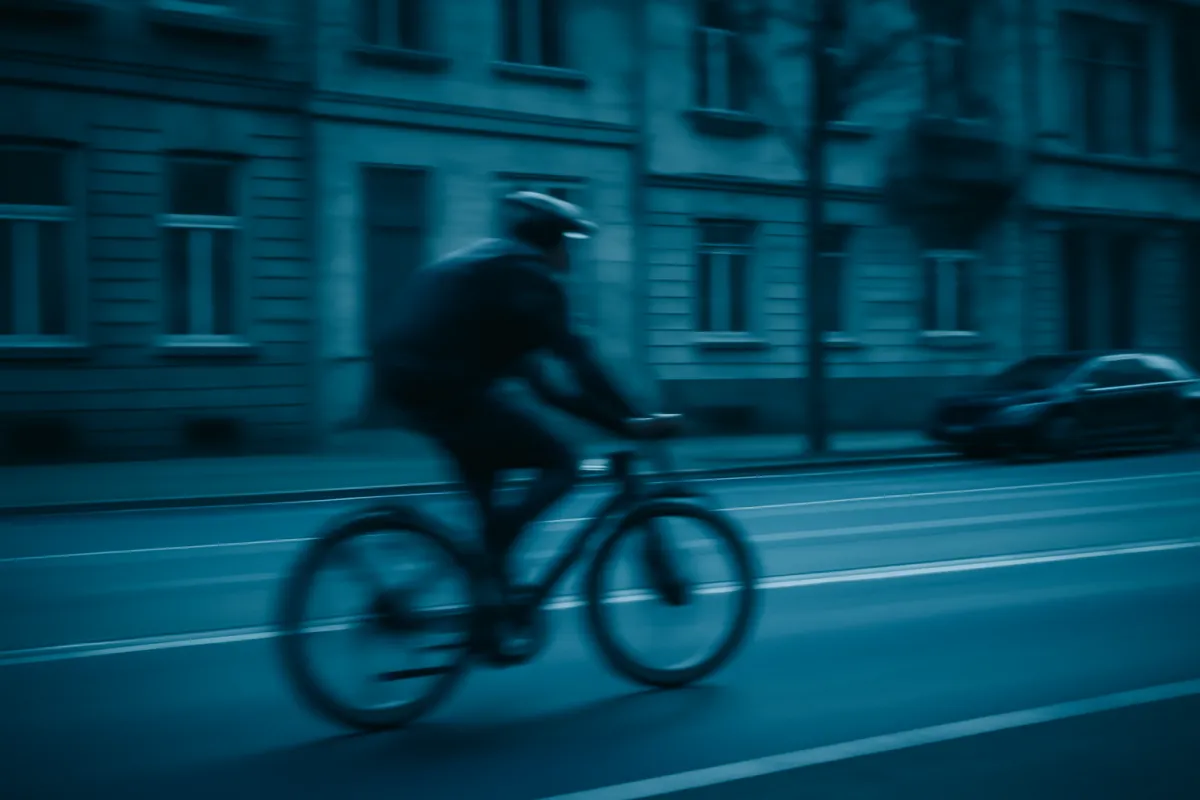
Its side effect is motion. A fast shutter freezes movement into a crisp instant, the water droplet suspended in air, the athlete locked mid-stride. A slow shutter lets anything that moves during the exposure smear across the frame, which can be a mistake or a deliberate effect depending on what you wanted. There are two kinds of motion blur to keep separate. Subject blur comes from the thing you are photographing moving, and it is sometimes desirable: the silky waterfall, the streaked car lights. Camera-shake blur comes from your own hands trembling during a slow exposure, and it is almost never wanted because it smears the whole frame, sharp subject and all. Most blurry beginner photos are camera shake, cured by a faster shutter or a steadier hold. The full treatment, freeze speeds by subject, the reciprocal rule, and deliberate blur, lives in our field note on what shutter speed is.
ISO: the light and noise control
So what is ISO in photography? At its simplest, ISO measures how strongly the sensor amplifies the light it receives. At the base value, usually ISO 100, the sensor reports the light plainly. Raise ISO to 400, 1600, 6400, and it multiplies the signal, brightening the image without gathering any more actual light. That makes ISO the setting of last resort for brightness: when the aperture is already as wide as it goes and the shutter is as slow as you dare, ISO buys the rest.
The catch is that amplifying the signal also amplifies the random flecks that come with it, and those flecks are noise, the grainy speckle that grows as ISO climbs. Push ISO high enough and clean shadows turn mushy and colors go blotchy. How high you can go before it matters depends heavily on the sensor: a larger sensor gathers more light per pixel and stays cleaner, which is the real substance behind our field note on full frame versus crop. It is also why pixel count is a red herring for low-light quality, a point our note on megapixels makes at length: cramming more pixels onto the same sensor can make noise worse, not better. Modern cameras handle high ISO far better than they used to, and the honest rule is that a slightly grainy sharp frame always beats a clean blurry one. For the full treatment of the numbers ladder, base ISO, auto-ISO limits, and how much noise genuinely matters at the size you publish, our ISO field note goes rung by rung.
Stops: the doubling and halving that ties it together
None of the three settings would be usable together without a shared unit, and that unit is the stop. A stop is a doubling or a halving of light, full stop, and all three settings are calibrated in it. Open the aperture from f/4 to f/2.8 and you let in one stop, twice the light. Change the shutter from 1/250 to 1/125 and you gain one stop, twice the light, because the sensor is open twice as long. Raise ISO from 800 to 1600 and you gain one stop of brightness through amplification.
This shared currency is what makes the triangle a balance rather than three separate puzzles. Because a stop is a stop no matter which setting delivers it, light is fungible between them. Give up one stop of shutter speed and you can repay it with one stop of aperture, or one stop of ISO, and the brightness lands in exactly the same place. That is the mechanical heart of manual photography: not memorizing numbers, but moving stops between three columns until the picture both looks right and reads right. Once you count in stops, the dials stop being arbitrary. f/2.8 to f/4 is not a mysterious jump, it is one stop darker, repayable anywhere.
How the three settings balance
Here is the skill the whole field note is building toward, and it is simpler than it sounds. To keep a photo’s brightness constant while you change its look, you move stops between the three settings so the total stays put. Every stop you take from one, you add to another. That single habit is the difference between fighting the camera and steering it.
Picture a correctly exposed frame at f/4, 1/250, ISO 400. Suppose you want more background blur, so you open the aperture two stops to f/2. That is two extra stops of light flooding in, and if you did nothing else the frame would be badly overexposed. So you pay it back: speed the shutter two stops from 1/250 to 1/1000, and the brightness returns to exactly where it started. Same exposure, new look, now with soft background and frozen motion. Or you could have paid it back in ISO, dropping from 400 to 100 for a cleaner file at a slower shutter. The scene had one brightness requirement and several ways to meet it, and choosing among them is the creative act. Beginners change one dial and panic when the photo goes dark or bright; photographers change one dial and immediately know which other dial pays for it.
What each setting controls, and its side effect
It helps to see the three side by side, because their brightness power is not the whole story. Each setting commands a certain range of brightness, measured in the stops it can travel across, and each drags along its own consequence. The chart below sizes the usable creative range of each control in stops, with its side effect named in the label. The point is not that one setting is better, but that they differ in both reach and cost.
What each control commands, and the side effect it brings
Usable creative range of each setting, in stops of brightness. Wider bar, more room to move. Illustrative typical ranges.
Shutter has the widest brightness range but the harshest side effect on moving subjects. Aperture has the narrowest range but the most dramatic creative payoff. There is no free lever; each stop of light costs you something.
Read the chart as a map of trade-offs, not a ranking. Shutter speed can travel the most stops, from long exposures to blistering fractions of a second, but every stop past your steady-hold limit risks blur. Aperture has the least travel, boxed in by the lens at both ends, yet its side effect is the one people fall in love with. ISO sits in the middle on both range and cost. Knowing which setting is cheap and which is expensive for a given shot is how you decide where to spend your stops.
Which setting to prioritize by shot type
The three settings are equal in the brightness budget but never equal in importance for a given photograph. One of them almost always carries the meaning of the shot, and that is the one you set first and protect. The others adjust around it.
For portraits, aperture leads. The whole look is built on depth of field, so you choose a wide aperture for background separation and let shutter and ISO fall in behind it. For sports and action, shutter speed leads without argument, because a frozen moment is the entire point and a blurred one is a wasted frame; you pick a fast shutter and pay for it with aperture and ISO. For low light, ISO leads in a defensive sense: you decide the highest ISO you will tolerate, then open the aperture wide and slow the shutter as far as you safely can to keep from needing to exceed it. For landscapes, aperture leads again but from the other end, stopped down to f/8 or f/11 for front-to-back sharpness, with a tripod absorbing the slow shutter that narrow aperture demands. Name the setting that carries the shot, and the exposure practically builds itself.
A balanced exposure, split three ways
Another way to feel the triangle is to think of a finished exposure as a light budget spent across three lines. In a well-judged frame, no single setting is doing all the work; the photographer has spread the decision so each setting sits in a comfortable range rather than pinned at an extreme. The split below is illustrative, one balanced daylight frame apportioned across the three controls, but it shows the mindset: you are allocating a fixed brightness budget, and a healthy allocation leans on the setting that serves the shot without starving the others.
A balanced exposure, apportioned across the three controls
Illustrative share of the exposure decision carried by each setting in one well-judged daylight frame. Shares sum to 100.
Change the scene and the split shifts: a sports frame throws far more weight onto shutter, a night frame onto ISO. The habit is the same, spend the budget deliberately rather than letting one setting hit its limit by accident.
Aperture priority and shutter priority
You do not have to set all three by hand to control the picture, which surprises beginners who think manual is the only serious mode. Cameras offer two semi-automatic modes that let you own the setting that matters and hand off the rest. In aperture priority, marked A or Av on the dial, you choose the aperture and the camera picks a shutter speed to reach a correct exposure. In shutter priority, marked S or Tv, you choose the shutter speed and the camera picks the aperture. In both, you usually still set or cap ISO, or let it float within a limit you define.
These modes are not training wheels; they are what most working photographers use most of the time. Aperture priority is the everyday default, because depth of field is the decision that matters in the majority of ordinary shooting, and letting the camera juggle shutter speed frees your attention for composition. Shutter priority comes out when motion is the point: a child’s football game, birds in flight, a street scene you want frozen or flowing. The mode you pick is a statement about which side effect you refuse to leave to chance. Choose aperture priority when the background blur cannot be wrong, shutter priority when the motion cannot be wrong.
Why full manual still matters
If the priority modes are so capable, why learn full manual at all? Because the camera’s automatic exposure is a guess, and in a handful of common situations the guess is reliably wrong. Manual mode, marked M, lets you set aperture, shutter, and ISO independently and lock the exposure exactly where you want it, immune to the camera changing its mind between frames.
The clearest case is consistency. Shoot a series in changing framing, some frames with a bright window, some without, and any automatic mode will re-expose each shot, so a subject’s face shifts brightness frame to frame. In manual, once you nail the exposure it stays put, which is why studio and event photographers live there. The second case is scenes that fool the meter: a snowfield the camera tries to darken to grey, a spotlit performer on a black stage the camera tries to brighten. In those, you overrule the meter by hand. Manual is also simply the best teacher, because setting all three yourself, and watching the picture respond, wires the triangle into your reflexes faster than any automatic mode can. You do not have to shoot manual forever, but shooting it for a while makes every other mode make sense.
Depth of field, a little deeper
Because depth of field is aperture’s side effect and the one beginners most want to command, it earns a closer look. Three things set how much of a scene is sharp: the aperture, the focal length of the lens, and the distance from camera to subject. Aperture is the lever you hear about most, wider for less depth of field and more blur, but the other two matter as much and are easy to forget.
Focal length stacks the effect: a longer lens at the same aperture renders a shallower, more compressed background, which is why an 85mm portrait lens melts backgrounds so readily and a wide 24mm keeps more in focus at the same f-stop. Our field note on 35mm versus 50mm walks exactly how those focal-length personalities change the look. Distance is the sleeper: the closer you focus, the shallower the depth of field, so a macro shot at f/8 can have paper-thin focus while a landscape at the same f/8 is sharp to the horizon. The practical upshot is that background blur is not bought with aperture alone. If you want more of it, you can open up, reach for a longer lens, step closer to your subject, or push the background farther away, and the best portraits usually stack several of those at once. This is where the lens choices in our prime versus zoom note cash out: a fast prime hands you the widest aperture, but technique supplies the rest.
Metering: how the camera guesses
Behind every automatic and semi-automatic exposure sits the light meter, the camera’s attempt to measure the scene and pick settings that render it correctly. Understanding metering is understanding both when to trust the camera and when to overrule it. The meter reads the light and aims to make the frame average out to a middle brightness, a neutral grey, which is a sensible default that works most of the time and fails in predictable ways.
The failures come from scenes that are not average. Point the camera at something mostly white, a snowfield or a bright wall, and the meter tries to darken it to grey, leaving your snow a dull dishwater colour. Point it at something mostly dark and the meter brightens it, washing out a moody night scene. The fix is exposure compensation, a dial that tells the camera to add or subtract a stop or two from its own guess: plus for bright scenes, minus for dark ones. Cameras also offer metering patterns, evaluative or matrix for whole-scene averaging, centre-weighted for the middle, and spot for a tiny precise area, and knowing which one is active saves you from mysterious exposures. The meter is a tool, not an authority. Read what it suggests, then decide whether the scene is one of the cases where it is fooled.
Reciprocity and equivalent exposures
The formal name for the trade at the heart of the triangle is reciprocity, and it is worth stating plainly because it unlocks a powerful habit. Reciprocity means that as long as you swap stops evenly between settings, many different combinations produce the identical brightness. f/2.8 at 1/1000 lets in the same total light as f/4 at 1/500, as f/5.6 at 1/250, as f/8 at 1/125. Each step narrows the aperture one stop and slows the shutter one stop, so the light lost on one is repaid on the other, and every pairing is a correct exposure. These are called equivalent exposures.
The habit this unlocks is fluency. Once you see that a correct exposure is a whole ladder of settings rather than one magic combination, you stop hunting for the answer and start choosing among answers. Need more background blur? Slide down the ladder toward wider apertures and faster shutters. Need everything sharp for a landscape? Slide the other way toward narrow apertures and slower shutters, and reach for a tripod when the shutter gets too slow to hand-hold. Add ISO as a third rung when the light runs out at the bottom of the ladder. Equivalent exposures are why two photographers can shoot the same scene at the same brightness and come home with completely different pictures. They picked different rungs on the same ladder.
One scene, three correct exposures
Make it concrete. Picture a single scene: a friend standing on a path at golden hour, a soft-lit tree line behind them, gentle even light. The scene needs a fixed total amount of light, and there are at least three good ways to give it, each a different photograph.
Exposure one, the portrait. You want the tree line to melt so your friend lifts off the background, so aperture leads: f/2, wide open on a fast prime. To balance that flood of light you speed the shutter to 1/2000 and drop ISO to 100. The result is creamy background blur, the classic look. Exposure two, the storytelling frame. You want the path and the trees to stay legible as a place, so you stop down to f/8 for depth of field. That narrow aperture costs three stops against the first frame, so you pay it back by slowing the shutter to 1/250 and nudging ISO to 200. Now the whole scene reads sharp, a portrait of a person in a place. Exposure three, the low-light version, shot twenty minutes later as dusk falls. Light is scarce, so ISO leads: you accept ISO 1600, open to f/2.8, and hold the shutter at 1/125 to stay sharp handheld. Grainier than the others, but a sharp frame where an automatic camera might have failed. Three correct exposures, one scene, three different pictures, and the triangle is how you chose among them on purpose rather than by accident.
The beginner mistakes that ruin exposures
Most exposure disasters are a small set of the same errors, and naming them is most of the cure. Step around these and your keeper rate climbs immediately.
- Shutter too slow to hand-hold. The number one cause of blurry photos is a shutter speed below your steady-hold limit, roughly one over the focal length as a floor. If light forces the shutter that slow, open the aperture or raise ISO to buy it back, or brace the camera. A sharp grainy frame beats a smooth blurry one.
- ISO left too high in good light. Auto ISO left uncapped will happily shoot a bright scene at ISO 3200, adding grain you never needed. In generous light, ISO belongs near its base value; save the high numbers for when the light is genuinely gone.
- Wrong depth of field for the shot. Shooting a landscape wide open at f/1.8 leaves most of it soft; shooting a group portrait at f/1.8 puts half the faces out of focus. Match the aperture to how much needs to be sharp, not to how much blur looks impressive on one face.
- Trusting the meter on tricky scenes. Letting the camera darken your snow to grey or blow out your night scene is a metering failure, not a camera defect. Dial in exposure compensation for scenes that are not middle-brightness.
- Chasing brightness with the wrong setting. Cranking ISO when the aperture is still at f/8, or slowing the shutter into blur when ISO had headroom, wastes the cheap stops and spends the expensive ones. Reach for the setting whose side effect you can most afford to accept in that shot.
How the triangle ties the whole kit together
Everything the site says about gear resolves into this one skill, which is why it deserves the last word. When our upgrade order field note crowns a fast prime the biggest visible jump per dollar, the mechanism is the triangle: a wider maximum aperture hands you more usable stops in the exact conditions, dim light and background blur, where the kit zoom runs out of room. The lens does not take better photos on its own; it widens the corner of the triangle you were most boxed in.
The same logic threads through the rest of the coverage. Our prime versus zoom note is, underneath, an argument about how many stops of aperture you can afford and how much you will pay in flexibility and weight to get them. A larger sensor, from our full-frame note, buys cleaner high ISO, which is more usable room on the ISO corner. A tripod, from the upgrade note, buys unlimited slow-shutter time by removing camera shake, unlocking the bottom rung of the equivalent-exposure ladder. Even lighting, the most underrated upgrade, is really a way to add light to the scene so you need fewer stops from the triangle in the first place. Learn the triangle and you can read any gear review in the language of stops: what does this buy me, and in which corner? Plan those purchases in order against your budget with our upgrade budget planner, and you will spend on the corner your photography is actually pinned in.
The histogram: reading exposure without guessing
The screen on the back of the camera can mislead, because its brightness changes with the ambient light and your own eyes, so a photo that looks perfect on a dim screen outdoors can be badly off when you get home. The honest reading of exposure is the histogram, a small graph the camera can display that plots how many pixels fall at each brightness level, from pure black on the left to pure white on the right. Learn to glance at it and you stop guessing whether a frame is exposed well.
Reading it is simpler than it looks. A histogram bunched hard against the left edge means shadows are being crushed to black with detail lost; bunched against the right means highlights are blown to featureless white, the least recoverable error of all. A well-judged exposure for most scenes spreads the data across the range without slamming either wall, though the ideal shape shifts with the subject: a snowfield leans right on purpose, a night scene leans left. Pair the histogram with the exposure compensation dial from the metering section, and you have a closed loop, read the graph, nudge the exposure, read again, that removes the back-screen guesswork entirely. It is the fastest way to turn the triangle from theory into frames that are right before you leave the scene, not disappointments discovered at the computer.
The bottom line
Three settings decide every photograph, and they are not three separate puzzles but one balance. Aperture sets brightness and depth of field, shutter speed sets brightness and motion, ISO sets brightness and noise, and a stop of light is the shared currency that lets you move freely between them. Set the setting that carries your shot first, aperture for portraits, shutter for action, ISO for the dark, then balance the other two around it, paying every stop you take on one with a stop you add on another. Lean on aperture priority and shutter priority for everyday speed, reach for manual when the light fools the meter or the frames must match, and remember that a scene has a whole family of correct exposures, not one. Learn this and the dials stop being intimidating and start being expressive, and every piece of gear you own or plan to buy finally makes sense as a way to widen one corner of the triangle you already understand.
This field note is a teaching document meant to build judgment behind the camera, not a spec sheet or a shopping list. It carries no sponsorship and names no maker, and the settings, f-stops, and ISO figures throughout are illustrative starting points for understanding the relationships, not fixed prescriptions for any given scene, since real exposures depend on your light, your lens, your sensor, and your subject. Treat every suggested setting as a place to begin experimenting, read your own histogram and results, and let the picture in front of you have the final word over any number printed here.
Frequently asked questions
What is the exposure triangle in simple terms?
The exposure triangle is the name for the three camera settings that together decide how bright a photo is: aperture, shutter speed, and ISO. Each one controls the brightness of the frame, and each one also brings a side effect you get whether you want it or not. Aperture changes how much of the scene is in focus, shutter speed changes whether motion is frozen or blurred, and ISO changes how clean or grainy the file looks. Understanding the triangle means understanding that you cannot change one without changing the picture, so every exposure is a trade you make on purpose.
Which should I set first, aperture, shutter speed, or ISO?
Set the one that matters most for the shot in front of you, then let the other two follow. For a portrait where background blur is the point, set aperture first and let the camera work out the rest in aperture priority. For sports where a frozen moment is the point, set shutter speed first in shutter priority. For dim scenes where any usable frame is the win, set ISO to a ceiling you can accept and open the aperture wide. The setting you choose first is a statement about what you are unwilling to compromise, and the other two adjust around it.
What is a stop in photography?
A stop is a doubling or halving of the light reaching the sensor, and it is the shared unit that lets the three settings talk to each other. Open the aperture one stop and you double the light; halve the shutter speed and you double the light; raise ISO from 400 to 800 and you double the sensitivity. Because they all move in the same currency, a stop lost on one setting can be repaid by a stop gained on another, which is the entire skill of manual exposure. Once you think in stops, the numbers on the dials stop looking arbitrary and start looking like a balance you can pay in three currencies.
What is ISO in photography?
ISO is the camera setting that controls how strongly the sensor amplifies the light it gathers, and it is the third corner of the exposure triangle alongside aperture and shutter speed. At its base value, commonly ISO 100, the sensor reports the light plainly; raise ISO to 400, 1600, or 6400 and the camera multiplies the signal to brighten the frame without collecting any more actual light. The trade is noise: amplifying the signal also amplifies random grain, so a higher ISO gives a brighter but grainier file. The practical rule is to keep ISO as low as your light allows, then raise it without shame when the only alternative is a blurry slow shutter, because a slightly grainy sharp photo beats a clean blurry one.
What settings should a beginner use in low light?
In dim conditions, open the aperture as wide as the lens allows, usually f/1.8 on a cheap prime or f/4 on a kit zoom, because that is free light with no grain penalty. Then set the slowest shutter speed you can hold steady, commonly around 1/60 for a still subject and faster for anything moving. Raise ISO only to cover whatever light the first two settings could not gather, accepting some grain as the price of a sharp frame over a blurry one. A slightly grainy sharp photo beats a clean blurry one every time, so spend ISO without shame when the alternative is a smeared shot.
What is the difference between aperture priority and shutter priority?
Aperture priority, marked A or Av, lets you choose the aperture while the camera picks a matching shutter speed to reach a correct exposure. Shutter priority, marked S or Tv, flips it: you choose the shutter speed and the camera picks the aperture. Both are semi-automatic modes that let you control the one setting that matters for your shot while automating the housekeeping. Most working photographers live in aperture priority for everyday shooting and switch to shutter priority when freezing or blurring motion is the whole point of the frame.
Why do my handheld photos come out blurry?
The most common cause is a shutter speed too slow to cover the tiny shake of your own hands, which smears the whole frame even when your subject is still. A rough safety rule is to keep the shutter speed at least as fast as one over your focal length, so a 50mm lens wants roughly 1/50 or faster, and a 200mm lens wants 1/200 or faster. If the light will not allow that speed, open the aperture wider or raise ISO to buy it back, or brace the camera against something solid. Image stabilization helps with hand shake but does nothing to freeze a moving subject, which still needs genuine shutter speed.
Does higher ISO ruin a photo?
Not on its own, and modern cameras handle high ISO far better than older ones did. Raising ISO adds grain, technically called noise, that grows as the number climbs, and it slightly reduces the range of tones the file can hold. But the noise from a moderate ISO is minor and often invisible at normal viewing sizes, and it is almost always preferable to the alternatives of a blurry slow shutter or a missed shot. Larger sensors, as covered in our field note on full frame versus crop, hold cleaner files at high ISO, but every camera has more usable ISO headroom than nervous beginners tend to use.
How can the same scene have more than one correct exposure?
Because brightness is only one requirement, and the three settings can reach the same brightness by many different routes. A scene that needs a certain total amount of light can get there with a wide aperture and fast shutter, or a narrow aperture and slow shutter, or a moderate pair with higher ISO, and all three frames are correctly exposed. They will look different, though: one has a blurred background, another has everything sharp, a third has visible grain. Correct exposure is a family of settings, not a single answer, and choosing which member of the family you want is the creative decision the triangle exists to serve.