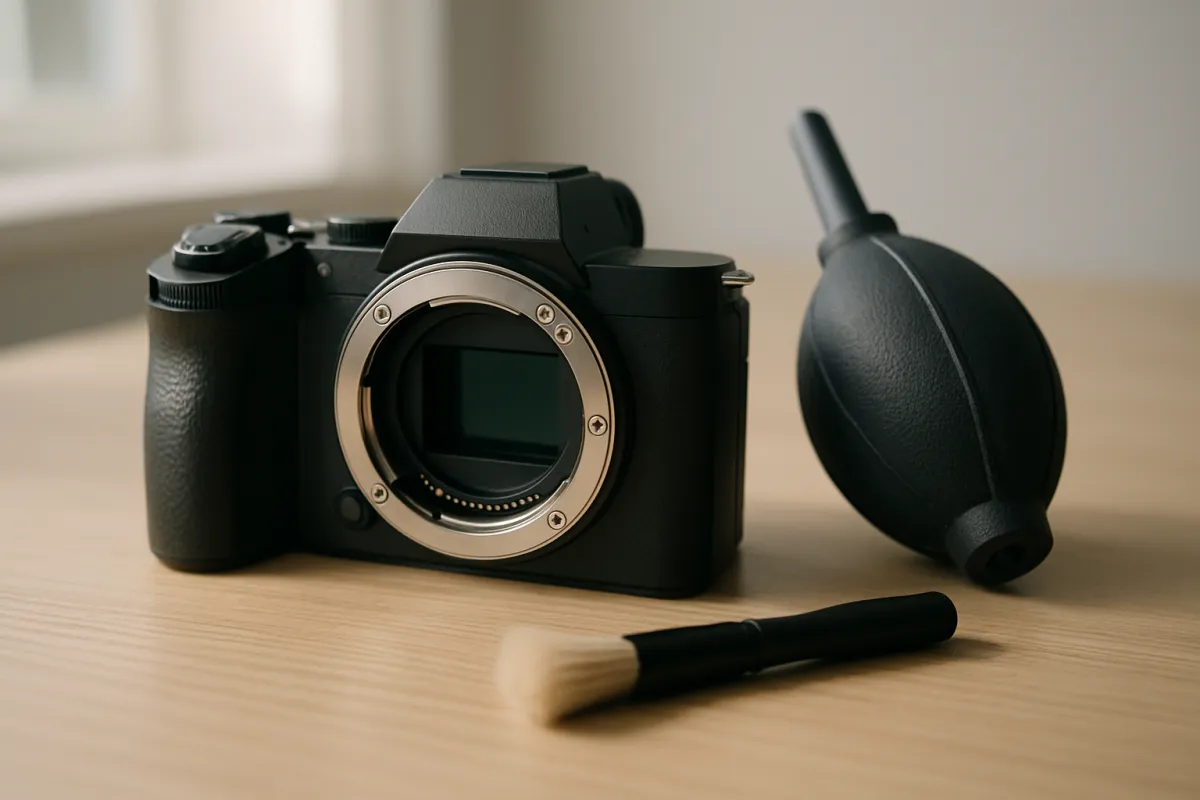
What's on this page
- Before you start
- What You Are Actually Cleaning: The Filter Stack, Not the Sensor
- Step 1: Confirm You Actually Have Sensor Dust
- Step 2: Run the Camera’s Own Sensor Cleaning Cycle
- Step 3: Blow the Chamber Out With a Manual Blower
- Step 4: Choose Between a Dry Brush and a Wet Swab
- Step 5: Do a Wet Swab Properly, One Pass Each Way
- Step 6: Re-Test and Know When to Stop
- Step 7: Prevent Sensor Dust With Better Lens Habits
- When Not to Clean Your Own Sensor
- Reading the Test Shot: Dust, Oil, and Dead Pixels Compared
- Choosing the Right Swab Width for Your Sensor Size
- A worked example: one dust spot from test shot to clean
- Common mistakes to avoid
- Troubleshooting the tough cases
- How Sensor Dust Actually Shows Up in Your Photos
- Removing Dust Spots in Editing Instead of Cleaning
- Mirrorless and DSLR Chambers Are Not the Same Job
- Sensor Dust in the Field, Away From the Desk
- What a Professional Sensor Clean Involves
- Where Sensor Cleaning Fits in Your Camera Care Routine
- Your Sensor Cleaning Checklist
- The bottom line
Short answer: Clean a camera sensor by working outward from zero risk: prove the dust is on the sensor with a test frame of a bright even surface at the smallest aperture, run the camera's own cleaning cycle, then use a rubber hand blower, then a dry brush, and only then a wet swab with one pass each way. Never use canned air, stop after two or three swabs, and send anything stubborn to a service center.
There is a moment every photographer eventually has: a wide shot of a bright sky, and the same soft gray blob sitting in the upper left of every single frame. That is sensor dust, and it is the one piece of camera maintenance that people are rightly nervous about, because unlike a smudged front element, the surface in question sits deep inside the body and is expensive to get wrong. The good news is that the great majority of sensor dust comes off with moving air and no contact at all. The honest news is that the last stubborn fraction requires touching the surface, and that is where the job stops being routine and starts requiring a decision.
This walkthrough turns sensor cleaning into a sequence you can follow calmly, including the part where the right answer is to stop and pay someone. By the end you will know how to prove that the dust is on the sensor rather than on your lens, how to use the camera’s own cleaning cycle first, how to use a hand blower without endangering anything, when a dry brush beats a wet swab, how to swab correctly with the right width and one pass in each direction, and where the hard stopping line sits. It pairs directly with our field note on cleaning a camera lens, which covers the far more common and far lower stakes version of the same job. If you decide the answer is a service clean or a cleaning kit, cost it against the rest of your kit in the upgrade budget planner.
Key takeaways
- You are not cleaning the sensor itself. You are cleaning the filter stack bonded over it, and a scratch there is usually a sensor assembly repair, not a polish.
- Prove it is sensor dust before you touch anything: a test frame of a bright even surface at the smallest aperture, repeated with a second lens.
- Work outward from zero risk: the camera's own cleaning cycle, then a rubber hand blower, then a dry brush, and only then a wet swab.
- Never use canned air or compressed gas, and never let a blower tip touch anything inside the chamber. Both rules exist because of expensive mistakes.
- Stop after two wet swabs, three at the very most. Anything oily, anything that will not shift, a floating stabilized sensor, or a camera under warranty all mean hand it to a service center.
Before you start
Sensor cleaning is a medium difficulty job with a low difficulty first half and a genuinely high stakes second half, and the whole skill is knowing which half you are in. The blower stage takes about five minutes and is something you can do without a second thought. The wet swab stage takes another ten and deserves a clear head, a still room, and a decision made in advance about when you will quit. Budget around twenty minutes end to end including the test shots, and do not start it an hour before a shoot.
Here is what you need, in the order it matters:
- A charged battery. This is first for a reason. Manual sensor cleaning mode holds the shutter open, and on a DSLR it holds the mirror up. If the camera loses power with a blower or swab inside the chamber, the mirror or shutter can come down onto it. Most bodies refuse to enter cleaning mode below a certain charge; do not talk yours into it with a nearly flat cell.
- A rubber hand blower. The large bulb type with a one way intake valve, so it draws clean air from the back rather than sucking dust straight back in through the nozzle. Not canned air, not a compressor, not your mouth.
- A test subject and a lens you can stop down. A patch of clear sky, a white wall, or a lit sheet of paper, plus any lens that reaches f/16 or smaller. A second lens is useful for the confirmation test in step 1.
- Optionally, a sensor brush and swabs sized to your sensor. Buy the swab width that matches your format, and buy several, because a swab is single use. Sensor cleaning fluid made for the job, not eyeglass cleaner and not a household alcohol wipe.
- A clean, still, low dust room. No open windows, no fan, no just vacuumed carpet. Wipe the desk first and let the air settle.
With those in place, the seven steps below take you from a suspicious blob in a photo to a clean frame, or to a clear decision that this one is not yours to fix. Tell the companion above your sensor size and what the test shot shows, and it will name your swab width and your stopping point as you read.
What You Are Actually Cleaning: The Filter Stack, Not the Sensor
The phrase sensor cleaning is a small lie that makes the job sound scarier and simpler than it is. On essentially every interchangeable lens camera, the imaging sensor itself is sealed behind a stack of thin optical layers: typically a cover glass, an infrared cut filter, and on many cameras an anti aliasing filter or a coating designed to shed dust. That stack is bonded into the sensor assembly. When you look into an open mount and see a rectangle with a faint colored sheen, you are looking at the outermost layer of that stack, not at silicon.
This matters in two directions. It is reassuring, because it means a swab is contacting a piece of optical glass or a coating designed to be cleaned, not the light sensitive surface, and the manufacturers who supply cleaning modes and cleaning kits clearly expect owners to do this. It is also sobering, because that outer layer cannot be replaced on its own. Scratch it, and the usual repair is replacing the sensor assembly, which on most bodies is one of the two or three most expensive parts in the camera. There is no polishing out a scratch on a filter stack the way you might live with a light scuff on a lens front element.
So the risk profile is lopsided in a specific way: the chance of damage per careful attempt is small, and the cost of damage when it happens is large. That is exactly the profile where you want a fixed rule rather than judgment in the moment, because in the moment you will always feel like one more pass will do it. The rule this article uses, and the one the stopping section returns to, is that two wet swabs is the working ceiling and three is the absolute one.
Step 1: Confirm You Actually Have Sensor Dust
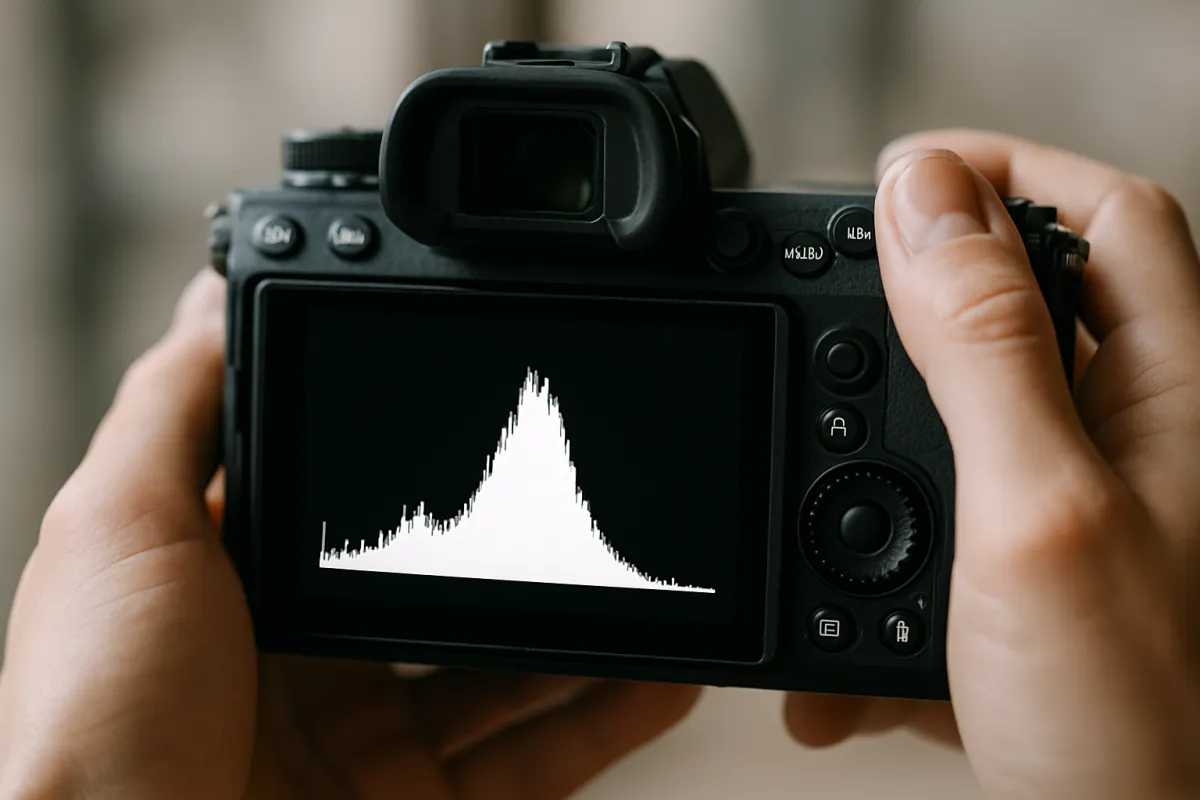
Start by proving the problem exists, because a surprising share of suspected sensor dust turns out to be something else entirely, and swabbing a clean sensor is pure downside. The diagnostic is a single test frame, and it is worth doing precisely rather than casually.
Set the camera to aperture priority or manual, choose your lens’s smallest aperture, which usually means around f/16 to f/22, and set ISO to base, commonly ISO 100. Set focus manually to infinity or deliberately defocus, because you want the surface to contribute nothing. Aim at something bright and evenly toned: clear blue sky away from the sun, a white wall, or a sheet of paper under even light. Then, during the exposure, move the camera slowly in a small circle. That deliberate blur wipes out any texture in the wall or paper, so the only things left with hard edges in the file are the shadows of particles sitting in front of the sensor. Shoot one frame.
Now look at it properly. Open the file at full magnification and pan across it, or raise contrast and clarity hard in your editor, which makes faint specks jump out. Sensor dust looks like soft edged gray or dark blobs at fixed positions, most often clustered toward the top of the frame as it appears in the image, which corresponds to the bottom of the sensor where gravity drops things.
The watch out is drawing the wrong conclusion. Swap to a different lens and shoot the same test again. Marks in identical positions in both files are on the sensor side. Marks that move, soften, or disappear are on the lens or a filter, and belong in the lens cleaning routine instead. A single bright dot that also appears in a lens cap dark frame is a stuck pixel and cleaning will never touch it.
Step 2: Run the Camera’s Own Sensor Cleaning Cycle
Before any tool comes near the mount, use the cleaning system the camera already has, because it costs nothing, risks nothing, and clears a meaningful share of ordinary dust. Nearly every modern body includes an automatic sensor cleaning function that vibrates the outer filter at high frequency to shake loose particles off the surface, usually onto an adhesive strip below it. Many cameras run it automatically at startup or shutdown, and every one that has it exposes a manual trigger in the setup menu, typically labeled sensor cleaning, clean now, or clean image sensor.
Use it deliberately rather than passively. Take the lens off, hold or stand the camera so the mount faces downward, and run the cycle. Facing down matters: the vibration only breaks the particle free, and gravity is what actually removes it, so a camera lying face up will shake dust loose and let it settle right back down. Run the cycle two or three times in a row with the body facing down, then put the lens back on and reshoot your test frame.
This step alone resolves a fair number of cases, particularly fresh dry dust picked up in a recent lens change. The watch out is expecting too much of it. The vibration cannot do anything about a particle that has bonded to the surface through humidity, static, or a smear of oil, and it will not shift anything sticky. If two or three cycles produce no visible change in the test frame, the cleaning system has done what it can and further cycles are just noise. That is your cue to move to air, not a reason to doubt the camera.
Step 3: Blow the Chamber Out With a Manual Blower
Air is the workhorse of sensor cleaning, and for most people it is where the job ends. The logic is the same as it is with a lens front element: a particle sitting on a surface is harmless until something drags it, so removing it without contact eliminates the risk entirely rather than managing it.
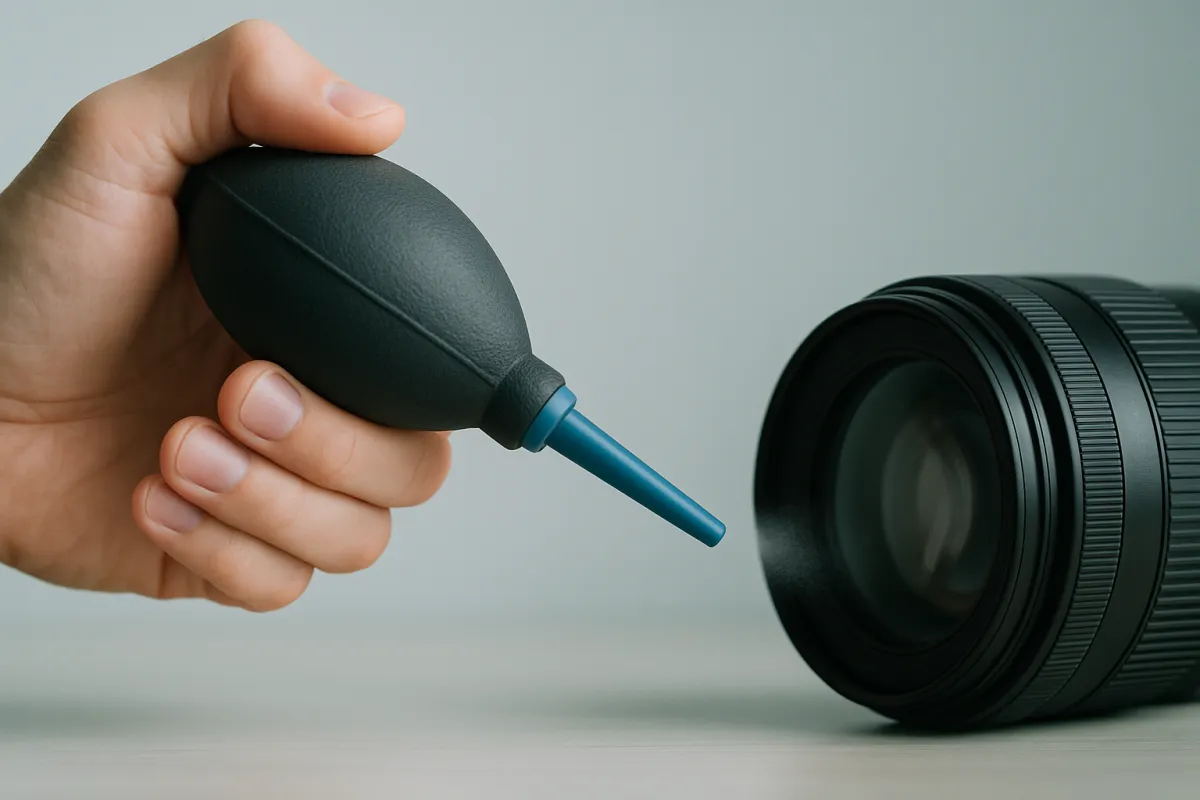
Set up first. Charged battery in, lens off, body cap in reach. Enter the camera’s manual sensor cleaning mode, sometimes listed as clean manually, mirror lockup for cleaning, or shutter open for cleaning. On a DSLR this raises the mirror and opens the shutter; on a mirrorless body it typically retracts the shutter curtain or opens the sensor shield. Then hold the camera with the mount facing downward, bring the blower up from below, and squeeze firmly several times, working across the whole rectangle and pausing to let the bulb refill.
Two rules are absolute here, and both exist because people have paid for breaking them. First, never use canned air or compressed gas of any kind: it can spray liquid propellant onto the filter stack, and its pressure is far beyond what this job needs or what you can control. Second, never let the blower tip touch anything inside the chamber, including the shutter curtain, the chamber walls, and the surface itself. Keep the nozzle at or just outside the mount plane and let the air travel. A shutter curtain is thin enough to dent under a poke.
Reshoot the test frame afterward. As an illustrative outcome, dry dust that has not been sitting for long usually gives up here, and many photographers go years without ever needing the next step.
Step 4: Choose Between a Dry Brush and a Wet Swab
If the test frame still shows spots after air, you have to decide what kind of contact to make, and the two options are not interchangeable. Choosing wrong is how a small problem becomes a smeared one, so spend a moment on the diagnosis rather than reaching for whatever is in the kit.
A sensor brush is a purpose made brush with fine, soft fibers, used dry. You charge it with static by blowing air through the bristles with your blower, which is what lets it attract and lift particles rather than just push them around, then sweep it across the sensor once in a single direction. Its job is dry particulate that air alone could not lift: the specks that are clinging by static or sitting in a corner where airflow does not reach. It is gentler than a swab, it is reusable if you keep it immaculate, and it does nothing whatsoever for anything wet.
A wet swab is a shaped, lint free pad on a stick, sized to your sensor, used with a few drops of sensor cleaning fluid. Its job is everything a brush cannot touch: particles bonded on by humidity, dried water spots, pollen, and small oil marks. The fluid dissolves or releases the bond and the pad carries the residue off the surface in one pass.
The decision rule is simple. Dry, loose looking specks after a blower point to the brush first. Anything that looks smeared, translucent, or greasy points straight to a swab, because dragging a dry brush through oil turns one small spot into a wide streak across the whole frame, which is the most common way people make things dramatically worse. When in doubt about which you are looking at, treat it as wet and swab.
Step 5: Do a Wet Swab Properly, One Pass Each Way
This is the step with real consequences, so technique matters more than effort. Do it once, correctly, and stop, rather than working at it.
Start with the right width. The swab should be slightly narrower than the sensor’s long dimension so that a single pass sweeps the full width without the edges catching the chamber walls. Full frame sensors, roughly 36mm across, take the wider common size, usually around 24mm. APS-C sensors, roughly 23mm to 24mm across, and Micro Four Thirds sensors, roughly 17mm across, are normally served by the narrower common size, around 16mm. Using an oversized swab is the mistake that bites, because the overhang scrapes the edges of the chamber and can collect the very grit you are trying to remove.
Now the fluid. Two drops on the pad is the usual starting count, placed near each corner of the face, then wait a second for it to wick across. Too little and the swab drags and squeaks and can scuff; too much and fluid pools at the edges and dries as streaks. Adjust by one drop, never by soaking.
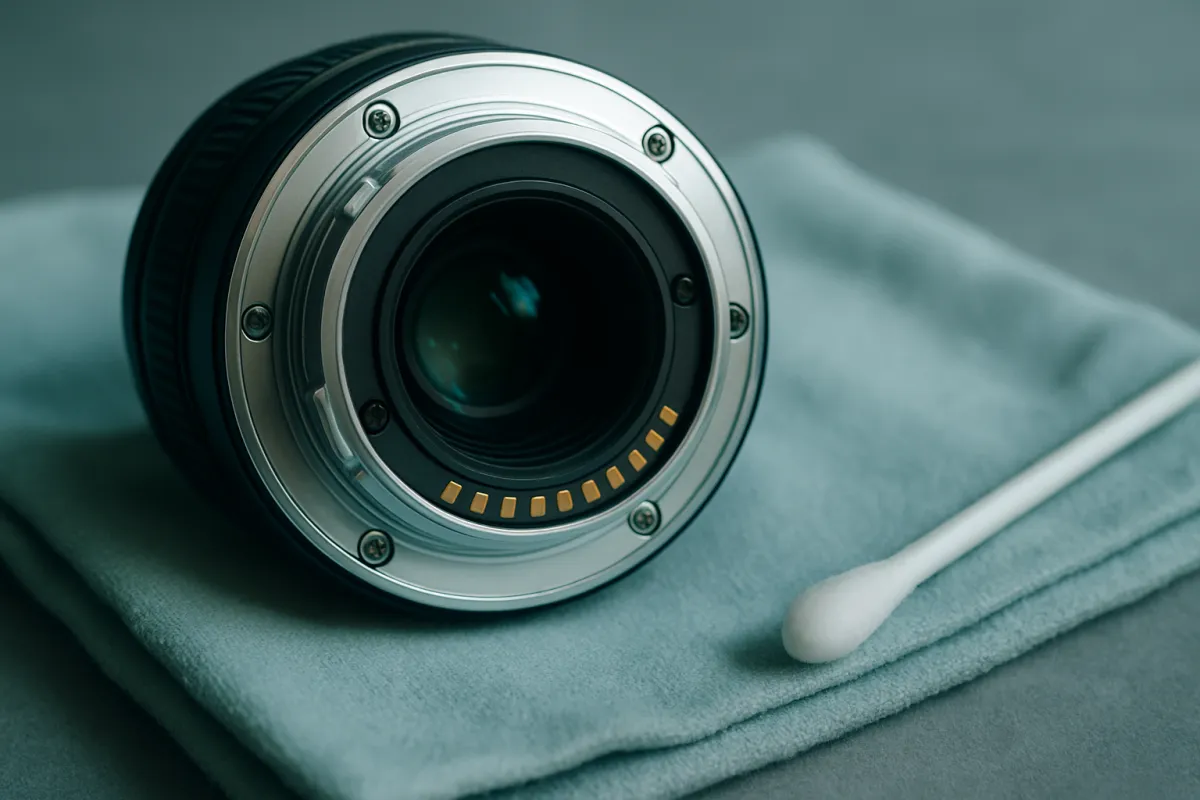
The pass itself: hold the camera in cleaning mode with the mount facing you, place the swab flat against one short edge of the sensor, and draw it smoothly across to the other edge in one continuous motion with light, even pressure, just enough that the tip flexes slightly. Then flip the swab to its unused face and draw it back the other way. That is the whole technique. Two passes, one in each direction, then the swab goes in the bin. Never reuse one, not even on the same sensor, because it is now carrying whatever it just picked up.
Step 6: Re-Test and Know When to Stop
Every attempt ends the same way: put the lens back on, shoot the exact same test frame at the same small aperture, and look at it at magnification. Using an identical test each time is what lets you tell progress from wishful thinking, since a slightly different aperture or a different wall changes what you can see.
Read the result honestly. If the frame is clean, you are done, and the temptation to do one more pass for good measure is the single most expensive impulse in this whole routine. If the spots have moved or changed shape, you dislodged something and a second swab is reasonable. If a faint streak appeared where there was none before, that is almost always residual fluid rather than damage, and one more fresh swab with a correctly wetted pad usually clears it. If the same spot sits in the same place, unchanged, the swab is not the answer to it.
Here is the stopping rule, and it is the most important sentence in this article. Two wet swabs is the working ceiling for ordinary dust, three at the absolute maximum if the frame started heavily specked, always with a fresh swab each attempt. Past that, the odds shift: each additional pass is more likely to introduce a mark than to remove one, because you are repeatedly dragging across a surface that has already proven the problem is not loose particulate.
When you hit the ceiling, stop cleanly. Put a body cap on, note what you saw in the test frame, and book a service clean. That is not a failure, it is the correct outcome of a decision rule you set before you started.
Step 7: Prevent Sensor Dust With Better Lens Habits
The cheapest sensor clean is the one you never do, and since almost all sensor dust arrives during a lens change, prevention is mostly a matter of a handful of small habits at the mount.
Change lenses with the camera facing down. Gravity is doing half the work for you: with the mount pointed at the floor, most airborne dust falls away from the opening rather than into it. Turn off the camera before you swap, because a powered sensor holds a static charge that actively attracts particles, and on many bodies powering down also closes a shutter or shield across the opening. Have the replacement lens uncapped and ready in your other hand so the body is open for a second or two rather than half a minute.
Choose where you change, not just how. A gusty beach, a dusty trail, or a building site are the worst possible places to open a camera, and postponing a lens change until you are back in the car or turned away from the wind prevents more dust than any cleaning routine removes. Inside a jacket or a bag lid works as an improvised shelter.
Keep the surroundings clean too. Rear caps on lenses in the bag, body cap on the camera when no lens is fitted, and an occasional vacuum of the bag itself, because a bag lining full of grit is a dust reservoir you dip into every time you swap. Fewer lens changes helps as well, which is one of the quiet arguments for a zoom in dusty conditions, covered in our field note on shooting sharp photos from the handling side. None of this is exotic; it is just consistency, and it moves most people from cleaning every few months to cleaning once a year.
When Not to Clean Your Own Sensor
Some cases are not close calls, and recognizing them before you open a kit is worth more than any technique in this article. Four situations mean the answer is a service center, full stop.
Visible marks that will not shift. If a spot has survived a correct blower pass and two correct wet swabs, it is not loose particulate. It may be bonded residue, a mark in a coating, or something that arrived from inside the camera, and none of those get better with a fourth pass. The only thing repeated attempts reliably add is risk.
Anything that looks oily. Smeared, translucent, or greasy looking spots, especially several of them appearing over a short period, usually mean lubricant has migrated from a moving part. One correct swab is a fair attempt; a return visit from the same spots is a mechanical problem that cleaning cannot fix, and every dry pass in between spreads it wider.
A mirrorless camera with in body stabilization, unless you are certain the sensor is locked. On a stabilized body the sensor assembly floats on a suspension so it can move to counteract shake, which is exactly why it does not enjoy being pressed sideways by a swab. Many bodies lock the assembly when you enter manual cleaning mode, and some say so explicitly in the menu or the manual. If yours does not tell you, do not assume it does. Our field note on image stabilization explains what is moving and why it is delicate.
Any camera still under warranty. Damage you cause by hand is not a warranty claim, and many manufacturers and dealers will clean a sensor cheaply or as part of a service while the camera is covered. A shop clean costs a small fraction of a sensor assembly replacement, which is the usual repair for a scratched filter stack. That asymmetry, cheap clean against expensive part, is the whole argument.
How visible one dust speck is, by aperture
An illustrative visibility index out of 100 for the same single particle photographed at different apertures, where 100 is as obvious as it gets. This is a directional model of how a small aperture sharpens the shadow a particle casts, not a measured test of any camera.
This is why the test shot uses f/16 to f/22 and why portrait shooters at f/1.8 never notice the dust that landscape shooters at f/16 cannot ignore. For what the aperture number itself means, see our aperture field note.
Reading the Test Shot: Dust, Oil, and Dead Pixels Compared
The single test frame you shot in step 1 answers more questions than most people ask of it, because dust, oil, and pixel faults each have a distinct signature. Learning to tell them apart takes about a minute and saves entire cleaning sessions.
Ordinary dust reads as a soft edged gray blob, usually roughly round, darker in the middle and fading at the rim, and it sits in exactly the same place in every frame from every lens. Larger particles read as darker and more defined; small ones are faint at f/16 and invisible by f/5.6. If you shoot two frames a minute apart and a blob has drifted slightly, it is a light particle sitting loose, which is the most cooperative kind.
Oil reads differently and the difference is worth memorizing. An oil spot tends to look smeared or slightly translucent rather than solid, sometimes with a comet like tail, and it often appears alongside several similar spots in a loose cluster. The behavioral test is the reliable one: dust moves for a blower and oil does not.
A stuck or hot pixel is not on the surface at all. It reads as a single bright point, one pixel wide, often colored, always at the same coordinate, and the diagnostic is to shoot a frame with the body cap on. Dust vanishes in a black frame because there is no light to cast a shadow; a stuck pixel is still glowing there. That is a sensor readout matter, handled by the camera’s own pixel mapping function if it has one, or by your raw converter, not by any cleaning tool.
Finally, a smudge on the rear element of a lens produces something in between, a large diffuse haze that changes as you swap lenses. The two lens test in step 1 separates it out immediately.
Choosing the Right Swab Width for Your Sensor Size
Swab width is the one specification in this job where getting it wrong causes damage rather than inconvenience, so it deserves its own attention. The principle is that the pad should span the sensor’s long dimension in a single pass while staying just inside the edges, so that no part of the pad rides up onto the chamber wall or the frame around the sensor.
The rough dimensions are worth carrying in your head. A full frame sensor measures about 36mm by 24mm, an APS-C sensor about 23mm to 24mm by 15mm to 16mm depending on the maker, and a Micro Four Thirds sensor about 17mm by 13mm. Our field note comparing full frame and crop sensors covers what those differences mean for your images; here they only decide a pad width.
Against those, the market has settled around two common widths: roughly 24mm for full frame, and roughly 16mm for APS-C and Micro Four Thirds. Sellers often label them by camera type instead of by millimeters, and matching your format is enough to land correctly. Some makers offer a narrower size again for the smallest formats.
Two watch outs. First, err narrow rather than wide. A swab a little narrower than ideal simply means you cover the width in a slightly less perfect sweep, while one that is too wide catches at the edges, which is how grit gets picked up mid pass and how a pad tip folds. Second, resist the improvised version entirely: a household cotton bud, a folded microfiber, or a lens tissue on a stick all shed fibers and none of them apply even pressure across the surface. The whole reason a sensor swab costs what it does is that it is sealed, lint free, and shaped to press evenly, and there is no sensible way to fake that at home.
A worked example: one dust spot from test shot to clean
Here is one realistic session run end to end, so the sequence is concrete. Picture an APS-C mirrorless body, no in body stabilization, out of warranty, that has just come back from a windy weekend with two lens changes on a trail. A wide landscape frame at f/13 shows a soft gray blob upper left, plus something fainter near the center.
Step 1, confirm. A test frame at f/22 of a white wall, defocused, camera moved slightly through the exposure, then contrast pushed hard in editing. Four specks appear, all dark and soft edged. A second frame with a different lens shows the same four in the same places, so this is sensor side. A body cap frame shows nothing bright, so no stuck pixels. Step 2, cleaning cycle. Lens off, camera face down, the menu cleaning function run three times. Retest: one of the four specks is gone, three remain. Free progress, no risk.
Step 3, blower. Battery at full, manual cleaning mode selected, camera held mount down, the blower squeezed six or seven times from below with the tip kept outside the mount. Retest: two of the three are gone. One faint speck remains, lower left in the test frame. Step 4, choose. The remaining spot is small, dark, and hard edged rather than smeared, so it reads as a bonded particle rather than oil. Air has already failed on it twice, so this goes to a wet swab rather than a brush.
Step 5, swab. A 16mm swab for the APS-C sensor, two drops of fluid, one smooth pass left to right, flip, one pass right to left, swab discarded. Step 6, retest. The speck is gone and no streak appeared. That is one wet swab used out of a ceiling of two, and the session ends there rather than chasing a perfect frame. Step 7, prevent. Bag vacuumed out, both rear caps checked, and a resolution to turn the camera off and face it down at the next swap. Total time, about twenty minutes, one swab used, and no reason to reach for a second.
Where the effort goes in a careful sensor clean
An illustrative split of your attention across one full session, summing to the whole. Notice how much of it sits in confirming the problem and in air, and how small the contact stage actually is.
More than half the session happens before anything touches the surface, which is the point. The swab is a small slice of the work and all of the risk.
Common mistakes to avoid
Damaged filter stacks come from a short list of predictable errors, and most of them are impatience wearing a disguise. These are the ones that recur:
- Skipping the confirmation test. Cleaning a sensor because a photo has a spot in it, without checking whether the spot is on a lens or is a stuck pixel, means opening a camera for no reason. Shoot the test frame with two lenses first, every time.
- Using canned air or compressed gas. The propellant can spray as a liquid onto the filter stack and the pressure is far higher than the job needs. This is not a preference, it is the fastest way to turn a dust problem into a service visit.
- Letting the blower tip touch something. The shutter curtain in particular is thin and unforgiving, and a nudge from a nozzle can dent it. Keep the tip at or outside the mount plane and let the air do the traveling.
- Working with a low battery. If power drops during manual cleaning mode, the shutter or mirror can close on whatever is inside the chamber. Charge fully first and never override the camera’s warning.
- Reusing a swab or wiping back and forth. One pass each way with fresh faces is the entire technique. A reused swab carries the grit it just collected, and scrubbing is how a particle gets dragged repeatedly across the same line.
- Dry brushing something oily. A dry brush through an oil spot spreads it into a wide streak that is far more visible than the original mark and takes a swab to fix.
- Not stopping. More attempts, more pressure, and more fluid feel like effort but the return curve is falling while the risk curve is rising. Two swabs, three at most, then a service center.
Troubleshooting the tough cases
Real sessions rarely go straight down the steps, so here is how to handle the situations that fight back. What if a streak appears after your swab that was not there before? Nine times out of ten it is residual fluid drying unevenly, not damage, and the cause is either too much fluid or a swab that dried out mid pass. One more fresh swab with the correct two drops, drawn steadily, usually clears it. That does count against your two swab ceiling, so if it does not clear, stop.
What if the same spot returns within a few frames of a successful clean? That points at a source inside the camera rather than at your technique. Lubricant migration produces recurring oil spots in roughly the same region, and a loose fragment of packaging or a shed fiber inside the body will keep landing back on the sensor. Neither is a cleaning problem; both are a service conversation.
What if you cannot get the camera into manual cleaning mode at all? Check battery level first, since most bodies refuse below a threshold, then check whether your model calls it something else, and remember that some mirrorless cameras want you to power off rather than enter a mode because they park a shield across the sensor. Never hold the shutter open on bulb as a substitute; a lost battery there closes the shutter onto whatever is inside.
What if the dust only shows in some photos? That is normal and it is the aperture doing it, as the chart above shows. The same particle that is glaring at f/22 is effectively invisible at f/4, which is why astro and landscape work at small apertures surfaces dust that portrait work never reveals. If you shoot our night sky field note routine at wide apertures, you may go a long time without seeing what a single f/16 frame would show.
How Sensor Dust Actually Shows Up in Your Photos
It helps to understand what you are looking at, because the physics explains both the test shot and the panic. A dust particle does not sit on the sensor’s light sensitive surface; it sits on the outermost filter layer, a small but real distance in front of it. Light converging toward the sensor passes around that particle, so what lands in the image is a shadow, and the character of that shadow depends entirely on how steeply the light is converging.
At a wide aperture the cone of light is broad, so light arrives at a given point from many angles, and a particle blocks only a small fraction of it from any one direction. The result is a shadow so soft and spread out that it disappears into the image. Stop down and the cone narrows, the light arrives from a much tighter range of angles, and the same particle now casts a small, distinct, hard edged shadow that reads as a gray blob. This is the whole reason a landscape shooter at f/16 sees a dusty sensor and a portrait shooter at f/1.8 does not, and it is also why the test shot deliberately uses the smallest aperture available.
Position works the same way in reverse. Because the particle sits in front of the sensor, its shadow lands in a fixed image position regardless of what lens is fitted or where you point the camera. That fixity is the diagnostic signature. It also means spots stack up in even skies and blank walls and hide completely in busy foliage, so the same sensor can look filthy in one frame and flawless in the next.
Understanding this changes the decision. Dust that only shows at f/16 in a plain sky is a real but bounded problem, and a spot removal brush in editing can be a perfectly rational answer to it if you shoot two such frames a year.
Removing Dust Spots in Editing Instead of Cleaning
Cleaning is not the only response to sensor dust, and for a small number of spots it is often not the proportionate one. Every serious raw editor includes a healing or spot removal tool, and most include a visualization mode that exaggerates contrast specifically to make dust findable. On a handful of frames, dabbing out four specks takes less time than setting up a swab and carries no risk at all.
The case for editing is strongest when the dust is few, faint, and appears against smooth, even areas, which is exactly where sensor dust shows up in the first place. A blob in a clear sky is the easiest possible healing job, because the surrounding tone is uniform. Many editors also let you copy a set of spot removals from one frame to every other frame in a shoot, which handles the fixed position property elegantly: the dust is in the same place in all of them, so one set of corrections applies to all of them.
The case against is volume and video. Fifty specks across a long shoot turns healing into a chore, and a fixed spot in moving video is far more distracting and much harder to remove than in a still. Panoramas and focus stacks also punish it, since the same speck appears repeatedly across overlapping frames.
The honest position is that these are complements, not rivals. Clean when the count is high, when you shoot small apertures often, or before a job where you cannot afford retouching time, and heal the last one or two faint specks in editing rather than reaching for a third swab. Our field note on editing photos for beginners covers where the spot removal tool lives in a normal workflow.
Mirrorless and DSLR Chambers Are Not the Same Job
The two body types present very different chambers, and the practical differences change how carefully you work and how often you need to. Our comparison of mirrorless and DSLR bodies covers the design split in full; what follows is only the cleaning side of it.
A DSLR keeps a mirror and a shutter between the mount and the sensor, so the sensor is not exposed when a lens comes off. That is genuine protection, and it is why DSLRs tend to collect dust more slowly. The cost is that manual cleaning requires locking the mirror up, which puts a hinged mirror and an open shutter directly in the path of your blower or swab, and it makes battery level a safety matter rather than a convenience one. Work with the mirror box in mind, keep the tip low and central, and never rush the withdrawal.
A mirrorless body puts the sensor much closer to the mount with far less in front of it, which cuts both ways. Access is easier and there is no mirror to worry about, so the swab pass is more straightforward. But the sensor is also more exposed during every lens change, which is why mirrorless owners typically meet sensor dust sooner and more often. Many recent bodies address this with a shutter or shield that closes when the camera powers off, which is a genuinely useful habit to lean on: turn the camera off before you swap.
The stabilized sensor question is mostly a mirrorless one. If the sensor assembly floats on a stabilizer, it can move under sideways pressure, and unless your camera tells you it locks the assembly in cleaning mode, that is a reason to stay with air and hand the contact work to a service center.
Sensor Dust in the Field, Away From the Desk
Everything above assumes a clean, still room, which is exactly what you do not have when you discover the problem. Field sensor cleaning is therefore mostly about restraint and triage, and the governing rule is that opening a camera in dusty air can easily add more particles than you remove.
The safe field actions are short. Run the camera’s own cleaning cycle with the body facing down; it needs no open chamber and no tools. If you carry a blower and conditions are calm, a blower pass with the camera face down, sheltered inside a bag lid or a jacket, is reasonable. Anything beyond that, particularly a wet swab, is a desk job. A swab in wind is how you introduce grit under the pad, which is the exact mechanism that scratches a filter stack.
The better field response is usually to shoot around it. Open up the aperture where the picture allows and the spots soften toward invisibility. Frame so that plain sky sits where the spots are not, if you know their positions from your test frame. And note the spot positions rather than fighting them, because you now know exactly where to heal them later.
There is also a straightforward preventive move that costs nothing on the day: decide in advance which lens stays on. Committing to one lens for a dusty location removes the only real dust entry point, and a zoom that covers the range you need beats a bag of primes and six mount openings on a beach. Pair that with a card discipline so you are not fumbling, as our field note on formatting an SD card sets out, and the whole outing gets calmer.
What a Professional Sensor Clean Involves
Knowing what you are handing over makes it much easier to hand it over. A professional sensor clean at a camera store or a manufacturer service center is not a mysterious operation; it is the same sequence in this article performed with better light, better tools, and a lot more repetitions of practice.
The technician typically works under bright, angled inspection light with a magnifier or a loupe made for sensor inspection, which shows exactly what is on the surface rather than inferring it from a test frame. That alone resolves the ambiguity that costs amateurs their extra swabs, because they can see whether something is a particle, a smear, or a mark before choosing a method. They will use a blower, a brush, and swabs much like yours, plus in some cases a static charged tool or a purpose built vacuum, and they will inspect between passes rather than after.
Turnaround is often the same day or while you wait at a store counter, and longer if it goes to a manufacturer service center. Sensor cleaning is one of the most common counter services in the trade, and it is priced as routine maintenance rather than as a repair, which is the comparison that matters: it costs a small fraction of the sensor assembly replacement that a scratched filter stack usually requires.
Two things are worth asking for. First, ask them to inspect and report rather than only clean, since a technician who tells you the spots were oil has told you something about your camera. Second, ask whether your body’s sensor is stabilized and how they handle it. A shop that answers both clearly is a shop worth returning to once a year.
Where Sensor Cleaning Fits in Your Camera Care Routine
Sensor cleaning is not a standalone ritual; it sits inside a small set of checks that keep a camera dependable, and slotting it into a rhythm stops it from becoming an emergency.
The useful cadence is by trigger rather than by calendar. Shoot a test frame at f/16 or smaller before any job where blank skies or plain backgrounds will appear, after any trip involving lens changes outdoors, and after any period when the camera lived in a bag with loose grit. Most of those tests come back clean, and the ones that do not give you days of notice rather than an unwelcome discovery in editing.
Order matters when you do more than one job at once. Clean lenses before you go near the body, since a rear element cleaned after the sensor drops fresh particles into an open mount. Cap everything between stages. And do the sensor last, because it is the step you most want to do in settled air on a clean desk.
Around that, the rest of the routine is ordinary: keep the front and rear caps on, keep the bag interior clean, store gear somewhere dry and ventilated rather than sealed and humid, and give the mount contacts an occasional light wipe. The full front element version of all this lives in our lens cleaning field note, and it is worth reading alongside this one because the two jobs share a philosophy: remove particles without contact wherever possible, touch the surface as rarely as you can, and stop the moment the result is good enough. If a service clean or a cleaning kit ends up on your list, price it against the rest of the year’s spending in the upgrade budget planner.
Your Sensor Cleaning Checklist
Run this in order and stop wherever the test frame comes back clean:
- Shoot the test frame: bright even surface, smallest aperture around f/16 to f/22, base ISO, defocused, camera moved slightly during the exposure.
- Repeat with a second lens, and shoot one frame with the body cap on, to separate sensor dust from lens dust and from stuck pixels.
- Charge the battery fully before opening anything, and work in a still, low dust room with the desk wiped down.
- Run the camera's own sensor cleaning cycle two or three times with the mount facing downward, then retest.
- Enter manual sensor cleaning mode, hold the body mount down, and use a rubber hand blower with the tip kept clear of every surface. Never canned air. Retest.
- Decide brush or swab: dry loose specks point to a sensor brush, anything smeared or greasy points straight to a wet swab.
- Match the swab width to your format, roughly 24mm for full frame and roughly 16mm for APS-C and Micro Four Thirds.
- Two drops of fluid, one smooth pass across, flip the swab, one pass back, then discard it. Never reuse a swab.
- Retest with the identical frame. Stop at two wet swabs, three at the absolute maximum.
- Stop entirely and book a service clean for anything oily, anything that will not shift, a stabilized sensor you cannot confirm is locked, or a camera under warranty.
- Prevent the next one: power off before swaps, face the mount down, shelter the change, keep caps on, and keep the bag clean.
The bottom line
Cleaning a camera sensor is a job with a gentle first half and a serious second half, and doing it well is mostly about respecting the boundary between them. Start by proving the dust is real and is on the sensor side, using a test frame of a bright even surface at the smallest aperture with a second lens as the control, because a stuck pixel and a dirty lens both masquerade as sensor dust. Then work outward from zero risk: the camera’s own cleaning cycle with the mount facing down, then a rubber hand blower with the tip touching nothing, never canned air. Most sessions end there. If they do not, choose deliberately between a dry brush for loose particles and a wet swab for anything bonded or greasy, use the swab width your sensor format calls for, two drops of fluid, one pass in each direction, fresh swab every time. Then retest with the identical frame and hold the line: two swabs, three at the very most, and stop. A service clean is priced as routine maintenance while a scratched filter stack is usually a sensor assembly replacement, so persistence is the expensive choice, not the thorough one. Do the low risk parts confidently, do the high risk part once and carefully, and hand over the cases that are not yours. Tell the companion above your sensor size and what your test shot shows for your swab width and your stopping point, and price any kit or service against the year in the upgrade budget planner.
This field note describes a careful maintenance routine rather than a repair procedure, and no brand of camera, swab, brush, or cleaning fluid is named anywhere in it on purpose. The visibility index, the effort split, and the swab counts here are directional illustrations of established handling practice, not measurements taken from any particular body or product, and sensor dimensions are approximate figures that vary between manufacturers. Menu names, cleaning modes, sensor locking behavior, and warranty terms differ by model and by region, so read the manual that came with your own camera before you open the mount, and check your own warranty paperwork rather than assuming. Contact cleaning carries real risk that you accept yourself; when a mark will not shift, when anything looks oily, when the sensor is stabilized, or when the camera is still covered, stop and have it handled by a qualified camera service technician instead.
Frequently asked questions
Is it safe to clean your own camera sensor?
It is safe enough to be routine if you stay inside the low-risk part of the job and stop where the risk climbs. Running the camera's own cleaning cycle carries essentially no risk, and using a rubber hand blower correctly carries very little, because nothing touches the surface. Wet swabbing is where real damage becomes possible, since you are dragging something across the filter stack that sits over the sensor, and a trapped hard particle under a swab is how a permanent mark gets made. Thousands of photographers swab their own sensors without incident, and the ones who get hurt are almost always the ones who kept going after two attempts failed. Treat the blower as normal maintenance, treat the swab as a considered decision, and treat a third failed attempt as your cue to hand it to a service center.
How do I know if the dust is on my sensor or on my lens?
Shoot a test frame of a bright, featureless surface at your lens's smallest aperture, then change lenses and shoot the same frame again. Sensor dust appears as soft dark blobs in exactly the same position in both files, because the particle is sitting in a fixed spot in front of the sensor and every lens projects through it. Dust or a smudge on the lens usually shifts, softens, or disappears when you swap lenses or change focal length, and marks on a front filter often move as you rotate it. A single bright dot that stays put even in a completely dark frame is not dust at all, it is a stuck pixel, and no amount of cleaning will remove it. Running that comparison first saves people from swabbing a perfectly clean sensor.
What aperture should I use for a sensor dust test shot?
Use the smallest aperture your lens offers, which on most lenses means somewhere around f/16 to f/22. A small aperture makes the shadow each dust particle casts on the sensor small and hard edged, which is exactly what makes specks visible; at a wide aperture like f/2.8 the same particle casts such a soft, spread out shadow that it effectively vanishes. Aim at something bright and evenly toned, such as clear sky, a white wall, or a lit sheet of paper, set focus to infinity or defocus deliberately, and move the camera slightly through the exposure so any texture in the surface blurs away. Image sharpness does not matter here, so ignore diffraction entirely. Then look at the file at full magnification, or raise contrast in editing, and the specks show up plainly.
Can I use compressed air or canned gas on a camera sensor?
No, and this is one of the few absolute rules in camera care. Canned air can spit liquid propellant onto the surface, which leaves a residue far harder to remove than the dust you started with and can require a service clean to fix. The pressure is also much higher and far less controllable than a hand blower's, which risks driving particles into places they were not before and stressing delicate parts inside the chamber. Compressors and air lines carry their own oil and moisture problems. A simple rubber hand blower gives you all the airflow this job needs, with a pressure you can feel and control, and it is the only air source that belongs anywhere near an open camera body.
How many times should I swab a sensor before giving up?
As an illustrative working rule, two wet swabs for ordinary dust and three at the absolute maximum if the frame started heavily specked, always with a fresh swab each time. The reason for a hard ceiling is that risk accumulates with every pass while the return drops sharply, so the fourth attempt is far more likely to create a mark than to remove one. If two careful swabs have not shifted a spot, the spot is telling you something: it is probably oil, something bonded on, or a mark rather than a particle, and none of those respond to more of the same. Stop, put a body cap on, and book a professional clean, which is inexpensive next to what a scratched filter stack costs to repair.
What size sensor swab do I need?
Swabs are sold sized to sensor width, and the rule is that the swab should be slightly narrower than the sensor's long dimension so it sweeps the full width in one pass without its edges dragging on the chamber walls. Full frame sensors are roughly 36mm across and take the wider common swab, usually around 24mm. APS-C sensors are roughly 23mm to 24mm across and Micro Four Thirds sensors are roughly 17mm across, and both are normally served by the narrower common swab, around 16mm. Using a swab that is too wide is the mistake that matters, because the overhang catches the edges of the chamber and can pick up grit or fold the tip. When a maker lists swabs by camera type rather than by millimeters, match your sensor format and you will land on the right one.
What does an oil spot on a sensor look like, and can I clean it off?
Oil shows up as a spot with a smeared, slightly translucent look rather than a crisp dark speck, and the giveaway is behavior rather than appearance: it does not move for a blower, and a dry brush drags it into a streak instead of lifting it. Small amounts of lubricant can migrate from moving parts inside the body, which is why a run of oil spots sometimes appears on a newer camera during its first few thousand actuations. A single small spot will often come off with one correct wet swab, but oil that keeps returning is a mechanical issue that cleaning cannot solve, and repeated dry attempts make it visibly worse by spreading it. Recurring oil is a service center conversation, not a home cleaning project.
Does cleaning the sensor myself void my camera's warranty?
Cleaning is not disassembly, so a careful blower clean is not usually treated as tampering, but this varies by manufacturer and by region and is worth checking in your own paperwork before you touch anything. The more practical point is that damage you cause with a swab is your responsibility rather than a warranty claim, and a scratched filter stack is one of the more expensive things you can do to a camera by hand. Many manufacturers and dealers will clean a sensor cheaply or as part of a service, and some include it during the warranty period, so a camera that is still covered is the strongest possible case for letting someone else do it. Read your warranty terms, then decide, rather than discovering the answer after a mishap.