What's on this page
- Before you start
- What a tripod actually buys you
- Tripod anatomy in plain terms
- Step 1: Weigh the Heaviest Setup You Own
- Step 2: Set Your Working Height
- Step 3: Read the Load Rating Honestly
- Step 4: Choose Legs by Material, Sections and Locks
- Step 5: Choose a Head That Matches Your Subject
- Step 6: Check the Details That Decide Daily Use
- Step 7: Set a Budget and Test Before You Commit
- A worked example: three photographers, three tripods
- Head types in plain terms
- Aluminium and carbon fiber, honestly compared
- Working height, centre columns and the shaky last section
- Travel tripods and packed length
- Monopods, tabletop tripods and the alternatives
- Setting up a tripod so it is actually steady
- Where a tripod fits in your gear budget
- Common mistakes to avoid
- Troubleshooting the awkward cases
- Your tripod checklist
- The bottom line
Short answer: Choose a tripod by weighing your heaviest real camera and lens setup on a kitchen scale, then looking for legs and a head each rated for roughly twice that weight. Legs alone should reach roughly your height minus eight or nine inches, because a raised centre column is the shakiest part. Pick the head type by your subject, choose carbon only if weight keeps the tripod at home, and check the folded length.
Almost every photographer buys two tripods. The first one is chosen on price, arrives light and cheerful, and turns out to shake in a breeze, creep after the head is locked, and stand two heads shorter than the person using it. The second one is chosen on specifications, costs more than felt reasonable at the time, and is still in service a decade and three camera bodies later. The interesting part is that nothing about the second purchase required expertise. It required knowing which four or five numbers actually matter and refusing to be distracted by the rest.
This field note turns that into a seven-step method you can run in an evening with a kitchen scale and a tape measure. By the end you will know how to weigh the setup that really decides your requirements, how to work out the height you need before a centre column is involved, how to read a load rating without being misled by it, how to choose between aluminium and carbon and between three legs sections and five, which head type suits what you actually shoot, which small details decide whether a tripod gets used, and how to set a budget and test the thing before the return window closes. If your support question is about a phone rather than a camera, our phone tripod field note covers that category properly and this one stays out of its way. You can weigh the spend against the rest of your kit in the upgrade budget planner.
Key takeaways
- Weigh your heaviest real setup, then look for legs and a head each rated for roughly twice it. Ratings describe what a support holds, not what it holds still.
- Height is decided before the centre column. Legs alone should reach roughly your height minus eight or nine inches, because a raised column is the shakiest part of any tripod.
- The head is not an accessory. Most disappointing tripods are actually disappointing heads, and the head type should follow your subject rather than the crowd.
- Carbon buys weight saved, not stiffness gained at the same price. It pays for itself only if the tripod is currently being left at home.
- Folded length and how it attaches to your bag decide whether a tripod is carried. A support you do not bring has a load rating of zero.
Before you start
Choosing a tripod is a low-difficulty job that takes about an evening of measurement and thinking, plus a week of living with the thing before you commit to it. Nothing here is technical. The difficulty is that tripod listings are written around the two numbers that flatter the product, folded length and maximum height with everything extended, and those are close to the two least useful numbers for deciding whether it will work for you.
Here is what to have in front of you before you start, roughly in order of how much it matters.
- Your heaviest camera and lens combination, and a kitchen scale. Not your usual setup. The heaviest one, because that is the setup the tripod has to survive, and guessing its weight is where most bad purchases begin.
- A tape measure and your own height in inches. Working height is personal arithmetic, and a tripod that is right for someone five foot four is wrong for someone six foot two.
- An honest description of what you shoot. Long exposures, portraits, product work, wildlife, video and travel all pull the decision in different directions, and the head especially follows this answer.
- A realistic account of how the tripod will travel. From a car to a spot fifty feet away is a completely different requirement from six miles on a trail, and it is the single biggest driver of whether carbon is worth paying for.
- A rough value for the kit that will ride on it. Not for insurance, just as a sanity check. As an illustrative band, five to fifteen percent of the kit’s value lands in reasonable territory for legs and head together.
- Your return window, read before you buy, because the flaws that matter only show up outdoors, in wind, with a real camera on top.
With those in hand, the seven steps below take you from a vague sense that you need a tripod to a specific load rating, a specific leg height, a specific head type and a price band, tested on real ground before the money is truly spent. Tell the companion above what you carry, how tall you are and where the tripod goes, and it will carry your numbers through every step below.
What a tripod actually buys you
It helps to be precise about the job, because a tripod is often sold as a cure for blur and that is only a third of what it does. The first thing it buys is exposure time. Once the camera is not moving, shutter speed stops being limited by your hands and becomes a creative control instead, which is what makes moving water smooth, night scenes clean at low ISO, and city traffic into ribbons of light. Our field note on shutter speed covers the creative side of that in detail.
The second thing it buys is repeatability. Any technique that combines several frames into one file, exposure blending, focus stacking, noise averaging, or a panorama, depends on those frames being identical everywhere except the thing you deliberately changed. Hands cannot do that. A locked tripod can, and it is the reason tripods appear in astrophotography, architecture and product work far more than in street or event photography.
The third thing, and the one people underrate until they experience it, is that a tripod changes how you work. A camera on legs slows you down, makes you look at the edges of the frame, and turns composition into a deliberate act rather than a reflex. Plenty of photographers report that their pictures improved on a tripod for reasons that have nothing to do with sharpness.
What a tripod does not buy is a substitute for stabilisation, and the reverse is equally true. Image stabilisation corrects small, fast movements while you hold the camera, which is a different problem from holding a frame still for thirty seconds. Neither replaces the other, and if you mostly shoot handheld in good light, the honest answer may be that you need a tripod less often than the buying advice suggests.
Tripod anatomy in plain terms
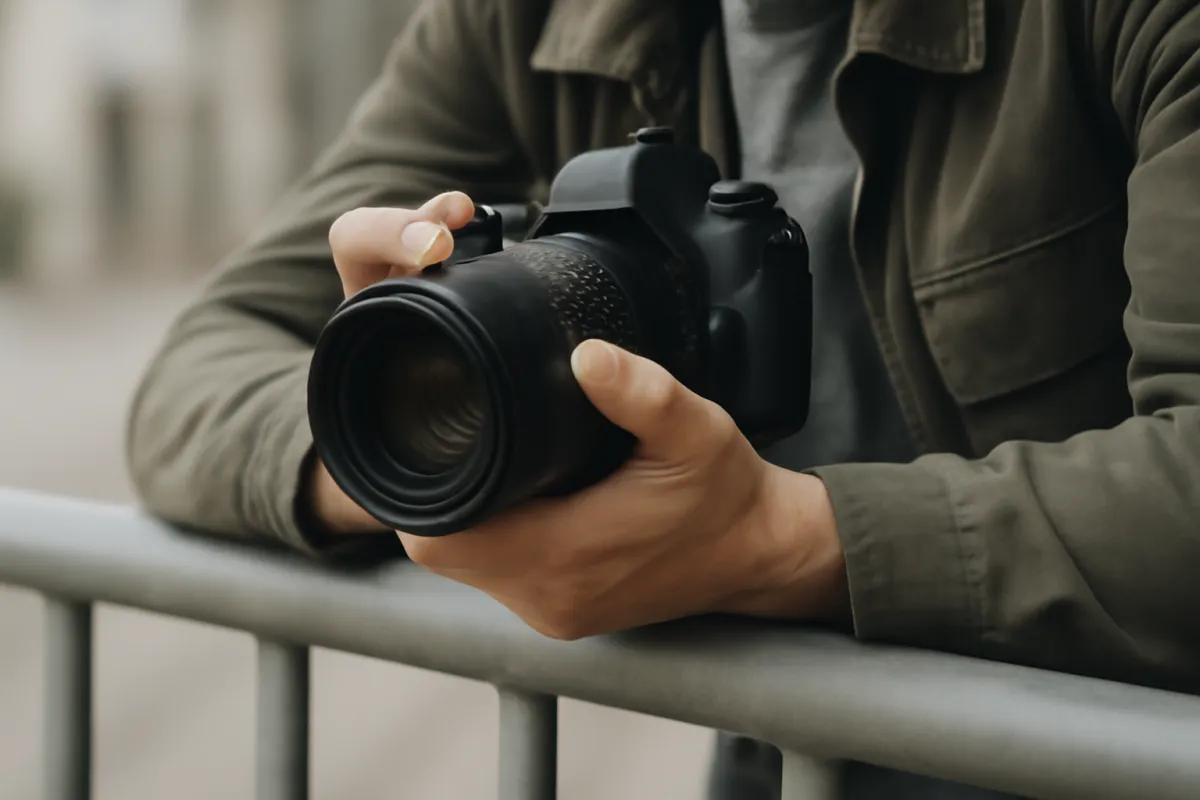
Five parts do all the work, and knowing what each one is called makes every specification sheet readable.
The legs are the three telescoping tubes, each made of two to five nested sections. Their diameter, material and section count decide almost all of the stiffness. Thicker top sections and fewer joints mean less flex.
The locks are what hold each section extended. Twist locks are collars you rotate a quarter turn, and they keep the leg profile smooth and clean. Lever locks are flip clamps you can operate with gloves and can see at a glance. Both work well when they are good and both are miserable when they are cheap.
The centre column is the vertical tube through the middle that raises the head above the point where the legs meet. It adds height quickly and costs stability immediately, because it is a single unbraced tube standing on top of a braced structure.
The head is the mechanism that sits on top and aims the camera. It is a separate product on most serious tripods, sold either bundled or on its own, and it is where a surprising share of the total performance lives.
The plate is the small metal piece that screws to the camera and clicks into the head. Most quality heads use the Arca-Swiss style dovetail, a widely copied clamp profile that lets plates and clamps from different makers work together, though tolerances vary between brands so it is worth confirming compatibility rather than assuming it.
There is a sixth part worth naming: the feet. Rubber pads suit hard floors, retractable or replaceable metal spikes bite into soil and grass, and the ability to swap between them matters more outdoors than most listings imply.
Step 1: Weigh the Heaviest Setup You Own
Start with a measurement rather than an estimate, because the gap between what people think their camera weighs and what it actually weighs is routinely a factor of two. Put your heaviest body and lens combination on a kitchen scale, fully assembled, with the lens hood, the quick release plate, any filter you habitually use and a battery fitted. Write the number down in pounds or kilograms. That single figure drives Step 3 and constrains everything after it.
Use the heaviest combination, not the usual one. A tripod that is perfect for a body and a small prime and marginal for the telephoto you own is a tripod that will let you down on exactly the day the telephoto comes out. As illustrative working figures that hold up reasonably across systems, a compact mirrorless body with a small prime lands near two pounds, a mirrorless body with a standard zoom near three, a mid-size DSLR with a fast standard zoom near four, a body with a professional telephoto zoom near five and a half, and a body with a long reach lens of the kind covered in our telephoto field note can reach nine pounds or well beyond.
Then add anything that habitually rides on the camera when it is on the tripod. An external flash, a small recorder, a microphone, an L bracket, a remote release, a filter holder with three filters in it. Individually these are ounces. Together they routinely add half a pound to a pound, and they always sit at the top of the stack where their leverage on the head is greatest.
The watch-out is buying for your current camera when a heavier lens is genuinely already in the plan. Bodies rarely get much heavier, but lenses do, and a long lens can double your requirement in one purchase. That is the one case where sizing slightly ahead is reasonable, because legs and heads outlive bodies by years. Sizing ahead for a lens you merely daydream about, however, buys you weight you will carry every single outing for a purchase that may never happen.
Step 2: Set Your Working Height
Now work out how tall the tripod needs to be, and do it as arithmetic rather than by looking at the headline number on a product page. Two adjustments turn your height into a leg specification.
First, your eye is not at the top of your head. For most adults the eye sits roughly four to five inches below the crown, so eye height is approximately your height minus four and a half inches. For someone five foot ten, which is seventy inches, eye height is about sixty five and a half.
Second, the head and plate lift the camera above the top of the legs. A typical ball head and plate stack adds around four inches, more for a large head, less for a compact travel one. Subtract that from your eye height and you have the number that matters: the height the legs alone must reach, with the centre column fully down. For our seventy inch example that is about sixty one and a half inches of leg.
The shortcut is worth memorising. The legs alone should reach roughly your height minus eight or nine inches. Compare that against the specification called maximum height without centre column, which good manufacturers publish and marketing pages tend to bury underneath the flattering figure that includes the column.
The watch-out is accepting the column as your height solution. A raised centre column is a single unbraced tube standing where three braced legs used to meet, and it is where wobble is introduced most easily on any tripod at any price. A tripod that only reaches your eye with the column up is a tripod you will either stoop over or shoot slightly shaky frames with. Neither is a good decade.
There is one honest exception. If you shoot mostly low, or from a seated position, or on hillsides where one leg is always shorter than the others, you can legitimately buy shorter legs and accept stooping when you are on flat ground. Just make it a decision rather than an accident.
Step 3: Read the Load Rating Honestly
Take your Step 1 weight and turn it into a specification, with one important adjustment. Published load ratings describe roughly what a support will hold without failing, tested in a way that varies from maker to maker and is rarely disclosed in detail. They do not describe the weight at which the setup remains genuinely still in a breeze, which is the property you are actually buying.
So apply a margin. Look for legs and a head each rated for roughly twice your heaviest setup. For the illustrative figures from Step 1 that means a two pound setup wants a four pound rating, three pounds wants six, four pounds wants eight, five and a half pounds wants eleven, and nine pounds wants eighteen. That doubling is a practical rule of thumb rather than a standard, and it exists because ratings are optimistic, because wind loads a tripod far harder than gravity does, and because your kit will get heavier before the tripod wears out.
Rate the legs and the head separately, because the weaker of the two sets your real ceiling. This is the single most common mistake in tripod buying: a solid set of legs sold with a small bundled head, where the head creeps under any load worth putting on it. Creep is the failure mode to watch for, because it is silent. You lock the head, the camera settles a fraction of a degree over the next few seconds, and the horizon you set is not the horizon you shot.
The watch-out is treating the rating as a target rather than a floor. Nothing bad happens from being well inside a rating, and a heavier, stiffer tripod is a better tripod in every respect except the one that decides whether it comes with you. That tension between stiffness and portability is the real trade in this whole purchase, and Steps 4 and 6 are where you resolve it.
Minimum load rating by camera setup
Illustrative minimum rating in pounds for legs and head, calculated as roughly twice the assembled weight of each setup. Setup weights are typical planning figures built from common body and lens combinations, not measurements of any specific product, so weigh your own kit before you buy.
The jump at the bottom is the point of the chart. One long lens can more than triple your requirement, which is why people who buy reach usually end up buying a second, heavier support. Set your own weight in the companion above to see your figure.
Step 4: Choose Legs by Material, Sections and Locks
With a height and a rating fixed, the legs are next, and three decisions define them.
Material. Aluminium is heavier, cheaper, tough, and completely adequate for a tripod that travels by car. Carbon fiber legs of comparable stiffness typically weigh meaningfully less, damp vibration slightly faster, and stay tolerable to hold in freezing weather, all of which cost money. Basalt sits between the two and appears occasionally. The rule that holds up is that carbon buys weight saved rather than stiffness gained at the same price, so it pays for itself only when weight is the reason the tripod stays home.
Section count. Every extra section adds a lock and makes the bottom tube thinner, which is where flex and vibration enter. Three sections gives the stiffest legs and the longest folded length. Four is the usual compromise for a tripod that goes in or on a bag. Five appears on travel designs where folded length rules everything. There is no wrong answer, only a trade you should make on purpose.
Lock type. Twist locks rotate a quarter turn and keep the legs smooth to slide into a bag, but they need all three collars opened and closed per leg and they can pack grit over time. Lever locks flip open, work with cold or gloved hands, and let you see at a glance whether one is undone, but they snag more and can need occasional tension adjustment. Quality matters far more than type: a good twist lock beats a bad lever every time. Test both in person if you possibly can.
Two smaller leg features deserve attention. Independent leg angle stops let each leg splay to a different angle, which is what makes a tripod usable on stairs, on slopes and low to the ground, and their absence is limiting outdoors. Removable or convertible feet, rubber for hard surfaces and spikes for soft ground, matter more than they sound, because a rubber foot on wet grass is a skate.
The watch-out is judging legs by how they feel unloaded in a shop. Every tripod feels rigid empty. Extend it fully, put a real camera on it, then press gently sideways on the head and watch how long the vibration takes to stop. That decay time, not the initial stiffness, is what separates good legs from decorative ones.
Step 5: Choose a Head That Matches Your Subject
The head is where most tripod disappointment actually lives, because bundled heads are where manufacturers save money and because people spend their attention on the legs. Four types cover nearly everything, and each one is genuinely bad at the jobs the others exist for.
A ball head uses a single sphere in a socket. Loosen one knob and the camera moves in every direction at once, then lock it. It is the fastest head to work with, the most compact for its capacity, and the right default for landscape, travel and general stills. Its weakness is that levelling a horizon and adjusting tilt happen on the same control, so a small correction can lose the whole position.
A pan and tilt head puts each axis on its own handle. Set the horizon once, then adjust tilt alone without touching it. That precision suits architecture, product work and copy stands, and the traditional three-handle design is bulkier and slower to reposition. A geared head takes the same idea further, moving each axis by fine screw for millimetre framing, at a real cost in weight and money.
A gimbal head balances a long lens at its centre of gravity so a heavy telephoto swings with a fingertip and stays wherever you leave it. For birds, wildlife and the kind of long-lens sport described in our sports photography field note, nothing else comes close. For anything else it is large, heavy and awkward.
A fluid video head adds damped resistance so pans and tilts start and stop smoothly rather than jerking, usually with a long pan bar and a levelling half-ball at the base. If you shoot moving footage, our video settings field note pairs with this, and a stills ball head will make every pan look like a mistake.
Two features cut across all four. A panning base that rotates independently underneath the head lets you swing horizontally without disturbing your levelling, which is what makes panoramas practical. And an Arca-Swiss style clamp, the widely adopted dovetail profile, gives you a large ecosystem of plates, L brackets and accessories, though tolerances differ between makers so it is worth checking a specific pairing rather than assuming.
The watch-out is buying legs and accepting whatever head comes taped to the box. If your budget is tight, better legs with a modest head is usually the wiser split, because heads are easy to upgrade later and legs are not. But do not let a bundled head that creeps convince you the legs are the problem.
Step 6: Check the Details That Decide Daily Use
You now have a height, a rating, a leg specification and a head type, which is enough to shortlist. This step is what separates the tripod you use from the one you own, and none of it appears in the headline specifications.
Folded length and how it carries. A tripod that does not fit your bag, strap to it, or ride comfortably in your hand for a mile is a tripod that stays in a cupboard. Measure it against the pack you actually own, and check whether your bag has side straps or a dedicated attachment, which our camera bag field note goes into properly. As illustrative figures, three-section full-size legs commonly fold to around twenty four inches, while four and five section travel designs typically come in nearer sixteen.
Its own weight. This is the number that decides whether it comes with you, and the honest range is wide. As planning anchors rather than product claims, full-size aluminium legs with a head often land somewhere between four and five and a half pounds, a comparable carbon set nearer three to four, and a travel carbon set under three. Every pound here is a pound you carry all day.
How low it goes. Minimum height matters for close-up work, for flowers and for foreground-heavy compositions of the kind our landscape lens field note argues for. Look for legs that splay flat and either a short column, a removable column or a design that lets you invert or bypass it.
The centre column design. A column that can be removed entirely, or swung horizontally, turns one tripod into two tools. A fixed column that cannot come out sets a hard floor on how low you can shoot.
Small things that turn out not to be small. A hook under the column for hanging your bag as ballast in wind. A bubble level, or a levelling base if you shoot panoramas. Foam leg wraps if you shoot in cold. A spare plate, because the plate is the part that gets left on a table.
The watch-out is optimising for a feature list rather than for the two or three things you will touch every single time. Most tripods are used the same way ninety percent of the time: extend, level, mount, shoot. Anything that makes those four actions faster is worth more than a feature you use twice a year.
Step 7: Set a Budget and Test Before You Commit
Set the number before you shop, because tripod pages are structured to make the next tier look like the obviously sensible choice, and because tripods have an unusually long tail of premium options.
A workable sanity check is to spend somewhere in the region of five to fifteen percent of what the kit riding on the tripod is worth, legs and head together. For an illustrative two thousand dollar kit that is roughly one hundred to three hundred dollars. Small kits sit above the band because supports have a price floor, and long-lens work sits above it too because a gimbal and legs stiff enough for nine pounds are simply more expensive objects. As very rough planning anchors, an aluminium set that is genuinely worth owning tends to start around one hundred and twenty dollars, a carbon set nearer three hundred, a gimbal adds a couple of hundred on top, and a fluid video head adds something similar. Prices move constantly by retailer and season, so treat every figure here as an anchor for planning rather than a quote, and check current pricing when you buy.
Then test before you commit, which is the entire point of this step. Set it up at full leg extension with the column down and your real camera and heaviest lens on top. Frame something, lock everything, then flick the end of the lens with a fingertip and watch the viewfinder or the rear screen. Count how long the image takes to settle. A good setup stops in about a second; a poor one wobbles on and on. Repeat it with the column raised and notice how much worse it gets, because that comparison teaches the lesson better than any article can.
Then run the practical checks. Lock the head firmly with the camera aimed slightly down and leave it two minutes: any drift is creep, and creep is a return. Extend and collapse all three legs three times and see whether the process annoys you, because you will do it thousands of times. Carry it for at least half an hour on the ground you actually shoot on. And set it up in wind if you can, with a bag hung from the centre hook, because wind is what tripods are really fighting.
The watch-out is the slow drift into keeping something that is nearly right. A tripod that is slightly too short, slightly too flexible, or fitted with a head that creeps is a tripod you will replace inside two years and resent for both of them. Do the testing while you can still send it back, and price the winner against the rest of the year in the upgrade budget planner.
A worked example: three photographers, three tripods
Theory reads easily, so here are three realistic photographers run end to end through all seven steps with the same arithmetic and three completely different answers.
Maya shoots landscapes on foot. Step 1: her heaviest setup is a mirrorless body with a standard zoom, three pounds on the scale with plate and filter. Step 2: she is five foot four, sixty four inches, so her legs need to reach about fifty six inches with the column down. Step 3: doubling three pounds gives a six pound minimum rating for both legs and head. Step 4: she walks a mile or two to most locations, so carbon earns its money, and four sections keeps the folded length compatible with her pack. Step 5: a ball head, because she reframes constantly and wants speed. Step 6: she checks folded length against her bag’s side strap and insists on a removable column so she can shoot low over rocks. Step 7: her illustrative starting point is around three hundred dollars for carbon legs and a modest ball head, which against a two thousand dollar kit is fifteen percent, at the top of the band and defensible because the legs will outlive two camera bodies.
Owen photographs wildlife from a vehicle and short walks. Step 1: body plus a long reach lens weighs nine pounds assembled. Step 2: he is six foot one, seventy three inches, so his legs need about sixty five inches. Step 3: eighteen pounds of rating, both parts, which immediately rules out most of what a beginner would look at. Step 4: he rarely walks far, so aluminium is fine and three sections gives him the stiffest legs for the money. Step 5: a gimbal head, because balancing nine pounds at its centre of gravity is the whole job. Step 6: he wants spiked feet and a hook for ballast, and folded length hardly matters. Step 7: aluminium legs plus a gimbal puts his illustrative starting point near three hundred and seventy dollars, which against a six thousand dollar kit is about six percent, comfortably inside the band.
Priya films interviews and short documentary pieces. Step 1: body with a fast telephoto zoom, a microphone and a cage comes to five and a half pounds. Step 2: she is five foot seven, sixty seven inches, so about fifty nine inches of leg, though she often works below eye level anyway. Step 3: eleven pounds of rating. Step 4: she carries between locations all day, so carbon and four sections. Step 5: a fluid video head, non-negotiable, because a ball head cannot produce a usable pan. Step 6: she prioritises a levelling base, since a fluid head on unlevel legs makes every pan drift uphill. Step 7: carbon legs plus a fluid head puts her illustrative starting point near four hundred and twenty dollars, about nine percent of a four thousand five hundred dollar kit.
Same seven steps, same arithmetic, three different supports, because the inputs differ. Run your own weight, height and subject through the companion above and it lands you on your version.
Where a sixty five inch working height comes from
An illustrative breakdown for a photographer five foot ten, whose eye sits about sixty five and a half inches up. The four slices sum to that total on a three-section tripod with the centre column fully down, and they show why the last section is the one to think about.
Roughly a third of your height comes from the thinnest tube on the tripod. That is why extending the top sections first and leaving the bottom one collapsed whenever you can afford the height is the single cheapest stability upgrade there is.
Head types in plain terms
It is worth spending a little longer on heads, because this is where the same money produces the widest range of outcomes.
A ball head’s quality lives in three places: how smoothly the ball moves when partially loosened, whether the lock holds without creep at full load, and whether there is a separate friction control so you can set a drag that supports the camera while you compose. That friction control is the feature that separates pleasant ball heads from ones that let a heavy lens flop the moment you loosen the knob. A separate panning base underneath, with its own lock, is the second feature worth paying for.
A pan and tilt head’s quality lives in the handles and the gearing. Three handles is traditional, two is common on smaller units, and the question is whether each axis holds firmly at your load and whether the handles collide with the camera at the angles you actually use. Geared heads add fine screws on each axis and are genuinely wonderful for architecture and studio work, at a weight and price that only makes sense if precision is the point.
Gimbals come as full cradles, where the lens sits in a swinging arm, and as side-mount versions, which are lighter and quicker to balance. Either way the setup step is balancing: slide the lens foot forward or back until the rig stays put with nothing locked. A gimbal that has not been balanced is just a heavy, awkward head.
Fluid heads are rated by payload and by drag, and the thing nobody mentions is that a fluid head wants to be loaded near its intended range to feel right. Too light a camera on too big a head produces pans that feel sticky rather than smooth. A levelling base, the half ball that lets you level the head without adjusting individual legs, saves so much time on video work that many people consider it mandatory.
Whatever the type, the plate deserves one moment of thought. A plate that only screws in with a coin will rotate loose eventually; a plate with an anti-twist flange or a full L bracket will not. And an L bracket, which lets you switch between horizontal and vertical framing without flopping the head over sideways, is one of the few accessories almost everyone who buys one keeps using.
Aluminium and carbon fiber, honestly compared
The materials argument generates more heat than it deserves, so here is the useful version.
Carbon’s real advantage is weight at a given stiffness. Compare two tripods of similar leg diameter and section count, and the carbon one will usually be noticeably lighter while feeling about as rigid. It also damps vibration a little faster, which shortens the settle time after you touch the camera, and it does not conduct heat away from bare hands in winter, which is a bigger deal on a cold morning than any specification sheet conveys.
Aluminium’s real advantage is money and toughness. For the same price you can usually buy an aluminium tripod one whole tier stiffer than the carbon one, which for car-based or studio work is a straightforwardly better outcome. Aluminium also dents rather than cracking under a hard impact, and a dented leg usually still works.
The honest decision rule is about carrying. If the tripod will be carried far enough that its weight influences whether you bring it, carbon buys you the photographs you would otherwise not take, and that is worth real money. If it travels by car, gets set up, and comes home, aluminium is not a compromise. It is the correct answer, and the difference is better spent on the head.
Two smaller notes. Salt water is unkind to both materials, and to the locks and fasteners more than the legs, so rinse a tripod that has stood in surf and dry it properly. And leg diameter tells you more about stiffness within either material than the material name does, so compare the tube diameters listed in the specifications before you compare the words.
Working height, centre columns and the shaky last section
Two structural facts explain most of the stability complaints people have about tripods they already own.
The first is the centre column. Raising it puts your camera on top of one unsupported tube, so any sideways force gets a longer lever and the whole assembly gets a new, lower resonant frequency. In practice a fully raised column can undo a large part of what you paid for in the legs. Treat it as a fine adjustment of an inch or two, or as an emergency, not as a height strategy. Some tripods let the column come out entirely, which both fixes the temptation and lets the legs splay flat for low work.
The second is the bottom leg section. On a three-section tripod, as the chart above shows, roughly a third of your height comes from the thinnest tube. On a five-section travel tripod the bottom two sections are thinner still. The practical habit that follows is simple and free: extend from the top down, using the thickest sections first, and leave the thinnest collapsed whenever the height allows. On a windy clifftop you can also skip full extension entirely and accept a lower camera position, which is almost always the right trade.
The third fact, less structural but just as real, is that a wider leg splay is more stable than a narrow one, at the cost of height and floor space. Most tripods offer two or three angle stops per leg. In wind, or on a smooth floor where the feet might skate, going to a wider stop and a lower camera is the fastest stability improvement available without buying anything.
Add ballast if the tripod has a hook: hang your bag so it rests against the ground or presses down without swinging. A swinging bag in wind is worse than no bag at all, which is a detail people discover the expensive way.
Travel tripods and packed length
Travel tripods are a genuine category rather than a marketing label, and they solve a real problem with real costs.
The design usually folds the legs upward through one hundred and eighty degrees so they wrap around the head, which cuts folded length dramatically. It also uses four or five sections instead of three, which cuts it further. As illustrative figures, this can bring a full-size tripod’s folded length from around twenty four inches down to nearer sixteen, which is the difference between a support that sticks out of your pack and one that fits inside it.
What you pay for that is stiffness and setup time. Thinner bottom sections flex more, more locks means more actions every time you set up, and the folding head arrangement usually means a smaller head with a lower rating. None of that is disqualifying. It just means a travel tripod is a support for a camera that is not enormous, in conditions that are not extreme, carried by someone who would otherwise bring nothing.
That last point deserves emphasis. A travel tripod you actually carry produces more usable frames than a heavy-duty set that stays in the car, and the correct comparison is not against the better tripod but against no tripod at all. This is the same reasoning our upgrade order field note applies to gear generally: the equipment that is present beats the equipment that is superior.
If you go this route, be strict about two things. Check the rating against your actual heaviest setup rather than your usual one, because travel designs are where ratings are most often stretched. And check that the folded assembly fits or straps to the specific bag you own, measured rather than eyeballed, because a two inch mismatch is enough to make you leave it behind.
Monopods, tabletop tripods and the alternatives
A tripod is not the only support, and sometimes it is not the right one.
A monopod is one leg. It cannot stand alone and cannot do long exposures, but it takes the weight of a heavy lens off your arms, buys you two or three stops of hand holding, and is permitted in many venues and events where tripods are banned. For sport, for long lens work on the move, and for anyone whose complaint is arm fatigue rather than blur, a monopod is often the more useful purchase. Some come with small folding feet that add stability without turning them into tripods.
A tabletop or mini tripod is a few inches tall, weighs very little, and lives in a bag pocket. It handles food, product and detail work, it braces against walls and railings, and it is genuinely useful for travel video. It cannot reach eye level and it does not pretend to.
A clamp or bean bag solves the problem from a different direction. A clamp grips a railing, a fence post or a car window, and a bean bag lets a long lens rest solidly on any surface. Both are cheap, both are very stable, and both are limited to wherever a suitable surface exists.
Bracing and technique should not be dismissed either. Elbows in, a wall or railing to lean against, a shorter shutter speed and a burst of frames will rescue a lot of situations, and our sharp photos field note covers those methods properly. The reason none of them replace a tripod is repeatability, not steadiness.
And for phones specifically, the category has its own hardware, its own clamp designs and its own sensible price range, all of which our phone tripod field note handles. Trying to make one product family serve both is how people end up with a support that is wrong for everything.
Setting up a tripod so it is actually steady
Buying well is most of the job, and using it well is the rest. These habits cost nothing and recover a surprising amount of performance.
Extend from the top down, thickest sections first, and leave the bottom section in unless you need the height. Keep the centre column down. Splay the legs to a wider angle stop when it is windy or the ground is smooth. Point one leg toward your subject so you have room to stand between the other two, which stops you kicking a leg mid-sequence.
On uneven ground, adjust the legs rather than the head to get roughly level, then fine-tune with the head. On soft ground, push the feet in and let them settle before you mount the camera. On a hard smooth floor, use rubber feet and check nothing is going to skate.
Then remove the human. Use a remote release, a cable, or the two-second self-timer, because pressing the shutter with a finger reintroduces exactly the movement you set the tripod up to eliminate. On a DSLR, mirror lock-up or the electronic first curtain option removes the small slap of the mirror, which matters most at shutter speeds in the region of an eighth to a couple of seconds. On a mirrorless body, look for an electronic first curtain or fully electronic shutter setting.
Finally, turn stabilisation off when the camera is locked down and stationary. Many stabilisation systems can hunt for movement that is not there and introduce a small blur of their own, though behaviour varies by system and some modern ones detect tripod use automatically. Check your camera’s documentation rather than assuming, and if you are unsure, shoot the same frame both ways once and look at the result at full magnification.
Where a tripod fits in your gear budget
A tripod competes for money with lenses, and lenses change what your photographs look like more directly. So the tripod should not usually win that competition, with two exceptions worth naming.
The first exception is when your subject requires it. If you photograph the night sky, do long exposures of water, shoot interiors, blend exposures, or film anything with a pan in it, the tripod is not an accessory competing with glass. It is the thing that makes the picture possible, and it should be funded first.
The second exception is longevity. Legs and heads have no sensor, no firmware and no obsolescence cycle. A good set bought once will outlast several bodies and probably several lenses, which changes the maths on buying above your immediate needs. This is one of the few places in photography where buying once and properly is the cheaper path.
Timing is worth a thought too. A tripod bought at the same moment as a first camera is often the wrong tripod, because you do not yet know whether you shoot at dusk or at noon, on trails or from a car. A reasonable sequence is to borrow or buy cheaply, learn from what annoys you, then buy deliberately six months later. That is the same argument our first camera budget field note makes about spending on bodies before you know your habits.
One last budget note. If money is tight, better legs with a modest head is usually the more sensible split, because heads are simple to upgrade and legs are not. Weigh the whole spend against the rest of your year in the upgrade budget planner before you commit to either half.
Common mistakes to avoid
Most disappointing tripods come from a short list of predictable errors, and recognising them is faster than reading a hundred reviews.
- Buying on the headline maximum height. That figure almost always includes a fully raised centre column, which is the least stable configuration the tripod has. The number you want is maximum height without the column, and it is often several inches shorter.
- Ignoring the head. Solid legs with a creeping bundled head produce exactly the symptoms people blame on the legs. Rate the head separately and treat it as half the purchase.
- Treating the load rating as a target. Ratings describe what a support holds, not what it holds still in wind. Doubling your heaviest setup is the margin that turns a specification into stillness.
- Weighing the wrong camera. Sizing around your usual setup rather than your heaviest guarantees the tripod fails on the day the big lens comes out.
- Buying more tripod than you will carry. A heavy-duty set that lives in a cupboard has an effective load rating of zero. Folded length and weight decide usage more than any other pair of numbers.
- Stretching a phone support to hold a camera. Phone clamps and their legs are engineered around a few ounces, and asking them to hold a body and a lens ends in creep at best.
- Skipping the remote and the timer. Pressing the shutter by hand on a tripod reintroduces the movement you just spent money to eliminate, and it is free to fix.
Troubleshooting the awkward cases
Real situations rarely match a clean rule, so here is how to handle the ones that come up most.
What if your camera still shows movement on a tripod that should be stiff enough? Work through the chain in order: column down, bottom leg sections collapsed, wider leg splay, remote or timer instead of a finger, stabilisation off, and ballast hung from the hook so it presses rather than swings. If shake persists after all of that with the head locked, you are probably looking at head creep rather than leg flex, and that is a head problem.
What if the head slips under a heavy lens? First check the plate is genuinely tight and has an anti-twist flange, because a plate rotating on the camera’s threaded socket feels exactly like head slip. Then check you are not exceeding the head’s rating once the lens hood, filter holder and any accessories are counted. If the head is rated adequately and still slips, either the friction control needs setting or the head is not as capable as its rating claims.
What if you shoot in two very different ways, say landscapes on trails and video in a room? Do not try to solve both with one head. A very common and inexpensive answer is one good set of legs plus two heads that swap on the same standard thread, since legs are the expensive half and both heads then benefit from them.
What if a venue bans tripods? Many do, for crowd flow rather than photography reasons, and monopods are frequently allowed where tripods are not. Policies vary by venue and change, so check the specific rules for the place you are going rather than assuming, and take a clamp or a tabletop support as a fallback.
What if the tripod is fine but the pictures still are not sharp? Support solves camera movement, not missed focus or lens limitations, and those are different problems with different fixes. Our sharp photos field note separates them, and it is worth reading before you conclude the tripod is at fault. Low light in particular has its own set of solutions covered in our low light field note.
Your tripod checklist
Run down this list before you buy, and again before the return window closes.
- Weigh your heaviest camera and lens combination assembled, with plate, hood and any filter fitted.
- Add the flash, microphone, bracket or recorder that rides on the camera when it is on the tripod.
- Double that weight and treat the result as the minimum rating for the legs and for the head separately.
- Work out your eye height, subtract about four inches for the head and plate, and use that as the legs-only height you need.
- Confirm the maximum height without centre column, not the flattering headline figure.
- Decide aluminium or carbon on how far you carry it, not on which sounds better.
- Choose section count deliberately: three for stiffness, four for compromise, five for folded length.
- Handle both lock types if you can, and judge quality rather than type.
- Check the legs have independent angle stops and that the feet can be changed for the ground you shoot on.
- Choose the head by subject: ball for general stills, pan and tilt or geared for precision, gimbal for long lenses, fluid for video.
- Confirm the clamp standard matches any plates or brackets you already own.
- Measure folded length against the specific bag you carry, including its side straps.
- Check how low the tripod goes and whether the column comes out or swings.
- Set it up loaded, flick the lens, and count how long the image takes to settle.
- Lock the head with the camera angled down and leave it two minutes to check for creep.
- Carry it for half an hour on real ground before the return window closes.
The bottom line
A tripod is chosen well when you stop thinking about it. The method that gets you there is unglamorous: weigh the heaviest setup you own rather than the one you usually carry, double that number and demand it from the legs and the head separately, and work out your working height as your own height minus eight or nine inches so the centre column never has to be part of the plan. Pick aluminium or carbon on how far you carry it rather than on which material sounds more serious, choose the section count as a deliberate trade between stiffness and folded length, and treat the head as half the purchase rather than as something taped to the box, matching its type to what you actually photograph. Then check the details that decide daily use, folded length, its own weight, how low it goes, whether the column comes out, and test the whole thing loaded, in wind, on the ground you shoot on while you can still return it. Do that once and you own a support for a decade instead of buying two in three years. Set your weight, your height and your subject in the companion above, and weigh the spend against the rest of your year in the upgrade budget planner.
This field note sets out a general method for choosing camera support and deliberately names no brands or models, because the right tripod depends on your kit, your height, your subject and how far you carry it, and because models change faster than any article can track. The weights, heights, ratings, percentages and dollar figures above are rounded planning estimates built from typical gear dimensions and common price tiers, not measurements of any particular product or quotes from any retailer, so weigh your own equipment and check current specifications and pricing before you buy. Load ratings are published by manufacturers using methods that differ between makers and are rarely disclosed in full, which is precisely why the margin described here exists. Tripod policies at venues, parks and public buildings vary and change without notice, so confirm the current rules for the place you are going rather than relying on figures read anywhere, including here.
Frequently asked questions
What load rating do I need on a tripod?
Take the heaviest camera and lens combination you own, weigh it on a kitchen scale with the plate and any accessories fitted, and look for a tripod and a head each rated for roughly twice that number. As illustrative figures, a mirrorless body with a small prime is around two pounds and wants a four pound rating, a body with a standard zoom is around three pounds and wants six, a body with a fast telephoto zoom is near five and a half pounds and wants eleven, and a long wildlife lens on a body can reach nine pounds and wants eighteen. The doubling is not superstition. Published ratings describe the weight a support will hold without collapsing, not the weight at which it stays genuinely still in wind, so the margin is what buys you the stillness you actually paid for.
Is a carbon fiber tripod worth the extra money?
It depends almost entirely on how far you carry it. Carbon legs of comparable stiffness typically weigh noticeably less than aluminium ones, they damp vibration a little faster, and they are far more pleasant to hold in cold weather because they do not pull heat out of your hands. None of that matters if the tripod lives in a studio or rides in a car boot, where aluminium does the same job for less. The honest test is whether the tripod has been left at home because of its weight. If it has, carbon buys you the pictures you did not take. If it has not, the money is usually better spent on the head, which is the part most people underbuy.
How tall should a tripod be?
Tall enough that the camera reaches your eye without the centre column raised, which is a stricter requirement than most people realise. A workable model is that your eye sits roughly four to five inches below the top of your head, and that a head and plate add about four inches on top of the legs. Subtract both and you get a simple planning rule: the legs alone, with no column extension, should reach roughly your height minus eight or nine inches. For someone five foot ten that is about sixty two inches of leg. Anything shorter means either stooping all day or raising the column, and a raised column is the least stable part of any tripod.
Ball head or pan and tilt head, which should I get?
A ball head loosens one control and lets the camera move in every direction at once, which is fast and is why most stills photographers prefer it. A pan and tilt head separates the axes onto individual controls, so you can level the horizon and then adjust only the tilt without disturbing anything else, which suits precise architectural and product work. Beyond those two, a gimbal head balances a long lens at its centre of gravity so a heavy telephoto swings with a fingertip, and a fluid head adds damped resistance so video pans start and stop without a jerk. Choose by subject rather than by popularity, because each type is genuinely bad at the jobs the others exist for.
Do I still need a tripod if my camera has image stabilisation?
Stabilisation and a tripod solve different halves of the same problem, and one cannot replace the other. Stabilisation corrects small, fast movements of the camera in your hands, which buys you a few extra stops of hand holding. It does nothing about exposures measured in seconds, it cannot hold a frame identical across a bracketed or focus stacked sequence, and it cannot keep a composition fixed while you walk into it or change a filter. If your work involves long exposures, blending several frames, precise framing, or simply slowing down, a tripod is the tool. If you shoot handheld in daylight, stabilisation may genuinely be enough, and the honest answer is that many photographers need one far less often than the internet implies.
How much should I spend on a tripod?
Enough that you are not buying a second one, which is the trap almost everyone falls into once. As a sanity check rather than a rule, somewhere in the region of five to fifteen percent of what the kit riding on it is worth tends to land in sensible territory, so an illustrative two thousand dollar kit points at roughly one hundred to three hundred dollars for legs and a head together. Small kits sit above that band because supports have a price floor, and heavy telephoto work sits above it too because a gimbal and legs stiff enough to hold nine pounds simply cost more. Prices move constantly by retailer and season, so treat any figure as a planning anchor and check current pricing before you buy.
How many leg sections should a tripod have?
Fewer sections means fewer locks, thicker bottom legs and a stiffer tripod, at the cost of a longer folded length. More sections pack shorter and travel better, but the lowest section is always the thinnest and the flexiest, and every extra lock is another thing to fail or work loose. Three sections is the classic choice when a tripod mostly travels by car, four is the usual compromise for a tripod that goes in or on a pack, and five appears on travel designs where folded length is the priority. Whatever the count, a practical habit is to extend the thickest sections first and leave the thinnest one collapsed unless you truly need the height.
Can I use a phone tripod for a real camera?
Generally no, and the reason is not snobbery. Phone supports are built around a few ounces held by a spring clamp, with legs, locks and a head sized to that load, so putting a body and a lens on one asks the design to hold ten to thirty times what it was engineered for. The failure mode is not always a dramatic collapse either. Long before anything falls, an overloaded head creeps slowly after you lock it, so the horizon you carefully set has drifted by the time the shutter closes. Phone rigs are covered properly in our phone tripod field note, and the two categories are best kept separate rather than stretched to cover each other.