What's on this page
- Before you start
- Why video takes your shutter speed away
- Step 1: Pick your frame rate first
- Step 2: Set your shutter speed to double the frame rate
- Step 3: Control exposure with aperture and ISO
- Step 4: Add an ND filter for daylight
- Step 5: Set white balance manually
- Step 6: Choose a picture profile honestly
- Step 7: Set up focus for video
- Step 8: Record usable audio
- Step 9: Stabilize the shot
- Frame rate and shutter speed on one page
- Shooting for slow motion without wrecking the exposure
- What changes when you move indoors
- Recording settings that bite you later
- The stills habits that work against you in video
- A worked example: one clip from setup to card
- Common mistakes to avoid
- Troubleshooting the shots that go wrong
- Your video settings checklist
- The bottom line
Short answer: Shoot video by picking a frame rate first, 24 for a film look, 30 for a cleaner one, 60 or higher only for slow motion, then setting shutter speed to roughly double that number, such as 1/50 at 24 fps. Handle exposure with aperture, ISO, and an ND filter instead of shutter, lock white balance by hand, choose a picture profile, set focus deliberately, record audio properly, and put the camera on something steady.
Nearly every stills camera sold today also shoots video, and nearly every stills photographer who tries it has the same experience: the first clip looks wrong in a way that is hard to name. The exposure is fine. The focus is fine. The footage still looks cheap next to something shot by someone who knows what they are doing. The reason is almost never the camera, and it is almost never resolution. It is that video quietly takes one of your three exposure settings away from you, and if you keep shooting the way you shoot stills, that missing setting sabotages everything downstream.
That setting is shutter speed. In stills you spend it freely, and a faster shutter is usually a win. In video your shutter is spoken for: it has to stay tied to your frame rate to make motion look natural, which means it is no longer a lever you get to pull. This field note walks the nine settings you actually change, in the order you change them, with the reasoning a stills shooter needs to make each one make sense. It leans on the reference field notes rather than repeating them, so our shutter speed field note and our exposure triangle field note are the foundation underneath this one. Price out anything you decide you need with the upgrade budget planner.
Key takeaways
- Frame rate comes first and everything follows from it. Your base rate sets how normal motion looks; higher rates are captured only so you can slow them down later.
- The 180 degree shutter rule ties shutter speed to frame rate at roughly double: 1/48 or 1/50 at 24 fps, 1/60 at 30 fps, 1/120 at 60 fps. Deviating looks stuttery or smeary.
- With shutter locked, exposure is aperture and ISO only, which is why an ND filter is close to mandatory outdoors. In bright sun at 1/50 and base ISO, reaching f/2.8 takes about six stops of ND.
- Set white balance manually. Auto white balance shifting mid-clip is far harder to fix in video than the same drift is between stills frames.
- Bad audio reads as bad video more than soft footage does, so an external microphone and manually set levels buy more perceived quality than any resolution upgrade.
Before you start
Setting a camera up properly for video is a one hour job the first time and a two minute job every time after, because most of these settings stay where you put them. Difficulty is beginner to intermediate: nothing here is hard, but several steps ask you to unlearn a stills habit, which is the part that takes repetition. Budget an afternoon for the first real practice session, ideally outdoors in changing light so you meet the ND problem honestly rather than reading about it.
Here is what you need, in rough order of how much each one changes the result:
- A camera that lets you set shutter speed in video mode, which means a manual or shutter-priority video mode rather than a fully automatic one. Almost every interchangeable-lens camera made in the last decade qualifies, and many compacts and phone apps do too.
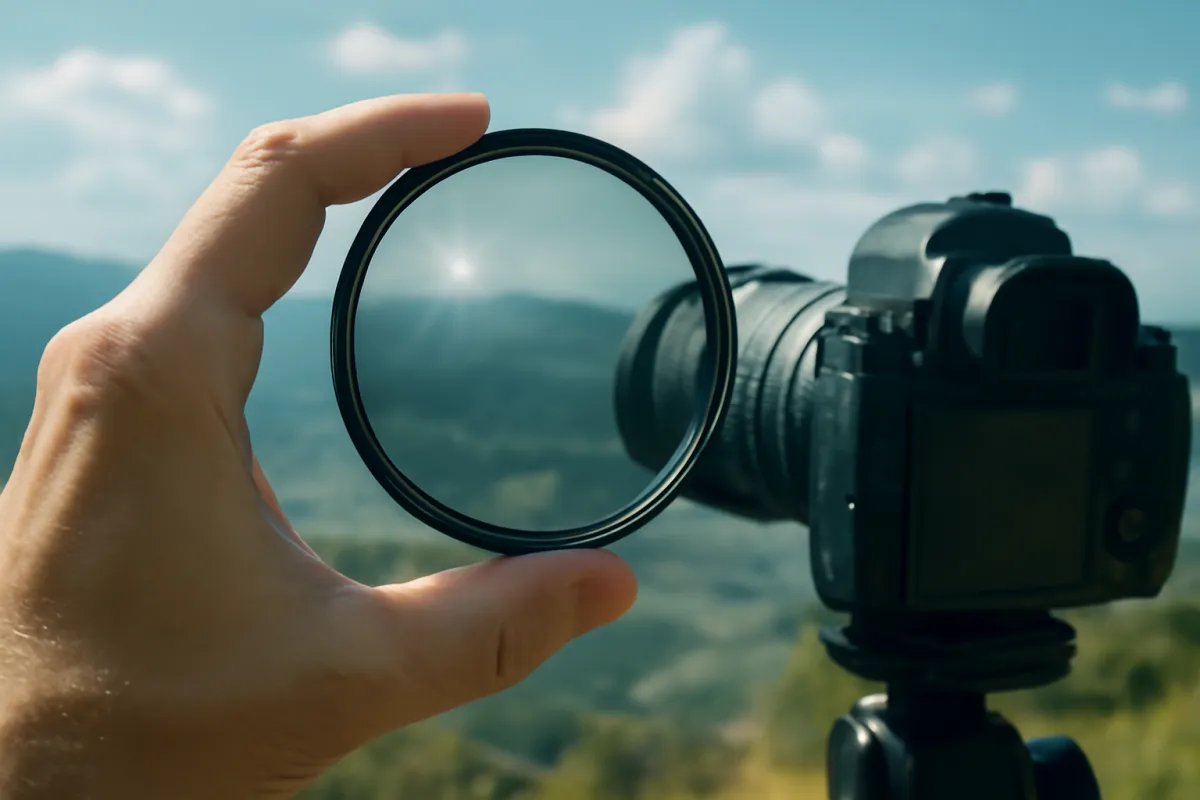
- An ND filter, either a fixed one or a variable one, sized to your lens thread. This is the single accessory that separates daylight video that works from daylight video that fights you, and it is covered in Step 4.
- A tripod, ideally with a fluid head. A photo ball head is fine for locked-off shots and terrible for pans, because it cannot move slowly and smoothly. A fluid head is the difference between a pan and a lurch.
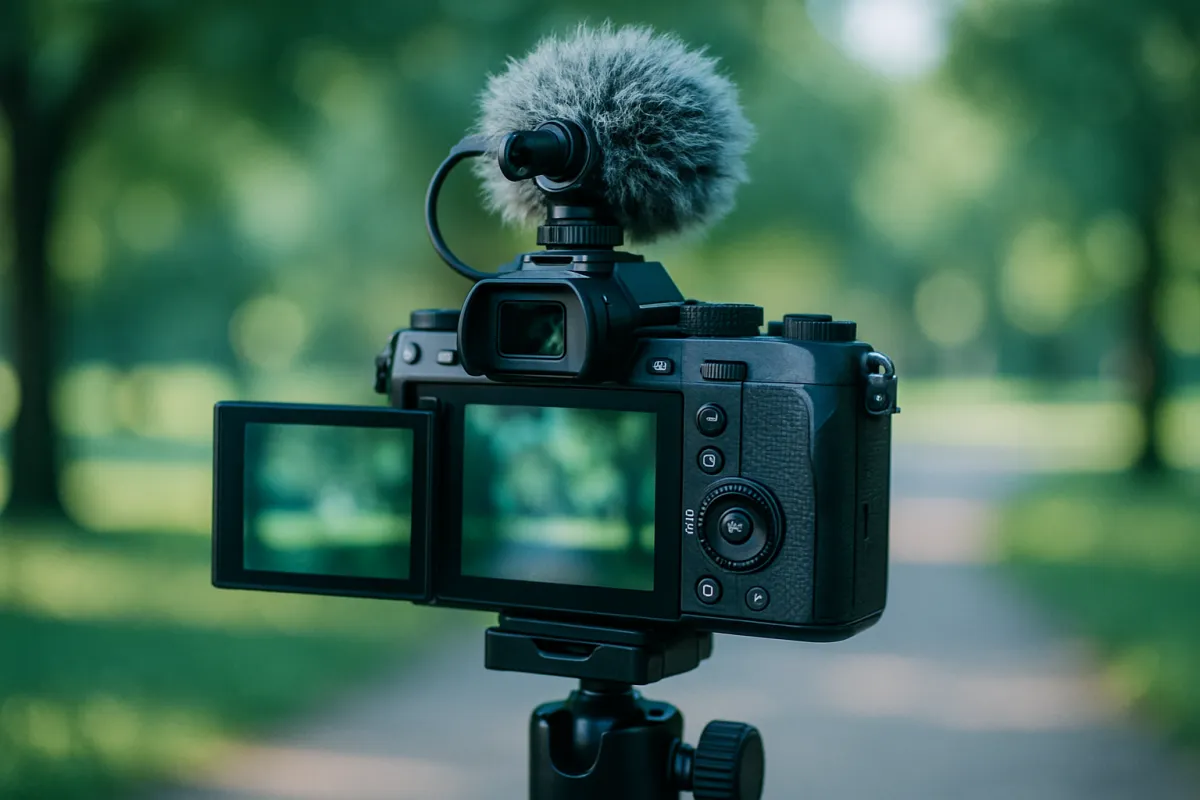
- An external microphone, even an inexpensive on-camera one. Built-in microphones sit inside a body full of moving parts and hear your hands more clearly than they hear your subject.
- A fast, high-capacity memory card and spare batteries. Video writes far more data per second than stills and drains a battery several times faster, so a card that is fine for photos can stutter or refuse to record video.
- Headphones. You cannot fix audio you never heard, and every audio problem worth catching is audible before the take rather than after it.
You do not need all of it on day one. The frame rate and shutter steps cost nothing and fix the most obvious problem, and the ND filter is the first thing worth buying. Run that purchase through the upgrade budget planner before you add anything else.
Why video takes your shutter speed away
Start with the mechanism, because the rest of this field note is downstream of it. A video file is a sequence of still frames played fast enough that your eye fuses them into motion. Each of those frames is exposed for some fraction of the time that frame occupies. At 24 frames per second each frame occupies 1/24 of a second, and the shutter can be open for anywhere from a tiny slice of that to nearly all of it. The share of the frame interval during which the shutter is open is called the shutter angle, described as a fraction of a 360 degree rotating disc, and it decides how much motion each frame contains.
A 180 degree shutter means the shutter is open for half the frame interval, which at 24 fps is 1/48 of a second. Each frame therefore contains half a frame’s worth of movement blur, and the gaps between frames contain the other half. That ratio is what your eye has been trained on by a century of film, and it reads as normal motion. Push the angle narrower, say 90 degrees at 1/96, and each frame is a crisper slice with bigger jumps between them, which reads as a stuttering, staccato jitter. Open it wider toward 360 degrees at 1/24, and each frame smears into the next, which reads as dreamy or drunk.
This is the whole constraint. In stills, a fast shutter costs you nothing but light, so you use it freely. In video, a fast shutter costs you the look of motion itself, and the cost is visible to people who could never tell you why. Our shutter speed field note covers what shutter speed does to a single frame; video adds the rule that the setting is no longer yours to spend.
Step 1: Pick your frame rate first
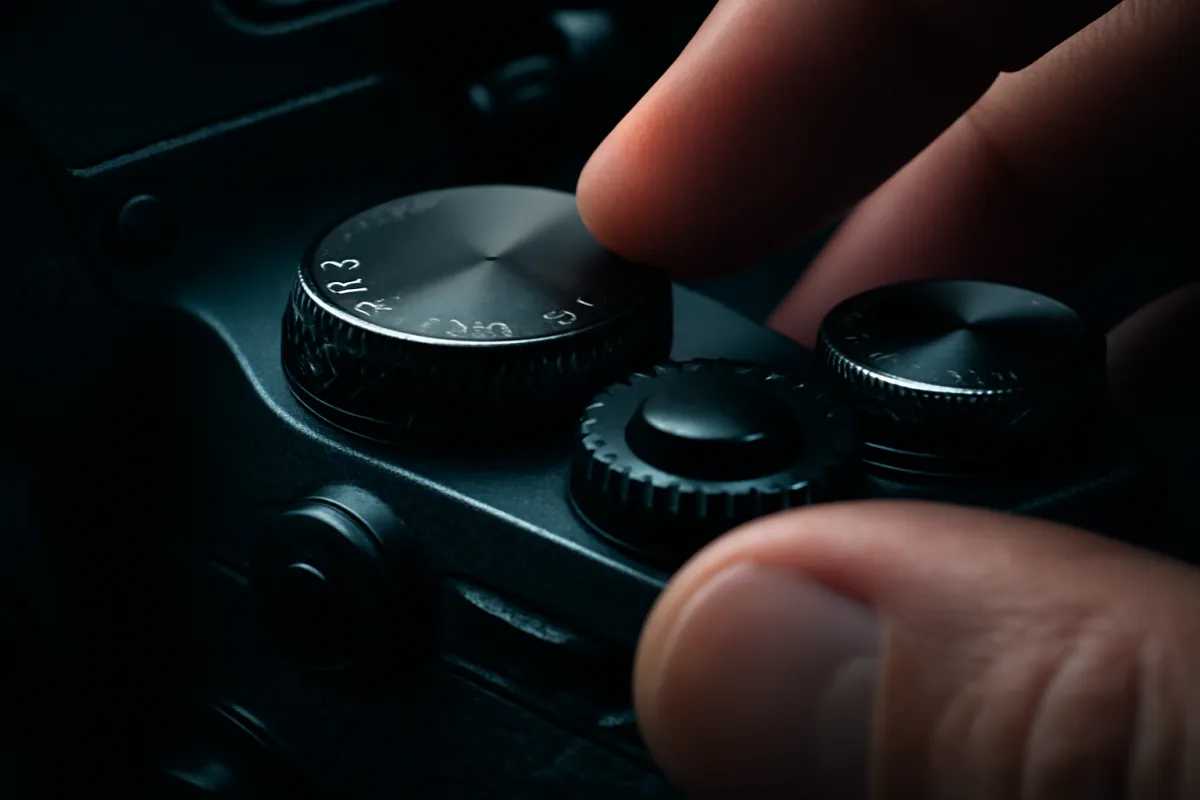
Frame rate is the first decision because it sets the shutter speed, and shutter speed constrains everything after that. Two questions decide it: how do you want normal motion to look, and do you want the option to slow any of this down later.
For normal motion, 24 frames per second is the traditional cinema rate. It carries a slight, familiar strobe on fast pans and quick movement, and because film has looked that way for a century, most viewers read it as cinematic without knowing what they are reacting to. Thirty frames per second is smoother and cleaner, with less strobe and a more immediate, present feel, which suits interviews, tutorials, product demonstrations, and anything that wants to look clear rather than filmic. Regions on 50 hertz mains power often use 25 instead of 24 for the same reasons plus flicker compatibility, and 25 behaves like 24 in every respect that matters here.
Higher rates are a different tool entirely. Capturing at 60 or 120 frames per second and playing them back on a normal timeline slows the motion down proportionally: 60 fps on a 24 fps timeline plays 2.5 times slower, and 120 fps plays 5 times slower. That is the only reason to shoot them. Shooting your whole project at 60 and playing it at 60 does not give you slow motion, it gives you a smooth, slightly video-ish look that many people associate with home camcorders.
The watch-out is mixing base rates carelessly. Pick one base rate for a project and stay on it, and treat high frame rate clips as deliberate inserts you know you will slow down. A timeline with 24 fps and 30 fps clips cut together will show a visible change in motion character at every cut, and no amount of grading fixes it.
How much slower footage plays on a 24 fps timeline
Capture rate divided by the timeline rate gives the slow-motion factor. Bar widths are that factor as a share of the largest, so 5x fills the track and 1x fills one fifth of it.
The arithmetic is simply capture rate divided by timeline rate. Shooting 30 fps for a 24 fps project buys you almost nothing in slow motion and costs you a mismatched base rate, which is why 60 and 120 are the rates worth reaching for. Set your own rate in the companion above.
Step 2: Set your shutter speed to double the frame rate
With the frame rate chosen, the shutter speed is no longer a decision so much as a calculation. Double the frame rate and use one over that number: 24 fps gives 1/48, 25 fps gives 1/50, 30 fps gives 1/60, 60 fps gives 1/120, and 120 fps gives 1/240. That is the 180 degree shutter rule, and it exists because it puts half a frame’s worth of motion blur in every frame, which is the ratio your eye reads as natural.
Some cameras do not offer 1/48 and jump from 1/40 to 1/50. Use 1/50 without a second thought: the difference is a fraction of a stop and roughly 8 degrees of shutter angle, which nobody has ever noticed in delivered footage. The same applies at 1/125 instead of 1/120 and 1/250 instead of 1/240. Get close and move on. What matters is that you are not shooting a 1/1000 shutter out of stills habit.
Deviating on purpose is a legitimate creative choice, and knowing what it costs is the point. A narrower angle, meaning a faster shutter, produces the crisp, juddering, adrenal look used for chaotic action, and it also makes any camera shake read as a series of jumps rather than a smooth wobble. A wider angle, meaning a slower shutter, smears motion and can hide shake, at the cost of anything fast turning into mush. Neither is wrong. Both are visible.
The watch-out is artificial light. Mains-powered lighting flickers at the frequency of the local supply, and a shutter speed that does not divide evenly into that flicker produces rolling bands across the frame. In 60 hertz regions, 1/60 and 1/120 are the safe shutter speeds; in 50 hertz regions, 1/50 and 1/100. If you are shooting 24 fps indoors in a 60 hertz region and you see banding, moving from 1/48 to 1/60 costs you a third of a stop of motion blur and solves it, which is a trade worth making every time.
Step 3: Control exposure with aperture and ISO
Shutter is locked, so exposure now runs on two controls instead of three. This is the moment the stills instinct fails hardest, because in stills the reflex when a scene is too bright is to speed the shutter up, and here that reflex is unavailable. Our exposure triangle field note explains why the three settings trade cleanly against each other; video keeps the trades and removes one of the traders.
Aperture is now your primary creative control, and it carries the same meaning it does in stills: wide open at f/2 or f/2.8 for a shallow, separated look, stopped down to f/8 or f/11 to hold a scene sharp front to back. Our aperture field note covers the depth of field mechanics in full. The wrinkle in video is that stopping down is no longer a free way to darken the frame, because it changes the look of every shot in the sequence. A clip that jumps from f/2.8 to f/11 between setups looks like two different cameras.
ISO is your second control, and it behaves as it does in stills, with one asymmetry: noise moves in video. In a still, grain sits there and can read as texture. In video, noise shimmers frame to frame, which is more distracting and compresses badly, so a clip at a given ISO usually looks noisier than a photo at the same ISO. Keep ISO low when you can and accept that video has slightly less usable ISO headroom than stills from the same sensor.
The watch-out is auto ISO. It is a reasonable safety net in stills and a hazard in video, because it can drift mid-take and produce a clip whose brightness slowly changes for no visible reason. Set ISO manually. If the light is changing that much during a shot, the fix is a variable ND you can adjust by hand, not a camera guessing on your behalf.
Step 4: Add an ND filter for daylight
Here is why an ND filter stops being an accessory and becomes equipment. Work the numbers for a bright sunny day at 24 fps. The shutter is locked at about 1/50 and base ISO is 100. The long-standing sunny 16 approximation puts a correct daylight exposure at f/16 with a shutter of one over the ISO, so 1/100 at ISO 100. Halving the shutter to 1/50 doubles the light reaching the sensor, so you have to close down one stop to compensate, landing near f/22.
That is the problem in one number. If you want the shallow, separated look that made you buy a fast lens, you want f/2.8, and f/22 to f/2.8 is six full stops. Your shutter cannot absorb them because it is locked. Your ISO cannot absorb them because you are already at base. There is exactly one tool left that removes light without touching frame rate, shutter, or aperture, and that is a neutral density filter, a piece of darkened glass in front of the lens.
ND strength is quoted in stops, and the numbering follows powers of two: ND8 is three stops, ND16 is four, ND32 is five, ND64 is six, ND1000 is about ten. Six stops in bright sun at f/2.8 means ND64. Under light cloud the exposure sits nearer f/16, so you need five stops, or ND32. Under full overcast it is nearer f/11 and four stops, or ND16. In open shade it is nearer f/8 and three stops, or ND8. A variable ND covers that whole range with a rotating ring, which is why most people who shoot outdoors carry one instead of a stack of fixed filters.
The watch-out with variable NDs is that pushing one to the extreme end of its range can produce an uneven dark cross across the frame, and cheap ones can add a color cast that you then have to correct on every clip. Buy the strength range you actually need rather than the widest one advertised, and stay off the last part of the dial.
Who does the exposure work outdoors once shutter is locked
Illustrative share of the exposure adjustment each tool handles on a typical daylight shoot at a fixed frame rate. Not a measurement, a working model of where the control actually comes from.
Shutter contributes nothing here, which is the entire difference from stills. Outdoors the ND carries most of the load, aperture is spent on the look rather than on brightness, and ISO mostly sits at base. Indoors the shares invert and ISO does most of the work.
Step 5: Set white balance manually
White balance in stills is close to a non-issue if you shoot RAW, because you set it afterward at no cost. Video is different in a way that catches people out. Most cameras record video as a processed file with the white balance baked in, so there is no free do-over, and worse, auto white balance can change during a take. Someone in a red jacket walks through frame, the camera reweights, and the color of the wall behind your subject shifts halfway through an otherwise perfect clip. That drift is genuinely hard to fix, because you are not correcting a wrong value, you are correcting a moving one.
So set it by hand. The reliable method is to fill the frame with a white or neutral gray card in the light you are shooting in and use the camera’s custom or preset white balance function to measure it. That gives you a value matched to the actual light rather than to a category. The quicker method is to pick the preset that matches the light, daylight for open sun, cloudy for overcast, shade for open shade, tungsten for warm indoor bulbs, or to dial a color temperature directly, with daylight sitting around 5600 kelvin and warm household bulbs down near 3000. Our white balance field note covers what those numbers mean.
The watch-out is mixed light, which is the situation where a single manual value cannot be right for everything. A subject lit by a window on one side and a warm lamp on the other will have two different color temperatures on two sides of one face. The honest fix is at the source: turn the lamp off, or gel it, or move the subject. If you cannot, favor the light on your subject’s face and let the background go warm or cool, because that is the error a viewer forgives.
Step 6: Choose a picture profile honestly
Picture profiles decide how much contrast, saturation, and sharpening the camera bakes into the file. The choice is usually framed as standard versus flat or log, and the honest version of the advice is a question rather than a recommendation: are you actually going to color grade this footage?
If yes, a log or flat profile earns its place. It records the scene with the contrast curve pulled way down, which keeps more information in the highlights and the shadows and gives you real room to shape the image afterward. That latitude is the entire product. It also comes with conditions: log profiles typically have a higher base sensitivity than the camera’s normal base ISO, they need to be exposed accurately rather than by eye because the flat image looks wrong on the screen, and they benefit enormously from a recording format with more color depth, since pushing contrast into a thin file is what produces banding in skies and gradients.
If no, a log profile is a straight downgrade. You get dull, washed clips that need work before they look like anything, and the work you then do to restore contrast is exactly the work the camera would have done better internally with more data than the file now contains. A neutral or standard profile with contrast and sharpening nudged slightly down is the right answer for most people most of the time: it leaves a little room to adjust without demanding a grade.
The watch-out is choosing log because it sounds professional and then applying a generic look to it in software. That path gives you the disadvantages of log with none of the benefits. If you want the footage to be usable straight out of the camera, say so with your profile choice, and keep your editing effort for the cut. Our photo editing field note makes the same argument about stills: the file you capture should match the workflow you will really run.
Step 7: Set up focus for video
Focus in stills is a single event: you place a point, confirm the lock, and take the frame. Focus in video is a continuous state that has to survive twenty or sixty seconds of everything moving, and that difference is why habits do not transfer.
Continuous autofocus with face or subject detection is genuinely capable on many current cameras, and it is the right choice when the subject moves, when the camera moves, or when you are shooting alone and cannot ride a focus ring. Two settings usually decide whether it looks good: the tracking sensitivity, which controls how eagerly the camera abandons your subject for something that crosses in front, and the transition speed, which controls how fast a refocus happens. Slow both down. A focus change that takes half a second reads as a deliberate rack; the same change in two frames reads as a glitch.
Manual focus with peaking is the safer answer for locked-off shots, static interviews, and anything where a mid-take hunt would ruin the clip. Peaking outlines the in-focus edges in a bright color on the screen, and the reliable method is to zoom the display in, focus on the eyes until the outlines light up, zoom back out, and then leave the ring alone. If the subject sits down and stays there, the distance is not going to change, and no autofocus system can be more reliable than a focus that physically cannot move.
The watch-out is focus breathing, the slight change in framing that many lenses show when focus shifts. On a rack focus it looks like a small unintended zoom. There is no setting that removes it, so the workaround is to plan racks that are small, or to frame slightly wider than you need so the shift lands outside your final crop.
Step 8: Record usable audio
Here is the least intuitive fact about video, and the one most worth internalizing: viewers forgive soft, noisy, or badly exposed pictures far more readily than they forgive bad sound. Hiss, room echo, wind roar, or a voice buried under traffic makes a clip feel amateur within two seconds, while the same clip with clean audio and a slightly soft picture reads as fine. If you have one upgrade to make, it is a microphone, not a lens.
The built-in microphone is the problem to solve. It sits in a body full of moving parts, so it records your fingers on the controls and the lens motor as clearly as it records your subject, and because it is far from the subject it captures far more room than voice. Any external microphone is an improvement. An on-camera shotgun narrows what it hears to roughly what the lens sees and helps in a moderately noisy space. A small clip-on microphone worn by the subject beats everything for dialogue, because proximity does more for intelligibility than any other factor.
Set levels manually rather than leaving automatic gain control on, because automatic gain audibly pumps the room noise up whenever nobody is talking. Aim for the loudest moments to peak well short of the top of the meter, and leave real headroom, because digital audio does not distort gracefully: once a peak hits the ceiling that information is gone and cannot be recovered. Wear headphones from the first take, and outdoors put a furry windshield on the microphone, since even a light breeze produces a low roar that no filter fully removes afterward.
The watch-out is forgetting room tone. Record thirty seconds of the empty room at every location before you pack up. It costs nothing and gives your editor a bed to patch gaps and smooth cuts with, and there is no way to fake it later.
Step 9: Stabilize the shot
Shake is the last thing that separates footage that looks intentional from footage that looks like it happened. There are three different tools here and they solve three different problems, which is why using the wrong one produces a result that feels off even when nothing is technically wrong.
A tripod solves static shots and slow moves. For video, the head matters more than the legs: a photo ball head locks and unlocks, which is all a still frame needs, but a pan on a ball head lurches because there is nothing damping the motion. A fluid head adds resistance so a slow pan or tilt starts and stops smoothly. Level the legs before you start, because a pan across an unlevel head drifts uphill or downhill through the move and looks strange in a way people notice without diagnosing.
Handheld technique solves everything that has to move. Tuck your elbows into your ribs so your torso carries the weight rather than your arms, hold the camera with both hands, and add a third contact point wherever you can, an eye to the viewfinder, a shoulder to a wall, forearms on a railing. Shoot wider than feels natural, because a wide lens shows proportionally less shake than a long one, and walk with soft knees and short steps rather than a normal stride.
The watch-out is stabilization itself. In-body and lens stabilization are tuned to hold a mostly static frame, so they are excellent standing still and awkward when you walk, where the slow repeating sway gives them something to fight and produces a floating, drifting look with edges that appear to wobble. Turn stabilization off on a tripod, where it can hunt and drift against a frame that is already still, and reach for a gimbal rather than electronic stabilization when the shot genuinely needs to move. Our image stabilization field note explains what each system is actually correcting.
Frame rate and shutter speed on one page
Everything above collapses into a short table you can memorize in a minute, and it is worth doing because these five relationships cover most of what you will shoot.
- 24 fps: shutter 1/48, or 1/50 if your camera does not offer 1/48. The film look. Base rate for anything narrative or moody.
- 25 fps: shutter 1/50. The equivalent base rate in 50 hertz regions, and flicker-safe there under mains lighting.
- 30 fps: shutter 1/60. The clean, present look. Base rate for interviews, tutorials, and demonstrations, and flicker-safe in 60 hertz regions.
- 60 fps: shutter 1/120, or 1/125. Captured to be slowed 2.5 times on a 24 fps timeline or 2 times on a 30 fps one.
- 120 fps: shutter 1/240, or 1/250. Captured to be slowed 5 times on a 24 fps timeline or 4 times on a 30 fps one.
The exposure side is just as short, assuming base ISO 100 and a 1/50 shutter. Bright sun meters near f/22, light cloud near f/16, full overcast near f/11, and open shade near f/8. Subtract from there to the aperture you want and the difference is your ND strength in stops: f/2.8 in bright sun is six stops and therefore ND64, f/2.8 under light cloud is five stops and ND32, f/2.8 under full overcast is four stops and ND16, and f/2.8 in open shade is three stops and ND8. All of these are illustrative starting points rather than measurements, so meter the scene in front of you and adjust. Our manual mode field note covers reading the meter itself.
Shooting for slow motion without wrecking the exposure
Slow motion is the one place where you deliberately break out of your base rate, and it comes with an exposure consequence people forget until the clip is dark. Doubling the frame rate doubles the shutter speed under the 180 degree rule, and doubling the shutter speed halves the light. Going from 24 fps at 1/50 to 60 fps at 1/120 costs you roughly a stop; going to 120 fps at 1/240 costs roughly two.
If you are outdoors with an ND on, that is a non-problem: back the variable ND off by a stop, or swap ND64 for ND32, and every other setting stays exactly where it was. This is the underrated argument for a variable ND. It turns a frame rate change from an exposure crisis into a quarter turn of a ring. Indoors, where you have no ND to give back, the stop has to come from aperture or ISO, and since you are usually already wide open, it comes from ISO, which is why indoor slow motion is noisier than the shots around it.
Plan slow motion at capture rather than in the edit. Slowing a 24 fps clip down in software does not create frames that were never recorded, so the result either stutters or gets smoothed by interpolation that produces soft, rubbery artifacts around moving edges. If you know a moment should be slow, shoot that moment at a high rate and shoot everything around it at your base rate.
The watch-out is that high frame rate modes often come with quiet compromises, which vary by camera and are worth checking in your own menu rather than assuming: a crop, a lower resolution, no autofocus, or no audio recording. None of those are dealbreakers for a two second insert, and all of them are unpleasant surprises if you discover them on the timeline.
What changes when you move indoors
Indoors, the entire problem inverts. Outdoors you are fighting to get rid of light. Indoors you are fighting to find it, and the ND filter comes straight off. A bright room lit by large windows sits many stops below open sun, illustratively something like eight, and a dim room sits ten or more. At a locked 1/50 and f/2.8, that puts you around ISO 400 in the bright room and ISO 1600 or beyond in the dim one, which is precisely the situation where video’s smaller ISO headroom bites.
Your levers indoors, in order of preference, are more light, a faster lens, and then ISO. More light means opening curtains, moving your subject toward the window, or adding a light source, and it is always the best answer because it costs you no image quality at all. A faster lens buys a stop or two once, permanently. ISO is the last resort, and the honest framing is that a slightly noisy sharp clip is better than a clean one where you had to slow the shutter and break the motion rule.
The one thing you must not do indoors is fix the exposure with shutter speed, which is the reflex you brought from stills. Dropping from 1/50 to 1/25 to save a stop makes every movement in the frame smear, and it is immediately visible on anything but a completely static subject. If you find yourself reaching for the shutter, you have run out of light, and the answer is to add some rather than to spend the one setting video will not let you spend.
Flicker deserves a second mention here, because indoor light is where it appears. Under mains-powered lamps, shutter speeds that do not divide evenly into the supply frequency produce rolling bands. If you see them, move to 1/60 or 1/120 in a 60 hertz region, or 1/50 or 1/100 in a 50 hertz one, and accept the small deviation from the shutter rule as the cheaper problem.
Recording settings that bite you later
The settings covered so far all change how a shot looks. A second group changes whether you end up with a usable file, and they are easy to overlook because they never appear in the frame.
Resolution is the least important of them for most people. A well-exposed, well-focused, well-lit clip at a lower resolution beats a badly shot one at a higher resolution every time, and higher resolutions cost card space, battery, computer speed, and sometimes recording time. The genuine argument for shooting at a higher resolution than you deliver is reframing: it lets you crop or punch in during the edit without softening the delivered image. Decide whether you want that flexibility before you fill a card with files your computer struggles to play.
Card speed is the one that actually stops a shoot. Video writes a continuous stream rather than short bursts, so a card that is perfectly happy with stills can fail partway through a take. Match the card to the write speed your recording mode asks for, which the camera’s manual states, and keep more capacity than you think you need, because video eats it several times faster than photography does.
The rest is housekeeping that becomes muscle memory: bring more batteries than seems reasonable, since continuous recording drains them far faster than stills; be aware that long takes in demanding modes can heat a body up enough to stop recording, and that giving it a break between setups helps; and check whether your camera has a clip length limit before you rely on one unbroken thirty minute take. None of these are settings so much as habits, and all of them have ended a shoot for someone.
The stills habits that work against you in video
It is worth naming the specific reflexes that transfer badly, because knowing the rule is not the same as unlearning the instinct. A stills photographer walking into video carries five habits that quietly cause most of the trouble.
The first is reaching for shutter speed to fix brightness. This is so automatic that people do it while reciting the 180 degree rule, and then wonder why one clip in ten looks stuttery. The second is trusting auto white balance because RAW made it free. Video files are usually processed at capture, so a drift mid-take is baked in. The third is shooting wide open by default. Shallow depth of field is harder to hold in video, because subjects move within a focus plane that a still frame would have caught cleanly, and f/4 with the subject sharp beats f/1.8 with the subject soft.
The fourth is judging exposure from the screen. In stills, the histogram is the honest tool and the screen lies about brightness. In video the same is true, with the addition of highlight tools like zebras, which show you exactly which parts of the frame are clipping while you are still able to do something about it. The fifth is ignoring sound entirely, which is not a bad habit so much as an absent one, since stills never required it.
None of these are hard to fix once named. They are simply the places where a skilled photographer will make mistakes that a complete beginner would not, because the beginner has no reflex to override.
A worked example: one clip from setup to card
Here is one realistic scene run end to end with illustrative numbers, so the sequence is concrete. The scene is a two minute interview with a friend seated on a bench in a park, mid afternoon, bright sun, with a tree-lined path receding behind them that you want soft so the frame reads as portrait rather than snapshot.
Frame rate. You want the piece to feel filmic rather than broadcast, so you pick 24 fps as the base rate, and you decide up front to grab two or three inserts at 60 fps for slow motion cutaways. Shutter. Doubling 24 gives 1/48, and your camera offers 1/50 as the nearest value, so you set 1/50 and stop thinking about it. Exposure. You want f/2.8 for the soft path behind the bench, and ISO sits at its base of 100. Sunny 16 puts this light near f/16 at 1/100, and your slower 1/50 shutter adds a stop, so the scene meters near f/22. From f/22 to f/2.8 is six stops. ND. Six stops means ND64, or a variable ND set near its six stop mark. On goes the filter, and the exposure lands at f/2.8, 1/50, ISO 100.
White balance. You hold a gray card in the same sunlight your friend is sitting in, run the camera’s custom white balance measurement, and lock it, so a passing red jacket cannot shift the wall of green behind them. Picture profile. You know you are cutting this quickly and not grading it, so you choose a neutral standard profile with contrast and sharpening pulled down one notch rather than a log curve you would not use. Focus. Your subject is seated and static, so you magnify the screen, focus manually on the near eye until peaking lights up the lashes, zoom back out, and leave the ring alone.
Audio. A shotgun microphone goes in the shoe with a furry windshield, automatic level control goes off, and you set the gain by hand while your friend talks at their real volume, watching the loudest moments stay well below the top of the meter. Headphones on, you catch a distant lawnmower and wait ninety seconds for it to pass. Stabilization. Tripod, fluid head, legs leveled, in-body stabilization switched off because the camera is already still.
The slow motion inserts. For the cutaways you switch to 60 fps, which takes the shutter to 1/120 and costs about one stop of light. You back the variable ND off by a stop, from roughly six stops to five, and nothing else changes: still f/2.8, still ISO 100. Those clips will play 2.5 times slower on the 24 fps timeline. Before you roll. Thirty seconds of room tone, a check that the card has space and the battery is fresh, and one ten second test clip played back to confirm the audio actually recorded. Then you shoot. Price the ND filter and the microphone in the upgrade budget planner if you are still assembling the kit.
Common mistakes to avoid
Most disappointing first attempts at video fail in one of a handful of predictable ways, and every one of them is a settings decision rather than a gear limitation:
- Leaving shutter speed on a stills value. A 1/1000 shutter at 24 fps gives you a 9 degree shutter angle and footage that judders on every pan. Set shutter from frame rate, every time, before you shoot anything.
- Shooting daylight without an ND filter. Without one you either stop down to f/16 and lose the look you bought the lens for, or you break the shutter rule to get exposure. Both are visible, and the filter costs less than either compromise.
- Leaving white balance and ISO on automatic. Both can drift mid-take, and a clip whose color or brightness changes for no reason is far harder to repair than one that is simply set wrong from the start.
- Choosing a log profile with no plan to grade. You trade a good-looking file for latitude you will not spend, then fight to put back the contrast the camera would have applied better.
- Ignoring audio until the edit. No editing software adds a microphone that was not there. Sound is where an audience decides whether something is amateur, and it decides fast.
- Shooting everything at 60 fps because it looks smooth. If you play 60 fps back at 60 fps you have not made slow motion, you have made a base rate most viewers associate with home video, and you have paid for it in file size.
- Walking while relying on in-body stabilization. It was built to hold a static frame, and asking it to smooth a walk produces the floating, drifting look that is the visual signature of a first-time video shooter.
Troubleshooting the shots that go wrong
What if your footage looks jittery on pans? Check the shutter first, because a shutter far faster than double the frame rate is the usual cause, and the fix is to slow it to the 180 degree value and add ND to compensate. If the shutter is right, the pan itself may simply be too fast for the frame rate, since 24 fps has a limit to how quickly it can carry detail across the frame before it strobes. Slow the move down or shoot the same move at 30 fps.
What if there are rolling bands across an indoor shot? That is mains flicker, and the fix is a shutter speed matched to the local supply frequency: 1/60 or 1/120 in a 60 hertz region, 1/50 or 1/100 in a 50 hertz one. Some cameras also have an anti-flicker or flicker-reduction setting that finds a compatible value for you.
What if vertical lines lean over during a fast pan or a handheld shot? That is rolling shutter, caused by the sensor reading out from top to bottom rather than all at once, so the bottom of the frame is captured fractions of a second after the top. There is no setting that removes it. Pan more slowly, avoid whip pans, and brace the camera, since the effect scales with how fast the frame is moving.
What if autofocus keeps hunting mid-take? Slow the transition speed and tracking sensitivity down, switch to face or eye detection so the camera has a specific target rather than a general one, or simply take focus manual for that shot. A locked-off interview does not need continuous autofocus at all, and turning it off removes an entire category of ruined take.
What if your clips look flat and gray straight out of the camera? You are almost certainly in a log or flat picture profile. Either commit to grading them or switch to a standard profile. What if they look noisy in the shadows instead? You are probably underexposed at a high ISO, and the fix is more light rather than more sensitivity, because raising ISO in the edit and raising it in the camera both amplify the same missing information.
Your video settings checklist
Save this and run it before every shoot. It takes about two minutes once the settings live in your muscle memory:
- Pick the base frame rate for the project (24 or 25 for film, 30 for clean) and stay on it for every normal-speed shot.
- Set shutter speed to roughly double the frame rate, taking the nearest value your camera offers, and do not touch it again for exposure.
- Set ISO manually at or near base, and switch auto ISO off so brightness cannot drift mid-take.
- Choose your aperture for the look you want, not for brightness, and keep it consistent across shots in the same scene.
- Add ND until the exposure is correct at that aperture, roughly six stops in bright sun at f/2.8 and 1/50, less as the light drops.
- Set white balance by hand, ideally measured off a neutral card in the actual light, and never leave it on automatic for a take that matters.
- Pick a picture profile that matches your real workflow: log only if you will grade, standard with contrast eased off if you will not.
- Decide focus per shot: continuous with slow transitions for moving subjects, manual with peaking for anything locked off.
- Fit an external microphone, turn automatic level control off, set gain by hand with real headroom, and monitor on headphones.
- Put the camera on a fluid head for static and panning shots, brace it against something solid handheld, and turn stabilization off on a tripod.
- Record thirty seconds of room tone at every location, then shoot a ten second test clip and play it back with sound before the real take.
The bottom line
Shooting video on a stills camera is not a different craft so much as the same craft with one setting confiscated. Shutter speed, which you spend freely in photography, is locked to your frame rate at roughly double it, because that ratio is what makes motion look normal, and once you accept that constraint everything else about video settings falls into place as a consequence. Pick the frame rate first for the motion you want, take the shutter that follows from it, and then handle exposure with the tools you have left: aperture for the look, ISO kept low, and an ND filter doing the work outdoors that shutter used to do. Set white balance by hand so it cannot drift, pick a picture profile that matches whether you will really grade, choose focus deliberately per shot rather than inheriting a stills reflex, record audio you have actually listened to, and give the camera something steady to sit on or brace against.
None of that requires a video camera, a cinema lens, or a rig. The body you already own almost certainly shoots better video than you are currently getting out of it, and the gap is nine settings and a piece of dark glass. The two purchases worth making first are an ND filter and a microphone, in that order, because they solve the two problems that no amount of technique works around. If you are weighing those against other upgrades, our camera upgrade field note argues the general case for spending on what limits you rather than on what tempts you, and you can price the whole list in the upgrade budget planner. Lock the shutter to the frame rate, put the ND on, and go shoot something.
This field note explains a shooting workflow and names no camera, lens, filter, or microphone, because no brand paid for a mention and the settings here work across every system. Frame rates, shutter values, ND strengths, and ISO figures are illustrative starting points drawn from standard practice rather than measurements of any particular body, so the light in front of you and your own meter decide the final numbers. Menu names and available options differ between manufacturers, and features such as flicker reduction, recording limits, and high frame rate compromises vary by model, so check your own camera’s documentation rather than assuming a setting exists. Treat everything here as a place to begin and let the footage on your screen be the judge.
Frequently asked questions
What camera settings should I use for video?
Set the frame rate first, because everything else follows from it: 24 frames per second for a filmic look, 30 for a cleaner broadcast look, 60 or higher only when you plan to slow the clip down later. Then set your shutter speed to roughly double the frame rate, which is the 180 degree shutter rule, so 1/48 or 1/50 at 24 fps and 1/60 at 30 fps. That leaves aperture and ISO to handle exposure, with an ND filter doing the heavy lifting outdoors. Finish with a manual white balance, a picture profile you will actually use, deliberate focus, monitored audio, and something steady to shoot from.
Why can I not just use the same settings I use for photos?
In stills, shutter speed is one of three settings you spend freely, and a fast shutter is usually a good thing because it freezes motion. In video, shutter speed is spoken for: it has to stay near double the frame rate or the motion stops looking natural, either stuttering because the shutter is too fast or smearing because it is too slow. That takes one of your three exposure controls off the table and leaves you with aperture and ISO, which is why an ND filter becomes essential outdoors. Almost every strange thing about video exposure traces back to that one locked setting.
Do I really need an ND filter to shoot video?
Outdoors in daylight, close to it. At 24 fps your shutter sits around 1/50, and at base ISO in bright sun that combination meters near f/22, which means shooting at f/2.8 for a blurred background would be about six stops overexposed. An ND filter is the only tool that removes light without touching frame rate, shutter, or aperture, so it is what lets you keep both the shutter rule and the aperture you want. Indoors you rarely need one, because the light is already many stops down and the problem flips to needing more light rather than less.
What frame rate should I shoot at?
Pick your base rate for how you want normal motion to look, then treat higher rates as a separate tool for slow motion. Twenty four frames per second is the traditional cinema rate and carries a slight, familiar strobe that most people read as filmic. Thirty frames per second looks a little smoother and cleaner, which suits interviews, tutorials, and anything broadcast-adjacent, and regions on 50 hertz power often use 25 instead. Shoot 60 or 120 only for clips you intend to slow down, because on a 24 fps timeline they play back 2.5 and 5 times slower respectively.
Should I shoot in a flat or log picture profile?
Only if you are genuinely going to color grade the footage, and only if you are willing to expose it carefully. A flat or log profile trades contrast and saturation at capture for more room to push the image later, which is a real benefit when you grade. If you are not grading, that same profile hands you dull, low-contrast clips that need work before they look like anything, and pushing contrast back into an underexposed log file can bring noise and banding with it. A neutral standard profile with contrast and sharpening nudged down is the honest choice for most people.
Should I use autofocus or manual focus for video?
It depends on whether the subject and the distance are changing. Continuous autofocus with face or subject detection is genuinely good on many modern cameras and is the right call for a moving subject or a solo shooter who cannot ride focus. Manual focus with peaking is the safer answer for a locked-off shot, a static interview, or any scene where the camera might grab the wrong thing partway through the take, because an autofocus hunt in the middle of an otherwise perfect clip is unfixable. If you do use autofocus, slow its transition speed down so refocusing looks like a decision rather than a twitch.
Why does my footage look shaky even with stabilization turned on?
In-body and lens stabilization are designed to hold a mostly static frame steady, so they excel handheld standing still and struggle when you walk. Walking gives them a slow, repeating motion to fight, and the result is often a floating, drifting look with edges that seem to wobble, sometimes called a warping or jello effect. The fixes are mechanical rather than electronic: shoot wider, hold the camera closer to your body with elbows tucked in, walk with soft knees, or use a gimbal for moving shots. On a tripod, turning stabilization off usually gives a cleaner locked frame.
What should I set my audio levels to?
Take the camera off automatic level control and set levels by hand so the loudest moments peak comfortably below the top of the meter, with a commonly used target being average dialogue sitting around the middle of the scale and peaks staying well short of clipping. Digital audio does not distort gracefully: once a peak hits the ceiling the information is simply gone, so leaving headroom matters more than getting a strong signal. Monitor with headphones from the start, because you cannot fix a hum, a rustle, or a wind blast you never heard. Record a few seconds of room tone at every location as insurance for the edit.