What's on this page
- What actually goes in a lighting kit
- Continuous light vs strobe: how they differ
- When continuous light is the better choice
- When strobe or flash is the better choice
- Softboxes vs umbrellas: how a modifier changes the light
- Shoot-through vs reflective umbrellas
- Softbox shapes and sizes, and what each does
- Key light: the light that does the work
- Fill light: how much shadow you keep
- Rim and hair light: separating a subject from the background
- One light, two lights, or three: choosing a setup size
- Stands, clamps, and booms: the unglamorous half of the budget
- Triggers and sync: getting light and camera talking
- Power: battery packs versus wall power
- Color temperature and mixing light sources
- Budget tiers: starter, mid, and advanced kits
- A worked example: pricing a two light portrait kit
- Where a lighting kit fits in your overall gear budget
- Renting or borrowing before you buy
- Common mistakes when buying a lighting kit
- Your lighting kit buying checklist
- The bottom line
Short answer: A photography lighting kit is a light, a modifier, and a stand, and in that order of importance. Choose continuous light if you shoot mostly stills or video in a controllable space and want to see the result before you shoot; choose strobe or flash if you need to freeze motion or overpower bright rooms. A softbox controls spill and rewards careful aim; an umbrella is cheaper and faster and fills a room. Start with one key light, add fill second, and treat a rim light as a finishing touch rather than a requirement.
Most photographers buy a lighting kit backwards. They price out two or three lights, a matching pair of softboxes, and a set of stands before they have ever placed a single light and watched what direction alone does to a face or a product on a table. Then the kit sits half used, because the photographer never learned what one light does before adding a second, and the money that would have bought a properly sized single setup is spread thin across pieces that do not get used together.
This buyer’s guide works through a lighting kit the other way around: continuous light against strobe and flash, softboxes against umbrellas, what a key, a fill, and a rim light each actually do, and what a starter, a mid tier, and an advanced kit cost when priced honestly rather than aspirationally. This site already has a full walkthrough on using an external flash once you own one, and this piece is the step before that, deciding what to buy and why. If you are unsure how exposure works before you add a light to the mix, our exposure triangle field note covers the ground this field note assumes.
Key takeaways
- A lighting kit is a light, a modifier, and a stand. Most beginners overspend on the light and underspend on the other two, which is backwards, since direction and softness come from the stand and the modifier.
- Continuous light lets you see the result before you shoot and doubles as video lighting; strobe and flash cost more effort to meter but deliver far more output for freezing motion or overpowering a bright room.
- A softbox controls where light goes and rewards careful aim; an umbrella is cheaper, faster, and spreads light more widely with less control. Neither is strictly better.
- Buy in order: one key light first, a fill second, a rim or hair light last. Each purchase teaches you something the previous one could not.
- Price the whole system, not the light alone. A light with no stand and no modifier is not a usable kit, and the upgrade budget planner helps price all three pieces together before you commit.
What actually goes in a lighting kit
The word kit oversells what is usually three separate purchases: a light, something to shape or soften that light, and something to hold it up. Skipping any one of the three leaves you with an unusable piece of equipment rather than a partial kit. A light with no stand has to be balanced on furniture or held by a second person. A light with no modifier is a small, hard source that produces the same harsh shadows a bare flash does. Neither failure is about the light’s quality; both are about the two pieces most beginners forget to budget for.
The light itself is the part manufacturers market hardest, and it is the least important of the three decisions in terms of how your photographs actually look. A modest light, correctly modified and correctly positioned, consistently outperforms an expensive light aimed straight at a subject from the camera position, because direction and source size do more visible work than raw output or color accuracy specifications ever will.
The modifier is what turns a point source into something a face or a product can be photographed under comfortably. Bare bulbs and bare flash heads are small relative to most subjects, which makes them optically hard, producing sharp-edged shadows. Everything a modifier does, whether it is an umbrella, a softbox, or a simple diffusion panel, works by making the effective source larger, which softens those shadow edges.
The stand, and the clamps or booms that go with it, is the piece nobody photographs enthusiastically online and everybody eventually wishes they had spent more on. A light that wobbles, tips, or cannot hold its angle under a modifier’s weight costs you shots and occasionally costs you the light itself when it falls. Budget for it as a real line item rather than an afterthought.
Continuous light vs strobe: how they differ
Continuous light stays on for as long as it is switched on, the same way a lamp or the sun does. You see the exact shadows, color, and brightness the camera will record before you press the shutter, which is the single biggest advantage of the category: there is no meter to trust and no test frame required, since your eye is the meter. Continuous lights also work identically for photo and video, because a video clip simply records what is already there.
Strobe and flash units fire a single brief, powerful burst timed to the shutter. Because the burst is so short, a flash can freeze motion that would blur under any continuous source, and because the burst is so bright, a flash can overpower daylight streaming through a window, something a continuous light of the same physical size usually cannot manage. The cost of that power is that you cannot see the lit result with your eye; you either trust a light meter, trust the camera’s automatic metering, or review a test frame and adjust.
Price and size cut in continuous light’s favor at the entry level. An illustrative modest continuous LED panel commonly runs less than a comparable flash once you add the flash’s trigger, and continuous panels are typically simpler electronics with fewer failure points. Flash and strobe pull ahead once output matters, since a small flash unit can produce far more usable light than a continuous panel of similar size and price, which is why most working portrait and product photographers eventually own flash or strobe even if they started on continuous.
When continuous light is the better choice
Continuous light suits still subjects that hold a pose or a position: product shots on a table, food, flat lay work, and portraits where the subject is comfortable staying put while you adjust. Because you see the light before you commit to a frame, continuous is genuinely faster to learn on, and the feedback loop of moving a light and immediately seeing the shadow move is worth more to a beginner than any amount of reading about it.
Video is the other clear case. If any meaningful share of your work is video, whether that is talking head content, product demos, or short clips alongside stills, a continuous light is not optional the way it is for photography; flash cannot light video at all, since it fires once per still frame rather than staying on. A single continuous kit that covers both formats is usually a better first purchase than a flash kit that only covers one.
Continuous light also suits small rooms and modest budgets where the light does not need to fight strong ambient brightness. In a dim room or at night, even a comparatively affordable continuous panel produces visible, usable light, and the low light field note on this site covers the camera settings that pair well with a continuous source once it is in place.
When strobe or flash is the better choice
Flash and strobe win once you need to freeze motion, since the burst duration of even an affordable flash is short enough to stop a hand gesture, a pet’s head turn, or fabric mid movement that a continuous light would render as a soft blur at any shutter speed a room’s ambient brightness allows. Anyone photographing people who move, children, pets, or fast hand work benefits from this far more than the specification sheet suggests.
Flash also wins when you need to overpower bright ambient light, most commonly a window streaming daylight into a room. A continuous light of modest size and price usually cannot compete with direct sun without an unreasonably long exposure or a very high ISO; a flash, fired at a meaningful fraction of its power, routinely can, which is why event and wedding photographers lean on flash even outdoors in daylight.
The learning curve is real but shorter than it looks. Flash use is a small, repeatable set of decisions rather than a mysterious skill, and if you already own or are considering a flash, our external flash walkthrough turns those decisions into eight concrete steps you can practice in an evening.
Softboxes vs umbrellas: how a modifier changes the light
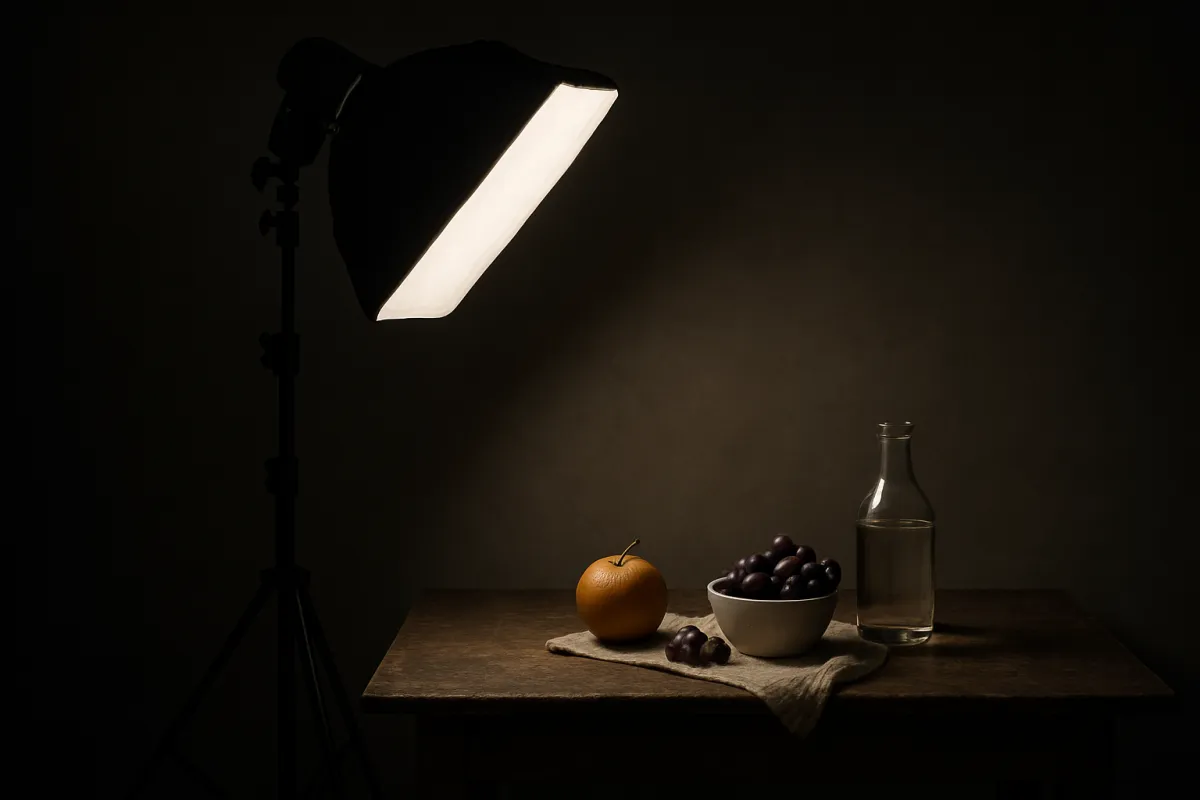
A softbox is an enclosed fabric box, usually with reflective interior walls and one or two layers of diffusion fabric across the front, mounted directly on the light. Because the box contains the light on three sides and only releases it through the front panel, a softbox produces a directional, relatively contained beam of soft light. You aim a softbox the way you aim a flashlight, and light mostly goes where you point it.
An umbrella is an open frame, either reflective on the inside with the light bounced back out the front, or translucent with the light shot straight through it. Because there is nothing containing the sides, an umbrella throws light in a wide cone, filling a room far more than a softbox of similar size would. That spread is genuinely useful for lighting a group, an event space, or a scene where you want fill everywhere, and it is genuinely unhelpful when you are trying to keep light off a background or out of a lens, where it can cause flare.
Cost and setup time favor umbrellas. A basic umbrella clips onto a bracket and pops open in seconds, and umbrellas are consistently the cheapest way to meaningfully soften a light. Softboxes take longer to assemble, since the internal rods usually need fitting before the front panel attaches, and they cost more for an equivalent size. The trade you are making is speed and price against control.
Shoot-through vs reflective umbrellas
Within umbrellas there is a second choice that matters more than the marketing suggests. A shoot-through umbrella is translucent white; the light passes straight through the fabric on its way to the subject, and the umbrella sits between the light and the subject, close to the light itself. A reflective umbrella is opaque, usually silver or white on the inside; the light fires into the back of the umbrella, bounces forward, and the umbrella sits behind the light, facing the subject.
Shoot-through umbrellas produce a slightly softer, more spread result and are more forgiving of imprecise light placement, but they lose more light to spill in every direction, including back toward the camera, which can cause flare if the umbrella sits close to your lens axis. Reflective umbrellas throw more of their output toward the subject rather than around the room, giving you a bit more usable power for the same input, at the cost of a marginally more contained, slightly harder result than a shoot-through of the same size.
Neither difference is large enough to agonize over for a first purchase. A reflective silver umbrella is the more common recommendation for a single starter light, since it wastes less of a modest light’s output, but a shoot-through is perfectly usable and often what a starter kit bundle includes by default.
Softbox shapes and sizes, and what each does
Softboxes come in a handful of common shapes, and the shape changes the character of the light more than most beginners expect. A rectangular or square softbox is the general purpose choice, producing an even, fairly neutral soft light suited to portraits and product work alike. A strip softbox, narrow and tall or narrow and wide, produces a thin band of light that is a common choice for rim and edge lighting, or for lighting a narrow subject like a bottle or a standing product without spilling light everywhere else.
An octagonal, or octabox, softbox produces a round catchlight in a subject’s eyes that many portrait photographers consider more flattering than the rectangular catchlight a square softbox leaves, though the difference is subtle enough that it rarely justifies buying a second modifier on its own. Size matters more than shape for softness: a larger softbox relative to your subject always produces a softer result than a smaller one at the same distance, regardless of which shape it is.
For a first softbox, a mid sized rectangular or square option is the sensible general purpose buy, since it handles portraits, small products, and flat lay work reasonably well without the narrower use case of a strip box or the added bulk and price of a large octabox.
Key light: the light that does the work
The key light is whichever light in your setup contributes the most brightness and defines the primary shadow direction in the photograph. In a one light setup, the key is the only light, and everything about the image’s mood and shape comes from where you place it. Positioned roughly forty five degrees to one side and slightly above your subject, a key light produces the classic, widely flattering portrait look, giving a face clear shape without hiding either side of it in shadow.
Move the key light more directly in line with the camera and the light flattens, reducing shadow and texture, which suits some product photography where you want detail visible everywhere rather than dramatic. Move it further to the side, toward ninety degrees, and shadow deepens dramatically, which suits moodier portrait work or texture heavy subjects like food or fabric where you want the surface to read clearly.
A single, well positioned key light is a complete lighting setup, not a compromise. Many professional portraits are lit with exactly one light and a reflector, and understanding what your key light alone can do before adding a second light is the fastest way to avoid a kit that has three lights fighting each other rather than working together.
Fill light: how much shadow you keep
A fill light does not add a new direction to a photograph; it raises the brightness of the shadow side that the key light already created, controlling how deep that shadow reads rather than removing it entirely. A fill light set much dimmer than the key preserves strong shape and mood; a fill set close to the key’s brightness flattens the image toward even, low contrast lighting.
The cheapest fill light is not a light at all. A plain white or silver reflector, positioned opposite the key to bounce some of its own output back into the shadow side, works as genuine fill and costs a fraction of a second lighting unit. Many photographers run an entire portrait or product setup on one light and one reflector for exactly this reason, saving the second powered light for when a reflector’s limited, ambient level of fill genuinely is not enough.
When a second light does become worth adding, keep it noticeably dimmer than the key rather than matching it, since a fill light that overtakes the key stops being a fill and starts fighting the key for the role of primary light source, producing a flat, directionless result that undoes the shape the key was creating.
Rim and hair light: separating a subject from the background
A rim, hair, or kicker light sits behind the subject, usually aimed back toward the camera, and its job is narrow: put a thin edge of brightness along hair, shoulders, or an object’s outline so the subject separates cleanly from whatever is behind it. Against a dark background in particular, a subject with dark hair or dark clothing can visually merge into it without a rim light; a thin bright edge fixes that in a way no amount of key or fill adjustment can.
Because a rim light points roughly back at the camera, it is the light most prone to causing lens flare, so a small flag, a piece of card, or careful framing to keep the light itself just out of frame is standard practice alongside it. A strip softbox is a common modifier choice for a rim light, since its narrow shape controls spill well in a role where you specifically do not want the light spreading forward onto the subject’s face.
Rim light is the purchase to make last, after you can already produce a complete, well shaped image with key and fill alone. It is a polish step, and a badly placed rim light, one that spills onto the face or blows out an edge, is more distracting than simply not having one.
One light, two lights, or three: choosing a setup size
A one light setup, key only, is the correct starting point for nearly everyone, not a compromise you graduate out of. It is the cheapest configuration, the fastest to learn, and genuinely sufficient for a large share of portrait, product, and small scene photography. Add a plain reflector for fill and a one light kit becomes remarkably capable for the price of a single light, a stand, and a modifier.
A two light setup, key and fill, is the natural second step once you have a specific reason to want it: shadows deeper than you want and a reflector that cannot reach the angle you need, or repeatable work like product photography where consistent, controllable fill matters more than the flexibility of moving a reflector by hand each time. Two lights roughly doubles the light and stand budget compared with one, which is worth confirming you actually need before buying.
A three light setup, key, fill, and rim, is the complete classic configuration and the one most tutorials illustrate, but it is also the setup most beginners buy prematurely. Three lights means three stands, three power sources to manage, and considerably more setup and breakdown time for every session. Reach for three lights once you can articulate exactly what the third light is doing that the first two cannot, not because three is the number every guide shows.
Stands, clamps, and booms: the unglamorous half of the budget
A light stand needs to do two unglamorous things reliably: hold your light at the height and angle you set it, and not fall over while doing so, especially once a softbox or umbrella is attached and catching any passing air movement like a sail. Basic stands are light, inexpensive, and perfectly usable indoors in a controlled space with no draft and no risk of being bumped.
Heavier duty stands, and a sandbag hung on the base of any stand, matter more than their unglamorous reputation suggests once a modifier is attached, since a softbox or umbrella dramatically increases how much surface area is catching air, turning a stable bare light stand into a genuine tip hazard. A sandbag is one of the cheapest items in this entire guide and one of the few that protects the rest of the kit from a single accident.
Booms, which let a light extend out and over a subject from a stand positioned off to the side, solve the specific problem of wanting light from directly overhead without a stand’s legs being in the shot or in your way. They are a later purchase for most beginners, useful once you know you want overhead lighting regularly rather than bought on the assumption you might.
Triggers and sync: getting light and camera talking
Continuous lights need no trigger at all; you switch them on and they are simply present in the room, exactly as visible to the camera as any other light source. Flash and strobe units need a way to know when to fire, synced to the instant your shutter opens, and how that connection happens is a real line item in the budget that beginners frequently miss when pricing a first flash based kit.
A cable running from the camera’s hot shoe to the light is the simplest and cheapest connection where it is supported, but it tethers you to a few feet of cord, which is awkward the moment the light is not right next to the camera. Radio triggers, a small transmitter on the camera and a receiver on or built into each light, are the standard solution for off camera flash and strobe work, function through walls and across a room reliably, and are worth budgeting for from the start rather than treating as an optional accessory.
Some lights include a built in wireless receiver, and some cameras include a built in commander that can control a compatible flash without any extra hardware at all. Before adding a trigger to your budget, check whether the light and camera you already own or are considering can already talk to each other, since this is one of the most commonly duplicated purchases in a first kit.
Power: battery packs versus wall power
Lighting gear draws power from one of two places, and the choice affects where you can shoot far more than most spec sheets suggest. Wall powered lights plug into an outlet and, as long as one is within cable reach, never run out mid session, which suits a fixed studio corner or a home setup where the light lives in one spot.
Battery powered lights, increasingly common on both continuous panels and flash units, free you to shoot anywhere an outlet is not, a spare room, a client’s home, an outdoor location, at the cost of a battery that depletes with use and needs charging or spare cells on hand. Flash units in particular draw heavily from batteries, since each burst spends stored energy quickly, and a unit run near full power repeatedly will drain noticeably faster than one used at lower, more typical power settings.
If your shooting happens in one consistent space, wall power is simpler and removes battery management from your workflow entirely. If you shoot in varied locations, a client’s space, outdoors, or anywhere you cannot guarantee an outlet, battery power is not a convenience but a requirement, and it is worth confirming a light’s battery option before buying rather than discovering the limitation on location.
Color temperature and mixing light sources
Every light source has a color temperature, a warmth or coolness to its output, and a photograph looks correct when your camera’s white balance matches the dominant source, or when every source in the frame shares a similar color. Daylight and most flash units sit at a similar, comparatively cool color temperature by design, which is why flash is often described as daylight balanced. Ordinary household bulbs commonly run considerably warmer.
Trouble starts when two differently colored sources land in the same frame: a cool flash on your subject against a room lit by warm bulbs produces a subject and a background that visibly disagree in color, a problem no single white balance setting can fully correct after the fact. Our white balance field note covers what a camera’s white balance setting can and cannot fix once a file is already shot.
Gels, thin colored sheets placed over a light, are the standard fix: a warm gel over a cool flash shifts its output to match warm household bulbs, letting the whole frame share one honest white balance. Continuous LED panels sidestep much of this problem, since many offer an adjustable color temperature dial that lets you match the room directly rather than correcting for a mismatch afterward, which is a genuine, underrated advantage of the category for anyone shooting in rooms with fixed, warm household lighting.
Budget tiers: starter, mid, and advanced kits
Pricing a lighting kit honestly means pricing the light, the modifier, and the stand together, not the light alone, since a light with neither is not usable. As illustrative, typical figures rather than exact prices for any specific product, a starter single light setup, one continuous panel or entry level flash, one umbrella, and one basic stand, commonly totals somewhere under $150. That single light setup is genuinely sufficient for a large share of portrait, product, and small scene photography.
A mid tier kit, typically a two light setup with a key and a fill, better stands, and at least one softbox rather than an umbrella alone, commonly lands in an illustrative $250 to $450 range depending on the light type chosen. This is the tier where the difference between continuous, flash, and strobe pricing starts to matter, since strobes generally sit at the top of that range and continuous panels nearer the bottom.
An advanced three light kit, key, fill, and rim, with softboxes throughout, sturdier stands with sandbags, and a proper trigger system, commonly runs past an illustrative $500 and climbs from there depending on light quality and modifier size. Use the companion above to price your own combination of light count, light type, modifier, and stand quality rather than treating any of these bands as a fixed number, since the specific units and modifiers you choose move the total meaningfully within each tier.
Typical cost per light, before modifiers, illustrative
Illustrative typical figures for a single light unit only, not a full kit and not a specific product's price. Add your chosen modifier and stand on top of each.
These are the light unit alone. A modifier and a stand add to every bar here before you have a usable kit, which is exactly what the worked example below prices out in full.
A worked example: pricing a two light portrait kit
Theory into a real number. Say you want a key and fill setup, two lights, for portrait work at home. You choose a speedlight with a trigger for each light, an illustrative $81 per light, because you occasionally want to freeze a subject’s movement and you may eventually shoot outdoors against daylight. You choose a softbox over an umbrella for better control in a small room, an illustrative $45 per light. You choose a basic stand for each, an illustrative $20 per light.
Per light, that totals $81 plus $45 plus $20, or $146 all in. For two lights, key and fill, the full kit totals $292. Broken down, the lights themselves are $162 of that, 55 percent of the budget. The softboxes together are $90, 31 percent. The stands together are $40, 14 percent, the smallest share and the one most beginners forget to budget for at all.
That $292 total sits comfortably inside the mid tier band above, and it buys a complete, usable two light setup rather than two lights with nothing to soften or hold them. Run your own combination, a different light type, an umbrella instead of a softbox, a third light for rim, through the companion above to see how each choice moves your own total before you commit to buying anything.
Where a two light softbox kit budget goes
Illustrative split of the $292 worked example above: two speedlights with triggers, two softboxes, two basic stands.
Modifiers and stands together are nearly half this budget. Pricing the light alone and forgetting these two lines is the most common lighting kit budgeting mistake.
Where a lighting kit fits in your overall gear budget
Lighting competes for money against lenses, bodies, and every other purchase on a photographer’s list, and it is worth being honest about where it belongs in that queue. Our upgrade sequencing field note argues that a basic lighting kit is one of the highest impact upgrades available for the price, often outperforming a body upgrade in how visibly it changes a photograph, and this field note’s tiers above back that claim with real numbers rather than a general assertion.
The reasoning holds up under scrutiny: a sharper lens or a cleaner sensor improves a badly lit photograph only marginally, since neither can add shape or control to flat, uncontrolled light. A basic lighting kit changes what the light itself does, which is a different category of improvement entirely, and it is available at a starter tier price well below most single lens upgrades.
That does not mean lighting should be the very first purchase for every photographer; someone shooting almost exclusively outdoors in daylight may get more immediate value from a lens or a tripod. It does mean lighting deserves a real line in the budget rather than being treated as an optional accessory bought after everything else, and the upgrade budget planner is built to weigh a lighting purchase against the rest of your gear list rather than in isolation.
Renting or borrowing before you buy
If you are genuinely unsure whether continuous or flash suits your work, or whether you will use a rim light enough to justify it, renting a kit for a single session is a legitimate way to answer that question before spending real money. Camera and lighting rental services exist in most cities and online, and a weekend rental of a complete two or three light kit typically costs a small fraction of buying the equivalent gear outright.
Borrowing serves the same purpose informally. A local camera club, a photography class, or a more experienced friend with lighting gear can often let you handle and test a light and a modifier for an afternoon, which teaches you more about whether you want a softbox or an umbrella than any amount of reading a specification sheet ever will.
The value of renting or borrowing first is not just cost avoidance; it is that lighting decisions are genuinely easier to make with a light in your hands than in the abstract. Someone who has physically set up a softbox once understands the assembly time and bulk in a way no description conveys, and that hands on knowledge changes what people actually choose to buy far more often than expected.
Common mistakes when buying a lighting kit
A handful of predictable mistakes account for most of the regretted lighting purchases photographers make, and knowing them in advance is the fastest way to avoid repeating them yourself:
- Buying the light and skipping the modifier. A light with no softbox or umbrella is a small hard source that produces the same harsh shadows a bare flash does, regardless of how much the light itself cost.
- Buying three lights before mastering one. A single well placed key light beats three lights fighting each other for attention, and it is also far faster to set up and break down.
- Underestimating the stand budget. A wobbling stand under a modifier is a genuine safety and equipment risk, not a minor inconvenience, and a sandbag is one of the cheapest, highest value items in this whole guide.
- Matching fill brightness to key brightness. A fill light set as bright as the key flattens the image and erases the shape the key was creating, undoing the point of adding it.
- Ignoring color temperature until it causes a problem. A cool flash mixed with warm household bulbs produces a visible color clash that is much easier to prevent with a gel than to fix afterward.
- Choosing continuous or flash based on price alone rather than use case. The right category depends on whether you shoot moving subjects and bright rooms, or still subjects and video, not on which option looked cheaper at first glance.
Your lighting kit buying checklist
Work down this list before adding anything to a cart:
- Decide continuous or flash based on what you actually shoot, moving subjects and bright rooms favor flash, still subjects and video favor continuous, not on price alone.
- Price the light, the modifier, and the stand together as one purchase, never the light in isolation.
- Start with one key light and a plain reflector for fill before buying a second powered light.
- Choose an umbrella for speed and budget, or a softbox for control and a more contained result, based on your space rather than habit.
- Confirm whether your light and camera can already talk wirelessly before adding a trigger to the budget.
- Add a sandbag for any stand carrying a modifier, one of the cheapest, highest value items available.
- Check a continuous light’s color temperature adjustment, or budget a gel for a flash, before mixing it with household bulbs.
- Save a rim or hair light for last, after key and fill alone already produce a complete, well shaped image.
- Rent or borrow a kit for one session first if you are genuinely unsure which category suits your work.
- Run the full combination through the companion above before buying, since modifiers and stands routinely add up to nearly half a real kit’s total cost.
The bottom line
A photography lighting kit is three purchases, not one: a light, a modifier, and a stand, and the two cheaper pieces matter as much as the light itself for how a photograph actually looks. Choose continuous light if you want to see your result before you shoot and your work includes video; choose flash or strobe if you need to freeze motion or overpower a bright room. Choose an umbrella for speed and a forgiving budget, or a softbox for a more contained, controllable result. Start with a single key light, add a reflector or a second light for fill once you can name a specific shadow problem it solves, and treat a rim light as the finishing touch it is rather than a starting requirement. Price the whole system together, since modifiers and stands routinely account for nearly half of a real kit’s total, and a light with neither is not a usable kit at all. Run your own combination through the upgrade budget planner before you buy, and let one properly modified, properly supported light teach you what it can do before a second light joins it.
This buyer’s guide describes categories of lighting equipment rather than specific products, which is why no brand or model appears anywhere in it. Every price above is an illustrative, typical figure meant to show how a light, a modifier, and a stand add up as a system, not a quoted price for any particular item, and real costs shift with the specific unit, retailer, and time you buy. Check current pricing and specifications directly with a retailer or manufacturer before purchasing, and let a rented or borrowed session, not this field note alone, make the final call on what your own work actually needs.
Frequently asked questions
Do I need continuous light or strobe for my first lighting kit?
Neither is universally better, and the honest answer depends on what you photograph. Continuous light stays on the whole time, so what you see with your eye is what the camera records, which makes it forgiving for beginners and doubles as video lighting. Strobe and flash fire only for a fraction of a second at much higher output, which lets you freeze motion and shoot at small apertures even in a bright room, but you have to trust a meter or a test frame rather than your eye. If you shoot mostly still subjects, portraits held in one pose, or video, start continuous. If you shoot moving subjects, need to overpower daylight, or want to work at low ISO with a closed aperture indoors, start with a flash or strobe. Plenty of working photographers eventually own both, because the two solve different problems rather than competing on quality.
What is the actual difference between a softbox and an umbrella?
Both are modifiers that turn a small hard light source into a larger, softer one, and both do it by making the effective source bigger relative to your subject. The difference is control over spill. A softbox is an enclosed box with a front diffusion panel, so the light it produces is directional, mostly forward, with relatively little escaping to the sides. An umbrella is open, so light bounces or shoots through it in a wide, largely uncontrolled spread that fills a room but is harder to keep off your background. Umbrellas are cheaper, faster to set up, and forgiving of imprecise aim. Softboxes cost more, take longer to attach, and reward precise positioning with a more controllable, contained result. Neither is strictly superior; a softbox suits controlled single-subject work, and an umbrella suits fast, room-filling setups like events.
How many lights do I actually need to start?
One. A single key light, used well, does more for a photograph than a second or third light used carelessly, and it is also the cheapest possible kit, which matters while you are still learning what a modifier and a stand cost to add. Fill light is the natural second purchase, because it controls how deep your shadows sit rather than adding a new kind of light, and a plain white reflector can often serve as a free fill before you buy a second unit. A rim or hair light is usually the third purchase and the one to skip longest, since it is a finishing touch rather than a structural part of the image. Buy in that order, key, then fill, then rim, and each purchase teaches you something the previous one could not before you spend on the next.
Do I need a dedicated trigger, or can I use my flash's built in wireless?
It depends entirely on what you already own. Many modern flashes and some continuous lights include a wireless receiver built in, and if yours does and your camera has a compatible commander mode or a compatible on camera transmitter, you may not need to buy anything extra. Older or budget units frequently lack that, in which case a small radio transmitter on the camera and a receiver on each light is the standard fix, and it works across brands as long as the receiver's voltage and connector match your light. Optical triggering, where one flash sets off another by light rather than radio, is the free fallback, but it struggles outdoors or across distance. Check what your existing gear already talks to before adding a trigger to the budget; it is the most commonly duplicated purchase in a first kit.
What is a rim or hair light and do I need one for a basic kit?
A rim light, sometimes called a hair light or a kicker, sits behind or to the side of the subject and points back toward the camera, catching the edge of hair, shoulders, or an outline and separating the subject from the background with a thin line of brightness. It is a refinement rather than a requirement. A photograph with only a key light, or a key and fill, is already a complete, well lit image; a rim light adds polish, particularly against a dark background where a subject can otherwise blend into it. Skip it in a starter kit and add it once you have exhausted what positioning your key and fill can do, because a badly placed rim light is more noticeable, and more distracting, than no rim light at all.
Can I build a usable lighting kit cheaply, or is that a false economy?
A modest, well chosen kit is not a false economy; a large, badly chosen one often is. The biggest lever on image quality is light direction and size, not price, so a single continuous panel or an entry level flash on a stand with a shoot-through umbrella will outperform an expensive light aimed straight at a subject from the camera position. Where cheap gear genuinely costs you is reliability under repeated use, color consistency between units, and features like fine power adjustment that make a kit faster to work with once you know what you are doing. A sensible approach is to buy the cheapest version of a complete one-light setup first, light, stand, and modifier together, then upgrade the individual piece that is actually limiting you once you can name it.
Do continuous lights work for both photography and video, or should I buy separate gear for each?
A single continuous light genuinely serves both, which is the strongest practical argument for choosing one over a flash if your work is mixed. Because the light stays on, exactly what you see is what a video clip and a still frame both record, so there is no separate metering step to learn for either format. The trade-off shows up in output: continuous lights are generally less powerful for their size and cost than a flash or strobe, so in a bright room or against strong daylight you may run out of usable brightness before a flash would. If most of your work is stills in a controllable space, a flash-based kit is usually the more capable buy per dollar; if video is a meaningful share of your output, a continuous kit avoids owning two lighting systems.
What should I prioritize if I can only buy one piece of lighting gear first?
The light itself, sized correctly, matters less than most beginners assume, and the modifier and the stand matter more. A bare bulb on a stand aimed through a cheap shoot-through umbrella and bounced with basic care will beat an expensive light fired directly at a subject. If forced to rank a first purchase, buy a light with a head that lets you angle and position it away from straight-on, since direction is the single biggest factor in how a photograph looks, then add a stand so the light is not held awkwardly or clamped to furniture, then add the cheapest usable modifier, an umbrella rather than a softbox, since it does most of the softening work for a fraction of the price. Save the softbox, the second light, and the rim light for once you understand what the first setup is missing.