What's on this page
- The short answer: who should shoot which
- What a raw file actually is
- What a jpeg actually is
- Bit depth: where the editing headroom comes from
- White balance: raw’s most forgiving trick
- Exposure recovery: highlights and shadows
- What jpeg does well, honestly
- File sizes and the storage arithmetic
- Burst shooting and buffer depth
- The workflow cost: raw needs developing
- Shooting raw plus jpeg together
- Compressed raw, HEIF, and the middle formats
- Raw on phones
- A worked example: one botched frame, two formats
- When jpeg is the smarter choice
- When raw earns its space
- Storage and backup habits for raw shooters
- Common raw versus jpeg mistakes
- How to switch to raw without regret
- The bottom line
Short answer: Shoot JPEG if you rarely edit, share straight from the camera, and value small files and zero friction. Shoot RAW if you edit your photos, shoot in difficult or mixed light, print large, or take frames you may care about for decades, because the RAW file keeps recoverable highlights and shadows, adjustable white balance, and thousands of brightness steps against JPEG's 256. RAW plus JPEG mode is the honest transition, paid for in storage.
Every digital camera makes the same quiet offer before you ever press the shutter: should it hand you a finished photograph, or the raw material one was made from? That is the entire raw versus jpeg question. A jpeg is a developed print, processed, compressed, and ready to share the second the shutter closes. A raw file is the negative: everything the sensor saw, held in suspension, waiting for you to decide what the picture should look like.
This field note walks the whole argument: what each format actually contains, where raw’s editing headroom comes from and how much of it you will really use, what jpeg honestly does better, the storage arithmetic, the middle paths like raw plus jpeg and compressed raw, and a worked rescue of a botched frame that shows the difference in practice. It builds on the exposure ideas in our exposure triangle field note, because the formats differ mostly in how much room they leave to correct an exposure after the fact.
Key takeaways
- A raw file is the sensor's unprocessed data, a negative to develop later; a jpeg is a finished, compressed picture with the camera's decisions baked in permanently.
- Raw's advantages are tonal depth: recoverable highlights and shadows, freely adjustable white balance, and thousands of brightness steps against jpeg's 256.
- Jpeg's advantages are real too: several times smaller files, zero required workflow, universal compatibility, deeper bursts, and instant sharing.
- Raw plus jpeg mode is the honest transition path: a shareable file today, a rescuable negative forever, paid for in storage.
- The format changes nothing about resolution or lens sharpness. It only decides who develops the photo, you or the camera, and how much can be corrected later.
The short answer: who should shoot which
If you want the conclusion before the mechanics: shoot jpeg if you rarely edit, share straight from the camera or phone, and value small files and zero friction; the format was built for exactly that life, and nothing in this field note should shame you out of it. Shoot raw if you edit your photos, shoot in difficult or mixed light, print large, or take frames you may care about for decades; the negative’s headroom is worth the workflow the moment any of those apply.
Most enthusiasts eventually land in one of two stable arrangements. The first is raw everywhere: every frame a negative, developed in batches, exported to jpeg for sharing, with storage bought accordingly. The second is situational: jpeg for casual days and family snapshots, raw switched on for trips, portraits sessions, golden hour, and anything unrepeatable. Both are defensible; what separates them is how much editing a person actually enjoys, not how serious a photographer they are.
The rest of this field note earns those recommendations. The differences between the formats are concrete and physical, not tribal, and once you see what each file actually contains, the choice for any given day of shooting tends to make itself.
What a raw file actually is
When the shutter closes, the sensor holds millions of brightness measurements, one per photosite, each recorded with fine precision, commonly twelve or fourteen bits per site, which means thousands of distinguishable levels between black and full brightness. A raw file is essentially that measurement dump, wrapped with metadata about the camera, lens, and settings, and stamped with the maker’s extension. It is not yet a picture: color has not been fully constructed, contrast has not been set, sharpening has not been applied, and white balance exists only as a note about what the camera would have chosen.
That unfinished state is the entire point. Every decision not yet made is a decision you can still make later, and make differently for every frame. The white balance is a suggestion you can override without penalty. The exposure brightness is a starting point with stops of headroom above and below. The color and contrast recipe is whatever you choose in software rather than whatever the camera committed to in the half-second after capture.
The cost of postponing decisions is that someone must eventually make them. A raw file needs software to interpret it, which is why one double-clicked on an unprepared machine may show nothing, or only the small preview jpeg embedded inside. Raw formats are also proprietary by maker, with an alphabet of extensions, though in practice every serious editor reads all the common ones. Think of the format as a commitment to develop your own photographs, with all the control and all the labor that phrase implies.
What a jpeg actually is
A jpeg from your camera is the product of a fast, opinionated darkroom that runs in the moments after capture. The camera takes the same sensor data described above and processes it completely: it constructs full color, applies a white balance, shapes the tones with a contrast curve, boosts saturation to taste, sharpens, reduces noise, and then compresses the result aggressively, discarding the fine tonal distinctions and high-frequency detail it judges the eye will not miss. What remains is written as a universal, finished image file a few times smaller than the raw would have been.
Two of those steps deserve emphasis because they are permanent. The tone curve flattens the sensor’s thousands of brightness levels into jpeg’s 256 per channel, and the compression discards data irreversibly: a jpeg cannot be un-decided back into the measurements it came from, which is why converting jpeg to raw is not a real operation. The camera also bakes its picture style into the file, the maker’s idea of pleasing color, chosen from menus like standard, vivid, or portrait before you shot.
None of this is a flaw; it is a design goal met. Jpeg is the most compatible image format on earth, readable by every device, browser, and printer made this century, and modern cameras produce genuinely excellent jpegs whose color science is a real part of why photographers choose one brand over another. The format’s bargain is stated plainly: the camera develops the photo now, well, and forever. Raw’s bargain is the opposite: nothing is decided until you decide it.
Bit depth: where the editing headroom comes from
The single number that explains most of raw’s advantage is bit depth. A jpeg stores eight bits per color channel, 256 brightness levels from black to white. A raw file stores twelve or fourteen bits, which is 4,096 or 16,384 levels across the same range. Both files can look identical on screen, because screens and eyes are happy with 256 well-chosen levels. The difference appears the moment you edit, because editing means stretching some part of the tonal range, and stretching reveals how much information was underneath.
Brighten a jpeg’s shadows by three stops and you are pulling a handful of stored levels apart to cover a wide range of output brightness; the result is banding, blotchy color, and amplified compression artifacts, the visual sound of data that is not there. The same pull on a raw file has hundreds of levels to work with in those same shadows, so the region brightens smoothly, as if the frame had been exposed better in the first place. The information was always in the sensor’s measurement; raw kept it, jpeg spent it.
This is also why the advantage is invisible when no editing happens. A perfectly exposed frame in easy light, shared as shot, gains nothing from the extra bits, and this is the honest core of the jpeg case: the headroom only matters if something needs correcting or interpreting. The further your shooting drifts toward difficult light, mistakes, and deliberate reinterpretation, the more often those extra thousands of levels convert from theory into rescued photographs.
White balance: raw’s most forgiving trick
White balance, the correction for the color of the light itself, is where raw’s postponed decisions feel most like magic. Light has color: shade runs blue, tungsten bulbs run orange, gym fluorescents run green, and the camera must counteract the cast so that white objects come out white, the whole system our white balance field note explains rung by rung. In a jpeg, the chosen correction is baked into every pixel; getting it badly wrong leaves a stubborn orange or blue cast that editing can reduce but rarely eliminates cleanly, because the correction distorts the already-compressed color data further.
In a raw file, white balance is metadata, a note riding alongside untouched measurements. Change it in software and nothing is being corrected at all: the file is simply developed as if the new setting had been dialed in at capture, with zero quality cost, as many times as you like. The frame shot on tungsten white balance in daylight, a mistake that ruins a jpeg, is a two-second slider move in raw. Mixed lighting, window light meeting lamplight at an indoor gathering, stops being a trap and becomes a taste decision made calmly on a large screen.
The practical consequence for raw shooters is a small, pleasant freedom: white balance stops being a setting worth worrying about in the field. Auto white balance, occasionally wrong in exactly the ways above, becomes perfectly acceptable, because wrong is now a temporary condition. Attention that would have gone to a menu goes back to the subject, which is the kind of quiet workflow benefit that never shows up in a spec comparison.
Exposure recovery: highlights and shadows
The second headline benefit is exposure latitude: how far a frame’s brightness can be corrected after capture before it falls apart. Raw files carry real recoverable range at both ends. Shadows lifted two or three stops on a modern sensor come up clean and detailed where a jpeg would show mud and banding. Highlights are the more precious direction: a sky that looks blown white in the preview often still holds cloud detail in the raw data, recoverable with a slider, while a jpeg’s clipped highlights are simply gone, overwritten with pure white at the moment of processing.
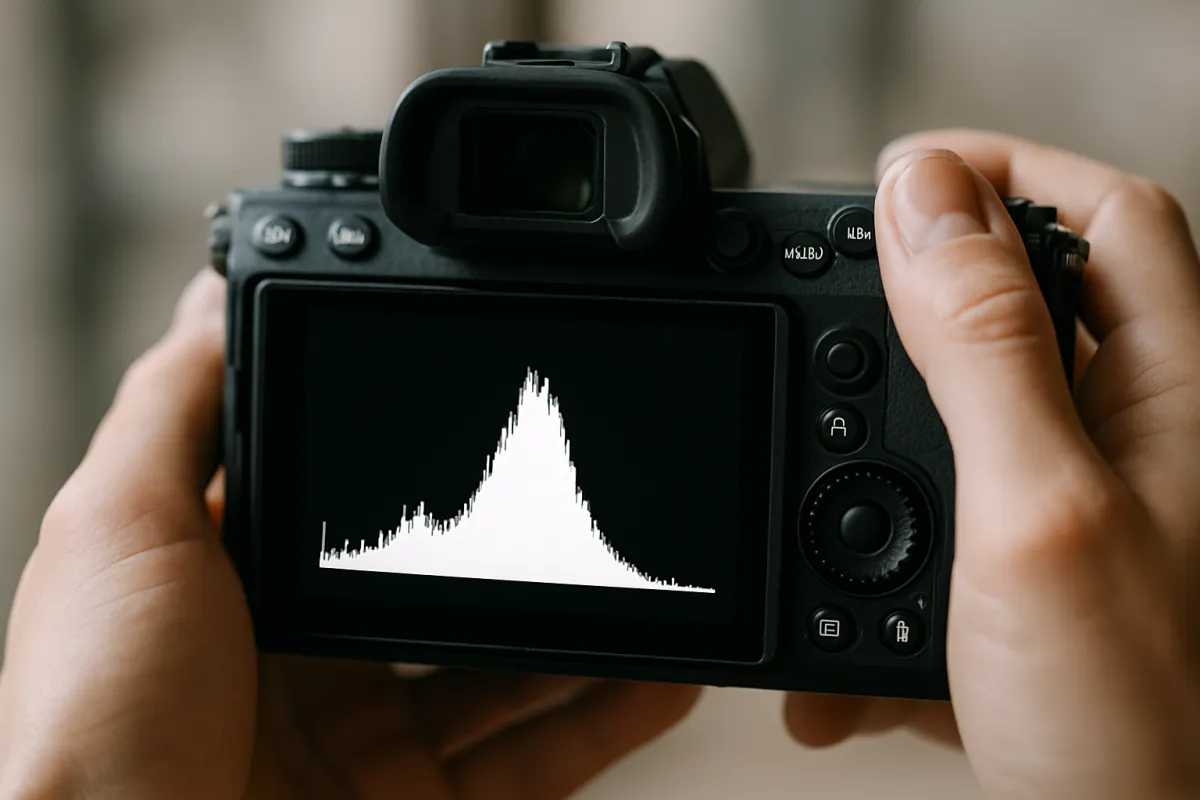
This latitude changes how you can shoot in hard light. High-contrast scenes, a dark room with a bright window, a backlit portrait at golden hour, exceed what any single processed jpeg can hold, but often fit inside a raw file’s range: expose to protect the highlights, then lift the shadows in software, and the frame contains both. The histogram-watching habit from our low-light field note pairs naturally with raw, because the format rewards a technically protective exposure that jpeg would punish as too dark.
The honest caveat is that latitude is a safety net, not a substitute for exposure. Recovery has limits, deep shadow lifts bring noise up with them, truly clipped highlights are unrecoverable in any format, and a frame exposed correctly always beats a frame rescued. Raw does not make the exposure triangle optional; it makes the penalty for losing a round against it survivable.
What jpeg does well, honestly
A fair fight requires jpeg’s case at full strength, and it is stronger than raw partisans admit. The files are finished: every frame is shareable the second it exists, with no import, no develop, no export, no software to own or learn. For family life, casual days, and anyone whose enjoyment of photography does not include a screen session afterward, that zero-step workflow is not laziness; it is the correct engineering choice for the job. A camera’s own processing is also genuinely good now, tuned by teams who know the sensor intimately, and picture styles let you pick a look you like and get it consistently.
The files are small, several times smaller than raw, which compounds everywhere: more frames per card, faster copies, cheaper backup, lighter cloud bills. Small files also keep the camera itself faster, a point covered properly in the burst section below. And compatibility is absolute: a jpeg opens on every phone, television, print kiosk, and web form on earth without translation, today and decades from now, a longevity argument that proprietary raw formats cannot quite match even with converters available.
Jpeg even serves a learning purpose raw can obscure: it forces exposure discipline. With little recovery headroom, a jpeg shooter must meter thoughtfully, watch the light, and get white balance close, the same skills our manual mode field note builds, because the file will not forgive much. Some photographers shoot jpeg deliberately for exactly this reason, the way film shooters practice discipline through cost. The format is not the beginner option; it is the finished-photo option, and finished has real value.
File sizes and the storage arithmetic
The size gap is easy to state and worth feeling concretely. As illustrative figures for a common 24-megapixel camera: an uncompressed raw file runs near 30 MB, a losslessly compressed raw near 15 MB, a fine-quality jpeg near 8 MB, and a space-saving jpeg near 4 MB. The exact numbers vary by camera and scene, detailed textures compress worse than clear skies, but the ratios hold: raw costs roughly two to four times the storage of jpeg for every frame, forever, across cards, drives, and backups.
Illustrative file sizes from a 24-megapixel camera
Typical per-frame sizes by format, in megabytes. Real sizes vary by camera and scene; the ratios are the point.
Compressed raw halves the negative's cost with little or no practical downside, which is why it is the sensible default where offered. Raw plus jpeg mode adds the two chosen sizes together per frame.
Run the arithmetic on your own volume and the gap becomes a budget line rather than a fear. An illustrative hobbyist shooting 500 frames a month in compressed raw accumulates roughly 7 to 8 GB monthly, under 100 GB a year, which current cards and drives absorb without drama; the same shooting in jpeg stays near 4 GB a month. A heavy travel month or a sports habit multiplies both. The backup field note matters three times as much at raw volumes, since every gigabyte should exist in more than one place, and the upgrade budget planner can tell you what an annual storage line does to the rest of the gear budget.
Two practical notes complete the picture. Buy cards for the format you shoot: raw’s bigger files want both capacity and write speed, and a card that was roomy for jpeg fills startlingly fast the week you switch. And cull honestly: the delete key is the cheapest storage upgrade there is, because no format makes 300 near-identical frames of one scene worth archiving. Our SD card field note covers the card-side habits that keep all of this reliable.
Burst shooting and buffer depth
File size has a performance edge that matters to action shooters: the buffer. When you hold the shutter down, frames pile into the camera’s fast internal memory and drain to the card as quickly as the card accepts them. Bigger files fill the buffer sooner and drain slower, so the same camera that sustains a long jpeg burst may slow to a crawl after a couple of seconds of raw, exactly as the play in front of you peaks. Spec sheets state the difference plainly, often several times more jpeg frames than raw before the camera chokes.
The mitigations are ranked and mostly cheap. Compressed raw helps first, since half the file drains twice as fast. A genuinely fast card, matched to the fastest interface the body supports, helps second and is the most common upgrade shortfall: a slow card strangles a good buffer. It is a small case study in the rule from our field note on how to upgrade camera gear: name the actual bottleneck first, because here the fix costs tens of dollars rather than a new body. Shooting deliberate short bursts rather than spraying helps most of all and improves the photography besides. And when a day is purely about sustained action, switching to jpeg for the day is a legitimate professional choice, not a surrender: sports shooters on deadline have always weighted speed and volume over headroom.
For most people this concern is smaller than it reads. Portraits, travel, family, and scenes never touch the buffer, and modern bodies with fast cards sustain raw bursts that would have seemed fantastical a decade ago. But if birds in flight or the pet action end of your shooting is central, buffer depth belongs in your format decision, and it is jpeg’s quietest genuine advantage.
The workflow cost: raw needs developing
Raw’s price is not really measured in gigabytes; it is measured in evenings. A raw file must pass through software to become a shareable picture: imported, interpreted, adjusted at least slightly, exported. Multiply by a vacation’s thousand frames and the format has committed you to a workflow, a program you know, a folder structure, a habit of finishing. Photographers who love that part, and many discover they do, describe the develop session as half the craft. Photographers who do not love it accumulate card after card of unprocessed negatives and quietly stop sharing photos at all, the format’s one truly bad outcome.
The software barrier itself has fallen. Built-in photo apps on current desktop and mobile platforms open common raw files, camera makers ship free developers tuned to their own colors, and capable free editors sit alongside the familiar subscription suites; batch tools apply one correction across hundreds of frames at once. What has not fallen is the requirement to actually do it. A useful test before committing: if editing ten photos sounds like play, raw will reward you; if it sounds like filing taxes, shoot jpeg or the dual mode without guilt.
There is a middle discipline worth naming, the light-touch raw workflow: develop everything in batches with one profile, fix only white balance and exposure where needed, export, done in minutes per hundred frames. Raw does not obligate you to sculpt every file; it only holds the door open for the frames that deserve it. Treating the develop pass as triage, not artistry, is how working photographers keep raw sustainable at volume.
What actually happens to an illustrative hobbyist's frames
An illustrative split of where a typical enthusiast's keepers end up. Most frames need little or no work in either format; the negative exists for the last slice.
The split is illustrative, but the shape explains both camps: jpeg serves the big left slice perfectly, and the right slice is why raw shooters keep negatives. Set your own volume in the companion above to price the difference.
Shooting raw plus jpeg together
Nearly every camera offers the diplomatic answer: record both formats for every frame. Raw plus jpeg mode hands you a finished file for instant sharing and a full negative for anything that turns out to matter, which makes it the standard advice for weddings-adjacent amateurs, travelers, and anyone mid-transition between the formats. The jpeg keeps the evening simple; the raw waits, patient and complete, for the five frames per hundred that earn a real edit.
The costs are exactly the sum of the parts. Storage per frame becomes the two sizes added, near 23 MB in the illustrative figures above with compressed raw and fine jpeg, so cards fill fastest of all in this mode, and the buffer carries both streams. Libraries grow pairs of every image, which either your software manages gracefully, most catalog tools treat the pair as one photo, or becomes mild folder clutter. Dual-slot bodies tidy this beautifully by writing raw to one card and jpeg to the other, separating the share stream from the archive stream physically.
Who should live here permanently, rather than in transit? Shooters whose output has two speeds: the family group chat tonight and the annual printed album later. Event volunteers who must deliver same-day but want protection for the keepers. And learners, for whom the mode doubles as a course: compare your developed raw against the camera’s jpeg of the same frame and you are reverse-engineering the maker’s choices, the fastest way to form taste about color and contrast there is.
Compressed raw, HEIF, and the middle formats
The clean raw-or-jpeg binary has grown useful middle options worth knowing. On the raw side, compression tiers: lossless compressed raw shrinks files roughly in half and costs nothing, making it the obvious default where offered, while lossy compressed raw shrinks further by discarding data judged imperceptible, a trade that action shooters accept for buffer depth and archivists skip. A related option on some bodies reduces raw bit depth in certain drive modes, fine print worth reading if you bought the camera for its dynamic range.
On the finished-file side, HEIF has arrived from the phone world as jpeg’s modernized rival: ten-bit depth against jpeg’s eight, better compression at the same quality, and support for wider color. A ten-bit finished file recovers meaningfully better than a jpeg and suits shooters who want more headroom without adopting a raw workflow. Its weakness is compatibility, the one thing jpeg never lacks: older devices, some printers, and plenty of web platforms still want jpeg, so HEIF shooters keep an export step in their pocket anyway.
The sensible reading of the menu: compressed raw quietly replaced uncompressed as the enthusiast default; HEIF is a genuine third way if your devices and destinations support it; and none of the middle options dissolve the underlying decision this field note is about, which remains who develops the picture and how much information survives to be re-decided later. Choose that first, then let the sub-format be an optimization.
Raw on phones
Phones joined the raw conversation properly once their pro camera modes began writing DNG files, and the results are more interesting than the small sensors suggest. A phone raw skips the aggressive baked-in processing that defines phone jpegs, the heavy sharpening, the confident HDR tone mapping, the smoothed noise, and hands you the sensor’s actual capture, editable with the same white balance freedom and tonal headroom as any camera raw, scaled down by the sensor’s physical limits. For phone shooters who edit, the difference in malleability is immediately visible.
The twist is that phone jpegs are not really jpegs in the old sense; they are computational composites, multiple exposures merged, machine-learned tone decisions applied, and that processing is genuinely hard to beat by hand in difficult light. A single phone raw frame gives up the multi-frame magic, which is why the most useful phone formats are the hybrid ones some makers offer: computational captures written with raw-like editability, keeping the merged dynamic range while unlocking the sliders. Where available, that hybrid is the phone answer to this whole field note.
The practical guidance mirrors the camera version at smaller scale. Casual phone shooting belongs to the default computational pipeline, which exists precisely to make finished photos without you. Deliberate phone photography, the tripod-braced dusk scene from our phone tripod field note, a portrait you plan to print, earns the pro mode and its raw. The formats did not change their nature by shrinking; the negative is still for the frames you intend to develop.
A worked example: one botched frame, two formats
Make the difference concrete with a single realistic failure. An indoor birthday, late afternoon: your subject stands with her back to a bright window, warm lamps inside, and in the rush you shoot with white balance stuck on a previous setting and exposure metered for the window. The preview shows the classic wreck: a dark, orange-tinted subject against a blazing white window. Same frame, both formats recorded. What can each become?
The jpeg fights you at every slider. Brightening the subject three stops drags up banding and blotchy orange noise from the 256-level shadows, the skin tones never quite escape the baked-in warmth because the correction is distorting already-compressed color, and the window is finished: the camera wrote pure white there, and pure white it remains. Twenty minutes of effort yields a frame that reads as rescued, shareable in the group chat, wrong to anyone who looks twice. Nothing was done badly in the edit; the information simply was not in the file.
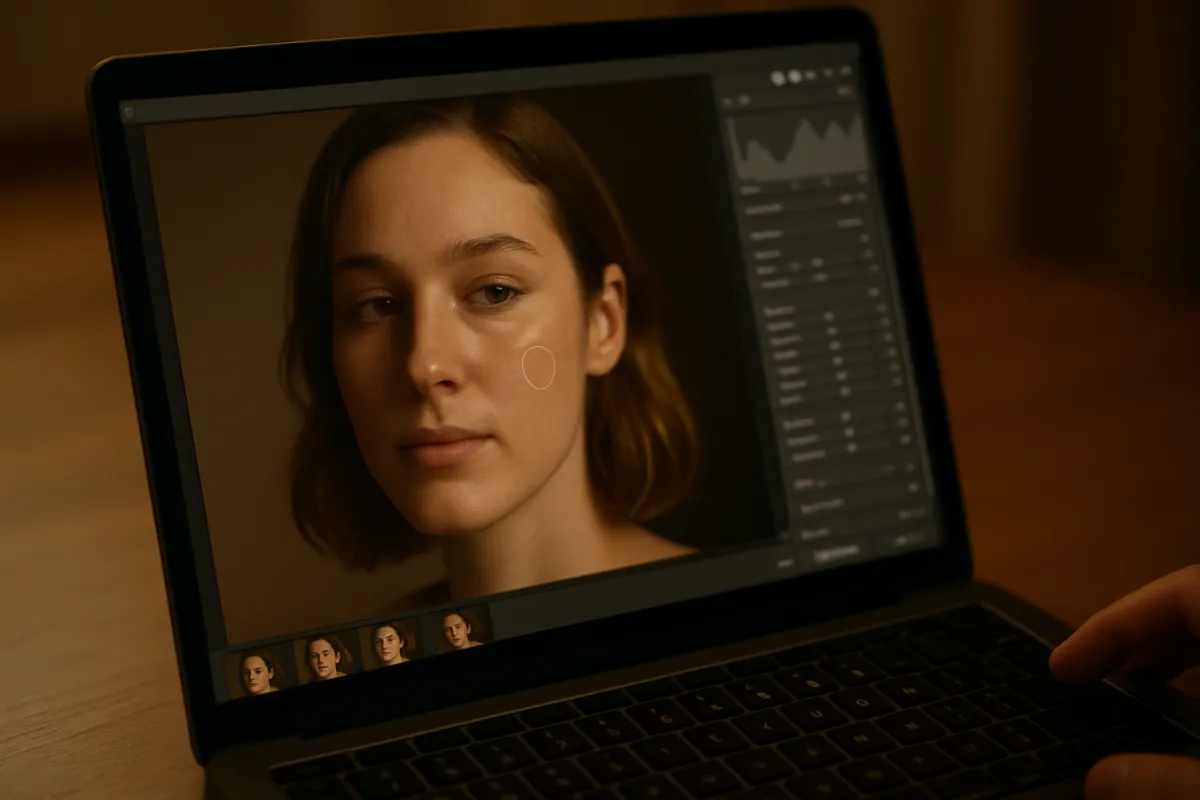
The raw develops like a different photograph. White balance is a two-second reset, the orange gone without residue because it was never baked in. The three-stop shadow lift comes up smooth, skin tones intact, with grain rather than damage, since the fourteen-bit file held hundreds of levels where the jpeg held a handful. The window recovers a full stop of detail, curtains and sky reappearing from data the raw retained above what the preview displayed. Five minutes of sliders produces a warm, believable frame of a moment that cannot be reshot. That asymmetry, on the frames that matter and went wrong, is the entire practical argument for the negative.
When jpeg is the smarter choice
Collecting the threads, jpeg is the better tool, not the compromise, in a set of recognizable situations. High-volume days where the buffer and the card are the constraint: sustained sports, wildlife bursts, an all-day event where thousands of frames will be shot and hundreds delivered quickly. Deadline days, when the photos are needed before any develop session could happen. Casual life, where the phone-like frictionlessness of finished files is what keeps the camera in use at all. And constrained storage stretches, the long trip with limited cards and no laptop, where tripling file sizes has a real itinerary cost.
Add the cases about people rather than situations. Shooters who genuinely do not want an editing hobby are correct to choose the format that finishes photos; a jpeg shared is worth more than a raw unprocessed on a shelf. Learners drilling exposure benefit from jpeg’s low forgiveness, which converts mistakes into lessons instead of slider work. And anyone whose camera produces colors they already love has a legitimate reason to keep them: the maker’s processing is part of what they bought.
The honest test for jpeg days is a pair of questions: will these frames need reinterpreting later, and is this moment repeatable if something goes wrong? When the answers are no and yes, a birthday cake in good light can be reshot in five seconds, jpeg’s costs vanish and its speed is pure profit. The format earns suspicion only when either answer flips, which is exactly the next section.
When raw earns its space
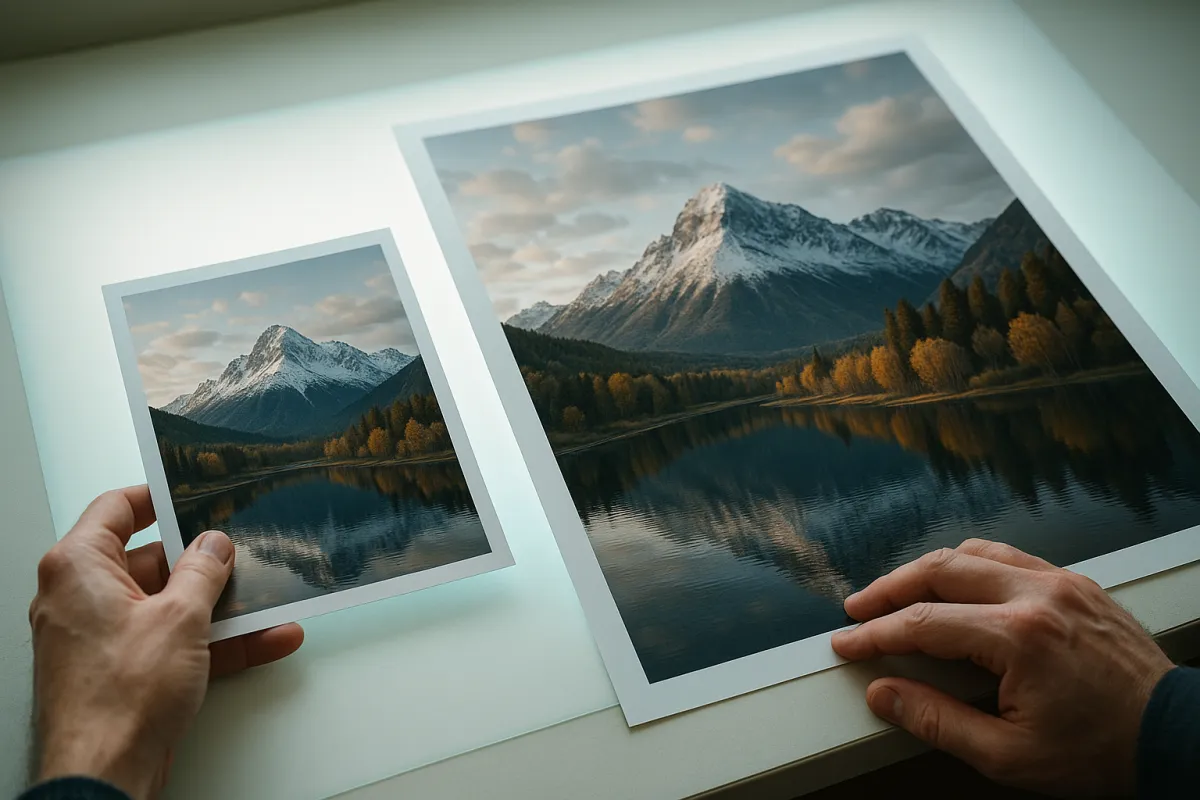
Raw claims its storage whenever a frame’s future is bigger than its present. Unrepeatable moments lead the list: the once-in-years family gathering, travel you will not retrace, the night sky on the one clear night of the trip. Difficult light follows: backlit portraits, mixed indoor sources, high-contrast landscapes, every scene where exposure and white balance are judgment calls that software patience serves better than field haste. Then output ambitions: frames headed for large prints, or serious crops of the kind our megapixels field note discusses, where every recovered tone contributes.
There is also a time argument that only raw makes. Developing software improves continuously: today’s noise reduction and highlight recovery extract visibly more from a decade-old raw file than the tools of its own era could, so an archived negative quietly appreciates, while a jpeg is finished in both senses of the word. Photographers re-developing old raw trips with modern tools are collecting interest on a decision made years earlier. An archive of negatives is a bet that your future taste and future software will both be better, and it is a bet that has paid reliably.
And raw belongs to anyone learning to edit, because it is the format on which editing works as advertised. The sliders in every tutorial assume raw latitude; practicing recovery on jpegs teaches the false lesson that editing barely works. If the develop session is becoming part of your craft, the negative is not an option anymore; it is the medium. From there the dual mode or full raw is a storage question, not a philosophical one.
Storage and backup habits for raw shooters
Adopting raw at volume upgrades storage from an accessory to part of the camera system, and a few habits keep it boring, which is what storage should be. Structure first: one master photo folder, organized by year and shoot, raw and exports kept in predictable places, so the archive stays navigable at ten times today’s size. Cull at import, deleting the obvious failures and near-duplicates before they cost backup space; an honest cull commonly halves a shoot with no loss anyone will ever notice.
Backups multiply in importance with file sizes and irreplaceability, and the standard advice scales cleanly: three copies of anything that matters, on two different kinds of storage, one of them away from your home, whether that is cloud or a drive at a relative’s house. Our photo backup field note turns that principle into a concrete setup. Raw’s extra gigabytes make cloud tiers and drive purchases a real annual line, so budget them alongside lenses in the upgrade budget planner rather than discovering them as emergencies.
Card discipline completes the loop. Buy quality cards sized for raw, format them in the camera rather than deleting files piecemeal, the habit explained in the SD card field note, and never reuse a card for a new shoot until its contents exist in two places. None of this is glamorous, which is the point: the negative’s whole value is that it will still be there, intact, when your skills or software grow into it.
Common raw versus jpeg mistakes
The classic first mistake is switching to raw before having any develop workflow, then meeting a card full of files the laptop shows as blank tiles the night after an important shoot. Set up and test the software pipeline, import, adjust, export one frame end to end, before committing a real event to the format. Its mirror image is staying in jpeg out of inertia through years of shooting whose keepers deserved negatives; the switch costs one menu visit and some gigabytes, and the archive difference compounds for decades.
The middle mistakes are about misunderstanding the safety net. Shooting raw sloppily because everything is recoverable overdraws an account with real limits: clipped highlights die in every format, deep lifts carry noise, and no slider refocuses a frame or slows a shutter that was too slow. Conversely, editing timidity wastes the format: a raw developed with the sliders untouched is just a bigger jpeg. And treating the camera’s preview as truth misleads in both directions, since that preview is itself a jpeg rendering; the histogram, not the thumbnail, reports what the raw actually holds.
The last mistakes are logistical. Running raw plus jpeg forever without ever once using a raw file pays double storage for an unused insurance policy; audit yourself after a few months and pick a lane. Archiving every raw including the failures buries the keepers in cost; cull like it matters. And skipping backups while accumulating an irreplaceable negative archive is the one error this whole decision cannot survive, because the format that preserves everything preserves nothing on a dead drive.
How to switch to raw without regret
If the case has landed and you want the negative, a staged switch avoids every classic regret. Week one: stay in raw plus jpeg, change nothing else, and set up the develop pipeline with the free tool of your choice or your platform’s built-in app. Develop exactly one raw frame end to end, import, white balance, exposure, export, so the pipeline is proven before it matters. Your shooting habits, cards, and sharing stay untouched; you are just accumulating negatives.
Weeks two and three: pick your five favorite frames from each outing and develop them beside the camera’s jpegs. This is where the format teaches itself, white balance freedom on the mixed-light frames, shadow lifts on the backlit ones, and where you discover your own taste versus the maker’s picture style. Check the storage arithmetic against reality, move to compressed raw if you have not, and buy the extra card the new file sizes justify. If, honestly, the develop sessions feel like a chore with no payoff, stop here with a clear conscience: you tested the format against your actual life, which is the point.
Week four and beyond: choose your stable arrangement, full raw with batch develops, permanent dual-format with dual cards, or situational raw for the days that deserve it, and fold the storage line into your normal gear budgeting. From there the format question is settled and attention returns to where it belongs, the aperture, the light, and the subject, with the quiet confidence that whatever happens in the field, the negative came home with you.
The bottom line
Raw versus jpeg is not a quality war; it is a decision about when your photographs get developed and by whom. Jpeg develops them instantly, in camera, well, and permanently: small, universal, finished files that reward good field technique and ask nothing afterward. Raw postpones every decision it can, white balance, tone, color, recovery, into a file several times larger that demands software and time, and repays them with latitude no finished format can match: the botched unrepeatable frame rescued, the hard light held, the decade-old negative improved by tools that did not exist when you shot it. Shoot jpeg when the moment is repeatable, the deadline is now, or editing is not your hobby; shoot raw when the frame might matter longer than tonight; run both while you find out which shooter you are. The format menu is one screen deep and the storage is a budget line, so make the choice deliberately, then get back to the light.
This field note weighs two file formats, not two kinds of photographer, and it carries no sponsorship and names no software or camera maker deliberately, because the trade-offs hold across all of them. Every file size, bit depth behavior, recovery claim, and percentage here is an illustrative typical figure meant to show the shape of the decision, not a measured spec for any particular body, so check your own camera’s manual and run your own storage numbers before restructuring a workflow around them. Archives are personal: test both formats on frames you care about, keep more than one copy of anything irreplaceable, and let your own developed results, not this or any write-up, settle which menu setting deserves your shutter.
Frequently asked questions
What is the difference between raw and jpeg?
A raw file is the sensor's unprocessed data, everything the camera captured, saved before any decisions about color, contrast, or sharpening are locked in. A jpeg is a finished picture: the camera processes that same data, applies its own color and contrast choices, compresses the result heavily, and throws away the information it decided you would not need. Raw gives you far more room to adjust exposure, white balance, and tone later, at the cost of larger files that need software to develop. Jpeg gives you a smaller, ready-to-share file with the camera's choices baked in.
Is raw better than jpeg?
Raw holds more information, so it is better whenever you plan to edit, shot in tricky light, or care about squeezing the most out of an important frame. That does not make it better for every person or purpose: jpeg is smaller, faster, universally readable, and finished the moment you shoot it, which better serves casual shooting, tight deadlines, and anyone who does not want an editing step. The honest answer is that raw is the better negative and jpeg is the better print. Choose based on whether you want to develop your photos or have the camera do it.
Do raw files take up much more space than jpegs?
Yes, typically several times more. As illustrative figures for a 24-megapixel camera, a raw file commonly runs 25 to 30 MB while a fine-quality jpeg of the same frame runs closer to 8 MB, so a card or drive holds roughly three to four times fewer raw frames. Many cameras offer lossless or lossy compressed raw options that cut the size substantially with little or no practical quality cost, and storage prices keep falling, which softens the penalty. The space cost is real but budgetable; the bigger cost of raw is the editing step, not the gigabytes.
Can I shoot raw and jpeg at the same time?
Almost every interchangeable-lens camera and many compacts offer a raw plus jpeg mode that saves both files for every frame. You get an instantly shareable jpeg and a full raw negative in case a frame deserves real editing, which makes the mode a popular safety net for events, travel, and the transition period while you learn raw. The costs are the combined file size, the fastest consumption of card and buffer, and a little library clutter from managing pairs. Cameras with two card slots can write raw to one card and jpeg to the other, which keeps the streams tidy.
Do I need special software to open raw files?
You need something that can interpret raw, because a raw file is data rather than a picture, but the barrier is lower than its reputation. Current versions of the built-in photo apps on major desktop and mobile platforms open common raw formats, camera makers supply free converters, and several capable free editors exist alongside the well-known subscription tools. The real requirement is a workflow: raw files want to be imported, adjusted at least lightly, and exported to jpeg for sharing. If that pipeline sounds unappealing, that is a legitimate reason to keep shooting jpeg, not a failure.
Does shooting raw make my photos sharper or higher resolution?
No. Raw and jpeg from the same camera record the same number of pixels through the same lens, so resolution and optical sharpness are identical. What raw preserves is tonal and color information: more brightness steps, recoverable highlights and shadows, and white balance that remains freely adjustable. A raw file can end up looking sharper after editing because you control the sharpening rather than accepting the camera's default, but the format itself adds no detail. If out-of-camera crispness is the goal, lens choice, focus, and shutter discipline matter far more than the file format.
Should a beginner shoot raw or jpeg?
A useful path is to start with jpeg while learning exposure and composition, since instant, finished files keep the feedback loop short, then switch to raw plus jpeg once editing becomes interesting. The dual format lets you keep sharing effortlessly while building a raw archive, and the first time you rescue a badly exposed frame from the raw file, the value of the format stops being theoretical. Storage is the only real cost of that safety net. What matters most is that the format never becomes a reason to shoot less; the best format is the one that keeps you photographing.
Can I convert a jpeg to raw?
No, not in any meaningful sense. Software can save a jpeg into a raw-style container, but the discarded information does not come back: the camera threw away the extra tonal depth, the unbaked white balance, and the recoverable highlight data when it created the jpeg, and no format change can restore what was never saved. Conversion only works in the other direction, raw to jpeg, which is exactly why people archive raw files. If a frame might ever matter enough to re-edit, the raw has to be captured at the moment you take it.