What's on this page
- What “Affordable” Actually Means for a Content Creator
- Who This Comparison Is For
- Three Price Tiers at a Glance
- Free Tier: Your Phone Is Not a Compromise
- Entry Tier: The First Dedicated Camera Purchase
- Mid Tier: Where Serious Creators Should Actually Look
- What You’re Really Paying For Above the Entry Tier
- Autofocus: The One Spec Worth Stretching Budget For
- Audio Input Matters More Than the Camera Body
- Battery Life and the Hidden Cost of a Spare
- Storage and Memory Cards: The Overlooked Line Item
- New vs Used: Stretching an Affordable Budget Further
- Content Type and Camera Fit: YouTube, Reels, Podcasts and Product Shots
- Lighting Basics That Cost Almost Nothing
- The Full Cost of Ownership Beyond the Camera Body
- Troubleshooting Common Affordable Camera Complaints
- A Worked Example: Two Creators, Two Budgets
- When Spending More Actually Pays Off
- Testing Before You Buy: What to Actually Check
- Return Windows and Warranty: Why They Matter More at This Price
- Where This Fits Into a Longer-Term Upgrade Path
- Common Buying Mistakes on a Tight Budget
- Your Affordable Camera Checklist
- The Bottom Line
Short answer: The most affordable genuinely good content creation setup is usually not a camera at all: a modern phone paired with an external microphone and a simple light solves more real problems per dollar than any budget camera body does alone. Once a phone's specific limits, no external mic input, a fixed field of view, awkward handling for self-recording, actually hold your content back, an entry-tier compact in the $200 to $400 band or a lightly used previous-generation body is where affordable camera money is best spent, with autofocus reliability and audio input prioritized over resolution.
Content creation gear shopping on a tight budget gets confusing fast, because every listing leads with the spec that is cheapest to advertise, resolution and megapixels, while staying quiet about the specs that actually decide whether a video looks and sounds professional on a phone screen scrolling past it in a feed. An affordable camera search also tends to surface results built for an entirely different buyer, a stills photography enthusiast or a professional videographer, neither of whom is optimizing for the same thing a creator on a real budget needs: the most reliable autofocus, audio and battery life per dollar spent, not the most resolution per dollar spent.
KitBorough’s vlogging camera field note goes deep on feature-by-feature vlogging camera comparisons across every price tier for walk-and-talk, arm’s length self-recording specifically. This field note takes a different angle: it starts from the budget line itself, works out what a creator actually gets at each realistic price point, and covers content styles beyond vlogging, including product demos, sit-down talking segments and photography-first social content, where the buying calculus looks a little different. Price any tier below against your own numbers in the content creator budget planner before you spend anything.
Key takeaways
- For most new creators, the most affordable good setup is a phone plus an external microphone and a simple light, not a camera at all.
- Once a phone's real limits start holding content back, an entry-tier camera in the $200 to $400 band or a lightly used previous-generation body is where affordable money is best spent.
- Autofocus reliability and a real microphone input matter more than resolution at every affordable price point.
- A reasonable budget split puts roughly half toward the camera body and the rest toward a microphone, a simple light, a memory card and a basic mount or tripod.
- Buying the camera and skipping the microphone is the most common affordable-budget mistake, because viewers forgive soft video far more than they forgive audio they cannot follow.
What “Affordable” Actually Means for a Content Creator
“Affordable” is doing a lot of work in any camera search, because the honest affordable range for a content creator spans from zero dollars, a phone already owned, up through a few hundred dollars for a dedicated entry camera, and the right answer inside that range depends entirely on which specific limitation is actually being solved. A creator who has hit a genuine wall, no external microphone input, a field of view too narrow for arm’s length framing, a battery that cannot survive a full recording session, needs a different purchase than a creator who simply assumes a camera is the next logical step.
This field note treats affordable as a real constraint to optimize inside, not an apology for not buying something more expensive. Every tier below is judged on what it actually fixes relative to what came before it, not on an abstract feature checklist, because the question that matters for a tight budget is always the same one: what specific problem does spending more money here actually solve.
Who This Comparison Is For
This field note is written for someone creating content, YouTube videos, short-form social clips, product demonstrations, podcasting with video, or photography-first social posts, on a real budget, who wants to spend money on the thing that will actually improve their output rather than the thing that looks most impressive on a spec sheet. It assumes no existing dedicated camera and treats a phone as a legitimate starting point rather than a compromise to escape as quickly as possible.
If arm’s length, walk-and-talk vlogging specifically is the content style, our vlogging camera field note compares that narrower category in more depth, covering flip screens, face tracking and stabilization feature by feature across every price tier. This field note stays focused on the budget decision itself and on content styles beyond walking vlogs.
Three Price Tiers at a Glance
Affordable content creation gear splits into three practical tiers that matter more than any individual camera’s marketing copy. Free, a phone already owned, paired with inexpensive accessories. Entry, a dedicated compact camera roughly in the $200 to $400 range, bought new or lightly used. Stretch, an entry-level interchangeable lens camera or a previous-generation mirrorless body, bought used, for a creator who has outgrown the entry tier’s specific limits.
Where an affordable content creation budget should actually go
Illustrative share of a modest total budget, out of 100, across the items that most directly affect how finished content looks and sounds.
A camera body claims less than half a realistic affordable budget once a microphone and basic lighting are priced in honestly, which surprises buyers who assume the camera itself is nearly the whole cost.
Free Tier: Your Phone Is Not a Compromise
A recent phone is a genuinely strong starting point for content creation, not a placeholder to abandon the moment any money exists. Computational stabilization, automatic exposure and color processing, and instant one-tap sharing are all mature on modern phones, and the cost of entry is zero if the phone is already owned. The honest limits are specific rather than vague: no real input for an external microphone on most phones without an adapter, a field of view that is not purpose-built for arm’s length self-recording, and handling that was designed as a phone shape rather than a device meant to be held and operated while also being the subject.
The single best move at this tier is spending whatever small budget exists on an external microphone that works with a phone, either a wired lavalier through an adapter or a phone-compatible wireless system, plus a simple clip-on light. Both of those purchases carry over directly and completely to any camera bought later, which makes them a safer first spend than a camera body whose resale value depreciates the moment a newer phone or camera makes it feel dated.
Entry Tier: The First Dedicated Camera Purchase
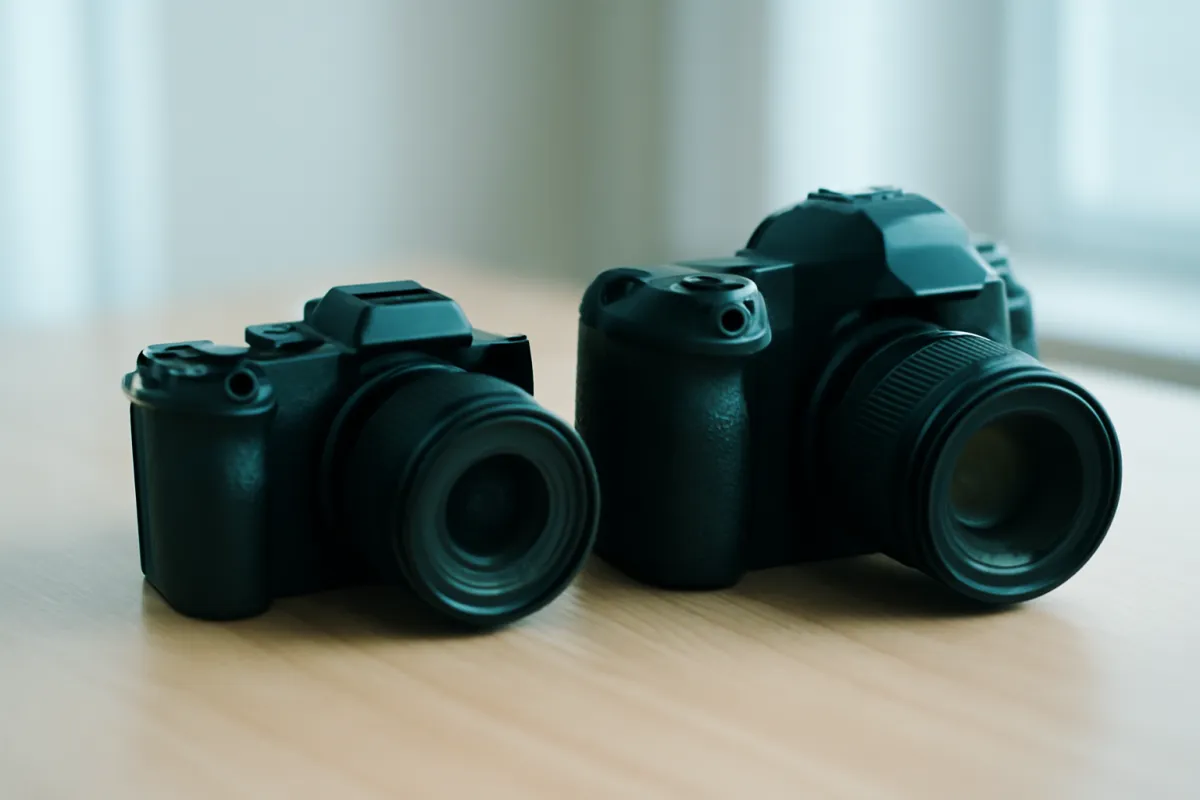
The entry tier, roughly $200 to $400 for a dedicated compact camera, is where a genuine, specific phone limitation gets solved rather than where content creation magically improves. The honest reasons to spend here are narrow and worth naming plainly: a real external microphone input the phone lacks, a flip screen built specifically for self-recording rather than a phone held awkwardly at arm’s length, or a longer optical zoom than a phone’s digital zoom can match without visible quality loss.
Entry-tier cameras in this band generally compromise somewhere, often in low-light autofocus consistency or in battery life during continuous recording, and being honest about which compromise matters least for a specific content style is the real skill in this tier. A creator shooting mostly in bright, well-lit conditions can tolerate a weaker low-light autofocus far more easily than one shooting primarily indoors under ordinary household lighting.
Mid Tier: Where Serious Creators Should Actually Look
Stretching into the $400 to $700 range, often by buying a previous-generation model or a lightly used current one rather than the newest release at full price, is where the most common affordable-budget frustrations genuinely improve: more consistent autofocus tracking across a wider range of lighting, better battery life for longer sessions, and often a more robust accessory shoe for lights and microphones. This is not the tier for a creator just testing whether content creation will stick; it is the tier for someone who already knows the answer is yes and has specifically identified what the entry tier’s compromises are costing them.
The used and previous-generation market does most of the real work in this stretch, because camera technology that matters for content creation, autofocus algorithms and sensor processing mainly, tends to mature over a few product generations rather than changing dramatically every single release cycle. A model two generations old at a steep discount frequently outperforms a brand-new entry-tier release at a similar price.
What You’re Really Paying For Above the Entry Tier
Every dollar spent above the entry tier is buying one of a short list of specific things, and naming which one matters to your own content is worth doing honestly before spending it. More reliable autofocus tracking in a wider range of lighting conditions is usually the first and most valuable thing extra money buys, followed by improved battery life for longer uninterrupted sessions, a more capable accessory shoe or dedicated microphone input, and only after those three, better resolution or dynamic range.
A creator chasing resolution first on an affordable budget is usually solving the wrong problem, because footage that is slightly soft but well-framed and well-lit reads as professional far more reliably than sharp footage that loses focus mid-sentence or runs out of battery mid-session. Spend the stretch money on reliability before spending it on resolution.
Autofocus: The One Spec Worth Stretching Budget For
Autofocus reliability is the single hardest spec to judge from a listing and the one most worth prioritizing on an affordable budget, because a creator operating the camera alone has nobody else available to correct focus manually during a take. The meaningful differences between an affordable camera’s autofocus and a more expensive one rarely show up in bright, simple test conditions; they show up in busier backgrounds, lower indoor light, and a face turning away and back during natural conversation.
Reading independent sample footage shot handheld in realistic, ordinary conditions rather than trusting a manufacturer’s demo reel is worth the extra research time at every price point, but it matters most at the affordable end, where the gap between a camera that tracks reliably and one that visibly hunts is often the single biggest difference between two options at a similar price.
Audio Input Matters More Than the Camera Body
A camera’s built-in microphone, on any affordable body, picks up more of the room and less of the specific voice that actually matters than most new creators expect, and no amount of camera-body spending fixes that on its own. A real microphone input, whether a dedicated jack, an accessory shoe that accepts a compatible microphone, or a USB-C input on some phones with an adapter, is close to the highest-value single spec on an affordable content creation purchase.
What actually makes affordable content look more professional, ranked
Illustrative weighting, out of 100, of which upgrade most improves how finished content is perceived by a viewer, drawn from common creator experience rather than a measured study.
Audio and lighting dominate perceived quality well ahead of resolution, which is exactly why this field note weighs a microphone input and a simple light more heavily than a camera's megapixel count.
Buying even an inexpensive external microphone, a basic wired lavalier or a simple shoe-mounted shotgun microphone, before spending the remaining budget on the camera body itself is one of the clearest, most reliable upgrades available at any affordable price point, and it is the one most often skipped because the camera feels like the more exciting purchase.
Battery Life and the Hidden Cost of a Spare
Rated battery life on an affordable camera’s spec sheet is almost always measured under conditions that do not resemble continuous content recording, intermittent stills shots with the screen mostly off, rather than a long, uninterrupted video take with the screen active throughout. A battery rated for a full day of casual stills use can realistically deliver well under an hour of continuous recording, and a dead battery mid-session is one of the most common, most preventable content creation frustrations on a tight budget.
Budgeting a spare battery as close to a requirement as the camera itself, rather than an optional accessory added later, avoids a specific and entirely foreseeable failure: a planned recording session ending early because nobody budgeted for the camera’s real power draw under actual use.
Storage and Memory Cards: The Overlooked Line Item
Video recording, especially anything beyond basic resolution and frame rate, consumes storage considerably faster than stills photography, and an affordable camera purchase that forgets to budget for a fast, sufficiently large memory card often ends up with a creator either recording at a lower quality than the camera supports or running out of space mid-session. Our SD card buying guide covers which speed class actually matters for sustained video recording rather than assuming any card that physically fits the slot keeps up.
A simple, repeatable backup habit matters here too, and it costs more in frustration to skip than it does in money to set up. Our photo and video backup field note covers a dependable system worth adopting from the very first recording session rather than after the first lost file teaches the lesson the hard way.
New vs Used: Stretching an Affordable Budget Further
Buying used is one of the single best moves available on an affordable content creation budget, and the inspection habits that protect a used purchase are straightforward. Work every dial and button, test the flip screen’s hinge specifically since repeated opening and closing is where wear shows up first, check the microphone input actually makes contact with a cable rather than sitting loose, and shoot a short test clip to confirm autofocus and battery reporting both function normally.
A previous-generation model bought used frequently delivers more real capability for the same money than a brand-new release at the bottom of its own lineup, because the camera industry’s meaningful improvements, autofocus algorithms and battery management mainly, tend to mature across a few generations rather than resetting with every new release. Buying from a seller offering even a short return window is worth a modestly higher price than an otherwise identical private listing with no recourse.

Content Type and Camera Fit: YouTube, Reels, Podcasts and Product Shots
Not every content style asks the same thing of an affordable camera, and being honest about the actual content style sharpens where budget should go. Long-form YouTube talking segments, often shot from a tripod rather than handheld, lean less on in-body stabilization and more on audio input and consistent indoor autofocus, since the camera barely moves once it is set up.
Short-form social clips, Reels and similar vertical formats, often favor a phone over any affordable dedicated camera, since native vertical recording, instant editing and immediate upload all happen on the same device without a file transfer step. Podcasting with video usually prioritizes audio quality and a simple, static framing over any advanced camera feature, making a modest camera paired with a genuinely good microphone the better split of a tight budget than a better camera paired with a worse microphone. Product demonstration and review content, covered in more technique depth in our product photography field note, asks for a camera that can shift focus cleanly between a face and an object held closer to the lens, a specific autofocus demand worth checking rather than assuming any camera handles it equally well.
Lighting Basics That Cost Almost Nothing
Lighting deserves its own short section because it is the single cheapest, highest-return upgrade available at the affordable end of content creation, and it is also the one most often skipped entirely. A single soft light, even an inexpensive clip-on or desk lamp style fixture pointed toward you rather than relying on an overhead room light, flattens harsh shadows and gives a camera’s autofocus and exposure systems an easier, more even scene to work with. Our photography lighting field note covers building out a more complete lighting kit once budget allows, but a single light is enough to start.
Positioning matters more than the light’s price. A light placed slightly above and in front of the face, angled down a little rather than shining straight on, produces a noticeably more flattering result than the same light pointed directly at the subject from eye level, and this costs nothing beyond a few minutes of experimentation. Window light, free and often excellent, works the same way: face a window rather than having it behind you, since a bright window behind the subject forces the camera to choose between a correctly exposed background and a correctly exposed face, and it usually chooses the background, leaving the subject dark.
The Full Cost of Ownership Beyond the Camera Body
An affordable camera’s sticker price is rarely the full cost of actually using it for content creation. A memory card, a spare battery, a basic tripod or phone mount, and some form of simple lighting are close to required rather than optional, and pricing them in honestly from the start prevents the common experience of a camera purchase that leaves no budget left for the accessories that make it actually usable.
The realistic add-on list for any affordable camera
- A memory card with enough speed and capacity for video, not just stills.
- A spare battery, given how much faster continuous recording drains a charge than rated stills use.
- A basic tripod, stand or mount, since most content is not shot fully handheld.
- Some form of simple, even lighting, even a single inexpensive clip-on light.
- An external microphone, the single highest-value line item on this entire list.
Troubleshooting Common Affordable Camera Complaints
A handful of complaints come up repeatedly with affordable cameras, and most have a specific, fixable cause rather than meaning the purchase itself was a mistake. Footage looks grainy or noisy indoors. This is usually the camera raising ISO automatically to compensate for a dim room, and the real fix is more light rather than a different camera, since even an expensive body gets noisy in genuinely poor lighting. Add a simple light facing you before assuming the camera itself is the problem.
Autofocus seems to hunt constantly. Check first whether the lens or camera is set to a continuous autofocus mode appropriate for video rather than a single-shot stills mode, since this single setting mismatch causes a large share of autofocus complaints that have nothing to do with the camera’s actual capability. Audio sounds muffled or distant even with an external microphone attached. Confirm the camera’s menu is actually set to use the external input rather than the built-in microphone, since some cameras require this to be selected manually rather than switching automatically the moment something is plugged in.
The battery seems to drain far faster than expected. This is normal for continuous video recording relative to a stills-photography battery rating, covered earlier in this field note, but if the drain seems unusually fast even accounting for that, check whether a screen brightness setting or a wireless connectivity feature like Bluetooth or Wi-Fi has been left active in the background, since both draw meaningful power continuously once enabled. Files take up more storage than expected. Check the actual resolution and frame rate the camera is set to record at, since many cameras default to a higher setting than necessary for web and social video, and dropping to a more modest setting that still looks sharp on a phone screen saves considerable card space without a visible quality loss for most platforms.
Working through this short list before assuming a return or an upgrade is needed resolves a meaningful share of affordable camera frustrations, because many of the most common complaints trace back to a menu setting rather than a genuine hardware limitation.
A Worked Example: Two Creators, Two Budgets
Creator one, a total budget of about $150, just starting out and genuinely unsure how serious the hobby will become. The honest move is a phone already owned, paired with an inexpensive wired lavalier microphone and a basic clip-on light, leaving room for a phone mount or small tripod. Spending this budget on an entry camera instead, and skipping the microphone to afford it, produces worse-sounding content than the phone-plus-microphone combination would have, despite costing roughly the same.
Creator two, a total budget of about $500, who has been creating content on a phone for several months and has hit a specific, real limitation, no microphone input being the most common one. Here, an entry-tier dedicated camera around $250 to $300, paired with a genuine external microphone and a simple light, solves the actual bottleneck directly. Run your own numbers through the content creator budget planner to see how your specific limitation and total budget split across these same categories.
When Spending More Actually Pays Off
Moving past the entry tier is worth it when a specific, named limitation is genuinely costing finished content quality, not as a default escalation once any extra budget appears. Inconsistent autofocus in the exact lighting conditions you actually shoot in, a battery that cannot survive your typical session length, or an accessory shoe too limited for the microphone and light combination you have already settled on are all legitimate, specific reasons to stretch the budget further.
Spending more without a specific limitation in mind is how affordable budgets quietly stop being affordable, chasing a marginally better spec sheet rather than fixing an actual, felt problem with the content being produced right now.
Testing Before You Buy: What to Actually Check
A short, deliberate test before committing to an affordable camera purchase catches most of the problems that only show up after a return window has already closed. In a store, or in the first hour after an online order arrives, run through the same short list every time rather than trusting a listing’s description alone. Point the camera at a moving subject, a person walking across the room works fine, and watch whether autofocus holds smoothly or visibly hunts and refocuses. Open the flip screen fully and check it moves freely without catching or feeling loose at the hinge, since that joint is the first thing to wear on a heavily used body.
Plug in whatever microphone you plan to actually use, even a basic one, and record a short test clip indoors to confirm the input works and the camera actually prioritizes the external source over its own built-in microphone, since not every camera makes that switch automatically. Finally, check the battery indicator during a few minutes of continuous recording rather than trusting the icon at power-on, because a battery that reports full but drains unusually fast under real video load is a legitimate reason to return a used purchase within its window.
None of this testing takes more than about ten minutes, and skipping it is how a camera with a genuine, fixable problem ends up kept and worked around rather than returned while that option still exists. A buyer who tests before the return window closes has real leverage; a buyer who discovers a problem two months later usually does not.
Return Windows and Warranty: Why They Matter More at This Price
A return window matters more on an affordable purchase than on an expensive one, not less, because the margin for absorbing a defective or mismatched unit is thinner when the total budget is already tight. A seller offering even a short, clearly stated return period, alongside a basic condition grade on any used listing, is worth paying a modestly higher price for than an otherwise identical private sale with no recourse at all if a problem surfaces during the testing routine above.
Manufacturer warranty coverage on a new affordable camera is usually a year or more and transfers rarely matter at this price point, since few buyers resell an entry-tier body for enough money to make a warranty transfer worth tracking. What matters more practically is simply keeping the original receipt and packaging until the return window has fully closed and the camera has been genuinely tested under real conditions, not just powered on and glanced at.
Where This Fits Into a Longer-Term Upgrade Path
An affordable camera bought today does not have to be the last camera purchase a creator ever makes, and treating it as a deliberate first step rather than a permanent ceiling changes how it is worth buying. A used entry-tier or stretch-tier body, bought at a fair price and kept in good condition, retains real resale value if content creation becomes a bigger commitment and a more capable system eventually makes sense.
This is part of why buying used rather than new matters doubly at the affordable end: a used purchase has already taken its biggest depreciation hit, so reselling it later recovers a higher percentage of what was paid than reselling a camera bought new ever could. A creator who outgrows an entry-tier compact in a year has lost comparatively little money if the original purchase was a well-chosen used body, and considerably more if it was a brand-new one bought at full retail price. Treat the first camera as a bounded bet rather than a permanent decision, and the affordable tier stops feeling like a compromise and starts feeling like the obviously correct place to begin.
Common Buying Mistakes on a Tight Budget
- Buying the camera and never buying the microphone. This is the single most damaging affordable-budget mistake, since audio quality affects viewer retention more than almost any camera spec.
- Chasing resolution over autofocus reliability. A sharp frame that loses focus mid-sentence is less usable than a slightly softer frame that holds focus throughout.
- Skipping a spare battery to save a small amount of money. A dead battery mid-session costs far more in lost content than a spare battery costs in dollars.
- Ignoring lighting entirely. A simple, inexpensive light frequently improves perceived quality more than a meaningfully more expensive camera body does on its own.
- Overbuying a camera system before a specific limitation exists. An entry-tier compact solves most new creators’ actual problems more simply and more cheaply than an interchangeable-lens system bought too early.
Your Affordable Camera Checklist
- Confirm your phone's specific, real limitation before assuming a camera purchase is the next step.
- Budget a microphone and a simple light before, not after, the camera body itself.
- Prioritize autofocus reliability and audio input over resolution at every price point.
- Research autofocus specifically with independent, realistic sample footage, not a manufacturer demo.
- Price a memory card, a spare battery and a basic mount into the real total, not just the camera's sticker price.
- Consider a lightly used previous-generation body before a brand-new entry-tier release at a similar price.
- Match the camera and budget split to your actual content style, not an aspirational mix of every style at once.
- Name the specific limitation that would justify spending more, rather than escalating budget by default.
The Bottom Line
The most affordable good content creation setup is frequently not a camera purchase at all, and being honest about that before spending anything is the single highest-value piece of advice in this entire comparison. A phone paired with an external microphone and a simple light solves more real, felt problems per dollar than almost any budget camera body does alone, and once a specific, named limitation of that setup actually appears, an entry-tier compact or a lightly used previous-generation body is where the next real dollar is best spent.
Prioritize autofocus reliability and a real microphone input ahead of resolution at every price point along the way, and price the full real cost, a memory card, a spare battery, a simple light and a microphone, into any camera budget from the start rather than discovering the gap after the camera itself is already paid for. Run your own content style and numbers through the content creator budget planner, and if arm’s length, walk-and-talk vlogging specifically is your content style, our vlogging camera field note picks up the feature-by-feature comparison from here.
This field note compares affordable camera categories and price tiers rather than specific products: no brand or model is named on purpose, since listings and prices change faster than an article can track. Figures for battery drain, budget shares and perceived-quality weighting are illustrative starting points for a general beginner category, not a specification for any one camera, so verify sample footage, the real microphone input and the actual battery life of any specific listing before buying.
Frequently asked questions
What is actually the cheapest way to start making content seriously?
The phone already in your pocket, paired with a cheap external microphone and a simple light. That combination solves the two problems that make footage look amateur, bad audio and bad light, for a fraction of any camera's price, and both pieces carry over directly to whatever camera is bought later. Spending the first real budget on a camera body before those two accessories is the most common overspend a new creator makes, because a camera cannot fix audio or lighting problems on its own.
Is a $200 to $400 entry camera actually better than a good phone for content?
Not automatically. An entry camera in that range often has a smaller sensor and weaker computational processing than a recent mid-range phone, so the honest upgrade case rests on a few specific things a phone cannot do at all: accepting an external microphone through a real input, offering a longer zoom or a different field of view, and giving a dedicated flip screen built for self-recording. If none of those three matter yet, the phone remains the better buy.
How much of an affordable content creation budget should go to the camera itself?
Less than instinct suggests. A reasonable starting split is roughly half to the camera body, with the rest spread across a microphone, a simple light, a memory card and a basic tripod or phone mount. A capable but modest camera paired with clean audio and even lighting consistently looks more professional on screen than an expensive camera paired with a tinny built-in microphone and a single overhead room light.
Does a budget camera need to shoot 4K to be worth buying?
No. Resolution is one of the least important specs for most content, since nearly every platform compresses video heavily on upload regardless of the source resolution. Autofocus reliability, stabilization and audio input affect how footage actually looks and sounds far more than an extra resolution tier, and a 1080p camera that nails those three fundamentals beats a 4K camera that hunts for focus or shows visible shake.
Should a beginner buy a used camera to save money for content creation?
Yes, with the same inspection habits that apply to any used camera purchase: check the shutter count if the body is a stills camera that also shoots video, work every dial and button, and look at the screen hinge closely since flip screens on heavily used cameras can develop play or cracking at the hinge from repeated opening. A lightly used previous-generation model is frequently the single best value move in this entire category.
What is the single biggest mistake people make buying their first content creation camera?
Buying the camera first and the microphone never. Viewers tolerate soft or slightly shaky video far more easily than they tolerate audio that is hard to understand, so a creator who spends their entire budget on the camera body and plans to add a microphone later frequently never does, because the budget is already gone. Buying a cheap external microphone alongside the camera, even a basic one, protects the thing that actually drives people away fastest.
Do I need a dedicated vlogging camera, or will any affordable camera work for content creation?
It depends on your content style. A dedicated vlogging compact, covered in full in our vlogging camera field note, is built specifically around arm's length self-recording with a flip screen and face tracking. A more general affordable camera, including many entry mirrorless bodies, works well for content that is shot from a tripod or handed to someone else to film, such as product reviews, sit-down talking segments or photography-based social content, where the vlogging-specific features matter less.
Is it worth buying an affordable camera secondhand from a marketplace listing rather than a retailer?
It can be, but the savings should be weighed against the lack of a return window on most private marketplace sales. A retailer or a dedicated used-gear seller that offers even a short return period and a basic condition grade is worth a modestly higher price than a marketplace listing with no recourse if the autofocus or the microphone input turns out to be faulty once you actually test it at home.