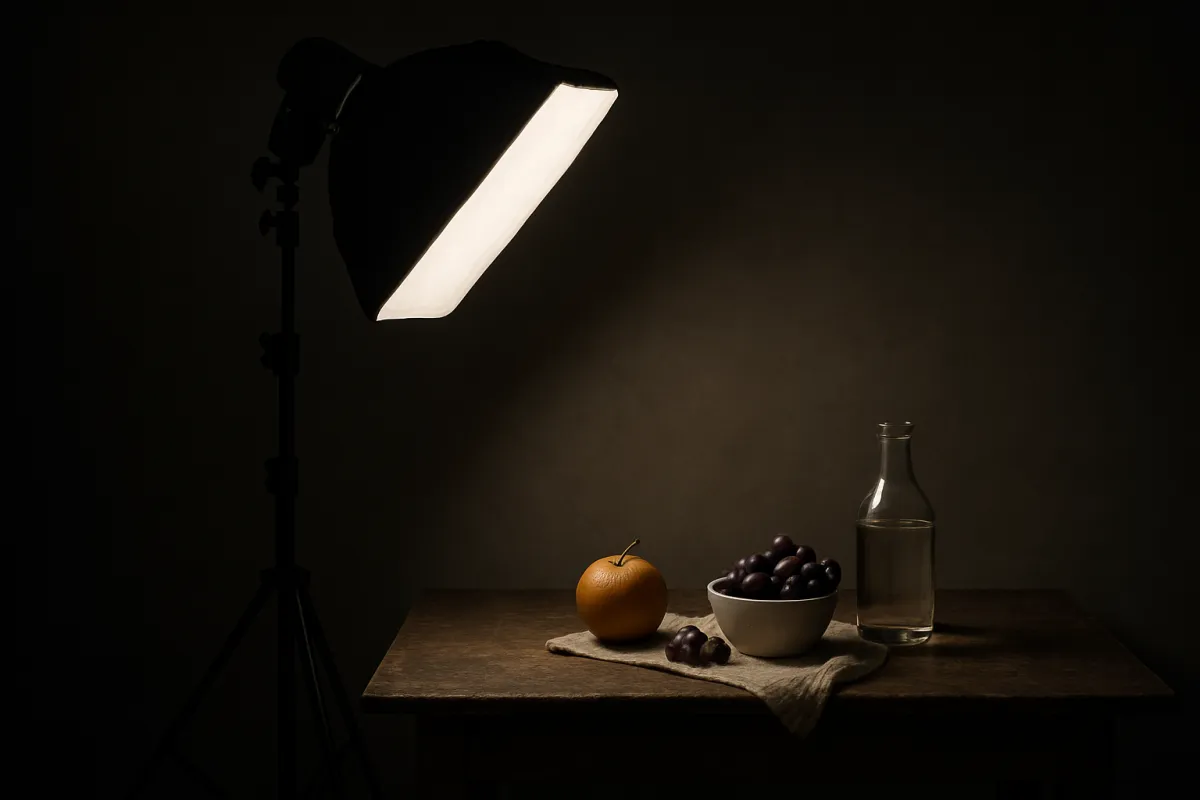
What's on this page
- What product photography is (and why it pays off)
- The gear you actually need for product photography
- Camera or phone for product photography
- Why a tripod matters for product photography
- Lightboxes, diffusion, and backdrops
- Lighting: window light versus continuous and strobe
- Softening light and killing harsh shadows
- The white background setup, step by step
- Lifestyle setups: products in context
- Camera settings for sharp product photos
- ISO, white balance, and honest color
- Composition and angles for product photos
- Budget versus better: a setup cost breakdown
- A worked example: photographing one product
- Editing basics for product photos
- Shooting reflective and glossy products
- Product photography on a phone
- Common product photography mistakes
- Your product photography checklist
- The bottom line
Short answer: Product photography is photographing an object so a viewer can see it clearly, judge it fairly, and want it. Light is the whole game: soft, directional light from a large window or one diffused lamp, never hard overhead light. Use a tripod, a clean plain background, a white card to bounce light, base ISO around 100, an aperture near f/8 to f/11 so the whole item is sharp, RAW capture, and light, honest editing.
Product photography is the skill of making an object look its best in a photo, and it is one of the highest-return techniques a small seller, maker, or hobbyist can learn, because a clean, well-lit photo is often the single thing that decides whether someone clicks buy. The gap between a listing photo that looks amateur and one that looks professional is rarely the camera. It is a short, learnable set of decisions about light, background, support, camera settings, and a light touch of editing, and every one of them can be practiced on your kitchen table with gear you may already own.
This field note is written for people photographing things they want to sell or show: handmade goods, resale items, small-business products, a portfolio, or a marketplace listing. It stays at the level of technique rather than naming brands or quoting prices, because the principles hold across every phone and camera. Where a setting or a focus habit overlaps a skill covered elsewhere, it leans on our reference field notes rather than repeating them: the exposure choices below are the same ones in our manual mode field note and exposure triangle field note, the focus habit runs through our sharp photos field note, and if you are shooting on a phone, our phone camera lens field note and phone tripod field note go deeper. Price any gear you are tempted by against the upgrade budget planner before you assume equipment is the problem.
Key takeaways
- Light is the whole game: soft, directional light from a large window or one diffused lamp flatters a product, while hard, direct light and overhead ceiling light make it look flat and cheap.
- You need very little gear to start: a steady camera or phone, a tripod, one soft light, a clean background, and a white card to bounce light are enough for genuinely professional results.
- Product shots sit still, so use the cleanest settings: base ISO around 100, an aperture near f/8 to f/11 to keep the whole item sharp, a tripod, and RAW capture for honest color.
- A plain, clean background sells the product: a simple white sweep for e-commerce, or a real surface with props for lifestyle shots that show the item in use.
- Edit lightly and honestly: correct white balance, lift contrast, clean up dust, brighten a white background, but never change the product's true color, texture, or shape.
What product photography is (and why it pays off)
Product photography is simply photographing an object so that a viewer can see it clearly, judge it fairly, and want it. That definition sounds obvious, but it points at the two jobs every product photo has to do at once: be accurate, so the buyer gets what they expected and does not send it back, and be appealing, so they choose it over the next listing. Those two goals pull gently against each other, and learning product photography is largely learning to serve both, to make an item look its best without misrepresenting it.
The payoff is unusually direct for a photography skill. For anyone selling online, the main photo is the storefront, the thing a shopper judges in a fraction of a second before reading a word of the description. A sharp, bright, clean image reads as a trustworthy seller and a quality product, while a dim, cluttered, blurry snapshot reads as neither, regardless of how good the actual item is. The same holds for a maker building a portfolio, a hobbyist documenting a collection, or a freelancer showing work.
What makes this such a rewarding skill to learn is that the returns come from care and understanding, not from spending. A thoughtful setup with a window and a piece of white card routinely beats an expensive camera used carelessly under a ceiling light. The rest of this article walks the whole workflow: the gear that actually helps, how to light a product, simple setups you can copy, the camera settings that keep it sharp, composition and angles, a budget-versus-better cost breakdown, editing, and the mistakes to avoid. Run your own kit and budget through the upgrade budget planner as you read, because most of what makes a product photo work is decisions, not price tags.
The gear you actually need for product photography
The honest starting list for product photography is short, and you probably own more of it than you think. In rough order of how much each one helps, you need a camera you can hold steady, a way to steady it, one soft light source, a clean background, and something to shape the light. Everything beyond that is refinement. A beginner who owns a phone, sets it on any firm support beside a window, and props a sheet of white card opposite to bounce light back is already equipped to make listing photos that look professional.
The camera can be a phone or an interchangeable-lens body, and we weigh that choice in the next section, but it matters less than beginners expect because the product is not moving and the light is under your control. The support matters more than it looks: a tripod, a small tabletop stand, or even a stack of books that holds the camera dead still lets you use a low ISO and a slow shutter for the cleanest possible file, which our sharp photos field note explains in full. The light can start as a free window and grow into a continuous lamp with a softbox. The background can be a roll of paper, a sheet of card, or a clean wall.
The shaping tools are the cheap secret of good product photography: a piece of white foam board or card to bounce light into shadows, and a sheet of tracing paper, a shower curtain, or a purpose-made diffusion panel to soften a light that is too harsh. These cost almost nothing and do more for the look than an expensive camera. Resist the urge to buy a big kit before you have shot anything. Set up with what you have, learn what each element does, and let the gaps you actually hit, not a shopping list, tell you what to buy next. Price the tempting upgrades against the upgrade budget planner first.
Camera or phone for product photography
The first question most beginners ask is whether their phone is good enough, and for a large share of product photography the answer is yes. Modern phone cameras resolve more than enough detail for online listings and social posts, and one of their supposed weaknesses is an advantage here: their small sensors give very deep depth of field, so the whole product tends to be sharp without any effort, which is exactly what most product shots want. Photographed on a tripod beside a good window, a phone produces images that hold their own for e-commerce, and our phone camera lens field note covers getting the most from the lenses you have.
An interchangeable-lens camera, a mirrorless body or a DSLR, earns its place when you want more control and the highest quality. You gain a proper aperture ring to fine-tune depth of field, better performance in dim light, cleaner files at low ISO, full RAW capture for precise color, and the ability to attach a macro lens for very small items like jewelry. None of that is necessary to start, but all of it helps once product photography becomes a regular part of what you do, and it is the difference that shows when a client or a marketplace demands large, flawless images.
The pragmatic path is to start with whatever you own and let results, not aspiration, drive the upgrade. If your phone photos look flat, the fix is almost always the light or the background, not the camera, so change those first. If, after your lighting is soft and your background is clean, you keep hitting real limits, small items that need magnification, colors that never quite match, or noisy files in a dim workspace, that is the signal a dedicated camera will pay off. Our first camera budget field note walks the buying decision, and the upgrade budget planner helps you sequence it sensibly.
Why a tripod matters for product photography
A tripod is the least glamorous item in product photography and one of the most valuable, because it unlocks the settings that produce a clean, sharp file. When the camera is locked down, you are free to use your camera’s base ISO, around ISO 100, for the lowest possible noise, and to let the shutter stay open as long as the exposure needs, even a full second or more, without a trace of camera shake. Hand-holding forces the opposite compromises, a faster shutter and a higher ISO, and it introduces the soft, slightly blurred look that instantly marks a photo as amateur. Our sharp photos field note covers why a steady camera matters so much.
The tripod does more than prevent blur, though. It fixes your framing, which is what lets you shoot a whole set of products from the identical distance, height, and angle for a consistent, professional-looking catalog, something impossible to match by hand. It also frees both your hands to adjust the product, tweak the light, add or remove a prop, and fine-tune the composition between frames without the framing drifting. And it slows you down in a good way, encouraging the deliberate, considered approach that product work rewards over the spray-and-pray habit that suits action.
You do not need an expensive tripod to start. Any stable support that holds the camera or phone dead still will do the job, including a cheap tabletop tripod, a clamp, or an improvised stack of books, and a phone simply needs an inexpensive holder to attach, which our phone tripod field note covers in detail. A remote release or the camera’s two-second self-timer removes the last bit of shake from pressing the shutter. If you buy one accessory for product photography before any light or backdrop, make it whatever holds your camera perfectly still, because it improves every single frame you will ever take.
Lightboxes, diffusion, and backdrops
Once the camera is steady, the tools that shape your light and background do the most for the look, and the good news is that they are inexpensive and easy to improvise. A lightbox, sometimes called a light tent, is a collapsible cube of translucent white fabric with an opening at the front for the camera. You place a small product inside and shine lights through the walls, which diffuse into soft, even, wraparound light with a built-in clean white background. For small items like jewelry, cosmetics, and accessories, an inexpensive lightbox is close to a shortcut to professional results, though larger products quickly outgrow it.
Diffusion is the broader principle a lightbox applies, and you can create it far more cheaply. Any translucent material placed between a light and the product spreads a small, harsh light into a large, soft one: a sheet of tracing paper, a white shower curtain, a thin white bedsheet, or a purpose-made diffusion panel all work. The rule that governs all of it is that a larger, closer light source is softer, so the aim is to make your light appear big and near relative to the product. This is the same soft, directional quality that flatters faces in our portraits field note, applied to objects.
Backdrops give the product a clean stage. The workhorse is a sweep, a single continuous sheet of paper or card that curves from horizontal under the product up to vertical behind it, so there is no hard seam or corner line to distract the eye. White is the standard for e-commerce, but a roll of paper in gray, black, or a color, or a textured surface like wood, slate, or fabric, sets a different mood for lifestyle work. Keep a few backgrounds on hand, keep them clean and wrinkle-free, and make sure whatever you choose contrasts with the product so its edges stay crisp rather than blending in.
Lighting: window light versus continuous and strobe
Lighting is the heart of product photography, and the first decision is your source. Natural window light is where almost every beginner should start, because it is free, it is soft when the window is large and the day is bright but overcast, and it teaches your eye what good light looks like. Place the product on a table beside a large window, out of direct sun so the light stays soft, and you have a professional-grade light source at no cost. Its one weakness is consistency: the sun moves, clouds change the brightness minute to minute, and once it is dark you are done, so a batch shot over hours can drift in look and color.
Continuous artificial light solves the consistency problem and is the natural next step. A continuous light, typically an LED panel or a lamp fitted into a softbox, stays exactly as bright and as colored as you set it, at any hour, which is what you want once you are shooting many items to a single consistent style. Crucially, continuous light is what you see is what you get: you watch the shadows and highlights move as you reposition the light, which makes it far easier to learn on than flash. One good continuous light with a softbox, plus a white card to bounce fill into the shadows, covers most beginner and intermediate product work comfortably.
Strobe, or studio flash, is the professional standard for a reason: it delivers a large burst of power that overwhelms ambient light, freezes any tiny vibration, and recycles quickly for high-volume shooting. The trade-offs are that it costs more, and because the flash fires only for an instant you cannot see the effect until you take a test frame, which makes it harder for a beginner to learn on. The honest advice is to master free window light first, add one continuous light when the lack of consistency starts costing you, and consider strobe only if you scale into high-volume or commercial work. In low light of any kind, the habits in our low light field note still apply.
Softening light and killing harsh shadows
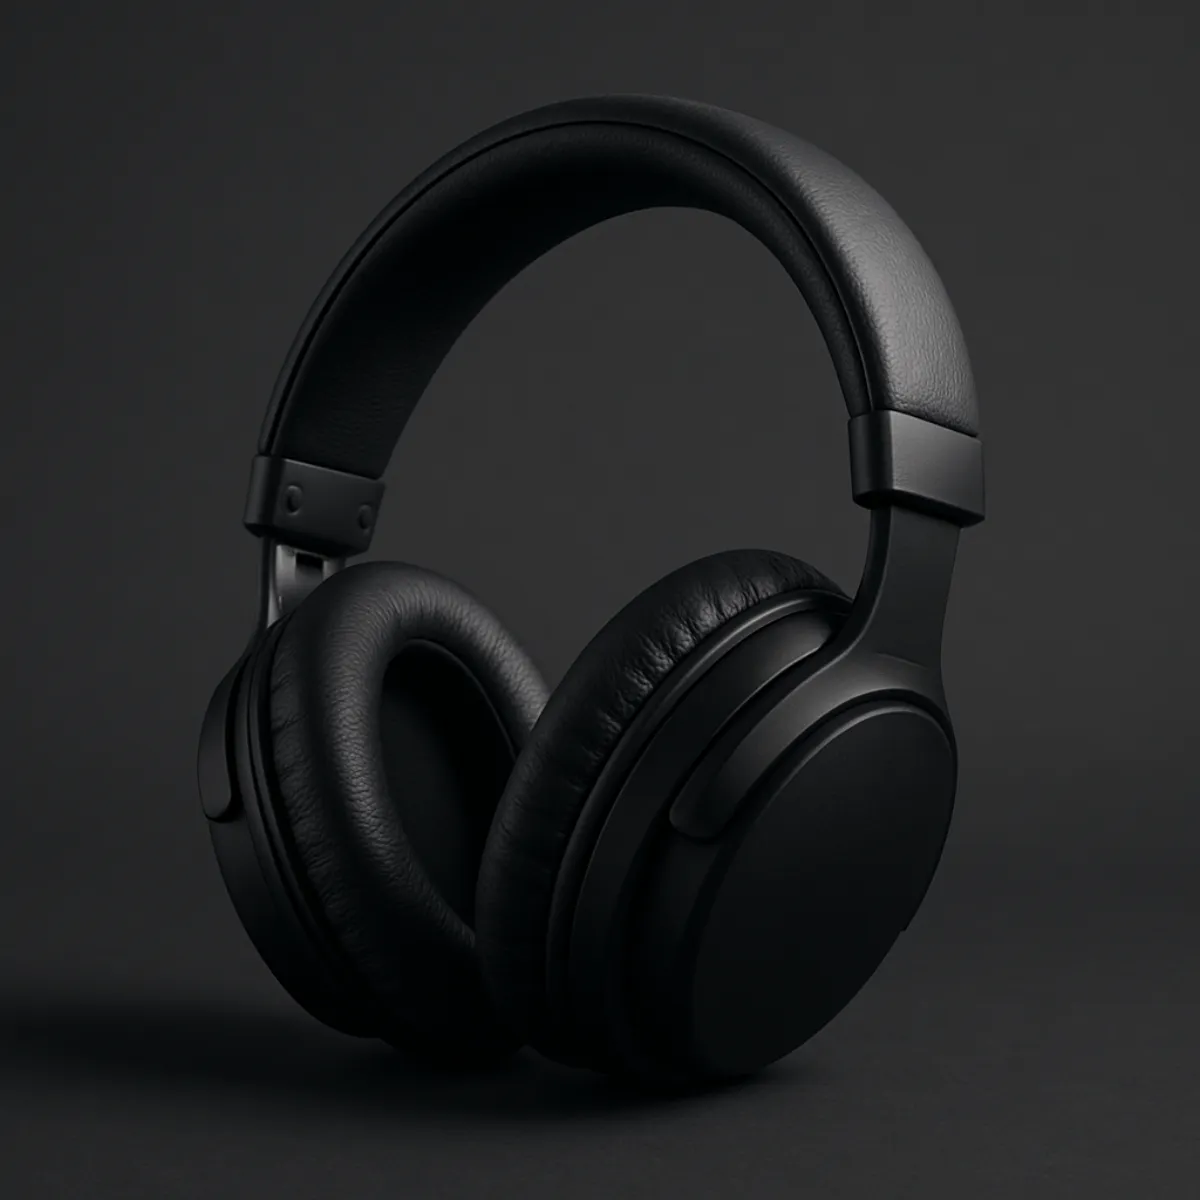
The single most common reason a product photo looks cheap is hard light, and learning to soften it is the highest-leverage skill in this whole article. Hard light comes from a small, bare source: a phone flash, a bare bulb, a spotlight, or direct midday sun. It creates harsh, sharp-edged shadows, blown-out hot spots on shiny surfaces, and an overall harsh look that flatters nothing. Soft light comes from a large source relative to the product, and it wraps gently around the item, rendering smooth gradients from light to shadow that make the product look premium.
There are two reliable ways to soften a light, and they rest on the same principle that a bigger, closer source is softer. The first is diffusion: put a translucent material between the light and the product, tracing paper, a white sheet, a shower curtain, or a softbox, which spreads a small harsh source into a large soft one. The second is bounce: aim the light at a large white surface, a wall, a ceiling, or a sheet of foam board, and let the product be lit by the soft reflected light instead of the direct beam. Either turns a hard light into a flattering one, and you can combine them.
Shadows themselves are not the enemy, because a little soft shadow is what gives a product three-dimensional shape, but harsh or overly dark shadows are. The classic single-light-plus-bounce setup controls them perfectly: place your one soft light to the side of the product at roughly 45 degrees so it models the form, then stand a white card or sheet of foam board on the opposite side to bounce light back and lift the shadows so they stay soft and detailed rather than turning to black. That white bounce card, sometimes called a fill card, is the cheapest and most useful tool in product lighting, and moving it closer or farther is how you fine-tune the depth of the shadows. Watch the shadow side as carefully as the lit side, because soft, controlled shadows are half of what makes a product look expensive.
The white background setup, step by step
The clean white background is the standard look for e-commerce, and it is more achievable at home than it appears, provided you understand it comes from two separate things: a continuous white surface, and enough light on that surface to render it truly white. The most common beginner error is expecting a white background to be white automatically, when an underlit white sweep photographs as a dull gray that then has to be rescued in editing. Get it bright at capture and the edit becomes trivial.
Start with the sweep. Take a large sheet of white paper or card, lay part of it flat on the table for the product to sit on, and curve the rest up to a vertical support behind, so the transition from floor to wall is a smooth curve with no hard seam or corner line. The product sits on the flat part, and behind it the eye sees only a seamless field of white. For small products a sheet of poster board works; for larger ones a roll of seamless paper does the same job at scale. Keep the sweep clean and unwrinkled, because every crease and smudge shows.
Now light it in two jobs. First, light the product itself with your soft side light and a bounce card, as in the previous section, so the item looks three-dimensional. Second, if you can, add a little separate light onto the background, or simply position the product far enough forward that your main light spills onto the sweep and brightens it, so the white reads as clean and bright rather than gray. In editing you finish by lifting the background to pure white while protecting the product’s edges. The caution is not to overdo the background light: if it spills too hard around the product it eats into the edges and the item looks like it is dissolving, so aim for bright and even, then clean it up gently afterward.
Lifestyle setups: products in context
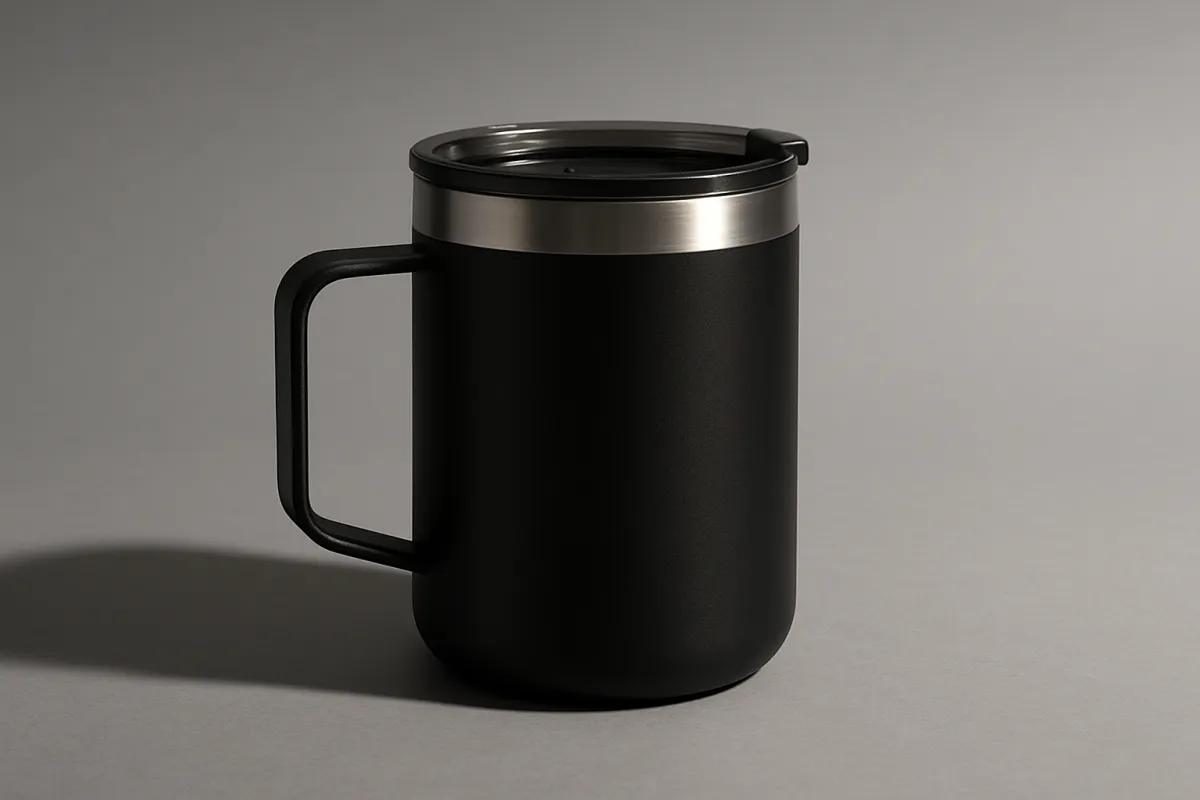
The white background sells the product in isolation, but the lifestyle shot sells the feeling of owning it, and a good listing usually wants both. A lifestyle photo shows the product in a real, relatable setting, in use or surrounded by props that suggest its world: a mug on a wooden table beside a book and a plant, a bag propped by a doorway with a coat and keys, a skincare bottle on a bathroom shelf with a folded towel. The goal is to help the viewer imagine the item in their own life, which a clinical white background cannot do.
The craft of a lifestyle shot is styling restraint. Choose a surface and a few props that fit the product’s story and price point, then use fewer than you think you need, because clutter competes with the hero item and confuses the eye. Every prop should either support the mood or hint at how the product is used, and anything that does neither should leave the frame. Keep the product clearly the star through position, focus, and light, and let the props stay quietly in support, often softly out of focus behind or beside it. A shallower depth of field is more welcome here than in a catalog shot, because a gently blurred background of props isolates the hero product, the same separation our portraits field note uses for faces.
Light a lifestyle scene the same soft, directional way, but you have more freedom to let the mood lead: warm window light for a cozy feel, brighter and cooler for a clean modern look. Watch the background for distractions, a cluttered shelf or a bright doorway pulling the eye, and simplify by moving props or shifting your angle. Compose so the eye lands on the product first and then explores the scene. Done well, a lifestyle photo does emotional work a plain shot cannot, which is why the strongest listings pair a crisp white-background hero with two or three lifestyle frames that show the item living in the world.
Camera settings for sharp product photos
Because a product sits still on a tripod, you get to use the settings that produce the cleanest, sharpest possible file, without the compromises that action forces. The three that matter are aperture, ISO, and white balance, and shutter speed simply falls wherever the exposure needs once the other two are set, since the tripod absorbs any length of exposure. If you shoot in manual mode, our manual mode field note walks the full routine, and the exposure triangle field note explains how the three trade off.
Aperture controls depth of field, the front-to-back zone of sharpness, and for most product work you want the whole item sharp rather than the shallow blur used for portraits. That points to a middle aperture, commonly in the f/8 to f/11 range for a single product, which keeps the front and back of the item crisp while staying near the lens’s sharpest performance. For very small subjects photographed close, like jewelry, depth of field shrinks dramatically, so you may need to stop down further to f/11 or f/16, or use focus stacking, to hold the whole piece sharp. For a lifestyle shot where you want the props behind to blur, open up toward f/4 instead. On a phone, aperture is fixed and the deep depth of field is automatic, so you simply tap to focus.
ISO should sit at your camera’s base, usually ISO 100, because a still subject on a tripod has no need for a higher one and a low ISO gives the cleanest, most detailed, least noisy file, which matters when a buyer zooms in. White balance is what keeps the product’s color honest, so set it to match your light, the daylight preset for window light or a custom value for a continuous lamp, rather than leaving it on auto, which drifts frame to frame and can misrepresent the color of what you are selling. Shoot RAW whenever you can, because it records the full color data and lets you set white balance and recover detail precisely afterward, which is exactly what accurate product color demands. Treat every number here as an illustrative starting point to meter from, then judge the result on screen.
ISO, white balance, and honest color
Color accuracy deserves its own attention in product photography, because unlike most photography, getting it wrong here has real consequences: a buyer who receives an item in a different shade than the photo showed will be disappointed and may return it. Your job is to render the product’s true color faithfully, which is a white-balance question first and an editing question second. Set white balance to match your actual light source rather than trusting auto, which guesses and drifts, and the daylight preset is a reliable start under window light while a custom or measured value suits a continuous lamp.
The most reliable way to nail color is to include a neutral reference in a test frame. A gray card or even a sheet of plain white paper photographed once under your lighting gives you a known neutral to click on in editing, which sets the white balance exactly and corrects any color cast in a single step. Shoot that reference frame, then remove it and shoot the product under the identical light, and your whole set inherits accurate color. This small habit is the difference between colors that are approximately right and colors that match the item in a customer’s hands.
Keep ISO low, as covered above, both for cleanliness and because noise at high ISO can subtly shift and muddy colors. Watch your exposure so you are not clipping highlights on glossy surfaces or crushing shadows, since both destroy color information that cannot be recovered. And carry the honesty through to editing: it is fine to correct a color cast so the photo matches reality, but it is not fine to shift a product to a shade you do not actually sell. Accurate color protects both the buyer and your reputation, so treat it as a technical requirement rather than a creative choice, and the returns and complaints that come from misleading photos never start.
Composition and angles for product photos
With the light and settings handled, composition and angle decide how compelling the product looks, and small changes here make a large difference. The most common beginner habit is shooting every product from a single flat, eye-level, straight-on angle, which is often the least flattering choice. Instead, choose the angle that best shows the product’s shape and most important features. A slightly elevated three-quarter view, looking down at perhaps 30 to 45 degrees, works for a huge range of objects because it shows the top and the front at once and gives a natural, dimensional sense of the item.
Different products call for different angles, so let the object guide you. Flat items like clothing laid out, books, or stationery often look best shot directly from above, the flat-lay, which turns the surface into a clean graphic composition. Tall items like bottles or shoes may want a lower, more head-on angle that emphasizes their height and stance. Anything with an important detail, a texture, a clasp, a logo, a material, deserves its own closer frame that highlights it. The reliable approach is to shoot each product from several angles and heights and choose the strongest, rather than settling for the first frame.
Apply the ordinary rules of composition, then break them with intent. Give the product a little breathing room rather than cramming it to the edges, place it thoughtfully in the frame rather than dead center out of habit, and keep the background simple so nothing competes with the item. Watch your edges for distractions creeping in, keep verticals straight so bottles and boxes do not lean, and mind the negative space around the product, which can look clean and premium or empty and awkward depending on how you balance it. Above all, keep focus on the product tack sharp where it counts, using the focus habits in our sharp photos field note, because a beautifully composed but softly focused product photo still fails.
Budget versus better: a setup cost breakdown
You can assemble a capable product photography setup for almost nothing and upgrade each piece as your needs grow, and it helps to see the two ends side by side. The table below pairs a starter approach for each element with a step-up option, at the category level rather than naming brands or quoting exact prices, since real costs vary widely by region and market. The pattern to notice is that the starter column is dominated by things you improvise or already own, and the biggest quality jumps come from light and support, not from the camera.
| Setup element | Budget option | Better option |
|---|---|---|
| Camera | The phone you already own, on a tripod | A mirrorless or DSLR you can set to manual, with a sharp lens |
| Support | A stack of books or a cheap tabletop tripod | A stable full-size tripod with a geared or ball head |
| Main light | A large window on an overcast day | A continuous LED light fitted with a softbox |
| Diffusion | Tracing paper, a white sheet, or a shower curtain | A purpose-made softbox or diffusion panel |
| Fill | A sheet of white foam board or card | A second bounce card or a reflector on a stand |
| Background | White poster board or a clean wall | A roll of seamless paper on a stand, in several colors |
| Small items | A cheap fold-up lightbox or light tent | A larger tent plus a macro lens for tiny detail |
| Surface and props | Household items you already own | A small collection of curated surfaces and styling props |
Read the table as a sequence, not a shopping list to buy all at once. Start entirely in the budget column, shoot real products, and let the specific limits you hit tell you which single element to upgrade first. For most people the highest-return early purchases are whatever holds the camera perfectly still and one good continuous light with a softbox, because those fix the two problems, shake and hard light, that most often make photos look amateur. The camera itself is usually the last thing worth upgrading, not the first. Run any tempting purchase through the upgrade budget planner so the spending follows the results rather than leading them.
A worked example: photographing one product
Theory into practice: here is a single realistic session, with illustrative settings, so the whole workflow is concrete. The product is a ceramic mug for an online shop, and you are shooting on a mirrorless camera beside a large window on an overcast afternoon, with a tripod, a sheet of white foam board, and a white poster-board sweep. You want a clean, bright, accurate catalog photo.
Set the stage. You curve the white poster board from the table up against a box to make a seamless sweep, wipe a smudge off the mug and rotate its handle to a flattering three-quarter angle, and set it on the flat part of the sweep. Place the light. The large window is your soft source, so you position the mug a couple of feet from it with the window to one side at about 45 degrees, which rakes soft light across the mug and reveals its form. Fill the shadows. You stand the white foam board on the opposite side, close to the mug, bouncing window light back into the shadow side so it stays soft and detailed rather than going black, and you slide the board nearer or farther until the shadow looks right. Steady and frame. With the camera on the tripod at a slightly elevated three-quarter angle, you compose the mug with a little breathing room and the sweep filling the frame behind it.
Dial the settings. You set ISO 100 for the cleanest file, choose f/8 so the whole mug is sharp front to back, and let the shutter fall where the meter lands, around a fifth of a second, which the tripod holds without a trace of shake. You set white balance to the daylight preset, shoot a quick frame with a sheet of white paper in shot as a color reference, then remove it and shoot RAW. Focus and shoot. You put a single focus point on the front face of the mug, confirm it is sharp, and fire using the two-second timer so pressing the shutter adds no shake, taking a few frames and checking sharpness at full magnification. Edit lightly. At the computer you click the white balance on the reference frame to set color exactly, lift the exposure and background to a clean white while protecting the mug’s edges, add a touch of contrast, remove one speck of dust, and straighten and crop to your shop’s standard framing. One mug, one window, one bounce card: ISO 100, f/8, daylight white balance, RAW, on a tripod. Run your own product’s kit through the upgrade budget planner before assuming you need more gear.
What makes a strong product photo
Illustrative weighting, out of 100, of how much each element contributes to a product photo that looks professional and sells. This is a mental model from common experience, not a measured study, so read it as where to spend your attention first.
Light and background carry a product photo, with sharp focus close behind, which is why the free skills matter most. Color and composition refine a frame those three already made good, and editing finishes it. Tune the model to your own shooting with the companion above.
Where the work goes in a product photo
Illustrative share of the effort that each stage contributes to a finished product photo. The four parts sum to the whole result, so no single stage does it alone.
Most of a product photo is made before you edit: the light you shape and the set you build do nearly two-thirds of the work, with the camera settings holding it sharp and honest. Editing finishes a frame those stages already made good. Adjust the split to your own work with the companion above.
Editing basics for product photos
Editing is the final stage, and for product photography the guiding rule is honesty: the edit should make an accurate photo look its best, never turn the item into something it is not. Most product shots need a modest, repeatable edit rather than a heavy one, and building a consistent routine you apply to every image is what makes a shop look coherent. Editing enhances a well-shot frame; it cannot rescue one that was badly lit or out of focus, which is why the setup work before this matters far more than any slider.
Start with the honest global adjustments that improve any photo. Set white balance precisely, ideally by clicking the neutral reference you shot, so the color matches the real product. Adjust exposure and contrast so the item looks crisp and bright without clipping the highlights or crushing the shadows. For a white-background shot, lift the background toward pure white while carefully protecting the product’s edges so it does not eat into the outline. Straighten any tilt and crop to a consistent framing across your whole set, since matching crops across a catalog is a large part of what reads as professional.
Then clean up and finish with restraint. Remove dust specks, lint, fingerprints, and small distractions that you missed at capture, which is quicker than reshooting but no substitute for cleaning the product first. Sharpen gently at the end to crisp up detail. The line you must not cross is altering the product itself: do not recolor an item to a shade you do not sell, do not smooth away real texture or grain, and do not hide a genuine flaw or seam, because all of these mislead the buyer and lead to returns, complaints, and lost trust. Keep a light hand, keep the color true, and let the edit polish an honest photo rather than fabricate a better product.
Shooting reflective and glossy products
Reflective and glossy products, glassware, polished metal, jewelry, glossy packaging, screens, are the hardest thing a beginner will photograph, because a shiny surface acts like a mirror and shows everything around it, including your lights, your camera, the room, and you. The instinct to fix harsh reflections by adding more direct light makes it worse, since every new light becomes a new bright streak on the surface. The whole craft of shooting reflective products is controlling what the surface is allowed to reflect.
The core technique is to surround the product with soft, even white rather than small hard lights and a cluttered room. A light tent or a cocoon of diffusion panels and white cards placed close around the item means the surface reflects a smooth, continuous field of white instead of distracting shapes, which is exactly why light tents exist and why professionals build white enclosures for shiny work. Large diffused sources placed to wrap the product, rather than small bare ones, turn the inevitable reflections into clean, gradual highlights that actually describe the shape of a glossy object rather than spoiling it. You are not eliminating reflection, which is impossible, you are shaping it into something flattering.
A few specific habits help. Watch through the viewfinder or screen and move the camera, the product, or the lights slightly to shift a distracting reflection off the important part of the surface. Keep yourself and the camera from appearing in the reflection by using a longer working distance, shooting through a gap in the diffusion, or masking the camera area with black card. For glass and liquids, backlighting through a diffused panel behind the product often works better than lighting from the front. And accept that difficult reflective items usually need patient trial and error plus more cleanup in editing than a matte product, so slow down, adjust one thing at a time, and check the surface carefully before you shoot.
Product photography on a phone
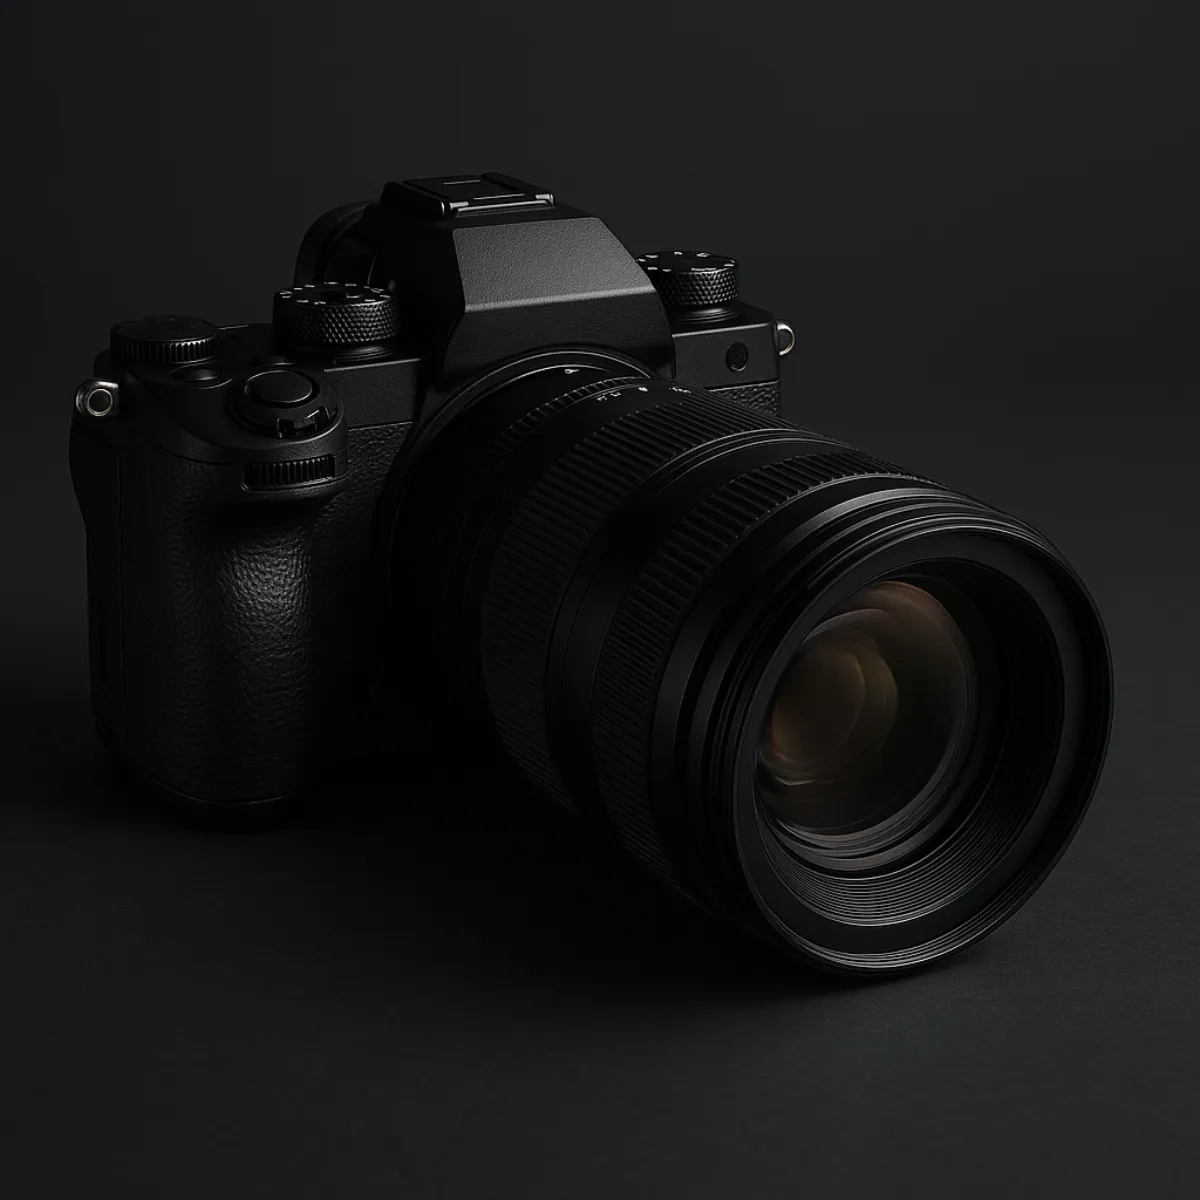
A phone is a fully capable product camera for most beginners and many small sellers, and treating it seriously rather than as a compromise gets you a long way. The same principles govern it as any camera: the light, the background, the support, and the settings do the work, not the badge on the device. Photographed on a tripod beside a good window with a clean background and a bounce card, a modern phone produces product photos that stand up well for online listings and social posts, and its deep depth of field means the whole item is sharp with no effort on your part.
Get the fundamentals right first. Steady the phone on a small tripod or a holder so the shot is sharp and your framing stays fixed across a set, exactly as you would with a camera, which our phone tripod field note covers. Light the product with soft window light from the side and fill the shadows with a white card. Keep the background clean and simple. Then tap the product on screen to set focus and exposure, and drag the exposure slider down a touch if bright or glossy areas are blowing out, since phones tend to overexpose product highlights. Crucially, never use the digital zoom, which simply crops and throws away quality; move the phone closer instead, and use the phone’s main lens rather than the ultrawide for the most natural, distortion-free look, as our phone camera lens field note explains.
Push a little further with the tools the phone gives you. Many phones offer a RAW or pro mode that unlocks manual control over focus, exposure, and white balance and records more editable detail, which is worth using for product work where color accuracy matters. Use a portrait or aperture mode sparingly for lifestyle shots where you want the background softly blurred, but keep it off for catalog shots where you want everything sharp. Edit on the phone or a computer with the same light, honest touch as any product photo. The phone’s real limits, less aperture control and weaker performance in dim light, rarely bite next to a bright window, so a phone is a genuine starting point, not merely a fallback.
Common product photography mistakes
Most product photos fail in one of a handful of predictable ways, and knowing them in advance is the fastest route to better images. These are the pitfalls that come up again and again, and nearly all of them are free to fix:
- Hard, direct light. Lighting a product with a bare bulb, a phone flash, or direct sun creates harsh shadows and blown highlights that make it look cheap. Soften the light with diffusion or bounce it off a white surface, and place it to the side rather than straight on.
- A cluttered or uneven background. A busy, dirty, or wrinkled background competes with the product and reads as amateur. Use a clean, simple sweep that contrasts with the item, and keep it wrinkle-free and free of stray objects.
- Camera shake from hand-holding. Shooting handheld in ordinary indoor light gives soft, slightly blurred photos. Put the camera or phone on a tripod, drop to base ISO, and let the shutter stay open as long as the exposure needs.
- Flat, dead-on lighting. Light aimed straight at the product from the camera position erases the shadows that show shape and texture. Move the light to the side at roughly 45 degrees so it models the form, then fill the shadows softly.
- Dirty products and stray marks. Dust, lint, and fingerprints show mercilessly at close range and in sharp focus. Clean and prepare the product before shooting rather than trying to fix every speck in editing.
- One boring angle for everything. Shooting every item flat and eye-level wastes the chance to flatter it. Shoot several angles and heights, use a three-quarter or overhead view where it suits, and add a detail shot of the important feature.
- Dishonest or absent editing. Leaving a white background gray and flat, or the opposite, recoloring the product to a shade you do not sell, both fail the buyer. Edit lightly and honestly: correct color, brighten, and clean up, but keep the item true to life.
Your product photography checklist
Save this and run down it the next time you photograph a product, or before a batch you want to get right:
- Clean and prepare the product: wipe off dust, lint, and fingerprints, and position it at a flattering angle before you shoot.
- Steady the camera or phone on a tripod or firm support so the shot is sharp and the framing stays consistent across the set.
- Choose a clean background: a seamless white sweep for catalog shots, or a styled surface with a few restrained props for lifestyle.
- Use soft, directional light: a large window out of direct sun, or one diffused continuous light placed to the side at about 45 degrees.
- Fill the shadows with a white card or foam board on the opposite side, moved closer or farther to control how deep the shadows sit.
- Set clean settings: base ISO around 100, an aperture near f/8 to f/11 to keep the whole product sharp, and let the shutter fall where it needs.
- Set white balance to match your light, shoot a neutral reference frame, and capture RAW for honest, correctable color.
- Focus carefully on the product and confirm sharpness at full magnification, using a timer or remote to avoid shutter shake.
- Shoot several angles and at least one close detail frame, watching the edges and keeping verticals straight.
- Edit lightly and honestly: correct color, lift exposure and the white background, clean up stray marks, crop to a consistent framing, and never misrepresent the item.
The bottom line
Product photography is not about owning an expensive camera; it comes from a short, repeatable set of decisions worked in order, most of which cost nothing. Light is the whole game, so make your light soft and directional with a large window or one diffused lamp, place it to the side to reveal shape, and bounce a white card into the shadows to keep them gentle, because hard, flat light is what makes a product look cheap. Put the camera on a tripod so you can shoot at base ISO and an aperture near f/8 to f/11 that keeps the whole item sharp, set white balance to match your light and capture RAW so the color stays honest, and stage the product on a clean sweep or a lightly styled surface that never competes with it. Shoot a flattering angle and a detail frame, then finish with a light, honest edit that brightens and cleans up without ever misrepresenting what you are selling. The freeing realization is how little of this requires money: the best product light is free, the most useful tool is a sheet of white card, and the biggest gains come from care and attention rather than gear. Work the checklist in order, and the camera or phone you already own will start returning photos that look professional and earn the click. Price any upgrade you are still tempted by in the upgrade budget planner, then go photograph something and keep the frame where the light is soft and the product looks like itself.
This field note teaches a photographic workflow, not a product: no brand paid for a placement and none is named on purpose, only lighting, settings, and setups that hold across every camera and phone. Every camera setting, aperture, and ISO here is an illustrative starting point to meter from rather than a fixed rule, because the exposure and depth of field that render a product well change with your sensor, your lens, your light, and the item in front of you. The one firm principle is honesty: a product photo must represent the real item accurately in color, texture, and shape, so treat the editing advice here as permission to polish an accurate frame, never to fabricate a better product than the one a buyer will receive.
Frequently asked questions
What do I need to start product photography?
You need less than most beginners assume, and none of it has to be expensive. The short list is a camera you can steady, a tripod or any firm support so the shot stays sharp, one soft light source, a clean background, and something to bounce or diffuse the light. A modern phone on a tripod next to a large window, with a sheet of white foam board bouncing light back into the shadows, produces genuinely usable product photos for an online shop or a portfolio. As you grow, the upgrades that help most are a continuous light with a softbox so you are not waiting on the weather, a larger seamless backdrop, and a camera you can set to manual so you control aperture and white balance. Buy in that order and each purchase earns its place, which you can sanity-check against our upgrade budget planner before you spend.
Is natural light or artificial light better for product photography?
Neither is better in the abstract, because the quality of the light matters far more than its source. A large window on an overcast day is one of the best product lights there is: soft, directional, and completely free, which is why so many small sellers start with nothing else. Its drawback is consistency, since the sun moves, clouds pass, and evening shooting is off the table, so a batch of photos taken over a day can drift in brightness and color. Continuous artificial lights, an LED panel or a lamp fitted with a softbox, fix that by giving you the same look at any hour, which is what you want once you are shooting many items to a consistent style. The honest advice for a beginner is to master free window light first, learn what soft directional light looks like, and only buy a light when the lack of consistency is actually holding you back.
What camera settings should I use for product photography?
Because most product shots sit still on a tripod, you can use the settings that give the cleanest, sharpest file rather than chasing motion. Start at your camera's base ISO, usually ISO 100, since a still subject on a tripod does not need a high ISO and a low one keeps the image free of noise. Choose an aperture that keeps the whole product sharp, commonly in the f/8 to f/11 range for a single item, because you generally want the front and back of the product in focus rather than the shallow blur used for portraits. Let the shutter speed fall wherever the exposure needs, even to a fraction of a second, since the tripod holds everything still. Set white balance to match your light instead of leaving it on auto, and shoot RAW so you can correct color precisely afterward. These are illustrative starting points to meter from, not fixed rules.
How do I photograph products on a white background?
A clean white background comes from two things working together: a continuous white surface behind and under the product, and enough light on that surface to render it bright white rather than dull gray. The simplest setup is a sweep, a single sheet of white paper or card that curves up from the tabletop to a vertical support so there is no visible seam or corner line behind the product. Light the product from the side with a soft source, then, if you can, add a little separate light onto the background so it reads as pure white. In editing you finish the job by lifting the background to true white while protecting the product, which is far easier when you started with a genuinely bright, evenly lit sweep rather than trying to rescue a gray one. Avoid overexposing so hard that light spills around the edges of the product and eats into its outline, a common mistake that leaves items looking like they are dissolving.
Can I do product photography with just my phone?
Yes, and for many sellers a phone is entirely sufficient to start. Recent phone cameras resolve plenty of detail for online listings, and their deep depth of field is actually an advantage for product work, where you usually want the whole item sharp. The keys to good phone product photos are the same as for any camera: steady the phone on a tripod or a stack of books so the shot is sharp, use soft directional light from a window, keep the background clean, and tap the screen to set focus and exposure on the product. Pull the exposure slider down a touch if highlights are blowing out, and avoid the digital zoom, which throws away quality, by moving the phone closer instead. The phone's main limits are less control over aperture and weaker performance in dim light, but next to a bright window those rarely matter. Our coverage of phone camera lenses and the phone tripod guide go deeper on getting the most from a phone.
Why do my product photos look flat and dull?
Flat, dull product photos almost always trace back to flat, dull light. Light that hits the product straight on from the camera position, such as a phone's built-in flash or a ceiling light directly overhead, erases the small shadows that reveal shape and texture, leaving the item looking two-dimensional and lifeless. The fix is directional light: move your single soft source to the side of the product, roughly 45 degrees, so it rakes across the surface and brings out form, then bounce a white card into the shadow side so they stay soft rather than black. A second common cause is a busy or dim background that gives the eye nowhere to rest, and a third is under-editing, since even a good capture usually needs a small lift in contrast and a white-balance correction to look crisp. Get the light directional and soft first, because no amount of editing rescues genuinely flat lighting.
What are the most common product photography mistakes?
The recurring mistakes are nearly all about light, background, and sharpness. The biggest is hard, direct light that creates ugly shadows and blown highlights instead of soft directional light that flatters the product. Close behind is a cluttered or uneven background that competes with the item, when a plain, clean sweep would let the product stand alone. Camera shake from hand-holding in dim light is another, and it is entirely solved by a tripod and a low ISO. Beyond those, beginners often shoot from a single boring eye-level angle, forget to clean dust and fingerprints off the product before shooting, and either over-edit the colors until they misrepresent the item or skip editing entirely so the shot stays gray and flat. None of these require money to fix, only attention, which is why product photography rewards care far more than it rewards expensive equipment.
How much editing do product photos need?
Most product photos need a modest, honest edit rather than a heavy one, and the guiding rule is that the photo must still represent the real item accurately. A standard workflow is to set white balance so the colors are true, adjust exposure and contrast so the product looks crisp, clean up any dust spots or stray marks, and, for a white-background shot, lift the background to pure white while keeping the product's edges intact. Straightening and cropping to a consistent framing across a set of photos makes a shop look professional. The line you should not cross is changing the product itself: recoloring an item to a shade you do not sell, smoothing away real texture, or hiding a genuine flaw misleads buyers and leads to returns and complaints. Editing should make an accurate photo look its best, not turn it into a different product, so keep the color honest and the changes light.