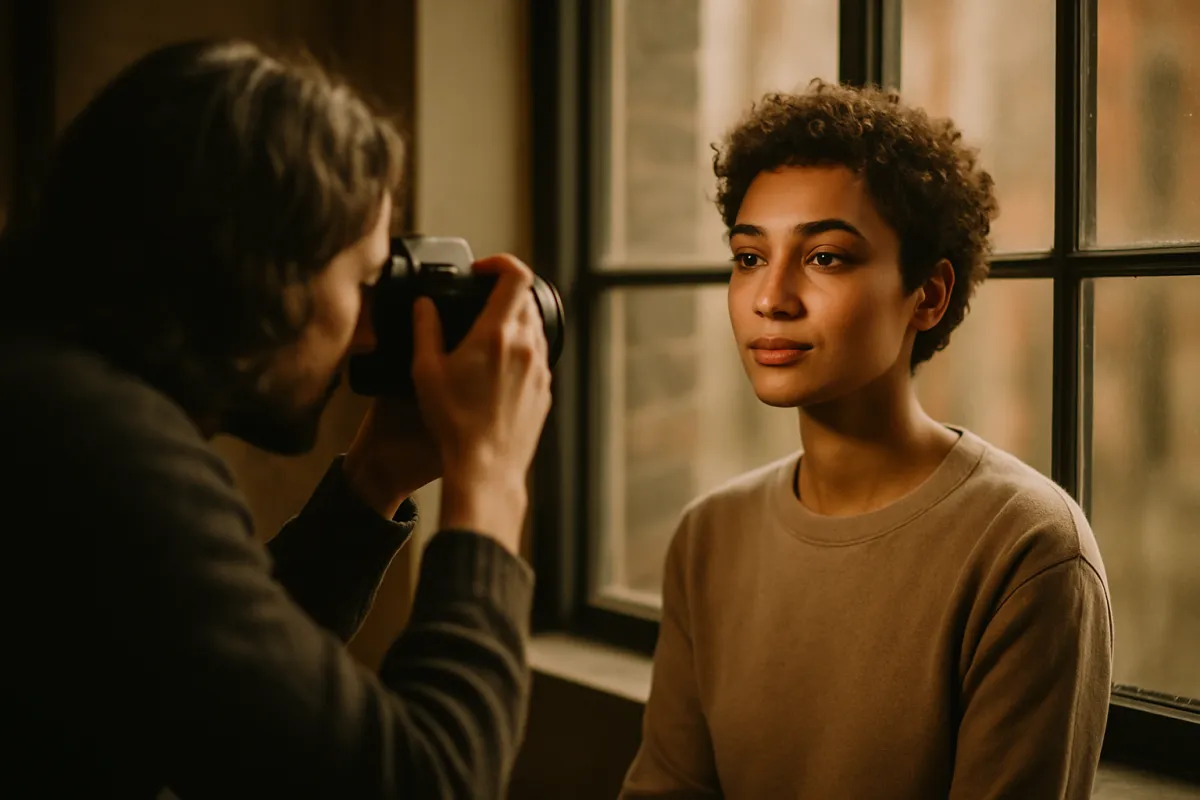
What's on this page
- Before you start
- Step 1: Pick a flattering focal length and lens
- Step 2: Open up for background separation
- Step 3: Focus on the nearest eye
- Step 4: Find flattering light
- Step 5: Simplify the background and composition
- Step 6: Direct and pose your subject
- Step 7: Dial exposure and white balance for skin tones
- Step 8: Edit portraits tastefully
- A worked example: setting up one portrait
- Common mistakes to avoid
- Troubleshooting tricky portraits
- Your portrait checklist
- The bottom line
Short answer: Take portrait photos with a longer focal length, 50mm to 135mm with 85mm the classic, so faces keep natural proportion; a wide aperture, an illustrative f/1.8 to f/2.8 for one person, to separate the subject from a simple background; and sharp focus placed on the nearest eye. Use soft, directional light from a window or the golden hour, relax your subject into a genuine expression, expose for honest skin, and edit lightly.
A portrait is the most human kind of photograph and, for many people, the most frustrating to get right. You raise the camera at a friend or your child, press the shutter, and the result is somehow flat: the background is a cluttered mess competing with the face, the eyes are not quite sharp, the light is doing unflattering things, and the whole frame looks like a snapshot rather than a photograph. The gap between those two outcomes is not talent or an expensive camera. It is a short, repeatable set of decisions about lens, aperture, focus, light, background, posing, exposure, and editing, and every one of them can be learned in an afternoon.
This is a how-to, so it leans on the reference field notes rather than repeating them. The aperture and shutter choices below are the same settings covered in our manual mode field note, and if your focus keeps landing soft, our sharp photos field note works the focus habit in full. The lens question runs through our 50mm versus 85mm field note and, for available-light portraits, our best lens for low light field note, while whether a single prime or a zoom suits you sits in our prime versus zoom field note. Price any glass you are tempted by with the upgrade budget planner before you assume the gear is the problem.
Key takeaways
- Focal length shapes the face: a 50mm to 135mm lens, with 85mm the classic, renders features in flattering, natural proportion from a comfortable working distance. Wide lenses up close distort.
- A wide aperture, an illustrative f/1.8 to f/2.8 for one person, separates the subject from the background, but the eyes must be tack sharp because depth of field is thin. Stop down to f/4 or more for groups.
- Soft, directional light flatters: a large window or the golden hour. Avoid harsh overhead midday sun, and if you cannot, move your subject into open shade.
- Focus on the nearest eye every time, with single-point or eye-detection autofocus, because that is where a viewer looks and where thin depth of field is least forgiving.
- Expression and a simple background matter more than any setting: talk your subject into a genuine look, and put nothing distracting behind them. Edit lightly so skin keeps its texture.
Before you start
Taking a good portrait is a low-difficulty, high-payoff skill: nothing here requires a studio or lights, only a handful of decisions you can practice in a single session. Difficulty is beginner to intermediate, and a productive first sitting runs about one hour with one willing subject, changing one variable at a time so you can see what each decision does to the result. The point is to build the habits so that when a real moment arrives, a birthday, a trip, a quiet afternoon, you already know where to stand, what to set, and what to say.
Here is the short list of what you need, in rough order of how much each one helps:
- A camera you can control, meaning one where you can set the aperture and choose the focus point. Nearly every interchangeable-lens camera qualifies, and many advanced compacts and phone portrait modes approximate the look.
- A portrait-friendly lens, ideally a fast prime around 50mm or 85mm with a wide maximum aperture near f/1.8, though a kit zoom set to its longest end and widest available aperture teaches the mechanics perfectly well.
- A willing subject and a little of their patience. Portraits are collaborative, and a relaxed person photographs far better than a tense one, so pick someone comfortable with you for your first practice.
- Good light, which is free: a large window with soft daylight, or the hour after sunrise or before sunset outdoors. You do not need to buy a single light to make a flattering portrait.
- A simple background and a little space behind your subject, because distance between the subject and whatever is behind them is what lets a wide aperture blur the background into a clean wash.
With that gathered, the eight steps below take you from flat snapshots of people to portraits that look intentional. Run your own kit and budget through the upgrade budget planner first, because most of what makes a portrait work is decisions and light, not the price of the lens.
Step 1: Pick a flattering focal length and lens
Start with the lens, because focal length decides the single most important thing a portrait does to a face: whether it renders features in natural proportion or distorts them. The reliable portrait range on a full-frame camera runs from about 50mm to 135mm, and the most celebrated single choice is 85mm. The reason is geometry, not fashion. A lens in this range lets you fill the frame with a head and shoulders while standing a comfortable few steps back, and that working distance renders the nose, eyes, and ears in the proportions the eye reads as natural and flattering.
Contrast that with getting close using a wide lens like a 24mm or 35mm. To fill the frame with a face you have to move in close, and at that distance the nearest feature, usually the nose, exaggerates in size while the ears recede, an effect that reads as a distorted, big-nosed caricature. This is why phone selfies taken at arm’s length often look unflattering: the lens is wide and the distance is short. The fix is always the same, back up and use a longer focal length, or on a phone switch to the longer portrait lens if it has one.
Two caveats keep this practical. First, account for your sensor: on a crop-sensor body you multiply the focal length by the crop factor, so a 50mm behaves like roughly 75mm and a 56mm like an 85mm, which is exactly why those lengths are sold as crop-camera portrait primes. Our 50mm versus 85mm field note weighs the two classic choices in full. Second, the range is a guide, not a cage: a 35mm shines for environmental portraits that deliberately include the setting around the person, and a 135mm gives tightly compressed, creamy headshots from across a room. If all you own is a kit zoom, set it to its longest end, around 55mm or 105mm, and you are already in portrait territory. Decide the look you want, headshot or environmental, and let that pick your focal length.
Step 2: Open up for background separation
With the lens chosen, the setting that most defines the portrait look is aperture, because a wide aperture creates the shallow depth of field that lifts your subject off a soft, blurred background. That separation is what makes a portrait feel three-dimensional and intentional rather than flat. For a single subject, a wide aperture in the illustrative f/1.8 to f/2.8 range is the usual starting point, and it is why fast primes are so loved for portraits: they open wider than most zooms and turn a busy background into a clean wash of color.
The caveat is the whole craft of Step 3, so read it carefully. At the very widest apertures, f/1.4 or f/1.8, depth of field can become so thin that only a sliver of the face is sharp: focus on the eyes and the ear or the tip of the nose may fall soft, and any focus error is punished immediately. Many portrait photographers therefore settle around f/2 to f/2.8 for a single person, which still blurs the background beautifully while giving enough depth to hold the whole near side of the face. Wide open is a tool, not a default, and there is no prize for shooting f/1.4 if it leaves the eyes soft.
Match the aperture to how many people are in the frame, because depth of field has to cover all of them. For one person, f/2 to f/2.8 is a dependable home base. For two people whose faces sit at slightly different distances, stop down to roughly f/4 so both are sharp. For a group of several, f/5.6 to f/8 keeps every row in focus, and you make up the lost light with more light or a higher ISO rather than by opening back up. Remember too that background blur depends on more than the f-number: a longer lens, a subject standing well in front of the background, and getting closer to your subject all increase the blur, so if your background is not melting away, move your subject further from it before you blame the aperture. Our best lens for low light field note covers the fast primes that make this easiest.
Step 3: Focus on the nearest eye
A portrait lives or dies on the eyes, so the rule here is simple and absolute: focus on the eye nearest the camera, every single time. At the wide apertures portraits use, depth of field is thin, and the eye is the first thing a viewer looks at, so a sharp eye against a slightly soft ear reads as a crisp portrait, while a sharp cheek and soft eyes read as a mistake no matter how good everything else is. Get this one thing right and forgive a lot elsewhere.
The reliable method is single-point autofocus. Select one small focus point, move it directly onto the near eye, half-press the shutter to lock focus, confirm the camera has locked, and only then take the shot. This puts you, not the camera’s guess, in charge of exactly where the sharpness falls. Many recent mirrorless cameras add eye-detection autofocus, which finds and tracks a subject’s eye automatically and is genuinely excellent for portraits, holding focus as the person moves. Use it when you have it, but keep single-point as your fallback, because eye detection can latch onto the wrong person in a group, struggle with a side profile, or hunt in dim light.
The watch-out is the most common portrait error there is: focusing on the nose or the cheek instead of the eye. At f/1.8 that small miss is enough to leave the eyes visibly soft, and it is heartbreaking on an otherwise lovely frame. Two habits prevent it. First, if you focus and recompose, be aware that at very wide apertures even a small recomposition shifts the plane of focus and can slide it off the eye, so at f/1.8 move the focus point itself rather than recomposing. Second, when depth of field is razor thin, take a couple of frames and check focus at full magnification on the back screen before you move on, because you cannot fix missed focus later. Our sharp photos field note drills the focus workflow in detail if you want the full routine.
Step 4: Find flattering light
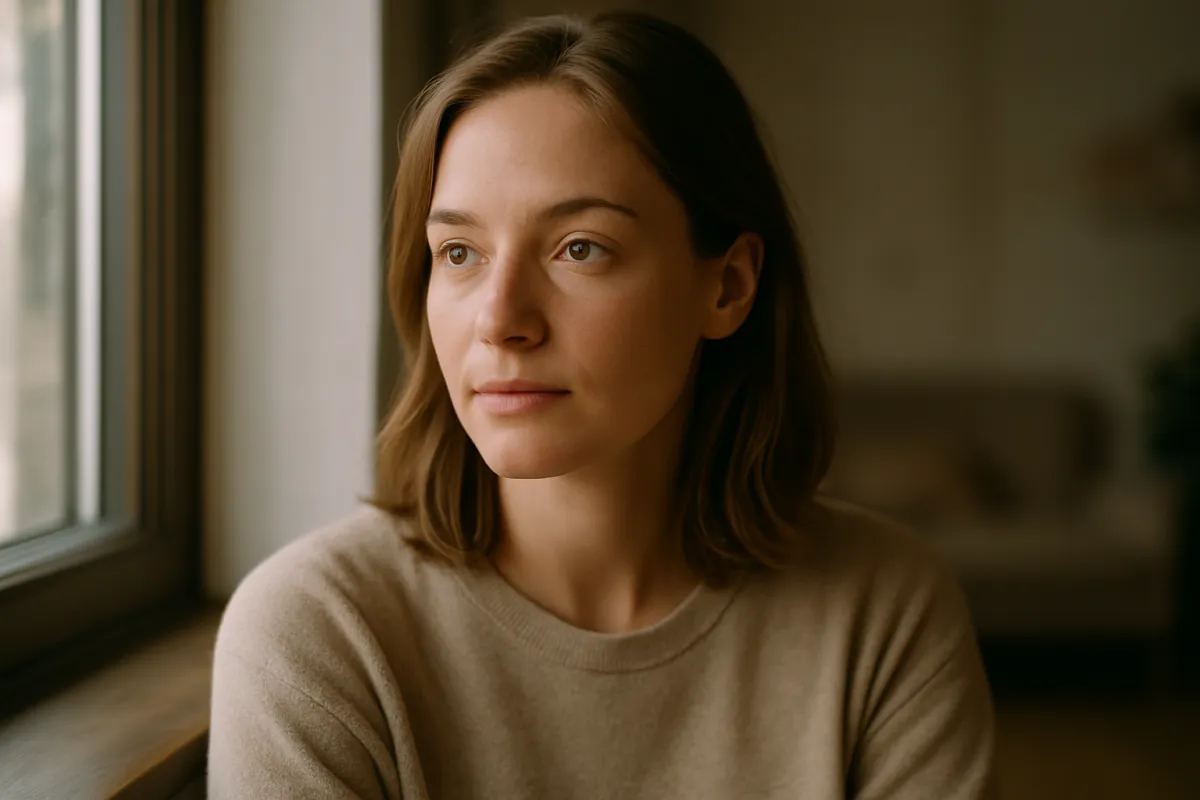
Light is what most separates a portrait that looks professional from one that looks like a snapshot, and the good news is that the best portrait light is free. What flatters a face is soft, directional light, and two everyday sources deliver it reliably. The first is a large window out of direct sun, which acts as a big, soft light source that wraps gently across the face. Turn your subject about 45 degrees to the window rather than facing it flat, and the light gives the face pleasing shape, bright on the near side and a soft shadow falling away on the far side, which is what makes a face look three-dimensional.
The second free source is the golden hour, the roughly one hour after sunrise and before sunset, when the sun is low and the light is warm, soft, and directional. It is the most forgiving natural light there is, and it is why so many outdoor portraits are shot at the edges of the day. You can place the sun behind or to the side of your subject to rim their hair with light, then expose for the face rather than the bright sky, which we return to in Step 7.
The one light to avoid is the harsh overhead sun of the middle of the day. A light directly above the head carves dark shadows into the eye sockets and under the nose and chin, gives the face a gaunt, unflattering shape, and makes people squint into the glare. Stated correctly, midday sun is not unusable, it is just hard, and the fix costs nothing: move your subject into open shade, under a tree, an awning, a doorway, or the shadow side of a building, where the light becomes soft and even. The one caveat with open shade is color, since shade under a blue sky can go cool and slightly blue on skin, which Step 7 corrects with white balance. The habit to build is to stop and read the light before you shoot: find the soft, directional part of whatever light you have, and put your subject in it.
Step 5: Simplify the background and composition
Once the light is right, look past your subject at what is behind them, because a distracting background is one of the fastest ways to ruin an otherwise good portrait. The eye is drawn to clutter, bright spots, and hard lines, so a lamp appearing to sprout from someone’s head, a bright doorway pulling attention to a corner, or a busy patterned wall all fight the face for attention. The goal is a background that is simple and quiet enough that the person is unmistakably the subject. A plain wall, foliage, an open sky, or a distant scene thrown into soft blur all work.
You have three tools to clean up a background, and they combine. The first is aperture, from Step 2: a wide aperture blurs the background into a soft wash. The second, which matters just as much, is distance: the further your subject stands in front of the background, the more that background blurs and the less any single object in it distracts, so the simplest fix for a cluttered background is often to move your subject a few steps forward. The third is your own position: move a step left or right, or crouch or rise, to slide a distracting object out from behind the head or to line the subject up against the cleanest part of the scene.
Compose the frame with the same care. Give the eyes room by placing them in the upper third of the frame rather than dead center, a common beginner habit that leaves too much empty space above the head. Leave a little space in the direction the subject is looking so the frame does not feel cramped. Avoid cropping at a joint, the wrist, elbow, or knee, because a crop through a joint looks like an amputation, whereas cropping mid-limb looks natural. The caveat is that rules of composition are starting points, not laws: centered symmetry can be powerful, and a tight crop that cuts the top of the head can feel intimate and modern. Learn the guidelines, then break them on purpose. Watch the edges and the background as deliberately as you watch the face, because a clean, simple frame is half of what makes a portrait look intentional.
Step 6: Direct and pose your subject
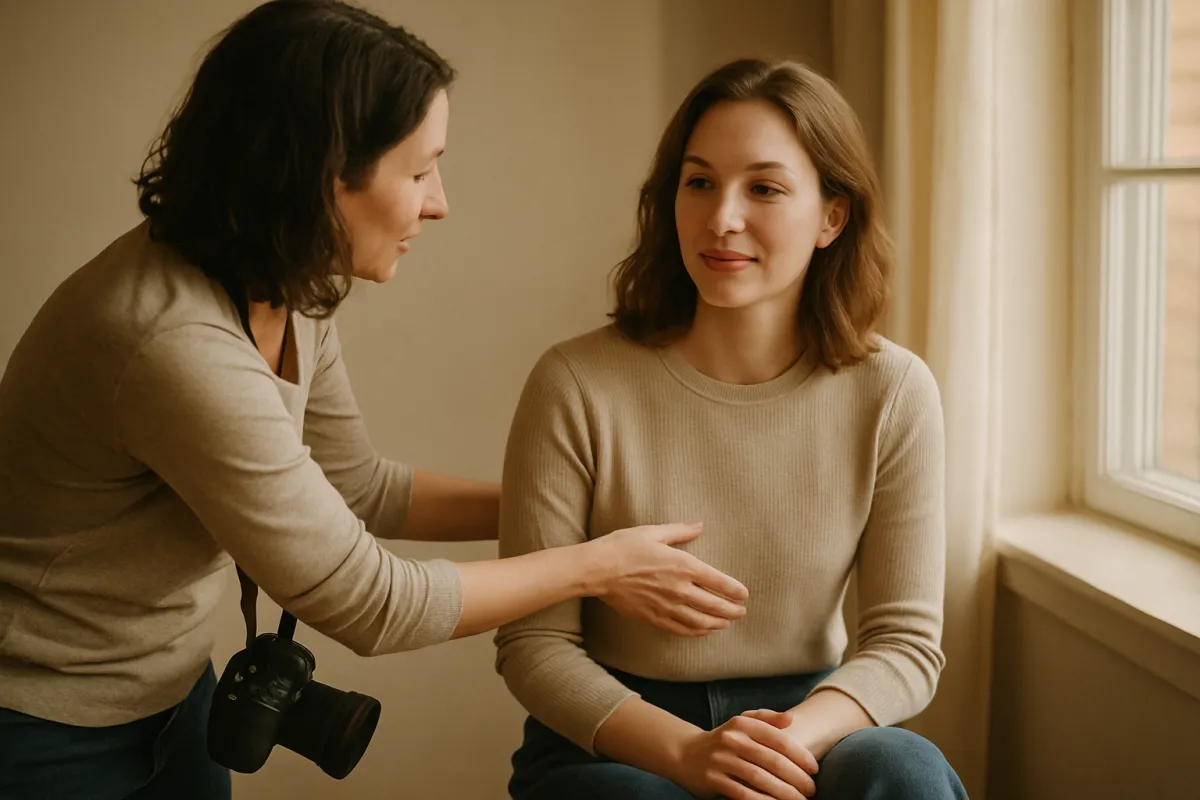
Most people feel awkward in front of a camera, so a large part of taking a good portrait is helping your subject relax and giving them clear, gentle direction. Posing sounds intimidating but is mostly a few small, natural angles rather than stiff formal poses. Start with the shoulders: turn them slightly away from the camera rather than square-on, which is more flattering and less confrontational than facing the lens straight. Then the chin: ask the subject to bring it slightly forward and down, which defines the jawline and avoids the double-chin look that a lifted chin creates. These two small adjustments alone lift most portraits.
Hands are where beginners and subjects both get stuck, because idle hands look awkward and hands pointed straight at the lens look oversized. Give the hands something relaxed to do: resting in a lap, tucked partly in a pocket, holding a cup or a prop, or lightly touching the face or hair. Keep them soft rather than clenched, and show the edge of the hand to the camera rather than the flat back or palm, which looks slimmer and more natural. For a standing subject, shifting weight onto the back foot and creating a slight bend somewhere, a knee, an elbow, relaxes the whole posture, because straight-and-stiff reads as tense.
The most important element is one no pose can rescue: expression. A technically perfect pose with a frozen, empty smile is a worse portrait than a slightly imperfect frame with a genuine look. So talk to your subject constantly, ask them a real question, get them laughing or thinking about something, and shoot in the moments between the posed smiles where the real expression lives. Give direction by showing as well as telling, since it is easier to mirror a pose than to parse an instruction, and reassure people generously, because most relax the moment they trust that you will make them look good. The caveat is to read the person: some want precise direction and some freeze under it and do better with a loose, conversational session. Match your approach to your subject, and the expression follows.
Step 7: Dial exposure and white balance for skin tones
With the frame and pose set, get the exposure and color of the skin right, because skin is what a viewer judges a portrait by and it shows errors instantly. Expose for the face, not for the whole scene, since the camera’s meter can be fooled by a bright window behind your subject or a dark background and leave the face too dark or too bright. The safe habit is to protect the highlights on the skin: badly blown highlights on a forehead or cheek lose all detail and cannot be recovered in editing, so set exposure so the brightest skin is bright but not clipped. A wide aperture from Step 2 and a shutter around 1/200 for a still subject leave ISO to balance the exposure, and you let ISO rise in dim light rather than dropping to a shutter too slow to hold.
White balance is what keeps skin looking like skin rather than orange or blue, so set it to match your light instead of leaving it on auto, which can drift from frame to frame and tint faces unpredictably. Under a window, the daylight preset is a good start; under warm indoor bulbs, the tungsten or incandescent preset removes the orange cast; in open shade under a blue sky, the shade or cloudy preset warms the cool blue back to neutral. Each preset simply tells the camera what kind of light it is looking at so it can render white as white and skin as natural.
The single most powerful habit here is to shoot in RAW. A RAW file records the full color and tonal data straight off the sensor, which means you can set white balance precisely after the fact with no loss of quality, and recover far more highlight and shadow detail on skin than a JPEG allows. This is why most portrait photographers shoot RAW: it turns white balance and exposure into decisions you can perfect calmly at the computer rather than pressure you to nail them in the moment. The tricky caveat is mixed light, a warm lamp on one side of the face and a cool window on the other, because no single white balance corrects both at once. The real fix is not in software, it is to control the light: turn one source off, or move your subject so a single kind of light dominates the face. Our manual mode field note works the full exposure routine if you want to set all three settings by hand.
Step 8: Edit portraits tastefully
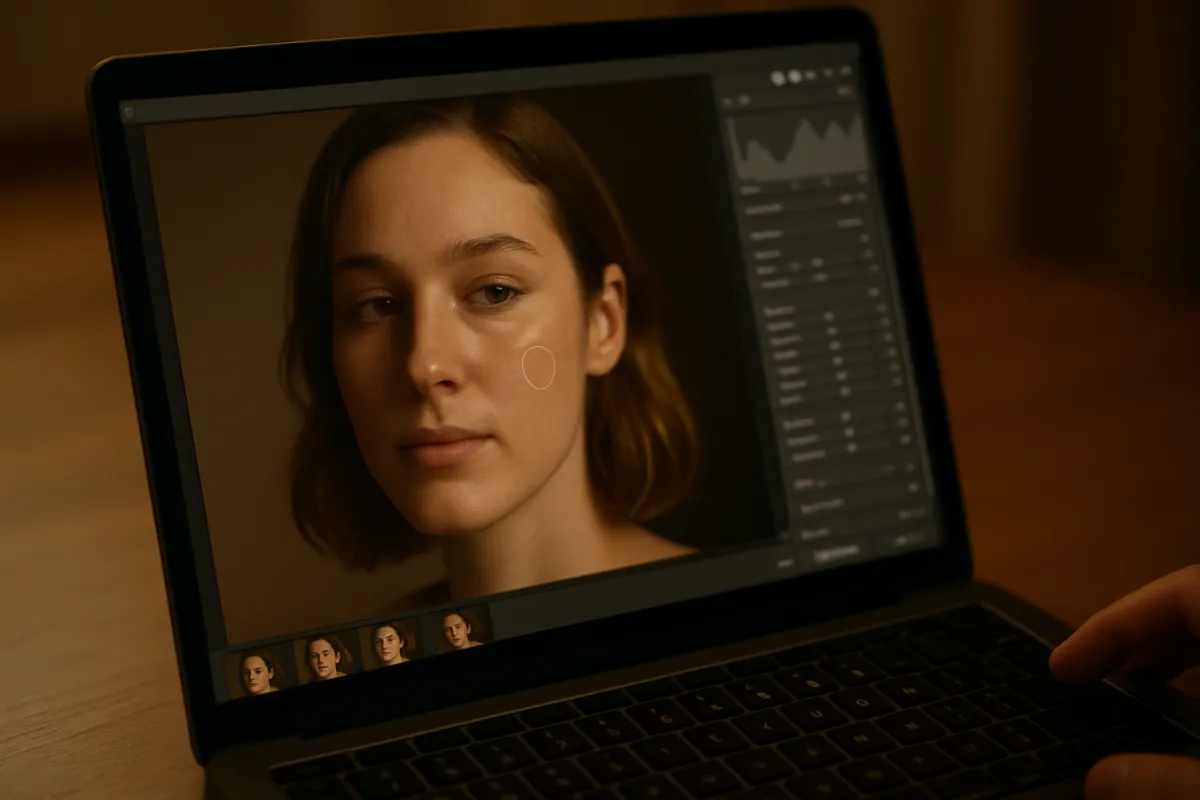
The final step happens after the shutter, and it is the one most often overdone. The goal of portrait editing is a person who looks like themselves on a good day, not a smooth plastic mask, so the guiding principle is restraint. Editing enhances a well-shot frame; it cannot rescue a badly lit or out-of-focus one, which is why the seven steps before this one matter more than any slider. Start with the global adjustments that would improve any photo: set white balance precisely on the skin, adjust exposure and contrast, and recover any highlight or shadow detail the scene needs. These honest, whole-image edits do most of the work.
For the skin itself, retouch with a light hand and a clear rule: remove only temporary things, a blemish, a spot, a stray hair across the face, while leaving permanent, character-defining features like moles, freckles, laugh lines, and natural skin texture fully intact. Those features are what make a face look like a specific real person rather than a generic doll. The single biggest mistake in portrait editing is over-smoothing skin until it loses all texture and turns waxy, which is far more noticeable and far less flattering than a visible pore ever was. If you soften skin at all, do it gently, at low strength, and keep the texture readable.
A few finishing touches lift a portrait without tipping into artifice: a subtle brightening of the eyes and a touch of local contrast on them draws the viewer in, a gentle vignette can steer attention to the face, and careful, restrained color grading sets a mood. The caveat on all of them is the same, less is more, and the tell of overwork is a portrait that looks processed rather than photographed. A reliable test is to make your edit, then step back from the screen or set it aside and return with fresh eyes: if the skin looks like a mannequin’s or the eyes look artificially glowing, dial it back. Sharpen last and lightly, keeping an eye on skin so you do not turn pores gritty. A tastefully edited portrait should make people say the person looks great, never that the photo looks edited.
What makes a flattering portrait
Illustrative weighting, out of 100, of how much each element contributes to a portrait that looks intentional. This is a mental model built from common experience, not a measured study, so read it as where to spend your attention first.
Light and expression carry a flattering portrait, with sharp eyes close behind, which is why the middle steps matter most. The lens and the edit refine a frame those three already made good. Tune the model to your own shooting with the companion above.
A worked example: setting up one portrait
Theory into practice: here is a single realistic sitting run through all eight steps, with illustrative settings, so the sequence is concrete rather than abstract. The scene is a portrait of a friend seated indoors near a large window on an overcast afternoon, the kind of everyday situation where most portraits actually happen. You want a warm, natural headshot with a soft background, and you have a 50mm f/1.8 prime on a full-frame body.
Pick the lens and focal length. The 50mm is on the short end of the portrait range but perfectly usable, so you plan to frame a head-and-shoulders shot from a few steps back rather than crowding in close, keeping the face in natural proportion. Open up for separation. You set the aperture to f/2 rather than wide open at f/1.8, buying a hair more depth of field so the whole near side of the face is sharp while the room behind melts into a soft wash. Find the light. You seat your friend about 45 degrees to the window, so the daylight wraps across the face with a gentle shadow falling away on the far side, and you skip the overhead room light so a single soft source shapes the face.
Simplify the background. You move the chair a few steps out from the wall, which pushes the background further out of focus, and you shift half a step left so a floor lamp is no longer growing out of your friend’s head. Set exposure and white balance. At f/2 and a shutter of 1/200 to keep a relaxed subject sharp, the meter balances near ISO 200 in that window light, an easy, clean value, and you set white balance to the daylight preset and shoot RAW so you can fine-tune the skin later. Your working trio is f/2, 1/200, ISO 200. Focus on the eye. You put a single point on the near eye, half-press, confirm the lock, and check focus at full magnification on the first frame. Pose and direct. You turn the shoulders slightly off-camera, ask for the chin forward and down, rest the hands loosely in the lap, and then chat and joke until a real, easy expression appears, firing a few frames in that window. Edit tastefully. At the computer you set white balance precisely on the skin, lift exposure a touch, remove one temporary blemish while leaving the freckles and texture alone, brighten the eyes a little, and sharpen lightly. One friend, one window, eight steps: f/2 for separation, 1/200 and ISO 200 to expose cleanly, single-point focus on the eye, 45 degrees to the light, a simplified background, an easy expression, and a light edit. Run your own scene’s kit through the upgrade budget planner before assuming you need a longer lens.
Building a portrait: where the work goes
Illustrative share of the effort that each stage contributes to a finished portrait. The four parts sum to the whole result, so no single stage does it alone.
Most of a portrait is made before you edit: the light you choose and the expression you draw out do more than half the work, with the lens and aperture setting the look. Editing finishes a frame those stages already made good. Adjust the split to your own work with the companion above.
Common mistakes to avoid
Most portraits fail in one of a handful of predictable ways, and knowing them in advance is the fastest route to better people photos. These are the pitfalls that come up again and again:
- Aperture too narrow for a single subject. Shooting a lone portrait at f/8 leaves the background sharp and cluttered and the subject flat against it. Open up to an illustrative f/1.8 to f/2.8 for one person to lift them off a soft background, and reserve the narrow apertures for groups.
- Focus on the nose or cheek, not the eyes. At wide apertures this small miss leaves the eyes just soft enough to spoil the frame. Place a single point or eye-detection autofocus on the near eye, confirm the lock, and check focus at full magnification when depth of field is thin.
- Harsh overhead light. Shooting under the midday sun or a ceiling light carves ugly shadows into the eyes and under the nose and makes people squint. Move your subject to a window, into open shade, or shoot at the golden hour.
- A busy, distracting background. A cluttered or bright background pulls the eye away from the face and can appear to sprout objects from the head. Move your subject away from the background, reposition yourself, and open the aperture to simplify what is behind them.
- A stiff pose and an empty expression. A rigid, square-on stance with a frozen smile reads as a snapshot. Turn the shoulders, relax the hands, and above all talk to your subject and shoot the real expression between the posed ones.
- Over-retouching the skin. Smoothing skin until it loses texture turns a person into a waxy mannequin, which is far more obvious than any blemish. Remove only temporary marks, keep freckles, moles, and texture, and edit with a light hand.
Troubleshooting tricky portraits
Real sittings do not always cooperate, so here is how to handle the situations that fight you. What if you do not own a dedicated portrait lens? You do not need one to start. Set a kit zoom to its longest end, around 55mm on a crop kit lens or 105mm on a longer zoom, and use the widest aperture it offers there, often f/5.6, then create separation by moving your subject well in front of the background and stepping in close. The blur will be gentler than a fast prime gives, but the framing and proportion will be right, and a 50mm f/1.8 prime is the single most affordable upgrade when you are ready, as our 50mm versus 85mm field note explains.
What if the light is low, indoors in the evening for example? Protect the shutter speed first, keep it around 1/160 or faster so a relaxed subject stays sharp, open the aperture as wide as your lens allows, and raise ISO to whatever that combination needs, accepting some noise as the price of a sharp, well-exposed face. Move your subject to the largest window or the softest lamp you have, because the quality and direction of a small amount of light matters more than the quantity, and a wide-aperture prime is the real long-term fix, which our best lens for low light field note covers in full.
What if you are shooting a group rather than one person? The main change is aperture and focus plane: stop down to roughly f/5.6 to f/8 so everyone from the front row to the back sits in the sharp zone, arrange faces at a similar distance from the camera rather than strung front to back, and focus on the front row or a person a third of the way into the group so the depth of field covers everyone. You will need more light or a higher ISO to pay for the narrower aperture, and a slightly wider lens helps fit everyone in without backing up impossibly far.
What if your subject is stiff and uncooperative, or a self-conscious child or teenager? Stop directing settings and start directing the mood. Keep the technical side quiet, chat about something they care about, give simple actions rather than abstract instructions, and take the pressure off by shooting candidly while they are distracted rather than demanding a pose and a smile on command. Short sessions beat long ones for restless subjects, and genuinely reassuring someone that they look good does more for the final frame than any adjustment on the camera. The best portrait tool in a tense sitting is patience.
Your portrait checklist
Save this and run down it the next time you photograph a person, or before a sitting you want to get right:
- Choose a portrait focal length: an illustrative 50mm to 135mm on full frame, or the crop-factor equivalent, and back up rather than crowding in with a wide lens.
- Open the aperture for separation: f/1.8 to f/2.8 for one person, f/4 for two, f/5.6 to f/8 for a group.
- Focus on the nearest eye with single-point or eye-detection autofocus, confirm the lock, and check focus at full magnification when depth of field is thin.
- Find soft, directional light: a large window at about 45 degrees, or the golden hour. Avoid harsh overhead sun, and use open shade if you are stuck at midday.
- Simplify the background: move your subject away from it, reposition yourself, and let the wide aperture blur what remains.
- Compose with care: eyes in the upper third, a little room in the looking direction, and no crops through a joint.
- Pose loosely: shoulders turned slightly away, chin forward and down, hands given something relaxed to do, and weight on the back foot when standing.
- Draw out a genuine expression by talking to your subject and shooting between the posed smiles.
- Expose for the face and protect skin highlights, set white balance to match the light, and shoot RAW.
- Edit lightly: global adjustments first, remove only temporary blemishes, keep skin texture, brighten the eyes a touch, and sharpen last and gently.
The bottom line
A flattering portrait is not luck or an expensive camera; it comes from a short, repeatable set of decisions worked in order. Choose a focal length in the 50mm to 135mm range so the face renders in natural proportion, open the aperture to an illustrative f/1.8 to f/2.8 to lift a single subject off a soft background, and place your focus with care on the nearest eye, because that is where a viewer looks and where thin depth of field is least forgiving. Then do the two things that matter most: find soft, directional light from a window or the golden hour and avoid the harsh overhead sun, and relax your subject into a genuine expression, because light and expression carry a portrait further than any setting. Simplify the background, expose for the skin and set white balance to match your light, shoot RAW, and finish with a light edit that leaves the skin looking like skin. The single most freeing realization is how little of this costs anything: the best portrait light is free, the best expression comes from a conversation, and a simple background is a step to the side. Work the list in order, and the camera you already own will start returning portraits that look intentional. Price any lens you are still tempted by in the upgrade budget planner, then go photograph someone and keep the frame where the eyes are sharp and the smile is real.
This field note teaches a shooting workflow, not a product: no brand paid for a placement and none is named on purpose, only focal lengths, apertures, and techniques that hold across every camera system. Every camera setting and focal length here is an illustrative starting point rather than a fixed rule, because the aperture, shutter, ISO, and lens that produce a flattering portrait change with your subject, your sensor size, the light, and the look you want. The aperture and focal-length numbers describe standard photographic technique, not a measured test of any specific lens or body, so treat them as a place to begin, judge your own frames on screen, and let the result in front of you, not any writer’s recipe, decide your final settings.
Frequently asked questions
What is the best focal length for portraits?
The classic portrait range on a full-frame camera runs from about 50mm to 135mm, with 85mm the most celebrated single choice. The reason is not magic, it is geometry: a lens in this range lets you fill the frame with a face while standing a comfortable few steps back, and that working distance renders features in flattering, natural proportion. Get too close with a wide lens like 24mm or 35mm and the nearest part of the face, usually the nose, exaggerates while the ears recede, an effect that reads as distorted. On a crop-sensor body you multiply by the crop factor, so a 50mm behaves like roughly 75mm and a 56mm like an 85mm, which is why those focal lengths are sold as portrait primes for crop cameras. Treat the range as a guide rather than a rule: a 35mm is excellent for environmental portraits that include the setting, and a 135mm gives tightly compressed, creamy headshots. Pick the length that gives you the framing and working distance you want.
What aperture should I use for portraits?
For a single subject where you want the background to melt into soft blur, a wide aperture in the f/1.8 to f/2.8 range is the usual starting point, because a wide aperture creates the shallow depth of field that separates the person from their surroundings. The caveat matters: at the very widest apertures like f/1.4 or f/1.8, depth of field can become so thin that the eyes are sharp but the ears or the tip of the nose fall soft, and any focus error is punished. Many portrait photographers settle around f/2 to f/2.8 for a single person as a balance of background blur and enough depth to hold the whole face. For two people, stop down to roughly f/4 so both faces sit in the sharp zone, and for a group, f/5.6 to f/8 keeps every row in focus. These are illustrative starting points, not fixed rules, because the exact depth of field also depends on your focal length and how close you are standing.
How do I get sharp focus on the eyes in a portrait?
Place your focus deliberately on the eye nearest the camera, because at the wide apertures portraits use, depth of field is thin and the eye is where a viewer looks first. The reliable way is single-point autofocus: select one small focus point, put it directly on the near eye, half-press to lock, confirm the camera has focused, and only then shoot. Many recent mirrorless cameras offer eye-detection autofocus, which finds and tracks the eye automatically and is genuinely excellent, but keep single-point as your fallback for side profiles, low light, or when the detection latches onto the wrong person. Avoid focusing on the nose or the cheek, a common mistake at f/1.8 that leaves the eyes just soft enough to spoil the shot. If you focus and recompose, be aware that at very wide apertures the small shift can move the plane of focus off the eye, so at f/1.8 it is safer to move the point itself. Our field note on sharp photos covers the focus workflow in full.
What is the best natural light for portraits?
Soft, directional light flatters faces, and two free sources give it reliably: a large window out of direct sun, and the golden hour in the hour after sunrise or before sunset. A window acts as a big soft light source that wraps gently across the face, and turning your subject about 45 degrees to it gives pleasing shape with a soft shadow on the far side. Golden hour light is warm, low, and gentle, and it is far kinder than the light in the middle of the day. The one to avoid is harsh overhead midday sun, because a light directly above carves dark shadows into the eye sockets and under the nose and chin, and it makes people squint. If you are stuck shooting at noon, move your subject into open shade, under a tree, an awning, or a doorway, where the light is soft and even. You do not need expensive equipment to light a portrait well, you need to read the light you have and place your subject in the good part of it.
How should I pose someone for a portrait?
Good posing is mostly about relaxing the subject and adding small, natural angles rather than stiff, formal poses. Turn the shoulders slightly away from the camera rather than facing it square, which is more flattering and less confrontational than a straight-on stance. Ask the subject to bring the chin slightly forward and down, which defines the jaw and avoids the double-chin look a lifted chin can cause. Give the hands something relaxed to do, resting on a lap, in a pocket, or holding a prop, because idle hands look awkward and hands pointed straight at the lens look large. Most important is expression, which no pose can rescue: talk to your subject, get them laughing or thinking about something real, and shoot in the moments between the posed smiles, because a genuine expression beats a perfect but empty pose every time. Give clear, gentle direction, show them what you want rather than only describing it, and reassure them, since most people feel awkward in front of a camera and relax when they trust the photographer.
How do I get accurate skin tones in a portrait?
Skin tone is mostly a white-balance question, so set white balance to match your light rather than leaving it on auto, which can drift shot to shot and tint skin. If your light is a window, the daylight preset is a good start; under warm indoor bulbs, the tungsten or incandescent preset removes the orange cast. The most reliable approach is to shoot in RAW, which records the full color data and lets you set white balance precisely afterward with no loss of quality, which is why most portrait photographers shoot RAW. For exposure, protect the highlights on the skin, because badly blown highlights on a cheek or forehead lose all detail and cannot be recovered, so expose so the brightest skin is bright but not clipped. Mixed light is the tricky case, for example a warm lamp and a cool window in the same frame, since no single white balance corrects both; the fix is to control the light by turning one source off or moving your subject so a single kind of light dominates the face.
How much should I retouch a portrait?
The goal of good portrait editing is a person who looks like themselves on a good day, not a plastic, airbrushed mask, so retouch with a light hand. A sensible workflow is to remove only temporary blemishes, a spot or a stray hair, while leaving permanent, character-defining features like moles, freckles, and natural skin texture intact. The single biggest mistake is over-smoothing skin until it loses all texture and looks artificial, which is far more noticeable and less flattering than a real pore. If you soften skin at all, do it gently and keep the texture visible. Beyond skin, gentle adjustments to exposure, contrast, white balance, and a subtle brightening of the eyes finish a portrait well. A useful test is to view the edit at full size and then step back: if the skin looks like a mannequin's, you have gone too far. Editing should enhance a good frame, it cannot rescue a badly lit or out-of-focus one, so get it right in camera first.