What's on this page
- How clean a camera lens needs to be
- The lens cleaning kit, and how often you need each piece
- Before you start
- Step 1: Understand When to Clean, and When Not to Over-Clean
- Step 2: Get the Right Tools, Not Your Shirt
- What never to put on a lens
- Step 3: Blow Off Loose Dust First
- Step 4: Brush, Then Wipe With Solution in Circular Motions
- Step 5: Clean the Rear Element and Mount Contacts Carefully
- Step 6: Prevent Future Dirt With Caps, Filters, and Storage
- A worked example: cleaning a smudged lens step by step
- Cleaning marks on a lens: which ones to touch and which to leave
- Common mistakes to avoid
- Troubleshooting the tough cases
- Lens cleaning in the field, away from the desk
- How to clean a photography lens, a filter, a phone lens, and a viewfinder
- How to clean a camera lens with no kit on hand
- Where lens cleaning fits in your camera care routine
- Your lens cleaning checklist
- The bottom line
Short answer: How to clean a camera lens safely: remove loose particles before anything touches the glass. Blow dust off with an air blower, sweep stragglers with a soft optics brush, then wipe only if a mark remains, using a clean optics cloth with a drop or two of fluid on the cloth, never on the glass, in a gentle spiral from the center outward. Never use a shirt, tissue, or household cleaner, and clean as rarely as possible.
How to clean a camera lens is the small job photographers get wrong most often: reach for your shirt hem to wipe a smudge off the front element and you have just performed the single most common way to scratch your own glass. It feels harmless, the mark disappears, and the fine grit that was riding on the fabric has drawn a faint arc across the coating that you will only notice months later in a bright backlit frame. Cleaning a lens is not hard, but it is one of those jobs where the wrong instinct does quiet, permanent damage, and the right method is almost embarrassingly gentle. The whole skill is knowing the order of operations and resisting the urge to rub.
This field note turns how to clean a camera lens into a repeatable routine rather than a panic when a fingerprint appears. By the end you will know when a lens actually needs cleaning and when to leave it alone, what belongs in a simple kit, how to lift dust without touching the glass, how to wipe a smudge without dragging grit, how to handle the rear element and the mount contacts, which marks on the glass are worth touching and which ones mean stop, and how to keep the lens clean enough that you rarely do any of this. Sharpness starts at the front element, so this pairs with our field note on taking sharp photos; clean glass is the cheapest sharpness there is, long before you consider upgrading the camera itself.
Key takeaways
- Remove particles before you ever wipe. The order is air, then brush, then a barely damp cloth, because rubbing dry grit is what scratches a coating.
- Fluid goes on the cloth, never on the glass, so liquid cannot run to the edge of the element and wick into the barrel.
- Nothing from the house: no shirt, tissue, paper towel, household cleaner, or solvent. Coatings are thin optical layers, not window glass.
- Clean as rarely as you can. A lens that looks clean should be left alone, because over-cleaning wears a coating for no gain in your photos.
- Internal dust is usually harmless. Fungus, damage to a coating, and anything behind the front element belong to a repair technician, not to you.
How clean a camera lens needs to be
Before any method, settle the standard, because how clean a camera lens has to be is the question that decides how often you touch it. The honest answer is functionally clean, not flawless. A front element sits so far outside the plane of focus that dust on it is invisible in a photograph, and even a fingerprint usually shows as a slight loss of contrast in bright backlight rather than as anything you can point at in the frame. The glass has to be clean enough that light passes through it without scattering into your highlights. It does not have to gleam under a flashlight.
That standard matters because the cleaning itself is the risk. Every wipe puts friction on an anti-reflective coating that is measured in fractions of a wavelength, and friction repeated over years is how coatings wear. So the target is the least contact that clears a mark you can actually see in your images, and then stopping. Photographers whose glass still looks new after a decade are not the ones who clean most thoroughly. They are the ones who clean least, cap the lens between shots, and let the hood take the knocks.
The routine that gets you there is short, and it is worth having in one sentence before the detail: move loose particles off with air, sweep anything stubborn with a soft optics brush, and only then wipe, using a clean cloth kept for optics with a drop or two of fluid put on the cloth rather than on the glass, in a gentle spiral from the center outward. Everything else in this field note is that sentence, slowed down, plus the reasons each part is in that order.
Two boundaries are worth setting now. Anything behind the front and rear elements is not a cleaning job at all: internal dust, haze, separation, or growth between elements means opening the lens, and opening a lens is a repair technician’s work. And the sensor is a different surface with a different and riskier procedure, so it stays out of scope here; our sensor cleaning field note covers that job on its own terms. What follows is about the outside of the glass, which is the part you can safely look after yourself.
The lens cleaning kit, and how often you need each piece
Lens cleaning comes down to four tools and one rule about the order they come out in, and the rule matters far more than the shopping. The order never changes: air first, then a brush, then a dry cloth, and fluid on the cloth only last. Each stage touches the glass a little more than the one before it, so you work down the list and stop at the first thing that clears the mark. Jumping straight to the wet wipe is how a gentle job turns into a permanent one.
Here is the whole kit, with an honest sense of how often each piece actually comes out:
- An air blower, almost every session. A rubber bulb with a narrow nozzle is the piece you reach for most, because moving air lifts the only thing that can scratch a coating and touches nothing while it does. Blow the front element on a dusty day and you will often need nothing else at all.
- A soft optics brush, often, and only after the air. It sweeps the few particles the blower leaves clinging near the ring. It is a follow up to the blower rather than a substitute for it, and it stays safe to use only if it lives capped or sleeved rather than loose in a bag.
- A cloth kept only for optics, used dry, every few sessions. A dry buff clears a light haze or a leftover streak with no liquid involved. Keep it sealed in a bag between uses, because a cloth that has ridden loose in a pocket has become the abrasive you were trying to avoid.
- Cleaning fluid, on the cloth, a handful of times a year. This is the least used item in the kit despite being the one people picture first. It is for oils and dried residue a dry cloth will not lift, it goes on the cloth and never on the glass, and one bottle tends to outlast several cloths.
- A few cotton swabs, occasionally. These are for the mount contacts and the rim inside the filter thread, not for the element itself.
- A pen style brush and pad tool, optional. Its real advantage is that it survives a bag pocket better than a loose cloth, which makes it the field version of the cloth rather than an upgrade on it.
Two categories never belong in the kit: anything borrowed from the house, and anything you would use on a screen or on eyeglasses without checking first. What may touch your particular front element is set by the care instructions that came with the lens rather than by a shelf label. No prices appear here because they move with brand and region, but the kit is cheap enough that cost has never been the real reason anyone reaches for a shirt hem.
Before you start
Cleaning a lens is a low-difficulty job that takes about five minutes of unhurried work, and the whole challenge is doing it gently and in the right order rather than doing anything technical. The biggest mistake happens before you touch the glass, so the preparation matters more than the wiping. Gather a few things and pick a spot first, because the setup is what keeps grit off the cloth and liquid out of the lens.
Here is the short list of what you need, in the order it matters:
- The lens itself, and a moment to inspect it. Hold the front element to a light at a shallow angle and look at what is actually there. Loose dust, a greasy smudge, and a dried water spot each call for a different response, and half the job is deciding whether the mark is worth cleaning at all.
- The right tools. An air blower, a soft brush made for optics, a clean cloth kept for optics only, and a small bottle of fluid intended for coated glass, chosen against your lens maker’s care instructions rather than against a marketing claim. Not a shirt, not a tissue, not a paper towel.
- A clean, stable surface with good light. Work over a soft cloth or a table you have wiped down, in light bright enough to show the mark and angled enough to reveal it. A clean surface means the cloth does not collect grit between passes, and good light means you stop the moment the glass is clear.
- A little restraint. The goal is a functionally clean lens, not a polished one. Plan to do the least that works, then stop.
With those ready, the six steps below take you from a smudged, dusty front element to clean glass with its coating intact, and then into a storage habit that means you rarely have to do it again. Tell the companion above what is on your lens and it will name the method and the one tool that matters for your case as you read.
Step 1: Understand When to Clean, and When Not to Over-Clean
Start by deciding whether the lens needs cleaning at all, because the most protective thing you can do for a coating is often to leave it alone. A front element is not a windshield, and it does not benefit from a wipe on principle. Every wet clean carries a small amount of friction, and the photographers who never seem to scratch anything are simply the ones who put a cloth on their glass a handful of times a year.
So the first question is what you are actually looking at. Hold the lens to a light at a shallow angle and identify the mark. Loose dust is almost never worth a wipe, because a few specks on the front element sit so far outside the plane of focus that they contribute nothing you can see. A fingerprint, a greasy smudge, or a dried spot is different, because oils and residue catch light and lower contrast in bright or backlit scenes, and those are worth removing. The useful test is whether the mark shows up in your images or only under a torch held at an angle, since the second kind is cosmetic.
The watch-out here is the urge to make the glass flawless. Chasing every mote of dust and buffing the element until it shines does nothing for your photos and does slow harm to the coating, which is why over-cleaning is a genuine way to degrade a lens over time. Many careful shooters blow the front element freely, since moving air touches nothing, and reserve a full wet clean for a mark they can see affecting a picture. Clean because the image needs it, not because the glass could be shinier, and you will handle the lens far less over its life. If you suspect a lens has gone soft rather than dirty, check the glass before you shop, and price any replacement with the upgrade budget planner only once you are sure cleaning was not the answer.
Step 2: Get the Right Tools, Not Your Shirt
With the decision made, gather the right tools, because the wrong ones cause the exact damage you are trying to prevent. The reason a lens cleaning kit exists at all is that ordinary household fabrics and papers are abrasive relative to coated optics, and purpose-made tools are shaped to lift dirt with as little contact as possible. The kit is short, it is inexpensive, and every piece earns its place.
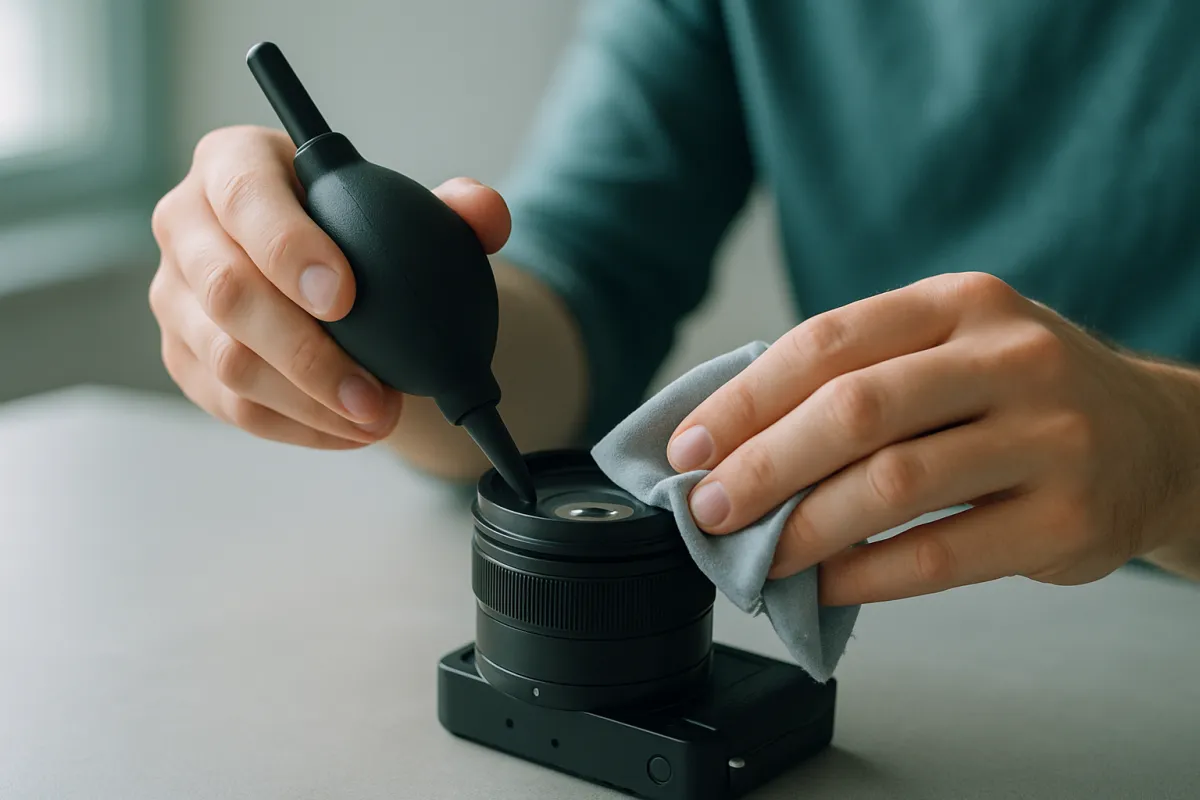
Four items make up the core. An air blower, usually a rubber bulb with a narrow nozzle, moves dust off the glass without touching it, and it is the tool you reach for first almost every time. A soft optics brush sweeps away particles the air leaves behind, its bristles fine and unloaded so they lift rather than drag. A cloth kept only for optics does the actual wiping, its fine weave designed to pick up oils instead of smearing them. And a small bottle of cleaning fluid intended for coated glass dissolves smudges that a dry cloth cannot. Some people add a pen-style tool with a retractable brush at one end and a soft cleaning pad at the other, plus a few cotton swabs for rims and contacts.
Two honest caveats belong with that list. First, no one can tell you from a distance that a given bottle or cloth suits your particular lens: coatings vary by manufacturer and by era, and formulations vary by bottle, so the care instructions that came with the lens are the authority on what may touch it. Second, a cloth is only as safe as it is clean. A cloth that has ridden loose in a pocket has collected grit and has become the abrasive you were trying to avoid, which is why the useful habit is one cloth, kept for glass, stored in a sealed bag, and washed or replaced when it stops looking clean.
The prices of all this are small enough that cost is not the reason anyone uses a shirt, though the exact figures move with brand and region often enough that quoting one here would be inventing it. Buy the pieces once, keep them together in the bag rather than in a drawer at home, and the improvised wipe stops being tempting. For what lives alongside them, our camera bag field note covers the pouch-and-pocket question in more detail.
What never to put on a lens
The list of things that must never meet a front element is short, and it is more useful than the list of things that may, because almost all coating damage comes from a handful of improvisations made in a hurry. Keep these out of the job permanently:
- Your breath. Fogging the glass feels like the classic move, and it is the classic mistake. Breath sprays fine droplets that carry whatever is in your mouth onto the coating, so you create spotting you then have to wipe away, and the moisture does nothing at all about the particles that cause scratches.
- A shirt, sleeve, scarf, or any fabric that has been out in the world. These carry grit you cannot see and fibers far coarser than anything woven for optics. The mark they leave is not one wipe deep, it accumulates as fine swirls over years.
- Tissue, paper towel, napkins, or kitchen roll. Wood-pulp papers feel soft against skin and are not soft against a coating. They also shed lint onto the glass while abrading it.
- Household glass cleaner, kitchen spray, alcohol, acetone, or any solvent from under the sink. A lens coating is a stack of thin optical layers, not window glass. Solvents can dull or lift those layers, and the result is permanent: a hazy or patchy coating cannot be restored at home and often cannot be restored at all short of a repair technician recoating or replacing the element.
- Canned compressed air. It can spit propellant onto the glass and delivers far more force than you need, which pushes particles into crevices rather than off the element.
- A fingernail, a blade, a toothpick, or anything else picked to scrape a stubborn spot. If a mark resists gentle chemistry, force is not the next escalation.
- Any contact with the sensor. With the lens off, the sensor is exposed and it is the most delicate surface in the camera. It has its own careful procedure, described in our sensor cleaning field note, and nothing in this routine should be pointed into an open camera body.
- A screwdriver. Internal dust, haze, growth between elements, and a loose or rattling element are all repair jobs. Opening a lens at a kitchen table almost always ends worse than the fault it was meant to fix.
One more entry belongs on the list, and it is a motion rather than an object: a dry cloth on gritty glass. The cloth may be perfect and the technique may be gentle, but if a hard particle is still sitting on the coating, the wipe drags it. That is why the order of operations does more for your lenses than any purchase.
Step 3: Blow Off Loose Dust First
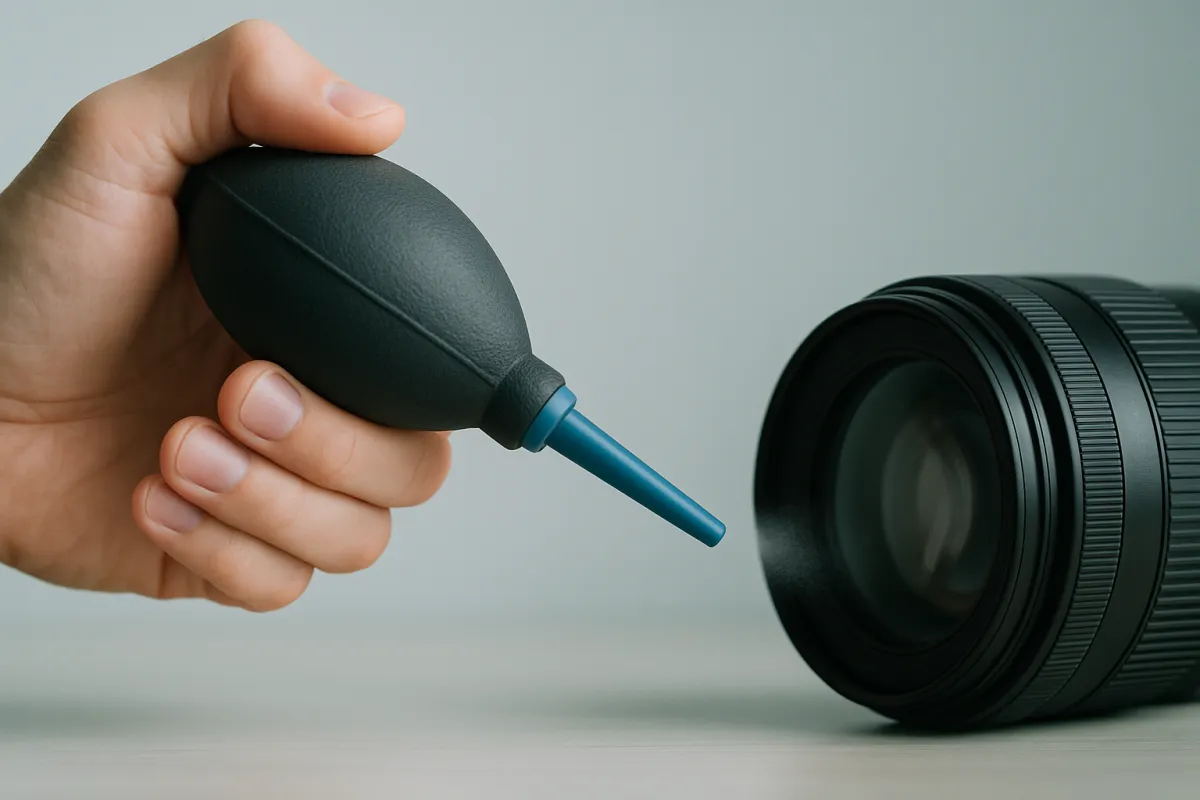
This is the step that prevents nearly every scratch, so it comes before any cloth touches the glass: get the loose particles off with moving air alone. The logic is simple and worth burning into memory. A hard grain of sand sitting on a coating is harmless while it stays put, but the moment you drag a cloth across it, that grain becomes a cutting tool and scores the surface. Remove the grit without touching it and the danger is gone before the wiping begins.
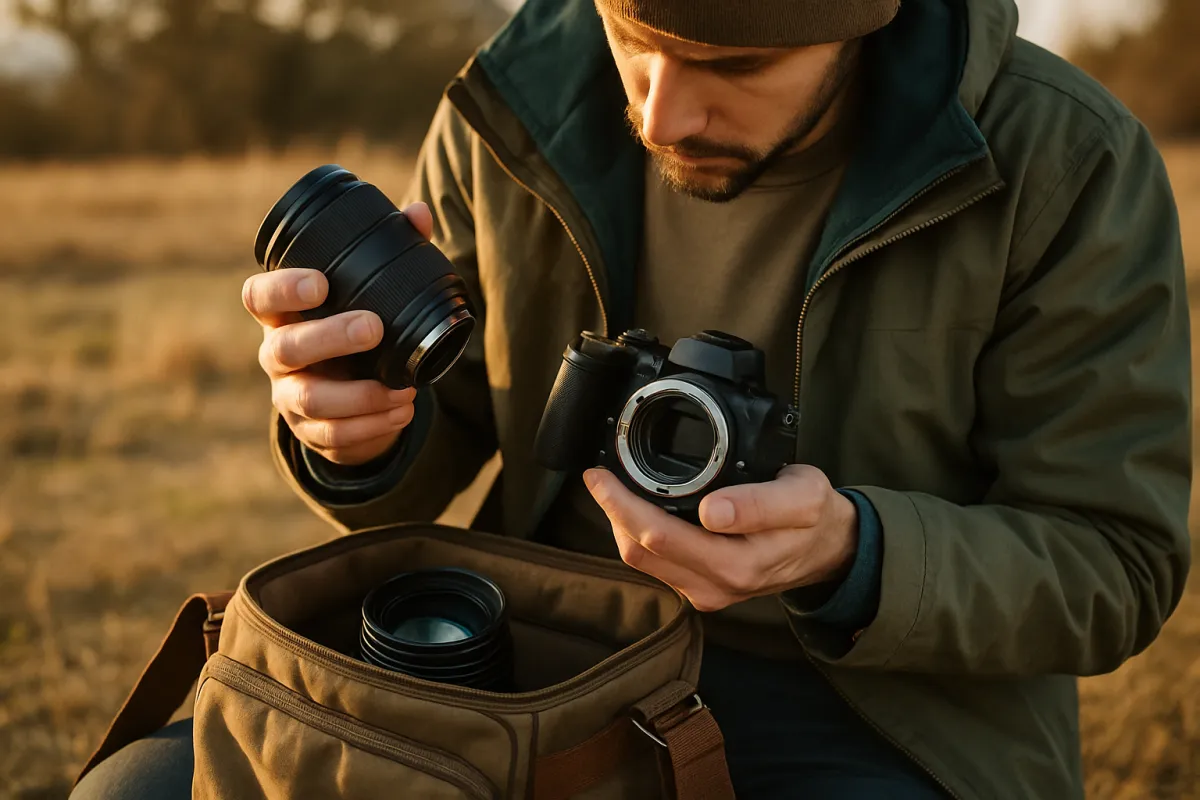
Hold the lens with the front element angled downward so dislodged dust falls away rather than settling back onto the glass. Take the blower, hold its nozzle close to but not touching the surface, and give several firm squeezes, working across the whole element and into the edge where dust gathers against the ring. Point air, not your mouth. Blowing with your breath puts fine droplets on the coating and creates the spots you then have to wipe away, which defeats the purpose. Canned air belongs on the banned list above for the same reason: too much force, too little control.
If a few particles cling after the air, follow with the soft brush, using light strokes to sweep them off, then blow once more to clear what the brush loosened. The watch-out for this step is impatience: the temptation is to see a little dust, decide it is nothing, and rub it away, which is precisely the motion that grinds it into the coating. Give the air its moment. If the only thing on the lens is dry dust, this step is usually the entire job, and you never reach for the cloth or the fluid at all. Clear the particles first, and everything after it is safe.
Step 4: Brush, Then Wipe With Solution in Circular Motions
Only once the surface is free of loose grit do you wipe, and this is where a smudge or fingerprint actually comes off. The sequence inside this step is brush, then damp wipe, then dry buff, and that order keeps friction low and liquid controlled. Give the element one last pass with the soft brush to confirm nothing gritty remains, because everything that follows assumes the surface is safe to touch.
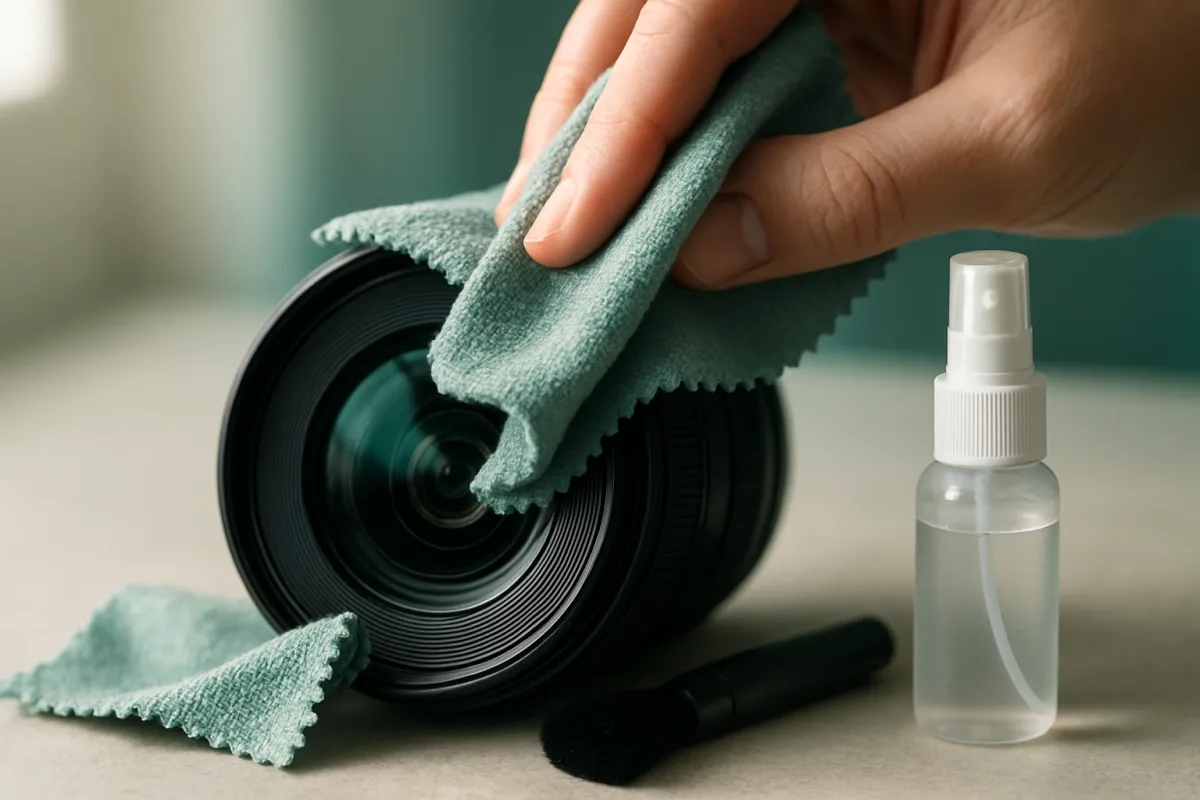
Now the fluid, and the most important rule in the routine: put a drop or two onto the cloth, never onto the lens. A lightly moistened cloth carries all the cleaning action you need, while liquid applied straight to the glass can run to the edge and wick past the retaining ring into the barrel, where it does not clean off and can invite haze or fungus. With the cloth barely damp, wipe the element gently in a spiral, starting at the center and working outward to the edge in small circular motions. The circular path stops you pushing a line of residue back and forth, and light pressure lets the fluid dissolve the oils instead of you scrubbing them.
Finish with a dry section of the same cloth, buffing lightly in the same spiral to lift any streak the fluid leaves behind. A faint haze after wiping is almost always leftover fluid, not dirt, so a gentle dry buff clears it rather than more liquid. The watch-out is over-wetting: a soaked cloth is the usual cause of streaks and the main way liquid reaches the interior, so if you are fighting streaks, use less fluid, not more. A pen-style brush-and-pad tool is an alternative for exactly this kind of smudge, used with the same light circular motion and the same rule about grit first. Wipe the least you can to clear the mark, then stop.
Step 5: Clean the Rear Element and Mount Contacts Carefully
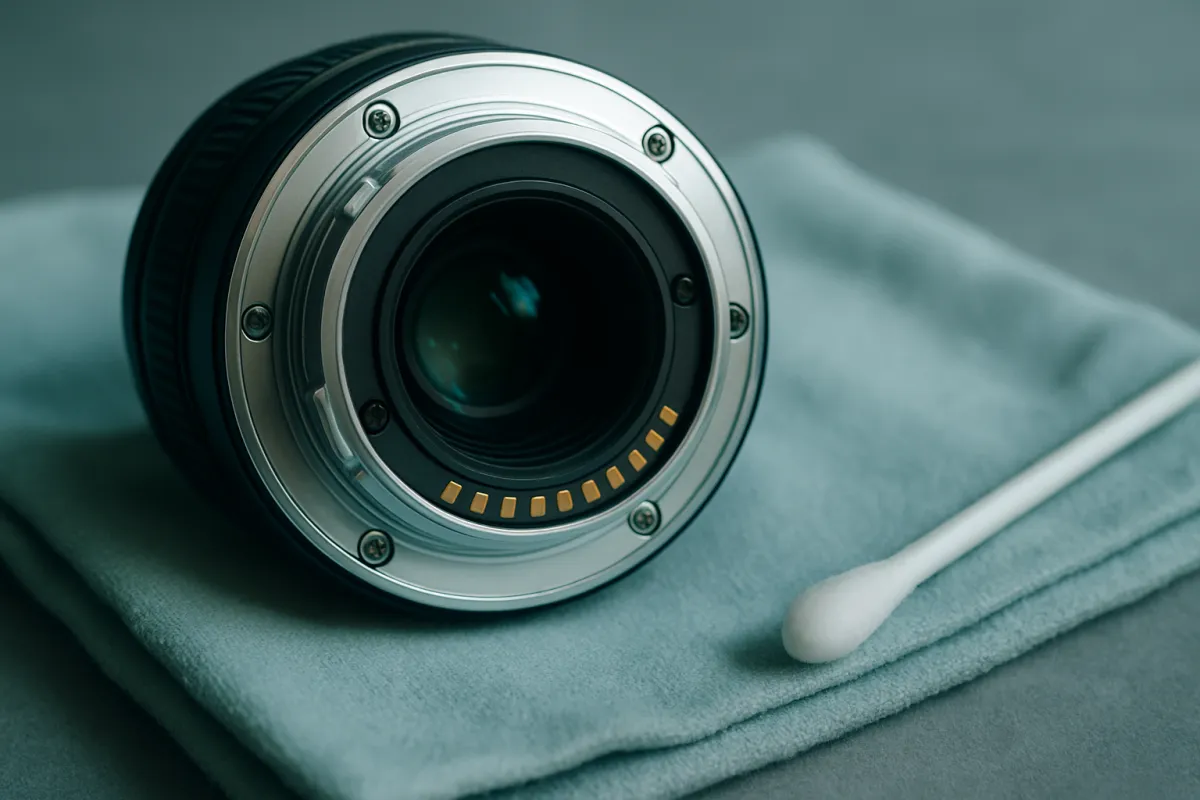
The front element gets all the attention, but the rear element and the mount contacts matter as much and want even more care, because they sit closer to the sensor and the camera’s electronics. When you detach a lens, turn it rear-up and inspect the back glass the same way you did the front. The rear element is cleaned with the identical method: air first, brush if needed, then a light wipe with a barely damp cloth only if a real mark is present. Because the rear element sits nearer the focal plane, a smudge there can have slightly more effect on the image, which is a reason to keep it clean and never a reason to scrub it.
The mount contacts are the row of small gold-colored pads on the back of the lens and the matching set in the camera, and they carry the electronic conversation between the two. If autofocus or the aperture starts behaving erratically, dulled or dirty contacts are a common and easily improved cause. Keep the touch dry and light: a clean dry swab or the dry corner of the optics cloth, one or two passes across the pads, is enough. Do not use solvent here, do not soak anything, and do not scrape. If the fault persists after a dry wipe, that is an electrical or mechanical problem for a repair technician rather than something more aggressive cleaning will fix.
The watch-out for this step is the mount opening itself. With the lens off, the back of the lens and the camera’s throat are both exposed, so work quickly, keep both openings pointed down to reduce what drifts in, and never aim the blower or push a swab into the camera body. Sensor cleaning is a separate and riskier task with its own procedure, so treat casual poking around inside the body as off-limits and read our sensor cleaning field note before you go near that surface at all. Cap the lens as soon as the back is clean.
Step 6: Prevent Future Dirt With Caps, Filters, and Storage
The best lens cleaning is the one you never have to do, so the final step is prevention, where a few cheap habits save the glass from most handling. The reasoning is direct: every clean carries a small risk to the coating, so the fewer smudges you create, the less you wipe, and the longer the lens stays as it left the factory. Prevention is not an afterthought to cleaning. It is the larger half of the job.
Caps are the foundation. Keep the front cap on whenever the lens is not actively shooting and the rear cap on whenever it is off the camera, because a capped element simply does not collect fingerprints or dust. A hood, which many people leave on permanently, adds a second layer by shielding the front element from stray fingers and knocks as well as from flare. Then there is the protective filter question, which is genuinely two-sided. One camp keeps a clear filter on the front as a sacrificial shield, so a scratch or a cleaning mishap lands on cheap replaceable glass rather than the front element. The other camp argues that an extra flat surface, especially a cheap one, can add flare or take a little sharpness, and that a hood plus a cap protects nearly as well without touching the optical path. Both are defensible; our filters field note lays out what each type actually does.
Storage closes the loop, and it is where the real enemy is beaten. Fungus grows in warm, dark, humid, still conditions, so keep lenses somewhere dry with a little airflow, and add a few silica gel packets to a case in a humid climate. The watch-out is the sealed bag left for months in a damp cupboard, which is close to ideal conditions for growth to take hold on a coating. Cap the glass, store it dry, give it air, and you will spend far more time shooting than cleaning.
Safe versus risky lens-cleaning habits
An illustrative risk rating, out of 100, for common ways people clean a lens, where higher means less risk to the coating. This is a directional model built from ordinary handling practice, not a measured test, and it rates habits rather than any product.
The safest habits touch the glass least: air and a soft brush sit at the top, the correct damp wipe just below, and every cloth rating assumes the cloth is clean. The bottom four are the everyday improvisations that mark coatings, with solvents last because that damage is not reversible. Tell the companion above what is on your lens for the matching method.
A worked example: cleaning a smudged lens step by step
Theory into practice: here is one realistic clean run through all six steps, so the routine is concrete rather than abstract. Picture a standard zoom that picked up a clear thumbprint on the front element at a family gathering, plus the usual scatter of dust from a day in a bag. The instinct in the moment was to swipe it with a shirt cuff. Instead, the lens comes home to the desk and the kit comes out.
Step 1, decide. Held to a lamp at an angle, the thumbprint plainly catches the light and would lower contrast in a backlit shot, so it earns a wet clean; the dust alone would not, but since the cloth is coming out anyway, the whole element gets done once. Step 2, tools. Out come the blower, the soft brush, a clean cloth kept in a sealed bag, and the small bottle of fluid, all laid on a wiped-down table in good light. Step 3, blow. Front element angled down, several firm squeezes clear the loose dust, and a couple of stray specks near the edge get swept off with the brush and blown away, so nothing gritty remains to drag.
Step 4, wipe. One drop of fluid goes onto the cloth, not the glass. Starting at the center, a gentle spiral outward lifts the thumbprint with almost no pressure as the liquid dissolves the oil, and a dry part of the cloth buffs away the faint streak left behind. The element is now clear under the same angled light that showed the print. Step 5, rear and contacts. The lens comes off; the rear element is only dusty, so air and a light brush handle it with no wipe needed, and since autofocus had been fine, the contacts get a single dry pass and nothing more. Step 6, prevent. Both caps go back on, and the lens returns to a dry shelf with a silica packet rather than to the sealed bag it came home in. Total time, about five minutes, no contact with dry grit, and a front element as clean as new with its coating untouched. Tell the companion above what is on your own lens to get the matching method.
The lens cleaning steps in order
Where your attention goes across one careful clean, as an illustrative share of the effort summing to the whole. Most of the work is removing particles and the single controlled wipe, not endless polishing.
Removing particles and the one controlled wipe are more than half the job; assessing and prevention bracket it. Notice there is no segment for polishing, because the goal is a functionally clean lens, not a shinier one.
Cleaning marks on a lens: which ones to touch and which to leave
Cleaning marks on a lens is a different job from routine cleaning, because a mark is a diagnosis before it is a task. Routine cleaning deals with whatever landed on the glass today. A mark is something that has stayed, and a good share of the marks people attack with a cloth are not on the outside surface at all, which is why pressing harder is so often the wrong answer. Work out what you are looking at first, then decide whether it is yours to fix.
Two quick checks separate the categories. Tilt the lens under a lamp and watch whether the mark moves against the reflections as the angle changes: something on the outside surface stays put relative to the reflection, while something deeper appears to shift behind it. Then blow the loose grit off and wipe once, lightly, with a clean dry cloth, and look again. If the mark changes at all, it is on the surface and the routine above applies. If it does not flinch, more pressure will not reach it, and what comes next is a decision rather than a harder wipe.
Sorted by what you may safely touch:
- Fingerprints and skin oil. Clean it. This is the ordinary case the six steps are written for: air, brush, then a drop of fluid on the cloth and a gentle spiral from the center out. Oils lift with chemistry and almost no pressure, so if you find yourself leaning on the glass, the fluid is doing too little and your hand is doing too much.
- Water spotting and dried mineral residue. Clean it, with patience rather than force. Rain and tap water leave a ring of minerals behind as they dry, and that ring is mildly abrasive in its own right. The fix is dwell time: hold a barely damp cloth on the spot for a few seconds so the residue softens, then wipe lightly and buff dry. Salt spray is the harsh version of the same thing and deserves a blower before anything touches it.
- Loose dust, grit, and lint. Do not clean it, blow it. These are not marks so much as passengers, and they are the one category that must never meet a cloth. Air, then a soft brush, then air again. If they refuse to move, that is a strong hint they are not on the outside surface at all.
- Fine swirl marks and light coating scratches. Leave them. These are cosmetic in nearly every case, because the front element sits so far outside the plane of focus that even a scratch you can see tends to cost a little flare resistance rather than sharpness. There is no cleaning move that removes a scratch: polishes and compounds take off coating rather than damage, so the lens comes back worse than it went in. A hood does more for a scratched element than any cloth will.
- A dull, patchy, or clouded area on the surface. Stop. That look is what a solvent or an aggressive polish leaves behind, and it is coating damage rather than dirt. More cleaning spreads it. If it appeared right after something from under the sink met the glass, the next step is a repair quote, not another wipe.
- Anything behind the front element. Stop and have it assessed. Internal dust is normal and worth ignoring in almost every lens. Haze, a rainbow shaped patch where two elements meet, and fine branching threads are different: they are inside the barrel, they are reached only by disassembly, and growth in particular can etch a coating if it is left, so it is worth acting on rather than living with. Keep a suspect lens away from the rest of your gear until someone qualified has looked at it.
The honest arithmetic is that of those six categories, two are cleaning jobs, one is an air job, and three are either cosmetic or a repair technician’s work. That ratio is the part most cleaning advice skips, and it is why the most experienced response to a mark on a lens is often to look at it carefully in angled light and then do nothing. If a mark genuinely is costing you images and it is not on a surface you can reach, the conversation is repair or replacement rather than technique, and the upgrade budget planner is for the second of those, once you are certain cleaning was never the answer.
Common mistakes to avoid
The banned-materials list above covers what not to touch the glass with. These are the process errors, the ones people make with the right tools in hand:
- Wiping before removing grit. The most damaging mistake of all, and the reason the order exists. Air and brush first, every single time, even when the dust looks too fine to matter, because the particle that scratches a coating is exactly the one you cannot see.
- Using too much fluid. A soaked cloth is the usual cause of stubborn streaks and the main route by which liquid reaches the barrel. A drop or two on the cloth is the whole dose, and the fix for streaking is less liquid, not more.
- Scrubbing a mark that will not move. Pressure is not the escalation that works. Dwell time is: let the fluid sit for a few seconds and lift the residue chemically rather than mechanically, and if it still will not shift, consider that it may not be on the outside at all.
- Cleaning in the wrong place. A wipe at a wiped-down table with good light is a different act from the same wipe on a windy beach where new grit lands between passes. Conditions decide what is safe, so a field wipe should be postponed almost every time.
- Over-cleaning a lens that is already fine. Polishing clean glass, or chasing every mote of dust, wears a coating over years for no gain in your photos. Clean because an image needs it, then stop.
- Reusing a cloth that has lived loose in a bag. The cloth is a consumable, not a permanent tool. Keep it in a sealed bag, and retire it once it has picked up sand or gone grubby, because a dirty cloth turns a correct technique into an abrasive one.
- Treating a coating problem as a cleaning problem. Haze that will not lift, a patchy sheen, or a dulled area is coating damage or something inside the lens, and more cleaning makes it worse. That is the point at which the lens goes to a repair technician.
Troubleshooting the tough cases
Real cleaning does not always go to plan, so here is how to handle the situations that fight you. What if a smudge simply will not lift? First confirm it is on the surface and not inside the glass by watching whether it moves as you wipe; if it is on the outside, add a second drop of fluid to the cloth, give it a few seconds to dissolve the oil, and wipe again with light circular pressure rather than more force. Dried water spots and sticky residue usually want that dwell time rather than harder scrubbing. A pen-style pad is worth trying for a stubborn fingerprint, but if the mark does not move at all, it is probably inside the element and not something to chase from the outside.
What if you see fine, web-like or branching threads that look like they are spreading rather than sitting as loose specks? That is the signature of fungus, not dust, and it is a different problem. Fungus takes hold in warm, humid, dark storage, and once established between elements it is inside the lens and beyond a safe home clean, because reaching it means disassembly and the growth can etch a coating if it is left. Keep the affected lens away from the rest of your gear so spores do not travel, and have it assessed by a qualified repair technician. The real fix is prevention through dry, ventilated storage.
What if there is a visible scratch or a dull patch on the front element? A light coating scratch usually has far less effect on your images than it looks like it should, because it sits so far outside the plane of focus, and many lightly scratched lenses shoot perfectly well with a hood managing any flare. What you cannot do is polish it out; abrasives and compounds remove coating rather than damage, and the result is worse than the scratch. A dull or patchy area, which is what a solvent leaves behind, is the same story and belongs to a technician who can quote a recoat or an element replacement. And trapped internal dust? Leave it alone in almost every case: it is nearly universal in used lenses, sits out of focus, and does not show in photos, so opening a lens to remove it risks far more than the dust ever costs. Cleaner shooting habits, covered in our sharp-photos field note, keep most of these situations from arising.
Lens cleaning in the field, away from the desk
Everything above assumes a clean table and good light, but most dirt arrives while you are out shooting, so field lens cleaning deserves its own habits. The governing rule outdoors is that conditions decide what is safe: the same wipe that is harmless at a desk can scratch on a windy beach, because new grit lands faster than you can clear it. The field version of the routine leans harder on air, caps, and patience, and it postpones every wipe it can.
Carry a minimal kit somewhere you can reach it: a blower or a pen-style tool with its retractable brush, plus one clean cloth sealed in a bag so it never shares a pocket with sand and keys. When something lands on the glass mid-shoot, turn your back to the wind, angle the element downward, and blow it off. If particles are actively blowing around you, do not wipe at all: cap the lens and wait, because dragging a cloth through fresh grit is the scratch scenario in its purest form. Sand and salt spray are the harshest case, and coastal work is where careful shooters are strictest; after a beach or trail day, blow the lens and the barrel seams before anything touches them and save the damp wipe for the desk, since dried salt is both abrasive and corrosive.
Two more field cases catch people out. Rain spots are best dabbed straight down with a dry corner of the cloth rather than swept, which keeps mineral residue from smearing, and the full clean waits for home. And when you carry a cold lens into a warm room, condensation fogs the glass; do not wipe it, just leave the lens capped in the bag until it reaches room temperature and the fog clears on its own. Long lenses need one extra thought, because a big front element is a big target: keep the hood extended and the cap on between sequences, a habit our telephoto field note treats as part of handling. Field cleaning done this way is mostly restraint, which is exactly why it works.
How to clean a photography lens, a filter, a phone lens, and a viewfinder
How to clean a photography lens is what everything above has covered, and the same method transfers to the other glass on a camera with small adjustments worth knowing. The order of operations never changes anywhere: move particles off before any cloth arrives. What changes is how delicate the surface underneath is, and the sequence below runs from the cheapest glass to the most precious.
A screw-on filter is the easiest case and the one most people handle badly. Unscrew it and clean it off the camera, on a flat surface, so you are not pressing against a lens barrel or straining the threads. A filter has two surfaces and both collect fingerprints, and because it is inexpensive glass sitting in front of expensive glass, it is the one piece you can afford to replace rather than clean aggressively. If a filter is scratched or hazy, replacement is almost always the right call, since a marked filter degrades every frame while a new one costs a fraction of the lens it protects.
A phone lens cover is a different material problem. The small window over a phone camera is usually a hard cover rather than a coated photographic element, so it tolerates handling better, but it lives in a pocket with keys and sand, which means it carries grit more often than any camera lens does. The blow-first rule matters most of all there. The rim around the cover traps lint, and a dry swab clears that better than a cloth, which just packs it in tighter. If phone photography is where most of your images come from, our field note on phone camera lenses covers what that small window can and cannot do.
The viewfinder eyepiece and the rear screen are the surfaces people forget and then blame the lens for. An eyepiece collects skin oil and, for glasses wearers, residue from spectacle coatings, and a smeared one makes focus look wrong when the lens is spotless. Clean it with a barely damp cloth and no pressure. The rear screen wants the same gentle treatment and no solvent, since screen coatings are not optical coatings. And the surface not to touch at all is the sensor: it sits behind the mount, it is the most delicate thing in the camera, and it has a procedure of its own in our sensor cleaning field note rather than a place in this routine.
How to clean a camera lens with no kit on hand
Sooner or later a smudge appears while your blower and fluid sit on a desk at home, and the honest first answer is that doing nothing is usually the right move. A fingerprint on the front element costs far less image quality than most people assume, because the element sits so far outside the plane of focus that even a noticeable smudge tends to show as a slight loss of contrast in bright backlight rather than as a visible mark. Shoot the day, keep the sun off the front element with a hood or a hand, and clean it properly at home. That is the version of this section that protects your coating best.
When something genuinely has to come off in the field, the improvisations rank clearly from safest to worst. Best is moving air with no contact: a firm puff from a blower if you have one, or turning the lens face down and tapping the barrel so gravity takes the loose particles. Next is a clean cloth you were already carrying for optics, used dry, in the same gentle spiral from the center out, and only once you are confident no grit remains. Below that the options get worse quickly, and the honest ranking is that most of them are worse than leaving the mark alone until you get home.
Two improvisations are worth naming so you avoid them under pressure. A shirt hem or a jacket sleeve is the classic scratch: fabric that has spent the day collecting dust is exactly the wrong thing to drag across a coating. Tissue and paper towel are wood-fiber products, coarser than they feel, and they leave lint behind on top of the abrasion risk. Breathing on the glass is the ambiguous case, common and not catastrophic in itself, but the moisture only helps if what follows is a clean cloth on grit-free glass, and it does nothing about the particles that cause the damage. If particles are what you are facing, the correct field move is a cap and patience, not a wipe, exactly as the field section above describes.
Where lens cleaning fits in your camera care routine
A clean front element is one habit inside a larger pre-shoot routine, and it earns more when the rest of the routine runs with it, because spotless glass does not save a shoot that fails on settings, cards, or backups. The pattern that works is checking the glass at the same moments you already check everything else, so lens cleaning costs no extra discipline at all. Think of it as inspection with an occasional wipe attached, rather than as a scheduled scrub.
Before a shoot, the sequence takes two minutes. Glance at the front element in angled light and give it a blower squeeze if dust shows, then confirm the camera itself is ready: settings returned to your baseline so yesterday’s high ISO or exposure compensation does not follow you into today, which is what our camera settings reference is built to standardize, and a card formatted in the camera rather than half full of last month’s files, a habit our SD card formatting field note walks through safely. A charged battery and a capped, hooded lens finish the check. If you are heading somewhere wide and exposed, our landscape lens field note is worth a look for what to bring before you worry about what to clean.
After a shoot, the order reverses: photos come off the card into a real backup first, the routine our photo backup field note turns into a system, and only then does the gear get its once-over, a blow if the day was dusty, caps on, and the bag stored somewhere dry with a silica packet rather than a damp closet. On a longer rhythm, perhaps monthly, glance at the mount contacts when you swap lenses and check that nothing web-like is appearing in the glass. Slot cleaning into those existing checkpoints and the lens stays clean as a side effect of a routine you were running anyway. If the check ever suggests the lens itself is the limit rather than its surface, that is the moment for the upgrade budget planner, not for another wipe.
Your lens cleaning checklist
Save this and run down it the next time a smudge appears, or before a shoot:
- Inspect first: hold the element to an angled light and decide whether the mark actually affects your images or is merely cosmetic.
- Clean only when needed: blow off dust freely, but reserve a full wet clean for a real smudge, because over-cleaning wears a coating.
- Use the right tools: air blower, soft optics brush, a clean optics-only cloth, and a fluid your lens maker’s care instructions allow.
- Rule out the rest permanently: no shirt, tissue, paper towel, household cleaner, alcohol, solvent, canned air, or anything scraped.
- Blow first, always: clear loose grit with moving air before any cloth touches the glass, and point air, not your breath, at the element.
- Brush off any clinging particles, then confirm the surface is free of grit before you wipe.
- Wipe with a drop or two of fluid on the cloth, never on the lens, in a gentle spiral from the center outward.
- Buff dry: clear any streak with a dry section of the same cloth, and use less fluid if streaks persist.
- Do the rear element with the same method, and give the mount contacts only a dry, light pass if focus has been erratic.
- Keep air and swabs out of the open camera body, and treat sensor cleaning as its own separate procedure.
- Route the rest: fungus, haze, internal dust, a rattling element, or a dulled coating goes to a qualified repair technician, not to a harder wipe.
- Prevent the next clean: caps on, a hood in place, a considered call on a protective filter, and dry, ventilated storage with silica gel.
The bottom line
Cleaning a camera lens well is a matter of order and restraint, not effort. Decide first whether the mark is even worth touching, because a lens that looks clean should be left alone and over-cleaning slowly wears a coating. When a real smudge is there, remove the loose particles with air and a soft brush before any cloth arrives, since rubbing dry grit is the one motion that scratches glass permanently. Then wipe with a drop or two of fluid on the cloth, never on the lens, in a gentle spiral from the center out, and buff any streak with a dry section. Handle the rear element the same way, give the contacts only a dry pass, keep everything out of the open camera body, and check your lens maker’s care instructions before you accept any claim about what a fluid or cloth may touch. Keep the house chemicals out of it entirely, since a coating that a solvent has dulled is a repair, not a re-clean. Most of all, prevent: caps on, a hood in place, a considered call on a filter, and dry ventilated storage that keeps fungus from ever starting. Do it in that order and a five-minute routine keeps your glass clear and its coating intact for years, which is the cheapest sharpness you will ever buy. For the habits that keep the whole image sharp, read our sharp-photos field note, and tell the companion above what is on your lens for the exact method to use.
Care note: nothing here is a product recommendation, and no brand, bottle, or cloth is named on purpose, because coatings differ between lenses and formulations differ between products, so the only reliable authority on what may touch your front element is the care instruction that came with your own lens. What this field note offers is the order of operations, which is where almost all avoidable damage happens, and that order reflects widely followed handling practice rather than a measured test of any particular lens, fluid, or fabric. No price is quoted because prices move with brand and region and a made-up figure helps nobody. Anything past the outside of the glass belongs to someone else: fungus, haze, internal dust, a loose element, or a coating that has been dulled by a solvent should be assessed by a qualified repair technician rather than treated with a harder wipe.
Frequently asked questions
What is the safest way to clean a camera lens?
The safest order is to remove particles before anything touches the glass, then wipe only if a mark remains. Move loose dust with air first, sweep any stragglers with a soft optics brush, and only then wipe with a clean cloth kept for optics, carrying a drop or two of fluid applied to the cloth rather than to the glass. The single rule that prevents almost every scratch is never to rub a lens that still has grit on it, because a hard particle dragged across a coating is exactly how a permanent mark gets made. Work in a gentle spiral from the center outward, use the least pressure that lifts the mark, and stop as soon as the glass is functionally clean rather than polishing it further. What is safe on your particular coating is a question for the care sheet that came with the lens.
Can I use my shirt to clean a camera lens?
It is one of the most common ways people quietly scratch their own glass, so it is worth ruling out for good. A shirt hem carries dust, lint, and often invisible grit picked up over a day, and dragging that across a coated front element is the motion that leaves fine swirl marks over time. Ordinary cotton is also much coarser than cloth woven for optics, and it tends to push oils around instead of lifting them. If a mark appears and you have nothing with you, the better move is usually to leave it: a smudge on the front element costs less image quality than most people assume, and it can wait for a proper clean at a desk. A small blower and a clean cloth take up almost no room in a bag, which is what keeps the shirt out of the job permanently.
How do I remove a fingerprint or smudge from my lens?
Clear the surface of loose particles with air first, then put a drop or two of a fluid made for optics onto the cloth, never onto the glass, and wipe in a light circular motion from the center toward the edge. The oils in a fingerprint respond to the fluid and lift with very little pressure, so let the liquid do the work instead of scrubbing. Finish with a dry part of the same cloth to clear any streak left behind, since a faint haze after wiping is usually leftover fluid rather than dirt. Putting the liquid on the cloth rather than the lens is what keeps it from running to the edge of the element and seeping past the retaining ring into the barrel, which is a problem you cannot reach from the outside.
Should I put cleaning fluid straight onto the glass?
Put it on the cloth instead. A lightly moistened cloth gives you all the cleaning action you need while keeping liquid away from the edge of the element, where it can wick past the retaining ring into the interior. Fluid inside the barrel does not clean off from the outside and can encourage haze or, in damp storage, fungus. It is also worth being honest about the fluid itself: coatings differ between lenses and eras, formulations differ between bottles, and no one can promise from a distance that a given liquid suits your particular front element. The care instructions that came with the lens are the authority on that, and the delivery method matters regardless: a couple of drops on the cloth, not a soaked cloth and never a puddle on the glass.
Does dust inside my lens affect image quality?
In almost every ordinary case, no. A few specks inside a lens sit far from the plane where the image forms and are so far out of focus that they contribute nothing you can see in a photo, even at small apertures. Nearly every used lens has some internal dust, and it is generally treated as normal rather than as a defect. The exceptions are heavy accumulation, which can slightly lower contrast, and anything that looks like it is spreading rather than sitting still, which points at fungus and is a different problem. Because opening a lens to chase harmless dust risks far more than the dust ever would, the sane response is to leave internal specks alone unless a repair technician who has inspected the lens says otherwise.
How often should I clean my camera lens?
As rarely as you can while keeping the glass functionally clean, because every wipe carries a small amount of friction and a coating gains nothing from being polished. Blow loose dust off freely, since moving air touches nothing, but save a full wet clean for a mark that actually shows in your images or in bright backlight. A workable habit is to check the front element before a shoot, blow it if dust shows, and wipe only when something is genuinely there. Over-cleaning is a real way to wear a coating over years, so a lens that looks clean is a lens to leave alone. The most useful routine is prevention: caps on between shots means there is very little to clean in the first place.
How do I know if my lens has fungus, and what do I do about it?
Fungus looks like fine branching or web-like threads on or inside the glass, and unlike dust it appears to spread over weeks rather than sitting as loose specks. It takes hold in warm, humid, dark, still conditions, which is why a lens left for months in a sealed bag or a damp cupboard is most at risk. Growth that has established itself between elements is inside the lens and is not a home job, because reaching it means disassembly and the growth can etch a coating if it is left. If you suspect it, keep the lens away from the rest of your gear so spores do not travel, and have it assessed by a qualified repair technician. Prevention is far easier than any cure: store lenses dry, with airflow, and out of long dark humid stretches.
How do I clean a photography lens if I have no kit with me?
Usually by not cleaning it. A fingerprint on the front element costs far less image quality than it appears to, because the element sits well outside the plane of focus, so it tends to show as a small loss of contrast in bright backlight rather than as a mark in the frame. Shoot the day, keep direct sun off the glass with a hood or your hand, and clean it properly at a desk. If something truly has to come off, rank the improvisations: moving air first, then a clean dry cloth you were already carrying for optics, used in the same light spiral. Never a shirt, a tissue, or a paper towel, and if grit is blowing around you, cap the lens and wait for the wind to drop.
How do I clean marks on a lens that will not wipe off?
Work out where the mark actually is before you press harder, because a mark that resists a light wipe is usually not on the outside of the glass at all. Tilt the lens under a lamp and watch whether it moves against the reflections as the angle changes, then blow the loose grit off and wipe once, lightly, with a clean dry cloth. If it shifts or fades, it is on the surface: put a drop of fluid on the cloth, let it sit on the mark for a few seconds so the residue dissolves, and wipe again in a light spiral rather than leaning on it. If it does not react at all, more force will not reach it. Fine swirls and light scratches are cosmetic and cannot be polished out, since compounds take off coating rather than damage, while haze, a dulled patchy area, or fine branching threads sit inside the lens or in the coating and belong to a qualified repair technician.
What should be in a lens cleaning kit?
Four pieces cover almost everything: an air blower, a soft brush made for optics, a cloth kept only for optics, and a small bottle of fluid intended for coated glass. A few cotton swabs for the mount contacts and a pen style brush and pad tool for the bag are useful additions rather than essentials. What matters more than the shopping is the order they come out in, which is air, then brush, then the dry cloth, then fluid on the cloth only if a mark remains, because each stage touches the glass a little more than the one before it. Keep the cloth sealed in a bag so it never collects the grit you are trying to avoid, and treat the care instructions that came with your lens as the authority on what any particular fluid may touch.