What's on this page
- What food photography is (and why it rewards care)
- The gear you actually need for food photography
- Camera or phone for food photography
- Why a tripod helps in food photography
- Lighting: why soft window light wins
- Diffusion and bounce: shaping window light
- Backlighting food and drinks
- Reflectors, backgrounds, and props
- Styling food so it looks fresh and appetizing
- Garnish, height, and the finishing touches
- Negative space and composition
- Choosing your angle: overhead, 45, or straight-on
- Matching the angle and light to the dish
- Camera settings for food photography
- White balance and appetizing color
- Shooting drinks and beverages
- A worked example: photographing one plated dish
- Editing food photos
- Food photography on a phone
- Common food photography mistakes
- Your food photography checklist
- The bottom line
Short answer: Photograph food beside a large window for soft, directional natural light, never under overhead bulbs or on camera flash, and shoot while it is genuinely fresh, before greens wilt and steam vanishes. Match the angle to the dish: overhead for flat spreads, 45 degrees for a plated main, low and straight on for tall stacks and drinks. A steady phone or camera, a tripod, a white bounce card, and a clean background are enough.
Food photography is the skill of making a dish look as fresh, delicious, and inviting in a photo as it does on the table, and it is one of the most rewarding techniques a home cook, food blogger, small cafe, or hobbyist can learn, because an appetizing photo is often the single thing that decides whether someone stops scrolling, reads the recipe, or books the table. The gap between a snapshot that looks greasy and dull and a photo that makes a mouth water is rarely the camera. It is a short, learnable set of decisions about light, styling, angle, and a light touch of editing, and every one of them can be practiced at your own kitchen table with the food you were going to cook anyway.
This field note is written for people photographing food they cook, sell, or love: a recipe blog, a cafe menu, a market stall, a social feed, or just the joy of a beautiful plate. It stays at the level of technique rather than naming brands or quoting prices, because the principles hold across every phone and camera. Where a habit overlaps a skill covered elsewhere, it leans on our other field notes rather than repeating them: the exposure choices below share the ground of our manual mode field note and exposure triangle field note, the focus habit runs through our sharp photos field note, the shallow-background look borrows from our portraits field note, and the shared studio setup is covered in our product photography field note. Price any gear you are tempted by against the upgrade budget planner before you assume equipment is the problem.
Key takeaways
- Soft, directional natural light from a large window is the heart of food photography: it reveals texture and gloss and makes food look fresh, while overhead bulbs and on-camera flash make it look flat and greasy.
- Shoot food while it is genuinely fresh: greens wilt, ice melts, sauces skin over, and steam vanishes within a minute or two, so plate it, style it, and shoot fast.
- Match the angle to the dish: overhead flat-lay for flat spreads, 45 degrees for a plated main, and a low straight-on angle for tall stacks and drinks.
- You need very little gear to start: a steady phone or camera, a tripod, a white bounce card, a diffuser for harsh light, and a few clean backgrounds and props are enough.
- Style with restraint and edit honestly: leave negative space, add a fresh garnish and some height, then correct color and lift the photo lightly without ever faking the food.
What food photography is (and why it rewards care)
Food photography is simply photographing a dish so that a viewer can see it clearly, understand it, and want to eat it. That sounds obvious, but it points at the two jobs every food photo has to do at once: be appetizing, so the viewer feels hungry and drawn in, and be honest, so the food looks like what someone will actually be served or will actually cook. Those two goals mostly pull in the same direction, because real food at its freshest is genuinely beautiful, and learning food photography is largely learning to catch it at that peak and light it so its best qualities show.
The payoff is unusually direct for a photography skill. For a food blogger, the lead photo is what earns the click from a search result or a social feed, long before anyone reads the recipe. For a cafe or a small food business, the photos on a menu, a delivery app, or an feed are the storefront, and an appetizing image reads as care and quality while a dim, greasy snapshot reads as neither, regardless of how good the food tastes. The same holds for a home cook building a portfolio or simply wanting to remember a dish well.
What makes this such a rewarding skill is that the returns come from attention, not from spending. A thoughtful plate by a window with a piece of white card routinely beats an expensive camera used carelessly under a kitchen bulb. The rest of this article walks the whole workflow: the gear that actually helps, how to light food, styling that keeps it fresh and appetizing, choosing the angle for each dish, the camera settings that keep it sharp and true, composition, editing, and the mistakes to avoid. Run your own kit and budget through the upgrade budget planner as you read, because most of what makes a food photo work is decisions, not price tags.
The gear you actually need for food photography
The honest starting list for food photography is short, and you probably own most of it already. In rough order of how much each one helps, you need a camera you can hold steady, a way to steady it, soft light (a window to start), a white surface to bounce that light, and a clean background or two. Everything beyond that is refinement. A beginner who plates a dish beside a window, props a sheet of white foam board opposite to bounce light into the shadows, and steadies a phone on a small tripod is already equipped to make food photos that look professional.
The camera can be a phone or an interchangeable-lens body, and we weigh that choice in the next section, but it matters less than beginners expect because the food is not moving and the light is under your control. The support matters more than it looks: a tripod, a small tabletop stand, or even a stack of books that holds the camera dead still lets you use a low ISO for the cleanest file and frees both hands for styling, which our sharp photos field note explains in full. The light can start as a free window and grow into a continuous lamp with a softbox. The background can be a wooden board, a sheet of card, a marble tile, or a clean cloth.
The shaping tools are the cheap secret of good food photography: a piece of white foam board or card to bounce light into shadows, a sheet of black card to add gentle contrast on the far side, and a diffuser (a sheer curtain, tracing paper, or a purpose-made panel) to soften harsh sun. A few small styling tools help too: a brush for oil, tweezers for placing garnish, a spray bottle for a fresh look, and paper towel for wiping drips. These cost almost nothing and do more for the look than an expensive camera. Set up with what you have, learn what each element does, and let the gaps you actually hit tell you what to buy next. Price the tempting upgrades against the upgrade budget planner first, and read our product photography field note for the shared studio kit.
Camera or phone for food photography
The first question most beginners ask is whether their phone is good enough, and for a large share of food photography the answer is yes. Modern phone cameras resolve more than enough detail for social posts, blogs, and menus, and one of their supposed weaknesses is an advantage for overhead shots: their deep depth of field keeps a whole flat-lay sharp from edge to edge without any effort. Photographed on a small tripod beside a good window, a phone produces food images that hold their own, and our phone camera lens field note covers getting the most from the lenses you have.
An interchangeable-lens camera, a mirrorless body or a DSLR, earns its place when you want more control and the highest quality. You gain a proper aperture to fine-tune how much of the dish is sharp, better performance in the dim corner of a kitchen, cleaner files at low ISO, full RAW capture for precise and appetizing color, and the shallow, creamy background blur that isolates a single hero plate. None of that is necessary to start, but all of it helps once food photography becomes a regular part of what you do, and it is the difference that shows when a client, a cookbook, or a stock library demands large, flawless images.
The pragmatic path is to start with whatever you own and let results, not aspiration, drive the upgrade. If your phone food photos look flat, the fix is almost always the light or the styling, not the camera, so change those first. If, after your light is soft and your food is fresh, you keep hitting real limits, a background you cannot blur enough, colors that never quite match, or noisy files in a dim kitchen, that is the signal a dedicated camera will pay off. Our first camera budget field note walks the buying decision, and the upgrade budget planner helps you sequence it sensibly.
Why a tripod helps in food photography
A tripod is the least glamorous item in food photography and one of the most useful, because it does two jobs at once. First, it locks the camera down so you can shoot at a low ISO for the cleanest file and let the shutter stay open as long as the exposure needs, without a trace of shake, which is exactly what a still plate on a table allows. Hand-holding forces the opposite compromises, a faster shutter and a higher ISO, and it introduces the soft, slightly blurred look that marks a photo as amateur, a habit our sharp photos field note explains how to break.
Second, and this matters more in food than in almost any other subject, a tripod frees both your hands while it holds the framing perfectly still. Food styling is fiddly, hands-on work: you are placing a garnish with tweezers, brushing oil onto a crust, wiping a drip off the rim, adding a spoon or a napkin, nudging a crumb. With the camera locked to a fixed frame, you can adjust the plate, check the screen, adjust again, and watch the composition improve without the framing drifting a millimeter. That tight feedback loop between styling and the exact frame is hard to get any other way.
A tripod is also what makes overhead flat-lay shots practical. Holding a phone or camera perfectly flat and square above a table by hand, while also styling the food, is genuinely awkward, and a tripod with a horizontal arm or a simple overhead rig holds that top-down view steady so you can work under it. You do not need an expensive tripod to start: any stable support that holds the camera still will do, including a cheap tabletop model, a clamp, or a stack of books, and a phone just needs an inexpensive holder, which our phone tripod field note covers. A two-second self-timer or a remote removes the last shake from pressing the shutter.
Lighting: why soft window light wins
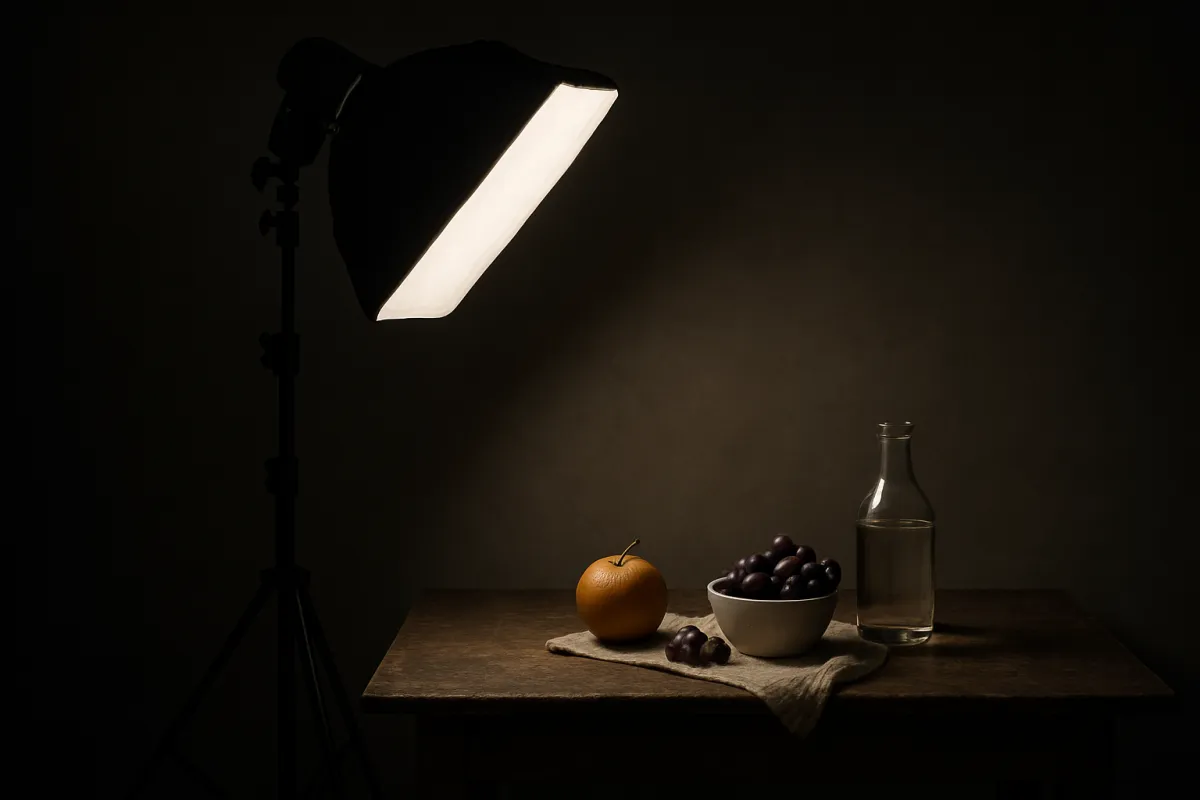
Lighting is the heart of food photography, and the first decision is your source. Natural window light is where almost every food photographer should start, because it is free, it is soft when the window is large and the day is bright but overcast, and it teaches your eye what good light looks like. Place the dish on a table beside a large window, out of direct sun so the light stays soft, and you have a professional-grade light source at no cost. Food looks its best in this kind of soft, directional light, which reveals the texture of a crust, the gloss of a sauce, and the layers of a stack.
The direction of the light matters as much as its softness. The most common beginner mistake is lighting food from the front, from the camera position, which flattens it and erases the small shadows that reveal shape and texture. Instead, place the food so the window is to one side, roughly 45 to 90 degrees off the camera, or behind the dish, so the light rakes across the food and models its form. Side light works for almost everything, and backlight, covered in its own section below, is especially good for drinks and anything that glows. Then bounce a white card into the shadow side so the darks stay soft and detailed rather than turning black.
Continuous artificial light is the natural next step when the weather or the hour stops cooperating. A continuous light, an LED panel or a lamp fitted into a softbox, stays exactly as bright and colored as you set it, at any time of day, which is what you want once you shoot food regularly. Crucially, continuous light is what you see is what you get: you watch the shadows and highlights move as you reposition it, which makes it far easier to learn on than flash. One good continuous light with a softbox, placed to the side or behind the dish, plus a white bounce card for fill, covers most beginner and intermediate food work. In any dim kitchen, the habits in our low light field note still apply.
Diffusion and bounce: shaping window light
Once you have chosen a window, the two tools that shape its light do the most for the look, and both cost almost nothing. Diffusion softens a light that is too harsh, and bounce fills the shadows it leaves. Together they turn any window, even one with direct sun pouring through it, into the soft, directional light that flatters food. The principle behind both is the same one that governs all lighting: a larger, closer, softer source wraps gently around a subject, while a small, hard one carves harsh shadows and blows out highlights.
Diffusion is for when the light is too hard, which usually means direct sun is hitting the window. Left alone, that hard sunlight creates sharp, ugly shadows and bright hot spots on a glossy sauce or a wet fruit. Hang a sheer white curtain, tape a sheet of tracing paper or baking parchment over the glass, or stand a purpose-made diffusion panel between the window and the food, and the same light spreads into a large, soft source that looks like a bright overcast day. On an overcast day the sky has already done this for you, which is why so many food photographers quietly prefer cloudy weather.
Bounce is for the shadow side. Even with soft directional light, the side of the dish away from the window falls into shadow, and if you leave it the food can look heavy and half-lit. Stand a sheet of white foam board or card on the shadow side, close to the plate, and it reflects soft light back into those shadows so they stay open and detailed. Move it closer to lift the shadows more, farther to let them deepen. The opposite trick is a black card or a sheet of dark foam on the shadow side, which subtracts light and adds gentle contrast and mood, useful for a dark, dramatic look. Watch the shadow side as carefully as the lit side, because how you fill or deepen those shadows is half of what gives food its shape and appetite appeal.
Backlighting food and drinks
Backlighting, placing your main light behind the dish so it faces the camera through the food, is one of the most useful techniques in food photography and the one that most quickly lifts a photo from ordinary to appetizing. When the light comes from behind, it skims across the top of the food toward the camera, lighting up the edges, making textures like a sugar crust or a crisp salad leaf sparkle, and separating the dish from the background. It is the light that makes food look most alive, and it is why so many restaurant and cookbook photos place the window or the softbox behind and slightly above the plate.
Backlighting is close to essential for drinks and anything translucent, because it makes liquids glow. A glass of juice, iced tea, beer, wine, or a cocktail comes alive when the light passes through it from behind, lighting the liquid from within and showing its color and clarity, where front light would leave it looking dull and opaque. The same holds for a bowl of soup, a jar of honey, a stack of pancakes with syrup, or any dish where you want steam to show, since rising steam is only visible when it is lit from behind against a darker background. If you want to photograph steam, backlight the hot dish against a dark background and shoot quickly.
The one thing backlighting needs is fill on the front, because a purely backlit dish can leave the side facing the camera too dark. This is where the white bounce card earns its keep again: stand it between the camera and the food, angled to catch the backlight and reflect a little of it onto the near side of the dish, so the front stays soft and detailed while the back edge glows. Adjust the card until the balance looks right on screen. Backlight plus a front bounce card, using a single window or one continuous light, is a setup that flatters an enormous range of food and drink, and it is worth making your default starting point before you try anything else.
Reflectors, backgrounds, and props
With the light shaped, the surface under the food and the things around it set the mood, and this is where food photography becomes a small act of design. The reflector, or bounce card, has already earned its place as the tool that controls your shadows, and a matching black card that subtracts light is its natural companion for darker, moodier shots. Beyond those, the backgrounds and props are what turn a lit plate into a scene, and the guiding rule is that everything in the frame should support the food rather than compete with it.
Backgrounds give the food a stage, and a small collection covers most needs. A light, neutral surface, a pale wooden board, a marble or stone tile, or a plain cloth, suits bright, fresh, airy food like salads, breakfasts, and baking, and reads as clean and modern. A dark surface, weathered wood, slate, or dark fabric, suits rich, moody, dramatic food like a seared steak, chocolate, or a glass of red wine, and makes bright food and backlit edges pop against it. Keep a couple of each on hand, keep them clean, and choose the one that contrasts with the food so the dish stands out rather than blending in.
Props are the supporting cast, and restraint is the whole craft. Choose cutlery, napkins, glassware, a hand in frame, or a scattering of the dish’s own raw ingredients, and use fewer than you think you need, because clutter pulls the eye away from the food. Every prop should either support the mood or hint at the story of the dish, and anything that does neither should leave the frame. Match the props to the food’s world: rustic linen and a wooden spoon for a home-baked loaf, sleek and minimal for a fine-dining plate. Keep them slightly out of focus or toward the edges so the food stays the clear hero, and let negative space, covered below, do a lot of the work that props are often asked to do.
Styling food so it looks fresh and appetizing
Styling is where food photography differs most from photographing any other subject, because food changes fast and looks its best for only a short window. The single most important styling rule is to shoot food fresh: the first minute or two after plating is when greens are crisp, sauces are glossy, ice is solid, foam is high, and steam is rising, and every minute after that the dish looks a little more tired. Prepare everything, set your light and camera, plate the food last, and shoot immediately. Many food photographers plate a stand-in or a rough version to set up the shot, then swap in the freshly plated hero at the last second.
Beyond freshness, styling is about arranging the food so it looks natural, generous, and appetizing. Plate with a little restraint and leave some empty space rather than crowding the plate, because a slightly under-filled plate with breathing room reads as considered while an overloaded one reads as messy. Turn the most attractive side or the freshest, most photogenic piece toward the camera, and arrange the food so there is a clear focal point for the eye to land on. Odd numbers and a little asymmetry usually look more natural than a rigid, even arrangement.
A handful of small tricks keep food looking its best. Brush a light coat of neutral oil onto meat, bread, or vegetables to bring back the gloss that makes food look fresh and just-cooked. Use tweezers to place a garnish precisely, and choose a garnish that actually belongs to the dish, a few of its own herbs, a dusting of the spice used in it, a drizzle of its sauce, rather than a random sprig. Wipe drips and fingerprints off the rim of the plate and the glass before every frame, since they show mercilessly at close range. Scatter a few loose crumbs, ingredients, or drops of sauce to suggest life and abundance. The line you should not cross is faking the food itself into something a diner will not receive: the goal is the real dish, caught fresh and shown at its honest best.
Garnish, height, and the finishing touches
If freshness and restraint are the foundation of food styling, garnish and height are the finishing touches that lift a competent plate into an appetizing one. Height and layers are what stop food from looking flat and lifeless, especially at the lower angles. A pile of pasta twirled up rather than spread thin, a burger stacked tall, a salad built up rather than laid out, a cake shown with a slice pulled slightly forward to reveal its layers: all of these give the eye somewhere to travel and make the food look generous and three-dimensional. When you plate for a photo, think about building the food up, not just out.
Garnish is the small, fresh element that signals life and finishes the dish, and the key is that it should belong. A scattering of the dish’s own fresh herbs, a grating of cheese, a dusting of the spice already in the recipe, a few of the raw ingredients, or a final drizzle of the sauce all reinforce what the food is. A random sprig of parsley dropped onto something it has nothing to do with looks exactly like what it is, an afterthought, so choose a garnish that honestly relates to the plate. Add it last, right before you shoot, so it stays crisp and fresh in the frame.
The finishing touches are the details that separate a careful frame from a sloppy one, and most of them take seconds. Wipe the rim of every plate and the outside of every glass so no drip or fingerprint distracts from the food. Position the hero element of the dish, the best-looking piece, toward the camera and in focus. Add a little steam by backlighting a genuinely hot dish, or a few fresh drops of water on produce and cold drinks to suggest freshness. Brush oil where food has started to dry and dull. None of this fakes the food; it simply catches the dish at the honest peak it holds for only a minute, which is exactly the moment worth photographing.
Negative space and composition
Composition decides how the eye moves through a food photo, and negative space, the empty area around the food, is one of its most powerful and most underused tools. Beginners tend to fill the frame edge to edge with food, which leaves the eye nowhere to rest and makes even a beautiful dish feel cluttered. Deliberately leaving empty space around or to one side of the dish reads as clean, considered, and premium, gives the food room to breathe, and, as a practical bonus, leaves a natural place for text if the photo is headed for a recipe card, a menu, or a social post.
The ordinary rules of composition apply to food, then you break them with intent. Place the dish thoughtfully rather than dead center out of habit: setting the food off to one side, roughly on a third of the frame, with negative space opposite, usually feels more dynamic than centering it. Use the natural lines in the scene, a row of cutlery, the edge of a board, a trail of scattered ingredients, to lead the eye toward the hero of the plate. Give the food a clear focal point, the freshest piece or the most attractive detail, and make sure the eye lands there first before it explores the rest of the scene.
Watch the edges and the background as carefully as the food. Keep distractions out of the frame, a stray utensil, a bright reflection, a cluttered counter behind the plate, by moving them or shifting your angle. Keep the background simple and let it contrast with the food so the dish stays the clear subject. For overhead shots, mind the arrangement of everything on the surface as a flat graphic composition, balancing the food, props, and empty space across the frame. And keep the focus tack sharp where it counts, on the hero of the dish, using the focus habits in our sharp photos field note, because a beautifully composed but softly focused food photo still fails.
Choosing your angle: overhead, 45, or straight-on
Angle is the decision that most changes how a dish reads, and the single most common beginner mistake is shooting every plate from the same middling angle out of habit. There are three workhorse angles in food photography, and the craft is choosing the one that suits the shape of the dish in front of you. The overhead flat-lay, shot straight down from directly above, turns the surface into a clean graphic composition and is unbeatable for flat foods and spreads. The 45 degree angle, the natural view of a plate set in front of you, shows both the top and the side of the food and suits an enormous range of plated dishes. The straight-on angle, level with the food, emphasizes height and layers.
The rule that ties them together is to match the angle to the height and shape of the food. Flat foods and spreads, a pizza, a salad, a grazing board, a table full of dishes, a bowl seen from above, look best shot straight down as an overhead flat-lay, because their interest is in the arrangement across a surface, not in their height. A plated main, a savory dish with some height and structure, a bowl of pasta, most everyday meals, suit the 45 degree angle, which is why it is the safe default when you are unsure. Tall, layered foods, a burger, a stack of pancakes, a layered cake, a club sandwich, and drinks in a glass want a low, near straight-on angle that shows every layer and the full height.
The reliable habit, especially while you are learning, is to shoot a dish from two or three of these angles and choose the strongest afterward rather than committing to the first frame. Small changes within an angle matter too: a flat-lay must be shot truly square to the surface or it looks subtly wrong, and a 45 degree shot can be nudged higher or lower to suit the dish. Let the food guide you, watch how each angle shows or hides its best qualities, and over time the right angle for a given dish will become an instant instinct rather than a decision.
Matching the angle and light to the dish
Because the right angle and the flattering light both depend on the shape of the dish, it helps to see the common cases side by side. The table below pairs a type of dish with the angle that usually suits it and the lighting that flatters it, at the level of general habit rather than a rigid rule, since the best choice always depends on the specific food and the look you want. Read it as a starting point that gets you to a good frame fast, then adjust from there by watching the food on screen.
| Dish or subject | Best angle | Lighting that flatters it |
|---|---|---|
| Flat spread, pizza, salad, grazing board | Straight-down overhead flat-lay | Soft, diffused side light across the whole surface |
| Plated main or savory dish | 45 degree angle (natural eye level) | Side or back window light with a white bounce card |
| Tall burger, stack, or layered cake | Low, near straight-on | Side light to rake across the layers, backlight for separation |
| Bowl of soup, ramen, or cereal | Slightly raised or overhead | Side or back light to show steam and texture |
| Drinks, coffee, or cocktails | Straight-on or slightly raised | Backlight through the glass to make the liquid glow |
| Bread, pastry, or baked goods | 45 degree or straight-on | Side light to bring out crust and crumb texture |
Read the table as a set of sensible defaults, not a law. The pattern to notice is that side light and back light do almost all the work across every dish, while the angle simply follows the height of the food: flat things go overhead, tall things go low, and most plated meals sit comfortably at 45 degrees in between. When a dish does not fit neatly into a row, fall back on the underlying principles, soft directional light and an angle that shows the food’s best quality, and shoot a couple of variations to compare. Use the companion above to get a starting angle, light, and camera setting for exactly the dish, device, and light you have in front of you.
Camera settings for food photography
Because a plated dish sits still on a table, you get to use the settings that produce the cleanest, most appetizing file, without the compromises that action forces. The three that matter are aperture, ISO, and white balance, and shutter speed simply falls wherever the exposure needs once the other two are set, since a tripod absorbs any length of exposure. If you shoot in manual mode, our manual mode field note walks the full routine, and the exposure triangle field note explains how the three trade off against each other.
Aperture controls depth of field, the front-to-back zone of sharpness, and food photography actually uses the full range depending on the shot. For a single hero plate where you want the background to melt into a soft blur behind the food, open up toward f/2.8 to f/4, the same shallow, separating look our portraits field note uses for faces, and focus carefully on the front of the dish. For an overhead flat-lay, where everything sits on one flat plane, or a tall stack you want sharp top to bottom, stop down to f/5.6 to f/8 so the whole scene stays crisp. On a phone the aperture is fixed and the deep depth of field is automatic, so you tap to focus and, if you want background blur, use a portrait mode sparingly.
ISO should sit low, around 100 to 400, because a still dish on a tripod has no need for a high one and a low ISO gives the cleanest, most detailed, least noisy file, which matters when someone zooms into the texture of a crust. If the kitchen is dim and the shot is on a tripod, keep the ISO low and let the shutter get slower rather than raising the ISO. White balance is what keeps the food’s color honest and appetizing, so set it to match your light, the daylight preset for window light or a custom value for a continuous lamp, rather than leaving it on auto, which drifts and can leave food looking cold and gray. Shoot RAW whenever you can, because it records the full color data and lets you set white balance and recover detail precisely afterward. Treat every number here as an illustrative starting point to meter from, then judge the result on screen.
White balance and appetizing color
Color deserves its own attention in food photography, because more than almost any subject, food lives or dies on its color: warm, natural, appetizing tones make a dish look delicious, while a cold blue or a sickly green cast can make the same food look unappealing or even spoiled. Getting color right is a white-balance question first and an editing question second. Set white balance to match your actual light source rather than trusting auto, which guesses and drifts, and the daylight preset is a reliable start under window light while a custom or measured value suits a continuous lamp.
The most reliable way to nail color is to include a neutral reference in a test frame. A gray card or even a sheet of plain white paper photographed once under your lighting gives you a known neutral to click on in editing, which sets the white balance exactly and removes any color cast in a single step. Shoot that reference frame under your light, then remove it and shoot the food under the identical light, and your whole set inherits accurate, natural color. This small habit is the difference between food that looks appetizing and food that looks slightly off in a way viewers feel even if they cannot name it.
Mixed light is the usual enemy of good food color, so avoid it. If daylight from a window and a warm kitchen bulb both fall on the dish, they fight, and no single white-balance setting can correct both at once, leaving part of the food the wrong color. Turn off the room lights and work with a single, consistent source, whether that is the window or one continuous light. Keep the exposure from clipping the highlights on a glossy sauce or crushing the shadows, since both destroy color information you cannot recover. And carry the honesty through to editing: warm the photo a little if it helps the food look natural, but do not push the color so far that the dish no longer looks like what someone will actually eat.
Shooting drinks and beverages
Drinks are a distinct corner of food photography with their own habits, and they reward a slightly different approach than a plate of food. The defining technique is backlighting, because a glass of liquid comes alive when light passes through it from behind. Place your main light, a window or a softbox, behind and slightly above the glass, and the liquid glows from within, showing its color and clarity, whether that is the amber of a beer, the deep red of wine, the bright orange of juice, or the layered look of an iced coffee. Front light, by contrast, leaves a drink looking flat and opaque, so make backlight your default for anything in a glass.
Angle and background matter as much as the light. Most drinks look best shot straight on or slightly raised, level with or just above the surface of the liquid, so the glass keeps its natural shape and the drink itself, the crema on a coffee, the fizz in a soda, the foam on a beer, reads clearly. Choose a background that contrasts with the drink so its backlit edges separate cleanly: a dark background makes a bright drink and its highlights pop, while a light background suits a pale or creamy drink. Keep the glass spotless, because fingerprints, smudges, and drips on glassware show ruthlessly and are the fastest way to make a drink look unappetizing.
The details that sell a drink are all about freshness and life. Condensation on a cold glass reads as refreshing, and you can encourage it by chilling the glass or misting it lightly with a spray bottle just before you shoot. Ice should be fresh and clear, and because real ice melts fast under any light, work quickly or plate the drink last, exactly as you would a hot dish. A garnish that belongs to the drink, a wedge of citrus, a sprig of mint, a coffee bean, finishes it, placed fresh at the last second. Steam rising from a hot coffee or tea, lit from behind against a dark background, adds warmth and life, so if you want it, backlight the hot drink and shoot the moment it is poured.
A worked example: photographing one plated dish
Theory into practice: here is a single realistic session, with illustrative settings, so the whole workflow is concrete. The dish is a bowl of pasta for a recipe blog, and you are shooting on a mirrorless camera beside a large window on an overcast afternoon, with a tripod, a sheet of white foam board, a light wooden board as a background, and a few props: a fork, a linen napkin, and a small dish of grated cheese. You want a warm, fresh, appetizing photo with the background softly blurred.
Set the scene. You lay the wooden board on the table beside the window, set the empty bowl where you will plate, and arrange the fork and napkin off to one side with some negative space opposite, checking the frame on the tripod-mounted camera. Place the light. The large window is your soft source, so you position the bowl with the window behind and to one side, at roughly 45 to 90 degrees, so the light rakes across the pasta and backlights its edges. Fill the shadows. You stand the white foam board on the near side, between the camera and the bowl, angled to bounce window light back onto the front of the dish so it stays soft and detailed rather than falling dark. Choose the angle. Because the pasta has some height twirled up in the bowl, you set the camera to a 45 degree angle that shows both the surface and the side of the dish.
Dial the settings. You set ISO 200 for a clean file, choose f/4 so the front of the pasta is sharp while the background blurs softly, and let the shutter fall where the meter lands, which the tripod holds without shake. You set white balance to the daylight preset, shoot a quick frame with a sheet of white paper in shot as a color reference, then remove it and shoot RAW. Plate and style fast. Now you plate the pasta fresh and hot, twirl it up for height, turn the best-looking side to the camera, tuck a few fresh basil leaves that belong to the dish, grate a little cheese on top, wipe a drip off the rim, and shoot immediately while it is glossy and steaming. Focus and shoot. You put a single focus point on the front of the pasta, confirm it is sharp, and fire using the two-second timer, taking a few frames and checking sharpness at full magnification. Edit lightly. At the computer you click the white balance on the reference frame, warm it a touch so the food looks natural, lift the exposure and contrast, clean up one stray crumb, and crop to your blog’s framing. One bowl, one window, one bounce card: ISO 200, f/4, daylight white balance, RAW, at 45 degrees. Run your own dish through the upgrade budget planner before assuming you need more gear.
What makes a strong food photo
Illustrative weighting, out of 100, of how much each element contributes to a food photo that looks fresh and appetizing. This is a mental model from common experience, not a measured study, so read it as where to spend your attention first.
Light and fresh styling carry a food photo, with the right angle close behind, which is why the free skills matter most. Background and color refine a frame those three already made good, and editing finishes it. Tune the model to your own shooting with the companion above.
Where the work goes in a food photo
Illustrative share of the effort that each stage contributes to a finished food photo. The four parts sum to the whole result, so no single stage does it alone.
Most of a food photo is made before you edit: the light you shape and the food you style do most of the work, with the angle framing it well. Editing finishes a frame those stages already made good. Adjust the split to your own work with the companion above.
Editing food photos
Editing is the final stage, and for food photography the guiding rule is natural honesty: the edit should make the food look as fresh and appetizing as it genuinely was, never turn it into something a diner will not recognize. Most food shots need a modest, repeatable edit rather than a heavy one, and building a consistent routine you apply to every image is what makes a blog or a menu look coherent. Editing enhances a well-shot, well-styled frame; it cannot rescue food that was badly lit or already tired, which is why the setup and styling matter far more than any slider.
Start with the honest global adjustments that improve any photo. Set white balance precisely, ideally by clicking the neutral reference you shot, so the color is true, then warm it a touch if that helps the food look natural and inviting, since slightly warm tones read as appetizing while cool tones can look unappealing. Adjust exposure and contrast so the dish looks bright and crisp without clipping the highlights on a glossy sauce or crushing the shadows. A gentle lift in vibrance can make fresh ingredients pop, but keep it restrained so the greens and reds still look like real food rather than plastic.
Then clean up and finish with restraint. Remove distracting specks, a stray crumb you missed, a smudge on the rim, a fingerprint on a glass, which is quicker than reshooting but no substitute for wiping the plate first. Sharpen gently at the end to crisp up texture. The line you must not cross is misrepresenting the food: do not recolor a dish into something it is not, do not composite in ingredients that were never there, and do not edit a menu or product photo into food a customer will not receive, because that misleads and disappoints. Keep a light hand, keep the color natural and warm, and let the edit polish an honest, freshly styled plate rather than fabricate a better meal than the one that was cooked.
Food photography on a phone
A phone is a fully capable food camera for most beginners, bloggers, and small food businesses, and treating it seriously rather than as a compromise gets you a long way. The same principles govern it as any camera: the light, the freshness, the angle, the background, and the styling do the work, not the badge on the device. Photographed beside a good window with soft directional light, a clean background, and fresh food, a modern phone produces food photos that stand up well for social feeds, recipe blogs, and menus, and its deep depth of field keeps an overhead flat-lay sharp corner to corner with no effort.
Get the fundamentals right first. Steady the phone on a small tripod or a holder so the shot is sharp and your framing stays fixed while you style, exactly as you would with a camera, which our phone tripod field note covers, and which matters even more for the awkward straight-down overhead angle. Light the food with soft window light from the side or behind, never the built-in flash, which flattens food and casts a harsh, ugly light. Keep the background clean and simple. Then tap the food on screen to set focus and exposure, and drag the exposure slider down a touch if a glossy sauce or a bright plate is blowing out, since phones tend to overexpose food highlights. Never use the digital zoom, which simply crops and throws away quality; move the phone closer instead, and favor the main lens over the ultrawide for the most natural look, as our phone camera lens field note explains.
Push a little further with the tools the phone gives you. Many phones offer a RAW or pro mode that unlocks manual control over focus, exposure, and white balance and records more editable detail, which is worth using for food where color accuracy matters. Use a portrait or aperture mode sparingly for a single hero plate where you want the background softly blurred, but keep it off for overhead flat-lays where you want everything sharp. Edit on the phone or a computer with the same light, natural touch as any food photo, keeping the color warm and honest. The phone’s real limits, less aperture control and weaker performance in a dim kitchen, rarely bite next to a bright window, so a phone is a genuine starting point for food photography, not merely a fallback.
Common food photography mistakes
Most food photos fail in one of a handful of predictable ways, and knowing them in advance is the fastest route to better images. These are the pitfalls that come up again and again, and nearly all of them are free to fix:
- Hard or flat lighting. An overhead ceiling bulb or an on-camera flash flattens food, kills its texture and gloss, and casts an unappetizing color. Move the food to a window and light it softly from the side or behind, and diffuse harsh sun with a curtain or a sheet.
- Shooting food that has sat too long. Wilted greens, melted ice, skinned-over sauce, and vanished steam all read as tired. Set up first, plate the food last, and shoot immediately while it is fresh and at its glossy best.
- The wrong angle for the dish. Shooting a flat pizza at eye level or a tall burger from straight above hides the food’s best quality. Match the angle to the shape: overhead for flat spreads, 45 degrees for a plated main, low and straight-on for tall stacks and drinks.
- A cluttered or clashing background. A busy counter or a background that fights the food competes for attention and reads as amateur. Use a clean, simple surface that contrasts with the dish, and clear stray objects out of the frame.
- Overfilling the frame. Cramming food and props edge to edge leaves the eye nowhere to rest. Leave negative space around the dish so it can breathe and the photo reads as clean and considered.
- Drips, smudges, and fingerprints. Marks on the rim of a plate or the side of a glass show mercilessly at close range. Wipe every plate and glass before each frame, and clean the food’s surroundings as carefully as the food.
- Unnatural color and over-editing. A cold color cast or heavy-handed editing makes food look artificial or spoiled. Set white balance to your light, keep the tones warm and natural, and edit lightly so the dish still looks like real food.
Your food photography checklist
Save this and run down it the next time you photograph a dish, or before a shoot you want to get right:
- Set up the scene, light, background, props, and camera first, then plate the food last so it is fresh when you shoot.
- Light the food with soft, directional light: a large window out of direct sun, from the side or behind, diffused with a curtain or sheet if the sun is harsh.
- Fill the shadow side with a white bounce card, moved closer or farther to control how open the shadows sit, and backlight drinks and anything you want to glow.
- Choose a clean background that contrasts with the food, and keep props few, relevant, and quietly in support of the dish.
- Style for freshness: leave some negative space, add height and a garnish that belongs to the dish, turn the best side to the camera, and brush oil for gloss where food has dried.
- Match the angle to the dish: overhead flat-lay for flat spreads, 45 degrees for a plated main, low and straight-on for tall stacks and drinks.
- Steady the camera or phone on a tripod so the shot is sharp and the framing holds while you style.
- Set clean settings: ISO around 100 to 400, aperture near f/2.8 to f/4 to blur the background of a hero plate or f/5.6 to f/8 to keep a flat-lay or tall stack sharp.
- Set white balance to match your light, avoid mixed light, shoot a neutral reference frame, and capture RAW for honest, correctable color.
- Wipe every drip and fingerprint, shoot fast while the food is fresh, then edit lightly and warmly without ever misrepresenting the dish.
The bottom line
Food photography is not about owning an expensive camera; it comes from a short, repeatable set of decisions worked in order, most of which cost nothing. Light is the whole game, so set the food beside a large window, light it softly from the side or behind to reveal texture and gloss, backlight drinks and anything that glows, and bounce a white card into the shadows to keep them gentle, because hard overhead light is what makes food look flat and greasy. Shoot the food fresh, in the first minute after plating, styled with restraint and a little height, a garnish that belongs, and some negative space to breathe. Match the angle to the dish, overhead for flat spreads, 45 degrees for a plated main, low for tall stacks and drinks, and keep the background clean and the color warm and honest. Put the camera on a tripod, choose the aperture that suits the shot, set white balance to your light, and shoot RAW so the color stays true. The freeing realization is how little of this requires money: the best food light is free, the most useful tool is a sheet of white card, and the biggest gains come from care, freshness, and attention rather than gear. Work the checklist in order, and the camera or phone you already own will start returning photos that look genuinely appetizing. Price any upgrade you are still tempted by in the upgrade budget planner, then go cook something and photograph it while the light is soft and the food is fresh.
This field note teaches a photographic workflow, not a product: no brand paid for a placement and none is named on purpose, only light, styling, angles, and settings that hold across every camera and phone. Every camera setting, aperture, and ISO here is an illustrative starting point to meter from rather than a fixed rule, because the exposure and depth of field that render a dish well change with your sensor, your lens, your light, and the food in front of you. The one firm principle is honesty: a food photo should show the real dish, caught fresh and at its natural best, so treat the styling and editing advice here as permission to catch food at the honest peak it holds for a minute, never to fabricate a meal that a diner or reader will not actually receive.
Frequently asked questions
How do I start food photography as a beginner?
You need far less than most beginners assume, and the light you already have is usually the best part. Start beside a large window on an overcast day, set the dish where soft daylight rakes across it from the side or from behind, and stand a sheet of white card or foam board on the shadow side to bounce light back and keep the shadows gentle. Steady your phone or camera on any firm support, choose the angle that suits the dish, and shoot the food while it is freshly plated and at its best. That single setup, a window, a bounce card, and fresh food, produces genuinely appetizing photos before you spend anything, and you can sanity-check any gear you are tempted by against our upgrade budget planner first.
What is the best lighting for food photography?
Soft, directional natural light from a large window is the standard that most food photographers return to, because it is free, flattering, and easy to read. Place the food beside the window so the light comes from the side or from behind rather than straight from the camera, which is what reveals texture, gloss, and steam and makes food look fresh. Diffuse harsh midday sun with a sheer curtain or a sheet of tracing paper to keep the light soft, and fill the shadow side with a white bounce card so the dark areas stay detailed. Backlighting, with the main light behind the dish, is especially good for drinks and anything translucent because it makes liquids glow and edges separate. The one light to avoid is a ceiling bulb directly overhead, which flattens food and casts an unappetizing color.
What is the best angle for food photography?
There is no single best angle, because the right one depends on the shape of the dish, and choosing to match the food is most of the craft. Flat spreads, pizzas, salads, and grazing boards look best shot straight down as an overhead flat-lay, which turns the surface into a clean graphic composition. A plated main or a savory dish suits a 45 degree angle, the natural view of a plate set in front of you, which shows both the top and the side. Tall subjects like burgers, stacks, and layered cakes want a low, near straight-on angle so every layer and the full height read clearly. Drinks usually look best straight on or slightly raised so the glass keeps its shape. The reliable habit is to shoot a dish from two or three angles and pick the strongest rather than settling for the first frame.
What camera settings should I use for food photography?
Because a plated dish sits still, you can use the settings that give the cleanest, most appetizing file rather than chasing motion. Set a low ISO, around 100 to 400, for a clean image, and choose an aperture that suits the shot: a wider aperture near f/2.8 to f/4 blurs the background behind a single hero plate, while a narrower f/5.6 to f/8 keeps a whole overhead spread or a tall stack sharp front to back. On a tripod the shutter speed can fall wherever the exposure needs. Set white balance to match your light, the daylight preset under window light, rather than leaving it on auto, and shoot RAW so you can correct the color precisely afterward, because food color has to look natural and appetizing. Treat these as illustrative starting points to meter from, not fixed rules, and judge the result on screen.
Can I take good food photos with just my phone?
Yes, and for social posts, menus, and food blogs a modern phone is entirely capable. Phone cameras resolve plenty of detail, and their deep depth of field keeps a whole flat-lay sharp with no effort, which suits overhead food shots well. The keys are the same as for any camera: steady the phone on a small tripod so the shot is sharp, use soft directional window light rather than the built-in flash, keep the background clean, and tap the screen to set focus and exposure on the food. Pull the exposure slider down a touch if a glossy sauce or a bright plate is blowing out, and avoid the digital zoom by moving the phone closer instead. Our coverage of phone camera lenses and the phone tripod field note go deeper on getting the most from a phone.
Why does my food look unappetizing in photos?
Unappetizing food photos almost always trace back to the light or to tired food. Hard, flat light from an overhead bulb or a phone flash erases the texture and gloss that make food look fresh, leaving it looking dull and greasy, so the first fix is soft, directional window light from the side or behind. Stale styling is the second cause: food photographs best in the first minute or two, before greens wilt, ice melts, sauces skin over, and hot dishes lose their steam, so plate it fresh and shoot fast. A cluttered background that competes with the plate is the third, and a color cast from mixed or artificial light is the fourth, which is why setting white balance to your light matters. Get the light soft and directional and the food fresh, and most of the problem disappears before you touch an editing slider.
How do I style food so it looks good in photos?
Food styling is about making the dish look fresh, natural, and appetizing without misrepresenting it, and a few habits do most of the work. Plate the food with a little restraint and leave some empty space rather than crowding every inch, because negative space around the dish reads as clean and considered. Add height and layers so the food is not flat, tuck a fresh garnish that actually belongs to the dish, and turn the most attractive side or the freshest-looking piece toward the camera. Small touches matter: wipe drips off the rim of the plate, brush a little oil to bring back gloss on food that has dried, and scatter a few loose crumbs or ingredients to suggest life. The line you should not cross is faking the food itself, since the goal is the real dish at its best, photographed while it is genuinely fresh.
What are the most common food photography mistakes?
The recurring mistakes are nearly all about light, freshness, background, and angle. The biggest is lighting food with a harsh overhead bulb or an on-camera flash instead of soft, directional window light, which flattens the food and kills its appeal. Close behind is shooting food that has sat too long, so it looks tired, melted, or dried out, when it should be plated fresh and shot fast. A cluttered or clashing background that competes with the dish is another, as is using the same flat angle for every dish rather than matching the angle to the shape of the food. Beginners also tend to overfill the frame with no breathing room, forget to wipe drips and fingerprints off the plate and glass, and over-edit the color until the food looks artificial. None of these need money to fix, only attention, which is why food photography rewards care far more than expensive gear.