What's on this page
- Why the moon breaks the night sky rules
- Before you start
- Step 1: Fit the longest lens you own
- Step 2: Check the phase and pick your night
- Step 3: Lock the camera down and kill vibration
- Step 4: Set a daylight exposure in manual
- Step 5: Focus manually on the terminator
- Step 6: Shoot a burst and read the histogram
- Step 7: Crop and sharpen the frame
- How much of the frame the moon actually fills
- Why your first moon shot was a white blob
- The terminator is where the detail lives
- Putting a landscape under the moon
- Teleconverters, crop bodies, and other reach
- Atmosphere is the limit no lens can fix
- Moonrise, moonset, and the balanced window
- Photographing the moon with a phone
- A worked example: one gibbous moon at 400mm
- Common mistakes to avoid
- Troubleshooting a difficult moon night
- Your moon photography checklist
- The bottom line
The moon is the subject that punishes you for learning astrophotography first. You spend a season teaching yourself to open the aperture wide, push the ISO into the thousands and hold the shutter open for twenty five seconds, you point that hard won recipe at a bright gibbous moon, and you get back a featureless white disc that looks like a hole burned in the sky. Nothing went wrong with the camera. The settings were simply the exact opposite of what the subject needed, because the moon is not a night subject at all. It is a sunlit rock photographed in the middle of the night, and it wants daylight settings.
That inversion is the whole point of this field note. Where our night sky walkthrough asks for a wide lens, a wide aperture, a high ISO and a long shutter, the moon asks for a long lens, a middling aperture, the lowest ISO you have and a fast shutter. The two subjects sit in the same black sky on opposite ends of every dial. Rather than restate the astro settings here, this field note names the reversal and works through the seven steps that follow from it, leaning on our telephoto lens field note for the reach and our histogram field note for the exposure check. Price the reach you would need in the upgrade budget planner as you read.
The short version: photograph the moon by fitting the longest lens you own, choosing a night when the phase puts the terminator across the disc, locking the camera on a solid support, switching to manual and setting roughly f/11 at ISO 100 with a shutter near one over your ISO, focusing carefully on the terminator, shooting a burst while reading the histogram, and finishing with a crop and a measured sharpening pass. Seven steps, one clear evening, and a moon with craters in it.
Key takeaways
- The moon is lit by the same sun that lights your afternoon, so it is a daylight exposure: think f/11, ISO 100 and a shutter around one over the ISO, then confirm on the histogram rather than trusting any recipe.
- Every setting runs backwards from night sky work: long lens instead of wide, low ISO instead of high, fast shutter instead of long, and no need for a dark site at all since the moon punches through city light.
- Focal length decides everything about detail. The lunar disc on your sensor is roughly the focal length divided by 115 in millimetres, which is why 300mm is a sensible floor and 600mm is comfortable.
- A white featureless blob is a metering failure, not a camera fault. The meter reads the huge black sky and overexposes the one bright object in it by several stops.
- A full moon is the brightest and the flattest. Craters appear through shadows, and shadows live along the terminator, so a half or gibbous phase usually photographs better.
Why the moon breaks the night sky rules
Start with the physics, because every setting below falls out of it. Sunlight leaves the sun and lands on two objects at essentially the same intensity: the ground under your feet at noon, and the surface of the moon. The moon has no atmosphere to dim it and no weather to shade it, so the lit half is under permanent direct sun. When you photograph it at eleven at night, you are photographing a daytime scene that happens to be sitting in the middle of your dark frame. The blackness around it is not part of the subject and should not influence your settings any more than a black studio backdrop would influence a portrait exposure.
Hold that thought against the astro recipe and the reversal becomes obvious. Star photography chases faint light: a handful of photons from objects unimaginably far away, which is why it needs the widest aperture available, an ISO in the thousands, and a shutter held open until the earth’s rotation becomes the limiting factor. Moon photography chases detail on a brightly lit object, so light is never the constraint. Once you stop fighting for light, you get to choose settings for quality instead, which means the base ISO for the cleanest file, an aperture near the lens’s sharpest range rather than wide open, and a shutter fast enough that vibration cannot register.
There is one more inversion worth naming, and it is the friendliest one. The single most important step in night sky work is driving somewhere dark, because light pollution erases stars before the camera ever fires. The moon does not care. It is bright enough to photograph from a city balcony, a suburban driveway or a parking garage roof, through the same orange glow that ruins the Milky Way. The gear bar is higher for the moon and the logistics bar is far lower, which makes it one of the few genuinely spectacular subjects you can shoot from home on a weeknight.
Before you start
Moon photography is a beginner friendly subject with an intermediate gear requirement, which is an unusual combination. The technique is not hard: there are perhaps five decisions, and they barely change from one session to the next. What it asks for is reach. If you own a telephoto lens, you can be shooting keepers within twenty minutes of stepping outside. If your longest lens is a kit zoom that stops at 55mm, you can still make a good photograph of the moon in a scene, but you will not be resolving craters, and no amount of technique substitutes for millimetres.
Budget forty five minutes to an hour for a focused session, plus a couple of minutes the day before to check when the moon rises and what phase it is in. You do not need to travel, you do not need to wait for a new moon, and you do not need warm clothes and a thermos unless you want them. Here is the kit list, in rough order of how much each item changes the result:
- The longest lens you own. This is the whole ballgame. A 300mm to 600mm telephoto is the comfortable range, 200mm is workable with a crop, and anything shorter changes the kind of photograph you are making rather than the quality of it.
- A camera you can set to manual. Any body with a manual mode qualifies. Sensor size barely matters here, which is another inversion: the high ISO advantage that makes a big sensor valuable at night is irrelevant when you are shooting at ISO 100.
- A tripod or another solid support. Not because the exposures are long, but because long lenses magnify every shake. A fence, a wall, a car roof or a bean bag will do in a pinch.
- A remote release or the self timer. Removing your finger from the camera at the moment of exposure removes the largest single source of blur in a locked down setup.
- A phase and moonrise check. A calendar app, an almanac or a planetarium app, consulted once, tells you the phase and the rise time. That is the entire planning burden.
With those gathered, the seven steps below take you from a white blob to a disc with mountains on the edge of it. If you are weighing whether the reach is worth buying, run the numbers through the upgrade budget planner first.
Step 1: Fit the longest lens you own
Every other decision in moon photography is a refinement. This one is the decision. The moon subtends about half a degree of sky, and the size of the image it forms on your sensor depends on nothing except focal length. The arithmetic is worth carrying in your head: the lunar disc measures roughly your focal length divided by 115, in millimetres. A 200mm lens gives a disc about 1.7mm across. A 400mm lens gives about 3.5mm. A 600mm lens gives about 5.2mm. Compare that to the height of your sensor, 24mm on full frame, and you have the share of the frame the moon occupies, which the chart further down plots across the useful range.
That single formula settles most gear arguments. It explains why 300mm is the usual floor for a recognisable crater shot, why photographers who are serious about the moon end up at 600mm and beyond, and why a teleconverter that multiplies focal length by 1.4 or 2 is such an attractive purchase for this subject specifically. It also explains why aperture, which dominates the lens conversation at night, barely enters the discussion here. You will be shooting around f/8 or f/11 regardless, so an f/5.6 zoom and an f/2.8 prime of the same length will produce the same lunar disc. Our telephoto lens field note works through what actually separates long lenses, and our focal length field note covers the millimetre numbers themselves.
The watch out is not to let this stop you. If the longest thing you own is a kit zoom, go out anyway and make a different photograph: the moon rising behind a ridge, over a roofline, beside a spire, with the landscape carrying the image and the moon supplying the accent. That picture is often better than a technically superior bare disc, and it is the one people actually hang on a wall. Reach buys crater detail. It does not buy a good photograph, and the two are not the same thing.
Step 2: Check the phase and pick your night
Night sky photography plans around the absence of the moon. Moon photography plans around its presence, and the planning takes about ninety seconds. You want two facts: what phase the moon is in, and when it rises or sets. Any calendar app, almanac or planetarium app will tell you both for your location, and unlike the Milky Way’s seasonal window, there is no wrong month. The moon comes around every twenty nine and a half days or so, and every one of those cycles offers the same set of opportunities.
Which phase you want depends on what you are after, and the answer surprises most beginners. The full moon is the brightest, the roundest and by far the flattest. When the moon is full, the sun is behind you and lighting the surface straight on, so shadows fall away from your line of sight and the disc goes contrastless, a bright circle with vague grey patches. A quarter or gibbous moon puts the sun off to one side, so crater rims and mountain ranges throw long shadows across the surface and the texture leaps out. If you want a photograph that makes people say they did not know the moon looked like that, shoot a gibbous phase a few days either side of full, not full itself.
The watch out is timing within the night. A moon low on the horizon is looking at you through a much thicker slab of atmosphere, and that slab is turbulent and full of dust, so low moons are softer, warmer in colour and often visibly wobbly in live view. A moon high overhead is looking at you through the least air possible and will always be sharper. The trade is that a high moon is hard to place in a scene with anything on the ground. If you want detail, wait until it climbs. If you want the moon with a landscape underneath, take the softness that comes with the horizon and accept it as part of the picture.
Step 3: Lock the camera down and kill vibration
Here is where beginners who have read about fast shutter speeds get complacent. Yes, you will be shooting at 1/100 second or faster, and yes, that is normally fast enough to ignore camera shake. But shake scales with magnification, and a long lens is a magnification device. At 600mm, a tremor that would be invisible at 24mm is enlarged twenty five times before it reaches the sensor. Add the fact that you are almost certainly going to crop the result heavily, which magnifies the blur again, and the margin for movement collapses. This is the one place where moon photography and night photography agree: put the camera on something solid.
The routine is quick. Set the tripod on firm ground with the legs spread wide, mount the camera, and if there is any breeze, hang your bag from the centre column or press down on the apex to damp it. Support the lens rather than the body if the lens has a tripod collar, since a long barrel cantilevered off a small camera mount is a spring waiting to vibrate. Then take your hands off the camera at the moment of exposure: use a remote release, or set the two second self timer, which is free and works just as well. On a DSLR, consider the mirror lockup or electronic first curtain option if your camera has one, because the mirror slapping up inside the body at the instant of exposure is a real and measurable source of softness at long focal lengths.
The watch out concerns stabilisation. In body and in lens stabilisation is a gift when you are handholding, and our stabilisation field note explains how the systems differ. On a locked down tripod, though, some systems can hunt for motion that is not there and introduce a small drift of their own. The safe habit is to switch stabilisation off when the camera is rigidly mounted and on when it is in your hands. If you are handholding by choice, brace against a wall or a rail, tuck your elbows in, and raise the shutter speed well past what the exposure needs. The technique overlaps almost exactly with the long lens discipline in our field note on taking sharp photos.
Step 4: Set a daylight exposure in manual
This is the step where the inversion becomes concrete, and where most moon photographs are won or lost. Switch to manual mode. Not aperture priority, not shutter priority, not any automatic mode, because every one of them hands the decision to a meter that is about to be catastrophically wrong. The camera’s meter looks at your frame, sees a rectangle that is ninety eight percent black, and calculates the exposure needed to render all that blackness as mid grey. Since the moon is the only lit thing in the frame, the meter’s correction blows it several stops past white. In manual mode the meter’s opinion is irrelevant, which is exactly what you want. Our manual mode walkthrough covers the dial mechanics if that is new territory.
Now set the three controls, and set them from the daylight logic rather than the night logic. ISO goes to base, usually 100 or 200, because there is no shortage of light and base ISO gives the cleanest file with the most recoverable detail. Aperture goes to somewhere in the middle of the lens’s range, around f/8 or f/11, both because most lenses are at their sharpest a couple of stops down from wide open and because you want no chance of the disc drifting soft. Shutter is what balances the exposure, and the daylight arithmetic gives you the starting number. The sunny 16 rule says a front lit subject in direct sun sits at f/16 with a shutter of one over the ISO. The moon is exactly that subject, but its surface is dark grey rock that reflects only a modest fraction of the light hitting it, so photographers open up about a stop and use f/11 with a shutter of one over the ISO instead. That rule of thumb has picked up the name looney 11.
Work it through. At ISO 100 the shutter starts at 1/100 second and the aperture at f/11. At ISO 200 it becomes 1/200 at f/11. Those are starting points, not answers, and the answer changes with phase: a thin crescent shows you a strip of surface lit at a grazing angle and typically needs one to two stops more exposure than a full disc, so slow the shutter accordingly. Haze, altitude and how full the moon is all shift the number. Take the frame, then move to Step 6 and let the histogram settle the argument. Our exposure triangle field note explains how the three controls trade, and our shutter speed field note covers the fractions themselves.
Step 5: Focus manually on the terminator
Autofocus fails completely on stars because there is nothing bright or contrasty enough to lock onto. The moon is a different case, and this is one of the few places where the moon is easier than the night sky rather than harder. The lunar disc is brilliant, and its edge against black sky is about as hard a contrast edge as exists in nature, so a modern autofocus system placed on the limb with a single small point will usually lock without hesitation. If it does, take the win. Confirm it with a magnified playback, then switch the lens to manual focus so nothing can shift between frames while you work.
Manual focus is the more repeatable route, and it takes under a minute. Switch the lens to manual, turn on live view, and magnify the display as far as it will go on the lunar surface. Aim that magnified box at the terminator, the curved boundary between the lit part and the dark part, because that is where the surface has the most contrast: crater rims lit on one side and black shadow on the other. Turn the focus ring slowly and watch the shadows. As you pass through best focus, crater edges go from soft grey smudges to hard steps and then soften again. Rock the ring gently and settle on the sharpest point. As with astro focusing, the infinity mark on the barrel is not a reliable stop, so trust the magnified view.
The watch out here is the atmosphere, and it will confuse you the first time. Look at a magnified moon in live view for thirty seconds and you will see it shimmer, ripple and go momentarily soft, then snap back. That is turbulence in the air column between you and space, not your focus drifting. Do not chase it with the focus ring. Find the sharpest setting during a steady moment, leave it, and take a lot of frames so that some of them land in the calm gaps. Recheck focus if you change lenses, if you use a teleconverter, or if the temperature drops noticeably over a long session, and otherwise leave the ring alone.
Step 6: Shoot a burst and read the histogram
One frame of the moon is a gamble. The atmosphere is moving, the support is settling, and the difference between a soft frame and a crisp one can be a tenth of a second of luck. So do what wildlife photographers do and shoot a short burst, five or ten frames, then another, then another as the seeing changes. You are buying lottery tickets on a moment of steady air. Later, on a large screen, you will pick the two or three frames that are visibly sharper than their neighbours and delete the rest. This is not sloppiness. It is the correct response to a subject you are viewing through a turbulent medium you cannot control.
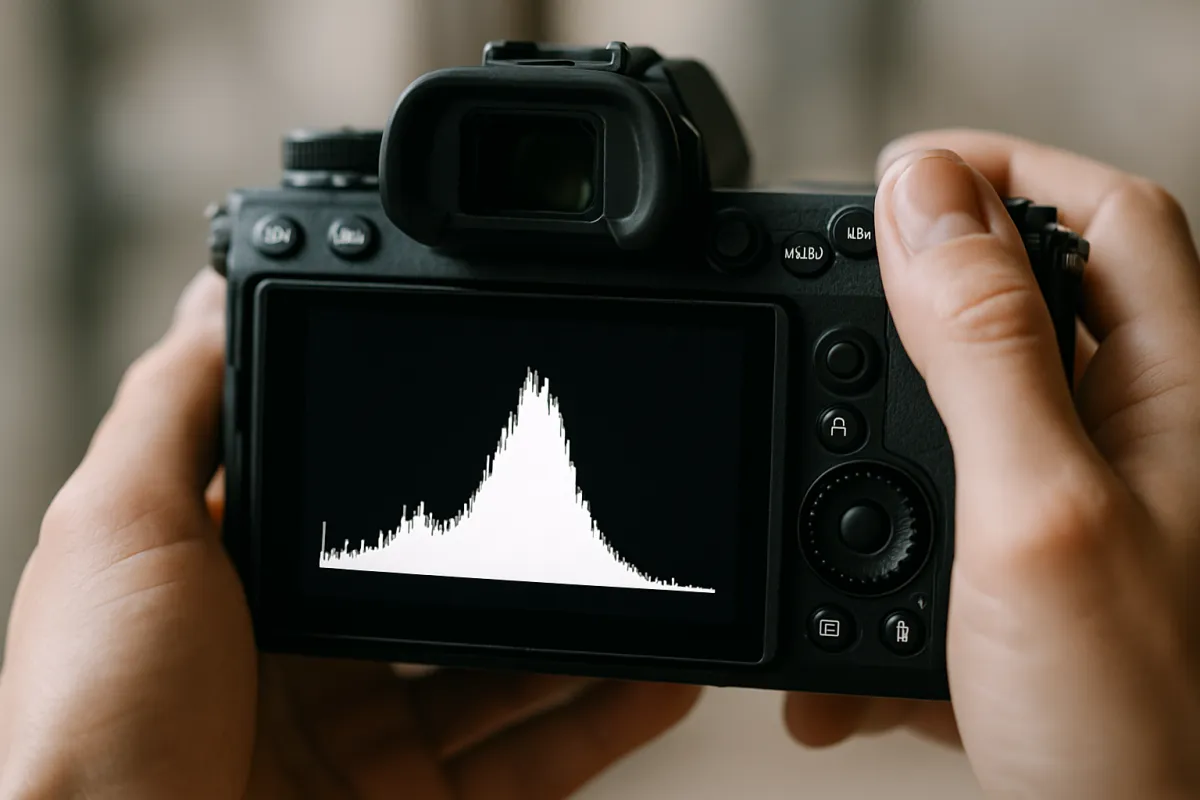
Between bursts, check the exposure on the histogram rather than on the picture. The rear screen is a liar in the dark: your eyes are adapted to night, so a badly overexposed moon looks perfectly bright and pleasing on the back of the camera and then arrives on your monitor as a white paper cut out. The histogram does not care about your night vision. A correct moon exposure looks strange at first glance: a huge spike jammed against the left edge, which is all that black sky, and a small isolated hump somewhere in the right half of the scale, which is the moon itself. What you are checking is that the small hump has not run off the right hand edge. If it has, and especially if the highlight warning is blinking across the disc, shorten the shutter and shoot again.
The watch out is the direction of your error. Highlight detail, once clipped, is gone permanently, and the moon’s brightest regions are exactly the ones that carry the fine texture you came for. Shadow noise, by contrast, is recoverable at base ISO. So when in doubt, expose a touch darker than you think you need and lift it later. Shoot RAW rather than JPEG for the same reason, since a RAW file preserves the highlight headroom a JPEG throws away, and our RAW versus JPEG field note explains what the format is actually holding. Our histogram field note reads the graph in more depth.
Step 7: Crop and sharpen the frame
Even at 600mm the moon occupies a modest slice of the frame, so cropping is not an admission of failure here, it is the standard final step. Open the sharpest frame from your bursts, crop to the disc with a comfortable margin of sky around it, and resist the urge to crop so tightly that the moon touches the edges. A little black space gives the disc room to read as an object floating in space rather than a circle pasted on a background. Before you commit, do the arithmetic on what the crop costs: if the moon fills fifteen percent of the frame height and you crop until it fills two thirds, that is roughly a four and a half times linear crop, which throws away about ninety five percent of the pixels. Starting from a twenty four megapixel file, you are left with something in the region of one megapixel. That is fine for a screen and marginal for a print, and it is the honest reason more focal length beats more cropping.
Then process with restraint. Set the white balance first, since moonlight photographed through the atmosphere often lands warm or slightly green, and a neutral to faintly cool grey looks right. Pull the black point down until the sky around the disc is properly black rather than dark grey, which instantly makes the moon look crisper. Adjust exposure so the bright limb sits just below clipping. Then add contrast carefully, because contrast is what makes crater shadows read, and a moderate clarity or texture lift genuinely helps a lunar surface in a way it does not help a face.
Sharpening is the last step and the easiest to overdo. Apply a modest amount, then look at the limb, the outer edge of the disc, at one hundred percent. If a bright halo has appeared along that edge, you have gone too far, and the halo will be the first thing anyone notices. Back off until it disappears. Noise reduction should be light or absent, because you shot at base ISO and the file is clean, and heavy noise reduction will smear exactly the small crater detail you spent the evening collecting. If you want to go further, stacking software can average dozens of frames into one cleaner, sharper composite, which is the standard technique among dedicated lunar photographers, but it is an advanced option rather than a requirement. Our editing walkthrough covers the general order of operations. The stack bar below shows how a moon session divides its effort, and the shape of it is another inversion worth noticing.
A moon session: where the effort goes
Illustrative split of the work across a single lunar shoot. Planning is a thin slice because the moon needs no dark site and no seasonal window, while editing grows because heavy cropping and careful sharpening carry the result.
Compare this with a night sky session, where planning dominates because the location and the moon phase decide everything before you arrive. The moon reverses that: you can shoot it from anywhere, so almost all the effort moves to the camera work and the crop.
How much of the frame the moon actually fills
The formula from Step 1 deserves its own section, because it answers the question every beginner asks and most gear reviews dodge. The moon covers about half a degree of sky. Run that through the geometry of a lens and the diameter of the lunar image on your sensor comes out at approximately the focal length divided by 115, in millimetres. That is the entire calculation. It does not depend on aperture, sensor size, megapixels or brand, only on focal length.
To turn that into a share of the frame, divide by the height of your sensor. A full frame sensor is 24mm tall, so the moon occupies about the focal length divided by 27.6, as a percentage of frame height. On an APS-C sensor roughly 15.6mm tall the same lens fills proportionally more of the frame, which is the one context where a crop sensor is a genuine advantage rather than a compromise, and our full frame versus crop field note works through why. The chart below plots the full frame figures across the range of lenses people actually own.
Share of the frame height the moon fills, by focal length
Illustrative geometry for a full frame sensor 24mm tall, from the moon's half degree apparent size. The lunar image is about the focal length divided by 115 in millimetres, which is then divided by 24mm of frame height. Crop sensors give proportionally larger figures.
The relationship is perfectly linear, which is why doubling focal length doubles the disc and quadruples the pixels on it. Note how little of the frame even a long lens fills: at 400mm the moon is under a sixth of the frame height, so cropping is expected rather than a failure. The companion computes the figure for your own lens and sensor.
Why your first moon shot was a white blob
Almost everyone’s first attempt comes back the same way: a smooth white circle with no markings, sitting in a grey sky, looking nothing like the textured object they were staring at. It is worth spending a moment on exactly why, because understanding the failure makes the fix permanent rather than a memorised setting.
Camera meters do not measure light in absolute terms. They measure the light coming off the scene and calculate the exposure that would render the average of that scene as mid grey, which is a sensible assumption for the vast majority of photographs. Point that logic at a frame containing one small brilliant object and an enormous field of black, and the average is nearly black. The meter dutifully calculates the several stops of extra exposure needed to lift that average to mid grey, and applies all of them to the moon as well. The sky becomes a washed out grey, and the moon, which needed no help at all, ends up four or five stops overexposed. Every crater, every ray system, every dark mare is buried under pure white.
The second contributor is your own night adapted vision. In the dark, a rear screen at normal brightness is dazzling, and a badly overexposed moon looks perfectly acceptable on it. You review the shot, decide it is fine, and shoot forty more the same way. Both problems have the same answer: take metering out of the loop by working in manual, and take your eyes out of the loop by judging exposure on the histogram. Do those two things and the white blob never returns.
The terminator is where the detail lives
If there is one idea that separates a striking moon photograph from a merely correct one, it is this. The features that make the lunar surface visually interesting, crater rims, central peaks, mountain ranges, ridges, are relief features. You see relief because of the shadows it casts. Shadow length depends on the angle of the sun above the local horizon, and on the moon that angle changes across the disc: near the terminator, the dividing line between lit and unlit, the sun is barely rising or setting on that patch of ground, so shadows stretch out enormously and every bump throws a long black streak. Near the centre of a full moon, the sun is directly overhead and there are almost no shadows at all.
This is why a full moon is the disappointing one. It is at its brightest and its most complete, and it is also lit from directly behind the photographer’s line of sight, which is the flattest lighting in photography whether the subject is a face or a satellite. What you get is a bright disc with subtle albedo differences, the dark maria and the bright ray systems, but very little three dimensional texture. Anyone who has lit a portrait knows the equivalent: an on camera flash pointed straight at a face kills every contour, and the same principle applies at a quarter of a million miles.
The practical takeaway is to shoot the phases either side of full, and to look at the terminator when you frame and focus. A first quarter or last quarter moon shows the terminator running straight down the middle of the visible disc, and the craters along it are extraordinary. A waxing or waning gibbous keeps most of the disc lit while pushing the terminator off centre, giving you a full looking moon with a textured edge. If you shoot several nights across a cycle, you will notice the same craters looking completely different as the light angle over them changes, which is one of the quiet pleasures of the subject.
Putting a landscape under the moon
Everything above assumes the moon is the subject. The other kind of moon photograph puts it in a scene, and it follows a different set of rules that are worth knowing because the two approaches fight each other. The tension is exposure: the moon is a daylight subject and the landscape below it, once the sun has gone, is a night subject. The brightness gap between them can run to many stops, which is why so many attempts end up as either a correctly exposed moon over a black silhouette or a correctly exposed landscape under a white disc.
There are three honest ways to handle it. The first and best is timing: shoot in the window around moonrise or moonset when the sky and land are still carrying twilight, so the brightness gap narrows to something a single exposure can hold. A full moon rises around sunset, which makes it the phase that lends itself to this. The second is to accept the silhouette and design for it: expose for the moon, let the ridge line or the building go black, and make a graphic image out of the shapes. The third is blending or compositing multiple exposures, which is a legitimate technique as long as you say so, because a moon dropped into a scene at a size or position it never occupied is a piece of illustration rather than a photograph.
Composition here leans on the compression effect of a long lens. Standing far back from a foreground object and shooting it at 400mm makes the moon appear enormous relative to that object, because the long lens narrows the field of view without changing the moon’s angular size. This is why the striking moon over a building shots are made from streets away with a telephoto, not from close up with a wide lens. Scout the alignment in advance, since the rise point on the horizon shifts noticeably from night to night, and our landscape lens field note covers the scene building side of the craft.
Teleconverters, crop bodies, and other reach
Since focal length is the binding constraint, it is worth knowing the ways to get more of it without buying a longer lens. A teleconverter, a small optic that sits between lens and body, multiplies focal length by a fixed factor, commonly 1.4 or 2. Because the lunar disc scales linearly with focal length, a 1.4 times converter makes the moon forty percent larger and a 2 times converter doubles it, which is a substantial gain. The cost is light and, usually, a little sharpness: a converter reduces the effective maximum aperture by one stop for a 1.4 and two stops for a 2. At night that would be painful. On the moon, where you are shooting at base ISO with light to spare, it is a cost you can absorb easily, which makes moon photography one of the best possible uses for a converter.
A crop sensor body works similarly in effect, though the mechanism is different. The lens still forms the same size lunar image, but the smaller sensor captures a narrower part of it, so the moon fills more of the frame. Whether that gains you real detail depends on pixel density rather than sensor size as such: a crop body with small, tightly packed pixels genuinely puts more pixels on the disc, while cropping a full frame file to the same field of view gives you the same picture with fewer pixels. This is the one photographic subject where a modest crop sensor camera can meaningfully outperform an expensive full frame one, provided the lens can resolve what the pixels are asking for.
The furthest end of the reach ladder leaves camera lenses behind. A spotting scope or a small telescope with a camera adapter offers focal lengths that no practical camera lens matches, and dedicated lunar photographers work that way. It is a different hobby with its own learning curve, and it is worth naming only so you know the ladder continues past 600mm. Whatever route tempts you, cost it honestly against how often you will use it before you buy, which is exactly what the upgrade budget planner is for.
Atmosphere is the limit no lens can fix
At some point, usually around the time someone fits a teleconverter, they discover that more magnification stops producing more detail. The reason is not the lens and not the sensor. It is roughly a hundred kilometres of turbulent, uneven air between the front element and space. Astronomers call the quality of that air the seeing, and on a night of poor seeing no equipment on earth will give you a crisp moon.
You can watch this happen in real time. Magnify the moon in live view and hold still: the image will shimmer, edges will crawl, and every few seconds the whole disc will go momentarily soft and then sharpen again. Those are pockets of air at different temperatures acting as weak, shifting lenses. Nothing in your control panel affects it. What you can control is how much air you are shooting through, and that depends almost entirely on altitude in the sky. A moon thirty degrees up is looking through roughly twice the air of a moon overhead, and a moon sitting on the horizon can be looking through many times more, which is why horizon moons are orange, soft and visibly wobbly.
The practical responses are simple. Shoot the moon high in the sky when you want detail. Avoid shooting over rooftops, chimneys, car parks or anything else radiating the day’s stored heat, because the rising thermal plume is turbulence you have added to your own light path. Give the camera and lens twenty minutes outdoors to reach ambient temperature, since a warm lens generates its own internal convection. And shoot many frames, because seeing fluctuates second by second and the sharpest frame in a burst of thirty can be visibly better than the average. That last point is the whole basis of lunar stacking software.
Moonrise, moonset, and the balanced window
The most useful thirty minutes in moon photography are the ones on either side of moonrise or moonset, and they are useful for a reason that comes straight from the exposure problem. During twilight the sky still holds light, and the ground still holds some too, while the moon’s brightness is unchanged. The gap between the brightest and darkest parts of your scene collapses to something a single exposure can actually hold, and you get a photograph with a detailed moon and a visible landscape in the same file, no blending required.
The phases cooperate with this in a pattern worth memorising. A full moon rises around sunset and sets around sunrise, which is why full moon rise shots over a horizon are such a staple. A first quarter moon is already high at sunset. A waning gibbous rises later in the evening. A thin crescent hangs near the sun and appears low in the west just after sunset or low in the east just before sunrise, often accompanied by earthshine, the faint grey glow on the unlit part of the disc caused by sunlight reflecting off the earth and back onto the moon. Earthshine is a beautiful thing to photograph and needs a much longer exposure than the crescent itself, which is a small exposure blend of its own.
The watch out is that rise times and horizon positions shift substantially from night to night, so a composition that lines up perfectly one evening will be off by a noticeable margin the next. Check the specific time and bearing for your location before you drive anywhere, allow extra minutes for the moon to clear haze and terrain, and treat a missed alignment as scouting for the following month. The golden hour habits in our golden hour field note apply directly to the twilight half of this window.
Photographing the moon with a phone
A phone will not resolve craters, and it is worth saying plainly why rather than blaming the software. The lunar image size formula does not care what device you use: the disc measures the focal length divided by 115. A phone’s main camera has an actual focal length of only a few millimetres, so the moon lands on the sensor as a fraction of a millimetre and covers on the order of one percent of the frame height. Digital zoom then enlarges that handful of pixels, which makes the moon bigger on screen without adding any information that was not captured.
What genuinely helps is the same discipline as with a camera. Hold the phone steady or better still clamp it to a small tripod, since a magnified handheld phone shot is hopeless, and our phone tripod field note covers the mounts. Tap and hold on the moon to lock focus and exposure onto the disc rather than the sky, then drag the exposure slider well down until the disc stops glowing and surface markings appear. If your phone offers a manual or pro mode, set the ISO to its lowest value and shorten the shutter, which is the same daylight logic as before. Some phones bracket and stack frames automatically in a night or long exposure mode, which can produce a surprisingly clean result. Our phone lens field note covers what clip on optics can and cannot add.
There is one phone technique that genuinely produces crater detail, and it is worth knowing: hold the phone camera up to the eyepiece of a spotting scope, a telescope or even a decent pair of binoculars locked on a tripod. The optic supplies the focal length, the phone supplies the sensor, and the result routinely beats anything pinch zoom can manage. Alignment is fiddly and inexpensive adapters exist to hold the phone in place. It is a fair reminder that reach comes from optics, never from software.
A worked example: one gibbous moon at 400mm
Theory into practice, with one realistic evening and illustrative settings so the sequence is concrete. The plan is a detailed disc shot of a waxing gibbous moon from a suburban back garden, with a 100 to 400mm zoom on a full frame body, roughly two hours after sunset once the moon has climbed well clear of the rooftops.
Step 1, lens. The zoom goes to 400mm, its longest setting. From the formula, the lunar disc lands on the sensor at 400 divided by 115, about 3.5mm across, which on a 24mm tall frame is about 14.5 percent of the frame height. Step 2, phase. A calendar check the day before showed a waxing gibbous, chosen deliberately over the full moon three nights later, because the terminator will sit off centre and throw long shadows through the crater fields along it. Step 3, support. Tripod set on the patio slabs with legs wide, the lens mounted by its own collar rather than the camera body, stabilisation switched off, and the two second self timer set. Step 4, exposure. Manual mode, ISO 100, aperture f/11, shutter set to 1/100 second from the looney 11 starting point of one over the ISO.
Step 5, focus. Live view on, magnified fully on the terminator, focus ring rocked slowly until the crater rims along that line show hard shadow edges rather than grey smudges, then left untouched. Step 6, frames and histogram. The first burst comes back with the highlight warning blinking along the bright limb and the moon’s hump pressed against the right edge of the histogram, so the shutter is shortened one stop to 1/200 second. The next burst reads cleanly, with the disc’s hump sitting comfortably clear of the right edge and the huge black sky spike jammed at the left. Six more bursts follow over twenty minutes as the seeing shifts. Step 7, edit. The two sharpest frames are picked at full magnification, cropped so the disc fills about two thirds of the frame height, which from 14.5 percent works out at roughly a 4.6 times linear crop. That leaves about one megapixel of the original twenty four, plenty for a screen and enough for a small print. White balance neutralised, black point pulled down, contrast and a light texture lift added, then modest sharpening backed off as soon as a halo appeared on the limb.
One evening, forty minutes, about eighty frames, two keepers with visible crater shadows along the terminator. The lesson that transfers is the crop arithmetic: nearly everything captured got thrown away, which is the clearest possible argument that focal length is the thing to invest in. Weigh that investment in the upgrade budget planner before the next lens purchase.
Common mistakes to avoid
Moon photographs fail in a small number of predictable ways, and nearly all of them trace back to applying night sky habits to a daylight subject. These are the ones that come up again and again:
- Leaving the camera in an automatic mode. The meter reads the black sky, pushes the exposure several stops up, and blows the disc to featureless white. Manual mode is not optional here.
- Using a high ISO because it is dark outside. It is dark around the subject, not on it. Base ISO gives the cleanest file and there is no shortage of light, so ISO 3200 buys nothing but noise.
- Using a long shutter because it is night. A multi second exposure will overexpose the moon into oblivion and record its motion as a smear. The moon crosses its own width in about two minutes, which sounds slow until you multiply it by a long lens.
- Shooting wide open on a fast lens. There is no reason to. Stop down to the lens’s sharper middle range, around f/8 to f/11, and take the sharpness for free.
- Judging exposure on the rear screen at night. Your dark adapted eyes will approve of a badly overexposed frame. Read the histogram instead.
- Shooting only the full moon. It is the flattest lighting the moon offers. The phases either side give you the terminator and the shadows that make craters visible.
- Shooting a low moon and blaming the lens. A moon near the horizon is being viewed through a thick, turbulent slab of air. Wait for it to climb and the same gear resolves more.
- Over sharpening in editing. A bright halo along the limb is the tell, and it is the first thing an experienced eye notices. Back off until it disappears.
Troubleshooting a difficult moon night
What if the moon is still a white disc even in manual? Your shutter is too slow for the ISO and aperture you set. Go back to the arithmetic: at f/11, the shutter should start near one over the ISO, so ISO 100 means about 1/100 second. If you set ISO 800 and left the shutter at 1/100, you are three stops overexposed. Check all three numbers together rather than adjusting one and hoping.
What if the moon is sharp in the middle and the edges look doubled? That is usually motion during the exposure, either from vibration or from the moon’s own drift at very long focal lengths. Shorten the shutter, use the self timer, and check that the tripod is not resting on a springy surface such as a wooden deck. What if every frame is soft in the same way? Suspect focus first, since long lenses have shallow tolerance and a nudged ring ruins a whole session, then suspect seeing, and compare frames from the start and end of the session to see whether the air improved.
What if the moon has an orange or yellow cast you did not intend? It is low in the sky and you are seeing it through a lot of atmosphere, which scatters the shorter wavelengths exactly as it does at sunset. Wait for altitude if you want a neutral moon, or keep the colour deliberately if the warmth suits the scene. What if the disc is clean but boring? Check the phase. A full moon is inherently flat, and the fix is a different night rather than a different setting. And what if thin cloud keeps drifting across it? Keep shooting, because a moon behind thin high cloud can produce a halo or a glow that makes a better photograph than the clear night would have, and the cloud gaps often give brief moments of unusually steady air.
Your moon photography checklist
Run down this list before and during the session:
- Check the phase the day before and prefer a quarter or gibbous moon over a full one for surface texture.
- Note the rise or set time and bearing if you want the moon in a scene, or wait for altitude if you want detail.
- Fit the longest lens you own, and add a teleconverter if you have one, since light is not the constraint.
- Lock the camera on a tripod or a solid support, mounting by the lens collar if the lens has one.
- Switch stabilisation off when the camera is rigidly mounted, and set a remote release or the two second timer.
- Set manual mode, RAW capture, base ISO, an aperture around f/8 to f/11, and a shutter near one over the ISO.
- Focus in magnified live view on the terminator, then leave the ring alone.
- Shoot bursts rather than single frames, and read the histogram, not the rear screen, between bursts.
- Confirm the bright limb is not clipping, and expose slightly darker rather than slightly brighter when unsure.
- Crop to the disc with breathing room, set the black point, add contrast, and sharpen only until just before a halo appears.
The bottom line
Photographing the moon well comes down to accepting that it is a daylight subject wearing a night costume, and then reversing everything the night sky taught you. Fit the longest lens you own, because the disc on your sensor is the focal length divided by 115 and nothing else changes it. Pick a phase with a terminator across it, because shadows are what make craters visible. Lock the camera down, because long lenses magnify tremor as faithfully as they magnify mountains. Set manual, base ISO, around f/11, and a shutter near one over the ISO, then let the histogram, not the meter and not your night adapted eyes, decide whether that was right. Focus on the terminator, shoot bursts to beat the atmosphere, and finish with a crop and a restrained sharpening pass.
The single highest leverage decision is focal length, and the single most common failure is letting an automatic mode meter the black sky. Get those two right and everything else is refinement. The happy part is that none of it requires a dark site, a moonless night or a long drive, which is exactly what makes the moon the opposite of the Milky Way in logistics as well as in settings: you can shoot it from a city balcony on a weeknight and still come away with mountains and craters. Cost your own reach in the upgrade budget planner, then wait for a clear evening and a moon three days off full.
Everything in this field note is technique rather than salesmanship: no lens, camera, teleconverter or piece of software is named, no manufacturer had any say in it, and the focal lengths and settings quoted carry across every system. The exposure figures, the looney 11 starting point and the crop arithmetic are illustrative first guesses meant to be adjusted, not specifications, because the right exposure shifts with the phase, the haze and how high the moon has climbed, so let the histogram on your own camera overrule any number printed here. Moon phases, rise times and horizon bearings change nightly and by location, so confirm yours with an almanac or planetarium app, and if you ever blend a moon into a scene it did not occupy, say so when you share the picture.
Frequently asked questions
What camera settings should I use to photograph the moon?
An illustrative starting point for a bright gibbous or full moon is f/11, ISO 100, and a shutter of about 1/100 second, shot in manual mode on the longest lens you own. That combination looks absurdly fast next to night sky settings, and the reason is simple: the moon is a rock in full sunlight, so it is a daylight subject that happens to sit in a dark frame. The daylight rule of thumb photographers use here is sometimes called looney 11, and it just says set f/11 and a shutter of one over your ISO. Treat it as a first guess, not a recipe. Take a frame, look at the histogram, and shorten the shutter if the bright limb is clipping or lengthen it if the disc is muddy. Thinner crescents need roughly one to two stops more light than a full moon, so expect to slow down for those.
What lens do I need to photograph the moon?
The longest one you can get your hands on. The moon covers about half a degree of sky, which means the image it forms on the sensor is roughly your focal length divided by 115 in millimetres. A 300mm lens therefore paints a lunar disc about 2.6mm across, and on a full frame sensor 24mm tall that is close to eleven percent of the frame height. At 600mm it doubles to about twenty two percent. Anything at or above 300mm gives you a moon with visible craters after a crop, 400mm to 600mm is the comfortable range, and below 200mm the moon is a small bright dot better used as an element in a wider scene than as the subject. Our telephoto field note covers how those long lenses differ.
Why does my moon come out as a white blob with no detail?
Because the camera metered the black sky instead of the moon. Matrix or evaluative metering looks at the whole frame, sees an overwhelmingly dark scene, and pushes the exposure up by several stops to make that darkness average out to grey. The moon, which was already correctly exposed, gets blown far past white and every crater with it. The fix is to stop letting the meter decide: switch to manual, set an exposure for the sunlit rock rather than the empty sky, and check the result on the histogram rather than the rear screen brightness. Spot metering directly on the disc is a workable second option, but manual is more repeatable because the answer does not change from frame to frame.
Is a full moon the best moon to photograph?
It is the brightest and the easiest to expose, but it is usually the least interesting to look at. At full, the sun sits almost directly behind you relative to the moon, so it lights the surface head on and casts almost no shadows toward your camera. The result is a flat, high contrast disc that reads as a bright circle with faint grey markings. Craters and mountains show themselves through the shadows they throw, and shadows are longest near the terminator, the curved line dividing the lit part from the dark part. A half or gibbous moon puts that terminator right across the middle of the visible disc, which is why those phases usually make the more striking photograph.
Do I need a tripod to photograph the moon?
You can get away without one more easily than you can at night, because the shutter speeds involved are fast, but a support still helps more than most beginners expect. The trouble is not exposure length, it is that long lenses magnify every tremor along with the subject. A 600mm lens magnifies your heartbeat as faithfully as it magnifies a crater. A tripod, or failing that a bean bag, a fence rail, a car roof or a wall, removes that variable entirely and lets you use a low ISO with a clear conscience. Add a remote release or the two second timer, and if the camera is locked down solidly, consider switching stabilisation off, since some systems can introduce a small drift when they have nothing to correct.
Should I use autofocus or manual focus on the moon?
Either can work, which is a genuine difference from star photography, where autofocus simply fails. The moon is bright and has a hard edge against black sky, so many modern autofocus systems will lock onto the limb without complaint, especially in live view with a single small focus point placed on the edge of the disc. The catch is consistency: the system can hunt when a thin cloud passes, and it may refocus between frames. The most repeatable method is to autofocus once, confirm it, then switch the lens to manual so nothing moves, or to focus manually from the start using magnified live view on the terminator, where the contrast is highest.
Why does the moon look so much bigger to my eye than in my photos?
Partly because of a perceptual effect and partly because of how lenses work. The moon appears dramatically large near the horizon to human vision, an illusion your brain constructs from the surrounding reference of trees and buildings, and a camera records none of that context, so it captures the same half degree of sky it always does. The other half is focal length. Your eye scans a scene and concentrates on the moon, while a wide lens spreads the whole sky across the frame and the moon becomes a dot. To make a photograph match the impression, you need real focal length, and you need to include familiar objects at a distance so the compression of a long lens can stack them against the disc.
Can I photograph the moon with my phone?
You can record it, and modern phones do better than they used to, but the physics is unforgiving. The size of the moon's image is set by focal length, and a phone's main camera has an actual focal length of only a few millimetres, so the lunar disc lands on the sensor at a fraction of a millimetre and occupies around one percent of the frame height. Digital zoom enlarges those few pixels without adding detail. What does help is a phone tripod, tapping the moon to set focus and exposure, then dragging the exposure slider well down so the disc stops blowing out. Some phones also offer computational modes that stack frames for a cleaner result. For real crater detail, though, a phone held to the eyepiece of a spotting scope or a small telescope beats any amount of pinch zoom.